The X is iconic, no doubt about it. To me the ANH X is the X wing. A shame as most have been abused or partly modified. I hope to pay proper tribute to the original builders of these fabulous miniatures and those here who have followed in their footsteps after over a decade of research.
It’s a damn good read too. These threads have been invaluable:
Building X-Wing 1/24 : Help!!
X-Wing Research: Differences Between the Hero and Pyro Models
The All-New X-Wing Thread
You would be wise to visit these threads as well:
Hero X-Wing Build
RED 4 - Hero X-Wing with machined armature (motorized)
As far as I know these talented individuals are the only ones to have documented their own X scratch-builds. It is because of their good work and the extensive research here on this forum (and others) that this build is possible. Thank you!
I was lucky enough to pick up another member’s scratch-build. I’ll let him chime in if he likes… will attempt to use as much of it as possible, but will most likely be rebuilding everything from the ground up. This build begins with the master patterns for resin cast assemblies.
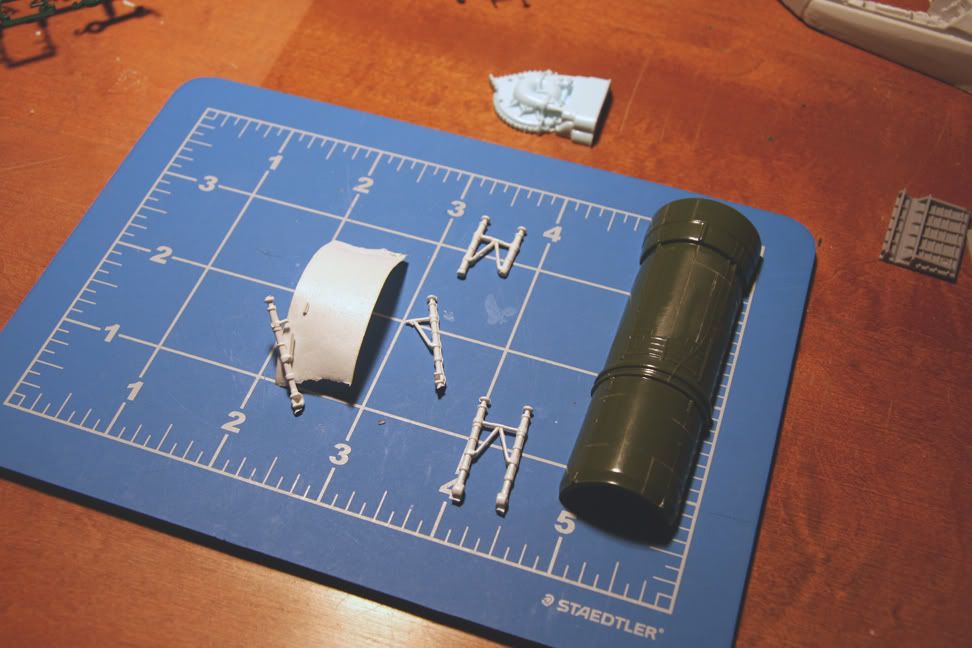
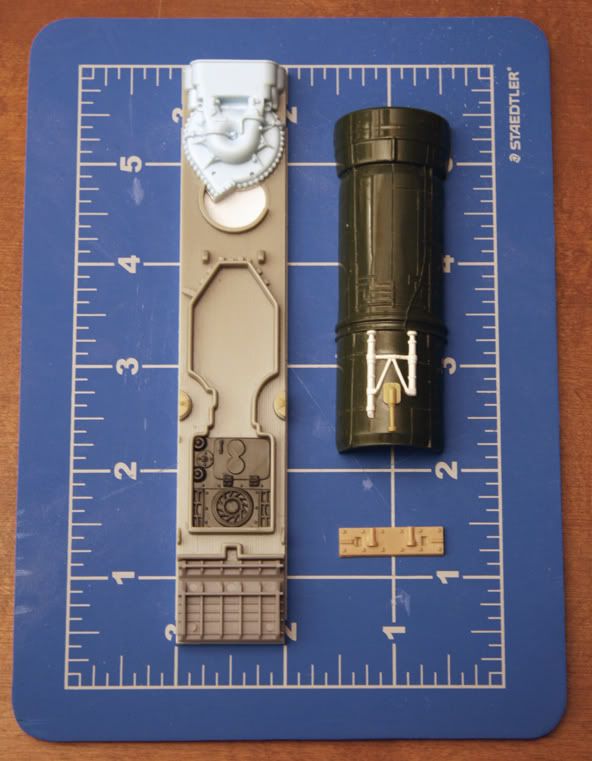
The engine master begins from the Phantom II engine cut and recombined, with panel lines added before gluing. This dark green plastic is from the 1976 release of the Phantom kit, and can be brittle. Speaking of brittle plastic, I have had terrible luck with the landing gear bits from the whitley. The one at the top was removed from another master in 6 pieces and has been reassembled. It is difficult to see in the photo but the detail is now a bit rough from the repair. Even Tenax couldn’t save this one… off to ebay for another and grabbed up the elephant kit required for this build from the same seller. Not sure if it was a result of packing but 1 of the 2 from the new kit was also broken. Gluing this one back together was a piece of cake, though.

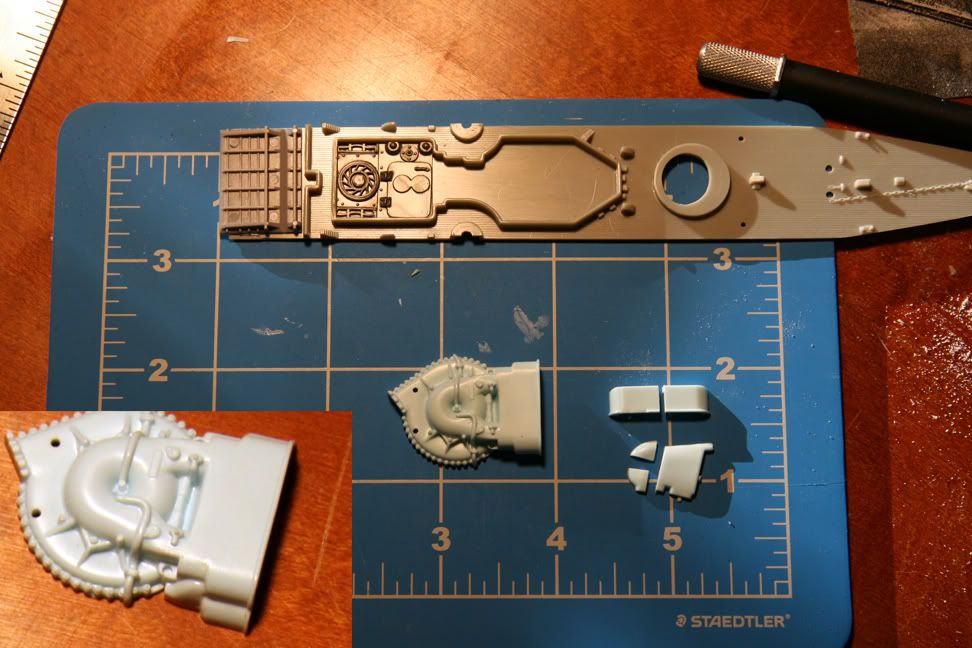
Also began construction of the strip that goes behind R2. I paid special attention to the Hurricane bit. If you have ever seen the kit-part you know that it does not sit flat; with a gap for another part that continues the raised border along the edge. The ILM droid strip looks to have some filler in there. I wanted mine to sit flat on the Scharnhorst deck so I used some bits from the Hurricane to approximate the shape of filler on the original.

It’s a start anyway. This build will take time.
And before you ask… the training remote is nearly finished. There will be an update to that thread shortly.
It’s a damn good read too. These threads have been invaluable:
Building X-Wing 1/24 : Help!!
X-Wing Research: Differences Between the Hero and Pyro Models
The All-New X-Wing Thread
You would be wise to visit these threads as well:
Hero X-Wing Build
RED 4 - Hero X-Wing with machined armature (motorized)
As far as I know these talented individuals are the only ones to have documented their own X scratch-builds. It is because of their good work and the extensive research here on this forum (and others) that this build is possible. Thank you!
I was lucky enough to pick up another member’s scratch-build. I’ll let him chime in if he likes… will attempt to use as much of it as possible, but will most likely be rebuilding everything from the ground up. This build begins with the master patterns for resin cast assemblies.
The engine master begins from the Phantom II engine cut and recombined, with panel lines added before gluing. This dark green plastic is from the 1976 release of the Phantom kit, and can be brittle. Speaking of brittle plastic, I have had terrible luck with the landing gear bits from the whitley. The one at the top was removed from another master in 6 pieces and has been reassembled. It is difficult to see in the photo but the detail is now a bit rough from the repair. Even Tenax couldn’t save this one… off to ebay for another and grabbed up the elephant kit required for this build from the same seller. Not sure if it was a result of packing but 1 of the 2 from the new kit was also broken. Gluing this one back together was a piece of cake, though.

Also began construction of the strip that goes behind R2. I paid special attention to the Hurricane bit. If you have ever seen the kit-part you know that it does not sit flat; with a gap for another part that continues the raised border along the edge. The ILM droid strip looks to have some filler in there. I wanted mine to sit flat on the Scharnhorst deck so I used some bits from the Hurricane to approximate the shape of filler on the original.

It’s a start anyway. This build will take time.
And before you ask… the training remote is nearly finished. There will be an update to that thread shortly.
Last edited:

