SS Hero Tie Fighter

I already said why: It's because it was like that in the original model. What part don't you understand. Over half of the guys on this board are going for 100% screen accuracy when available..........I'm one of those guys. peace,

Dave :)
 
Seems bonkers to me, but.....whatever floats ya (or your client's) boat.

Beats the hell out of me....why the weight of an armature would come into question....its there to support, the model hangs off of it....and a TIE weigh's jack anyhoo....as i said...barmy :lol

lee
 
I already said why: It's because it was like that in the original model. What part don't you understand. Over half of the guys on this board are going for 100% screen accuracy when available..........I'm one of those guys. peace,

Dave :)

So you wanna start a commotion over a modified armature that won't be seen? Then by that logic the resin armatures offered by Steve are totally unacceptable even if they perform the same function? And while a filming model is supported by various devices either kept out of view or sometimes edited out later our models are displayed with whatever attaching/supporting devices out in the open and if paring weight opens up new possibilities then why not?

I didn't start out to disrespect anyone and I certainly didn't say this machining MUST be done. Since you are linked to Steve do you really think it's a good stance to start friction where none existed and discourage folks from displaying their builds which might not always be the same fashion you'd choose for yourself?

I have already complimented Steve on the job done with this kit and I'd really rather not come to regret building it just because you two are associates. You weathered a lot of hardships and conflicts while getting these delivered, are you sure you want to start new animosity with how they get built?

Peace, back at ya.
 
I've already read several threads here and elsewhere that recommend "shimming" the armature with styrene to take up the slack in the fit so a simple sleeve (tubelike) for those areas that are exposed could care less what is or isn't under it.


I know I had to put a styrene sleeve over my resin armature but I assumed the resin had shrunk a little, I was sure the aluminum one was a perfect fit and no need for a styrene sleeve, if thats the case I'm happy I didn't pay extra for the aluminum version if I still had to use a sleeve over it.

Check out my Tie building thread: http://www.therpf.com/showthread.php?t=70234


GFollano
 
No offense intended. Just stating the obvious. If you've seen the photos of the original model being built, the armature is actually part of the TIE wing fellas. Don't take my comments as abrasive. I suppose I falsely assumed everyone has seen the behind the scenes photos of the TIE. You can clearly see the metal unfinished armature with resin bits glued onto it.............which ends up being painted on the finished wing struts. Being that it's solid aluminum, it doesn't weigh all that much in the first place. The TIE Body is now a hollow shell versus a solid resin hull that we used to use in this kit. See my logic??? We already lost weight on the thing from converting to a hollow shell for the main body............so the metal armature doesn't need weight loss. Nobody has ever had difficulty displaying even the solid resin ones......aside from wing sag...hence the armature........ I promise you the solid resin bodies weighed about the same as these hero bodies with solid metal armatures.

If you wan't your armature to weigh less, so be it. It's just alot of extra work for no true gain. To each his own I guess. Personally, with the weight of the koolshade in those wings..........i'd be very afraid that the weight of the wings on a hero TIE would bend or bow that little bitty armature.

The whole point of the armature was internal support and build of the struts. Why fix it if it ain't broke???
 
GF, there isn't any shimming needed on the metal armatures. I have both a TIE standard and an Interceptor. There will be zero gaps with either. I've already test fit them on the armatures. The only question I have about this "shimming" situation is whether those resin armatures show any warping or shrinkage. I wouldn't think it could occur with metal reinforcement in there, but I could be mistaken. I wish I had some resin armatures to test my theory.

If someone has a resin armature, do me a favor and do a roll test. see if the thing will roll smoothly on a flat surface without wobbling. The other test Steve could do is take a caliper and see if the metal armature and resin armature are the same dimensions.

If it turns out that the resin armatures are inaccurate, I'd stop offering those altogether, offer only the metal armatures and adjust the kit price accordingly.

Again, After I did some very minor trimming of the kits parts, there were zero issues of fit onto the metal armatures.

One other thing to keep in mind, the armatures only fit inside the bodies one way. Each end has a different size of notches. Make sure you got them oriented correctly.

Your upper and lower TIE hulls should correspond to the Armature notches. If not, you may have either two upper hulls or two lower hulls. Look at the notches for both resin parts and metal parts.......they should match perfectly.
 
Last edited:
DarthDuck, my "accuracy" comments are from the widely accepted "accurist" idea that all parts inside and out of these builds are more valuable to the collectors if they match precisely the originals. Even the stuff you can't see. That's my personal point of view on this.......................and in no way, reflects anyone else's point of view including Steve. :) Unfortunately I have found out more times than I can count that I end up taking short cuts for the unseen stuff because I'm lazy...............and I'll be the only one who notices it. The problem with a true die hard accurist, is that he or she will know and won't be able to live with it.

All my comments were keeping with this "accurist" point of view in mind. Many of the guys waiting on these hero kits have been yearning for this degree of accuracy for many many years. I do yearn for it, I just seldom follow thru.......LOL.
 
OK GUYS... Seize fire... look pms are not neccessary... Build the models accordingly. If you want to stay true to the studio model leave the armeture alone and press on. If you want to do a creative alternative .. go for it. All i was saying is make sure folks know its not neccessary with the metal armeture.. the resin armeture needs a lil work.. its a cost saving tool for those that cant afford the metal one.

No one here is bashing anyone. Everyone turn the sensitivity meters down and get back to buisness. I cant stand the drama this hobby brings sometimes.

Don, build away brutha... cant wait to see what your up to... David.. thanks for the input...if i know one thing your comments were not to offend but to guide.

You will see here in this forum accuracy to the filming model is the ultimate goal... so understand fans of the craft will point out differences to the filming model.. trust me at every opportunity....;)

Steve
 
Honestly guys, I never got bent out of shape or anything, seriously, it just came across that way in my crappy post. My bad!!! I apologize once again. :)
 
I was serious about wanting to help you figure out the resin armatures Steve. Send me a couple and I'll try to solve the problem. :)
 
I read in a build thread (by GF here at RPF, fine model too!) that he shimmed his resin armature and believed the metal one was about 30cm in diameter.

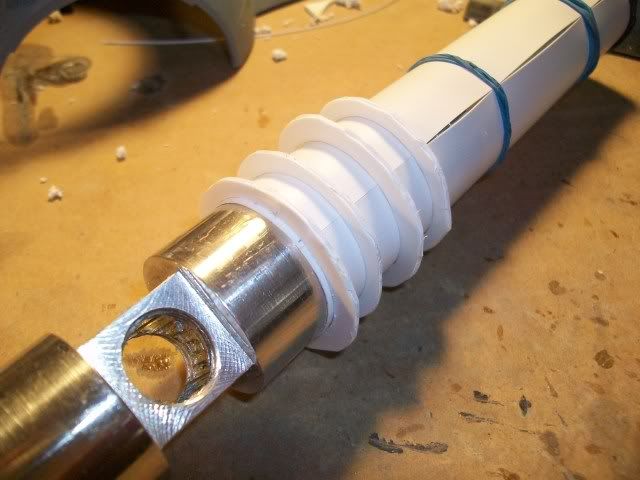
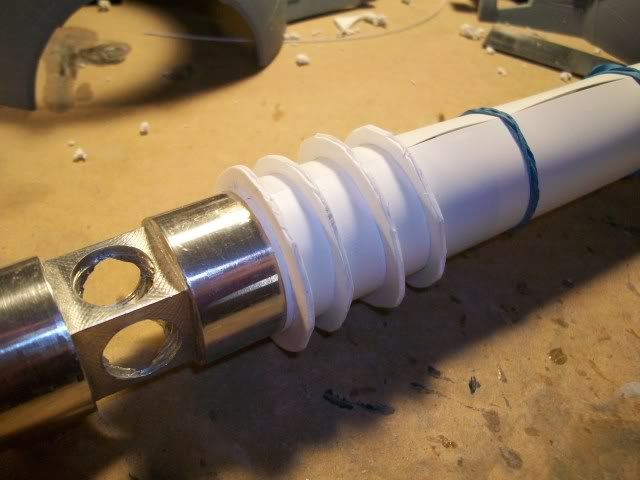
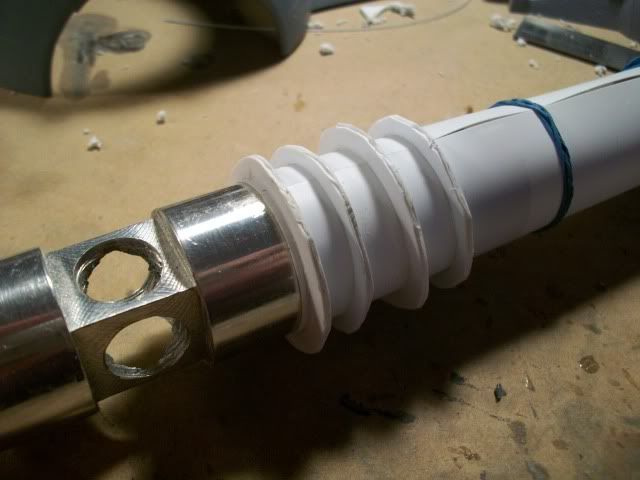
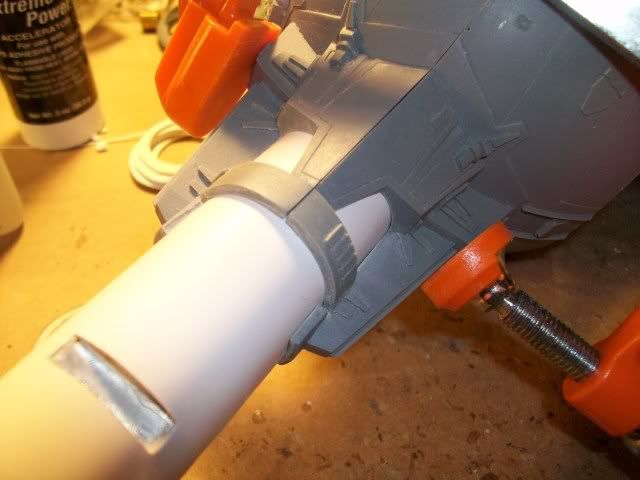
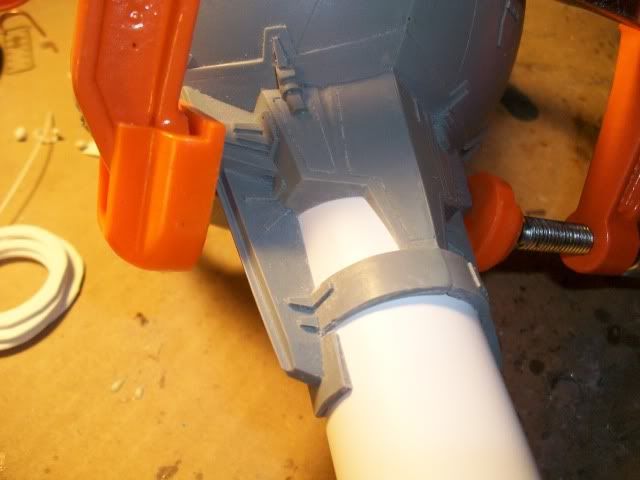
The armature I received varies between 28.47 and 28.50mm which is close enough to just call 28 1/2 mm. That still leaves "slop" (if you wanna call it that) when you fit it into the kit pieces which explained the gaps I saw on prefitting. I'm using .010 plastic to sleeve the areas I had machined away and bring it back to a "solid" tube (looks wise) which will then take up the slack and accept paint better than aluminum could have. To that end I fashioned up some simple jigs which when slipped in place snug up the sleeve to enable gluing. A couple of those sleeves are very snug for where I'll be applying glue while a couple of others are looser just as "holders" but when you tilt them slightly off axis they do snug it all up again anyways. They're just easier to move around that way.

000_0003.jpg

000_0002-1.jpg

000_0001.jpg
 
Looking good DD! I am almost ready for primer on my build. I did shim my resin armature as there were gaps that were due to it being smaller than "hole" the 2 fuse halves make. A heads up with an issue I had with the end parts that the wing star rests on. Although I made sure that they were in the notches of the armature, they still butted up against the rings that are on the fuse. Looking at photos of the Studio Model there is some space, but on mine the amount of space varied from very little to none. I don't fault the model on this one I must have screwed it up somehow but as hard as I tried I couldn't get it right. I also had to do a bit of work so the wings would be straight. One of my wings sloped down where it attached to so it sat at an extreme angle. I shimmed up the part it sits on until it was straight. If I rotate the wing 180 it is crooked in the opposite way from the way it was before I shimmed it. Hope that made sense. I should have tested each wing on each side, but I just put them on in the orientation needed to match filming models. My latest issue is that one wing sits higher than the other and I need to relocate two of the four parts with the bolts that sit above and below the supports on the wings themselves so I can center it more.

Your work is always awesome so I am sure you won't have the issues I am having. I look forward to throwing mine away after I see how great this one looks!:lol
 
Fett_ish,
Thanks for the heads up on the wing attachments. I am looking at those and will pay attention like you warned.
I'd love to see your build if you have a link? I'm sure you're too harsh on yourself just as you're too kind with words to me.:)

I have looked on the various build threads but of course that only includes the ones I've stumbled upon.
Does anyone have an inventory or WIP of exactly what they used for the perimeter edging? Sizes of any structural shapes and such or an actual build sequence if layered up with strips? I can go by eye but wouldn't want to reinvent the wheel if someone can share.:confused
 
A heads up with an issue I had with the end parts that the wing star rests on. Although I made sure that they were in the notches of the armature, they still butted up against the rings that are on the fuse. Looking at photos of the Studio Model there is some space, but on mine the amount of space varied from very little to none. I don't fault the model on this one I must have screwed it up somehow but as hard as I tried I couldn't get it right.


I know exactly what you mean, I completely shaved off those pins, I didn't use the notches as guide, so I could easily adjust the spacing of those parts as desired. If you notice in my photos I actually covered the notches with the styrene sleeves. There should be a spacing between the end parts and ring of the fuselage like the original Tie's.

GFollano
 
Last edited:
BTW even with the .20 mm sleeves on, I still had to sand some areas inside the fuselage pylons for a perfect fit.

GFollano
 
Last edited:
DD your build of the Warbird was just fantastic, I thought,so your kudos are deserved in perpetuity. I just updated my post with pics and a long winded :confused description of what I have done so far,since you asked.
http://www.therpf.com/showthread.php?p=1153951#post1153951
Hope it helps,but I am sure you will work it out. GF I wish I had access to your brain since we clearly had the same issues,yet you went ahead where I feared to tread:lol. Anywho, back to your build DD! Its gonna be sweet.

Thanks for that link- I'm sorry I lost track of your thread somehow?:confused

And thank you very much for your kind words- I appreciate them.:cool
 
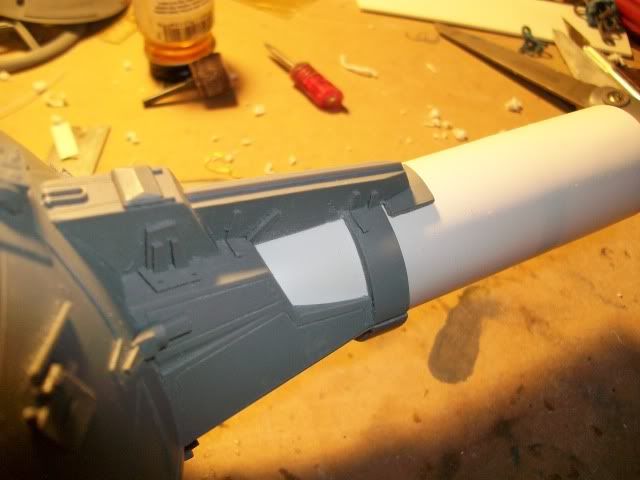
With the cockpit halves in place and clamped slightly you can see how snug everything is now. There are no gaps between the wing mounts and the newly sleeved armature with the white styrene visible.
000_0005.jpg

000_0006.jpg

000_0007.jpg


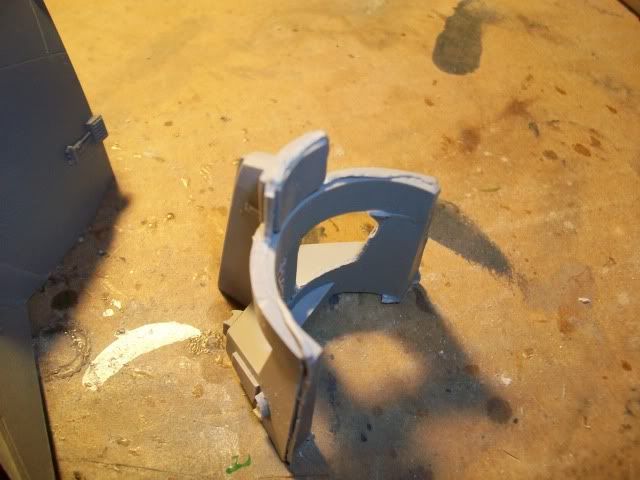
Now the outer wing mounts will be another story. It's as if the two part molds weren't fully seated or the resin raised them apart as curing? They're considerably "thicker" than their counterparts and will require sanding on the inside to get them thinner and "round" where they join.
000_0002-2.jpg
 
This thread is more than 14 years old.

Your message may be considered spam for the following reasons:

  1. This thread hasn't been active in some time. A new post in this thread might not contribute constructively to this discussion after so long.
If you wish to reply despite these issues, check the box below before replying.
Be aware that malicious compliance may result in more severe penalties.
Back
Top