Finally, an update!
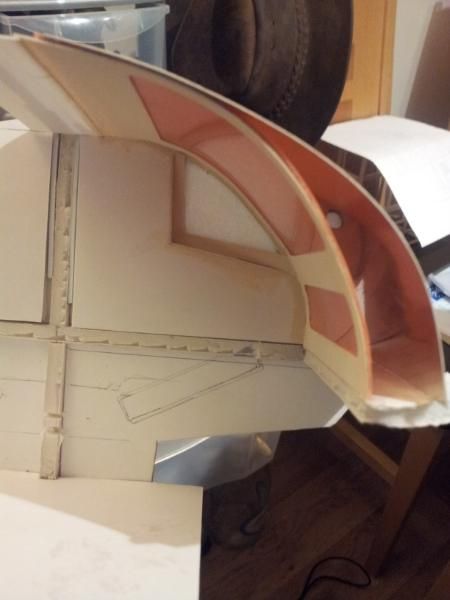
I have constructed and installed the new orange cockpit wall panel and I have to say that the new Sainsbury carrier bags are not as orange as the old ones were! :angry Still. I think it will be okay if I maybe add a couple more layers.
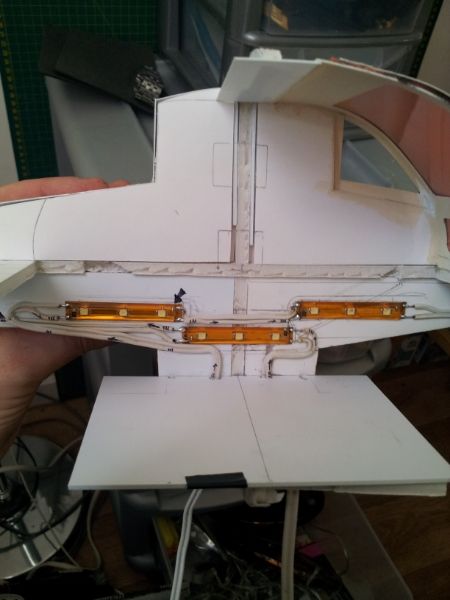
I have blacked out the back of the panel surround because I am going to risk making a total nob of myself by attempting to install lights in this model.
These are 12v LED strips and they come on a huge roll. you can cut them at every third LED. I love them because you can use them in really thin cavities.
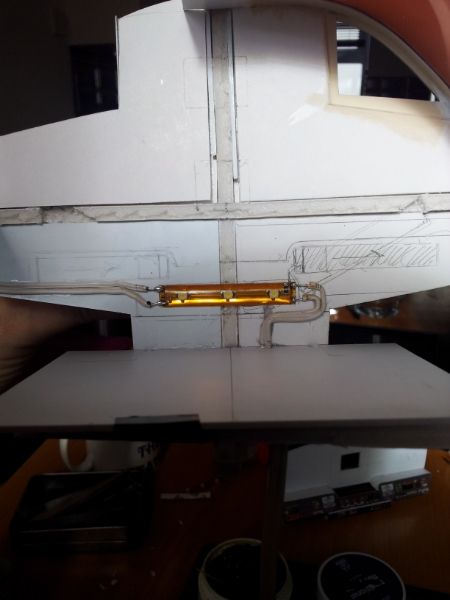
Once the connections are soldered, they are tested and then stuck down into position and the wiring loom is superglued to the structure to avoid any movement at the solder joints. As you can see, I have clearly marked the live feed and the direction of current so as not to crosswire anything.
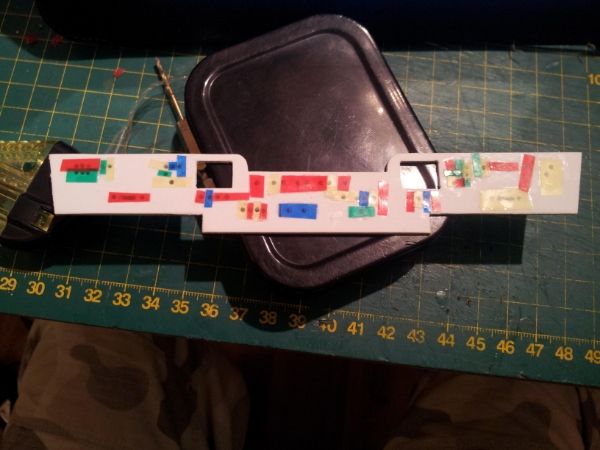
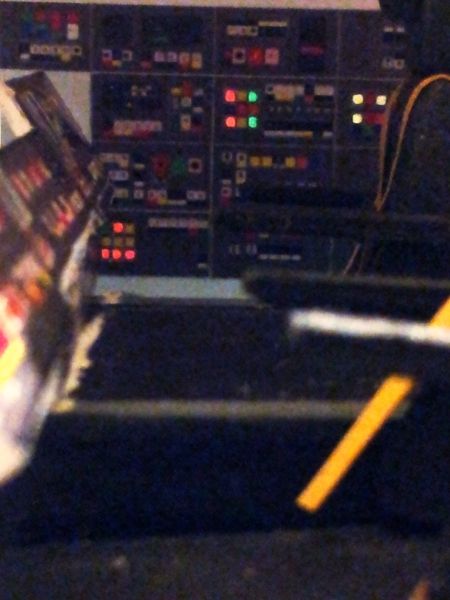
the control panels are all printed this time around so it just meant cutting out sixty four 1mm x 1mm squares and then marking each square's position on the plastic backing. I then drilled out a hole at each of these positions and affixed the corresponding colour of acetate for each button. looks a mess, I know...
I am really pleased with the result, though...")
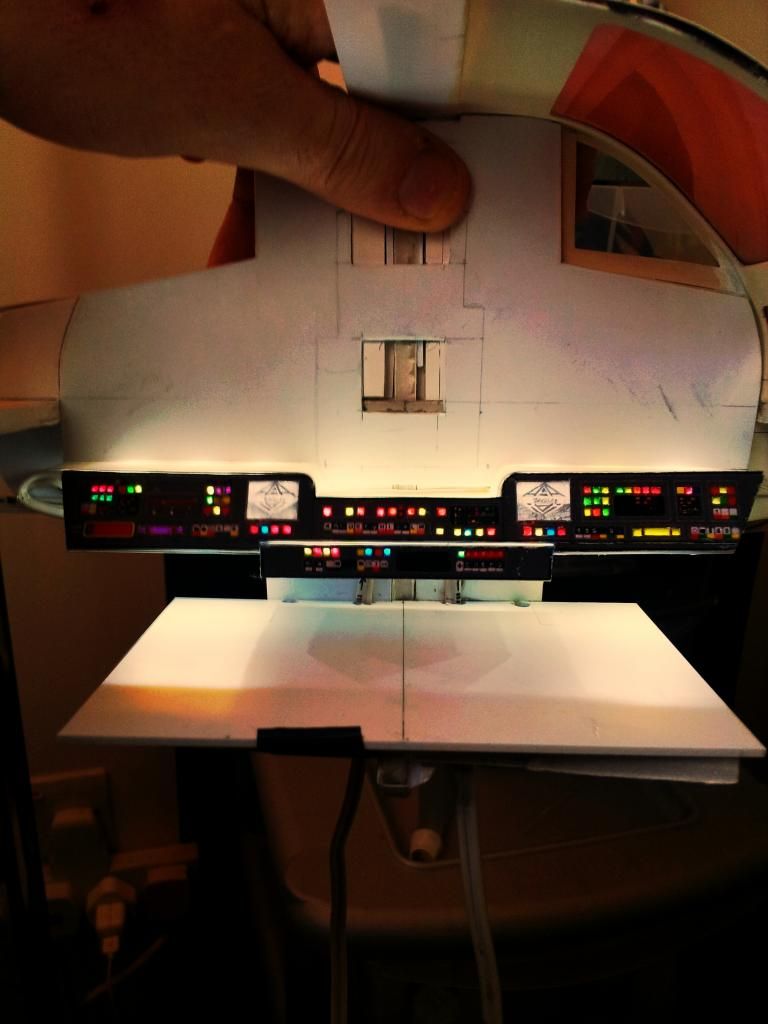
now begins the boxing in the top and bottom of the front console and painting it with three coats of black, inside and out to stop any light leakage. I think the end results will merit the extra work.
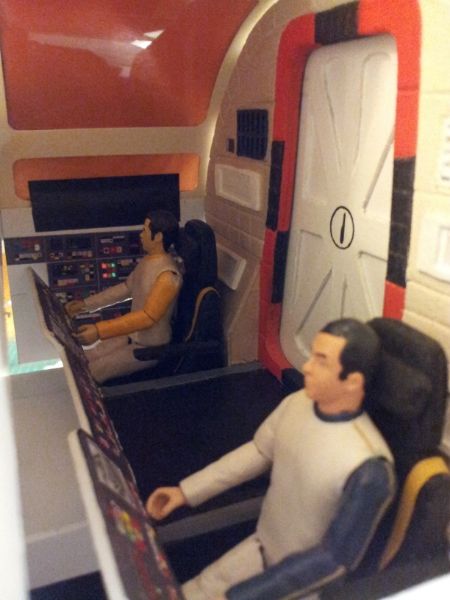
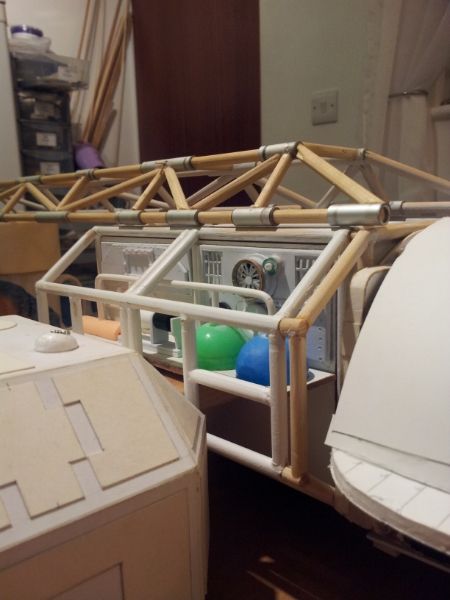
I took these two blurry pics because I won't have the opportunity to access this view when the Beak is skinned. I will try it again when I find a minute to see if I can get a better focus. I just like the pics, even if the chairs ARE covered in dust. Reminds me of Ring Around The Moon
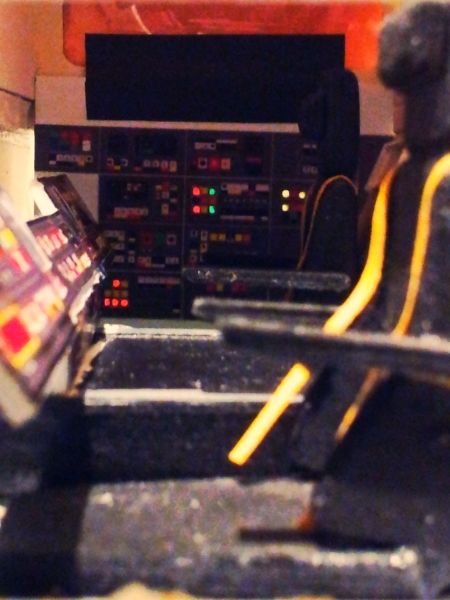
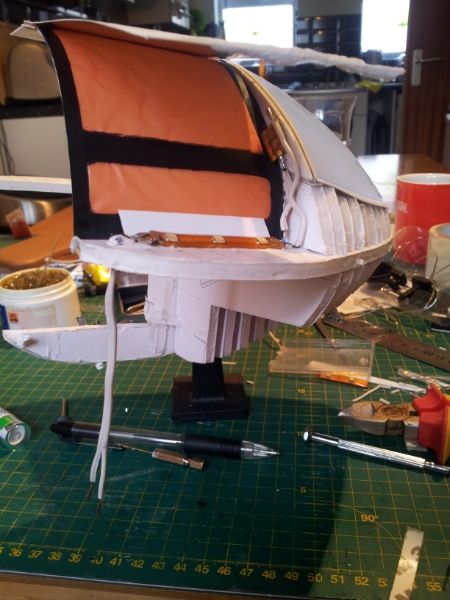
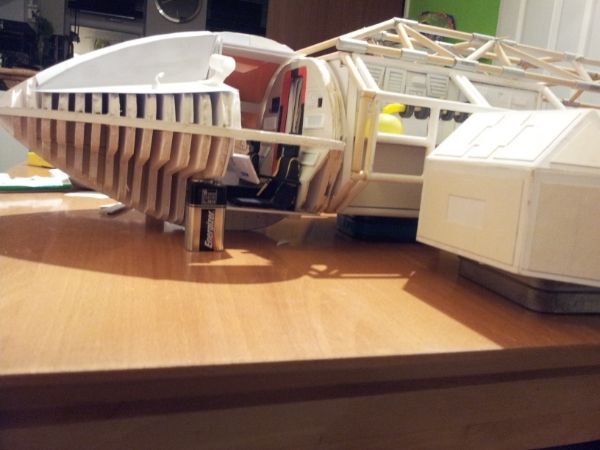
And Finally, three pics to show how the outside is shaping up. I am starting to feel that I am getting close to achieving something here now, once I am done with these blasted lights in the CM.

Anyways, I hope you liked my little update, and I will try to post more soon
I have constructed and installed the new orange cockpit wall panel and I have to say that the new Sainsbury carrier bags are not as orange as the old ones were! :angry Still. I think it will be okay if I maybe add a couple more layers.
I have blacked out the back of the panel surround because I am going to risk making a total nob of myself by attempting to install lights in this model.
These are 12v LED strips and they come on a huge roll. you can cut them at every third LED. I love them because you can use them in really thin cavities.
Once the connections are soldered, they are tested and then stuck down into position and the wiring loom is superglued to the structure to avoid any movement at the solder joints. As you can see, I have clearly marked the live feed and the direction of current so as not to crosswire anything.
the control panels are all printed this time around so it just meant cutting out sixty four 1mm x 1mm squares and then marking each square's position on the plastic backing. I then drilled out a hole at each of these positions and affixed the corresponding colour of acetate for each button. looks a mess, I know...
I am really pleased with the result, though...
now begins the boxing in the top and bottom of the front console and painting it with three coats of black, inside and out to stop any light leakage. I think the end results will merit the extra work.
I took these two blurry pics because I won't have the opportunity to access this view when the Beak is skinned. I will try it again when I find a minute to see if I can get a better focus. I just like the pics, even if the chairs ARE covered in dust. Reminds me of Ring Around The Moon
And Finally, three pics to show how the outside is shaping up. I am starting to feel that I am getting close to achieving something here now, once I am done with these blasted lights in the CM.
Anyways, I hope you liked my little update, and I will try to post more soon
Last edited: