Space 1999 Eagle Transporter Build Club (PIC HEAVY!)

Me, too! :)

Some people seem to look for things to get angry about, but in this case, it's pure elitism and snobbery....the sort of people that never offer help or advice when it is asked for, but are always quick to criticise behind the scenes...

ahem... I'm standing RIGHT HERE!!!! I can HEAR you....:darnkids
 
I have had really nasty emails about this build. Not from anyone on this site. But there is another site where I actually had to remove my email address.

Some people are such purists that they quite literally explode with genuine anger and can culture that all the way up to genuine hatred, because someone didn't follow the doctrine, as lay-ed down in the holy prints of blue....To them, wrong is right if that's how it was in the show. They feel threatened.... Few people like to see something built for pennies when it cost them thousands of pounds to assemble. Many of these people fear that the standards will start to slip now that the 'riff raff' Have been let in, making things on the cheap.

Other people sit back and think more positively. They see the advantages of substituting materials, innovating the design, subtly altering certain elements. They don't feel threatened by someone's innovation, they don't believe that ANY model should necessarily cost thousands of pounds if there is a cheaper way to make it well.

Certain iconic items have this effect on people and them's the stakes you take when you take 'em on!

Wow..nasty e-mails over something like this?!
That's certainly justified...
That's what we get for fashioning engine bells from plastic wine glasses and the like...:behave :lol

I was going to make my bells out of aluminum, until my lathe deal fell through...so I improvised. I'd like to think the Original Builders might've done the same thing in the same circumstances, so I sleep very well at night! :)

Me, too! :)

Some people seem to look for things to get angry about, but in this case, it's pure elitism and snobbery....the sort of people that never offer help or advice when it is asked for, but are always quick to criticise behind the scenes...

MrHateAol, If you take a minute to read the above posts, I am sure that you will see that I clearly stated that I am not referring to anyone on this site.:)
 
Last edited:
Okay, THIS time I was just having fun with you. No, I realized afterwards I was likely protesting too much, and appreciated the "alignment". I'm letting it all go and looking forward to going back to outrageously green with jealousy over how drool-worthy your work is... as well as a whole bunch of other people here.

I let model-building go for a loooong time and this is helping me gear up to hopefully become a real contributor here. So forget about me and do that voodoo you do...
 
And now, back to business....

I have finished adding the detailing to the round corner of the first unit. Time consuming work but worth the effort. It needs a few more coats of paint yet.


20130226_234717_zps940122b1.jpg

20130226_234704_zpsf4e1f4f0.jpg


I have finished up the mock-up landing pad and suspension and all seems to be in good order. It will obviously need refining but at least it works!

20130226_232831_zps03294c29.jpg

20130226_232825_zpsf7d8395d.jpg


I just thought I would take a picture with my little Alphan figure, in homage to that awesome picture that Bob took with his engine bell.

20130226_230952_zps5d2b1aba.jpg
 
Last edited:
It’s so much fun just being a spectator on these builds. Darren, if I could, I would love to build a replica of your replica. :thumbsup
 
It’s so much fun just being a spectator on these builds. Darren, if I could, I would love to build a replica of your replica. :thumbsup

:lol the way I feel today, you can HAVE the blooming thing! :facepalm

Seriously though, Randy, thank you and by all means join the party and have a go! You will certainly get all the help you need :)
 
With all the great updates going on, I figured I should chime in and add to the mayhem. Here are pics of my mold master under construction for the beak of the Eagle. Ill cast two hollow halves to save on weight, and leave the option open for detailing the interior. this started out as a model in Sketchup, and was then 3D printed in plastic. I forgot to have the model polished and have therefore had to go back in with auto putty and smooth everything back out. :(
Oh well, live and learn.
 
That's beautiful work 8 Perf. The resolution's pretty solid too. Are you planning to 3D a good deal of the ship or just the harder to make sections?
 
That's really neat, 8 perf! :thumbsup

I'm hoping here to get back into mine big time once this tooth (well, teeth :unsure) issue is behind me. Yep...finally dealing with that! :)
 
Its going to be close to 24 inches when done, so what is that? 1/72 scale or so? I printed the beak, the tops of the landing pads, the oleo strut mounts, the main engine bells with diffusers inside, and all 8 of the octagonal main frame sections. Should be pics further up the thread.
 
Darren great job so far! Looking forward to updates Ray and Bob. 8perf great job - When you say you forgot to have it polished, is that a step that the 3d printing service does?
 
Cracker - Yes, In the material I chose, what Shapeways calls "white, strong, and flexible", there is an option to have it polished. It is then very smooth to the touch. As is, it was almost like 600 grit sandpaper. Not too bad, but rough enough that it was noticeable, even after primer.
 
8perf, thanks for the info. That's just exactly what I needed. My LM nozzles look like sugar cube sculptures when magnified. I want to see if the details will still be there after polishing.
 
Good evening/morning all :)
Well, I have actually been a busy boy today! :cool
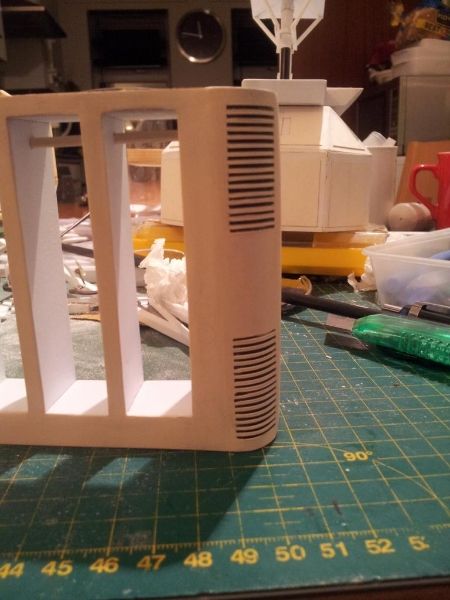
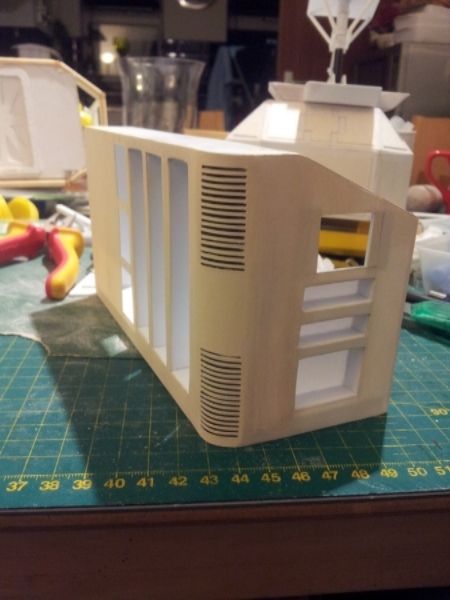
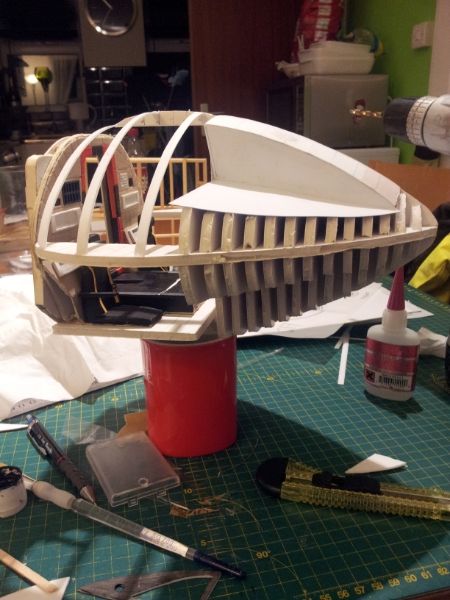
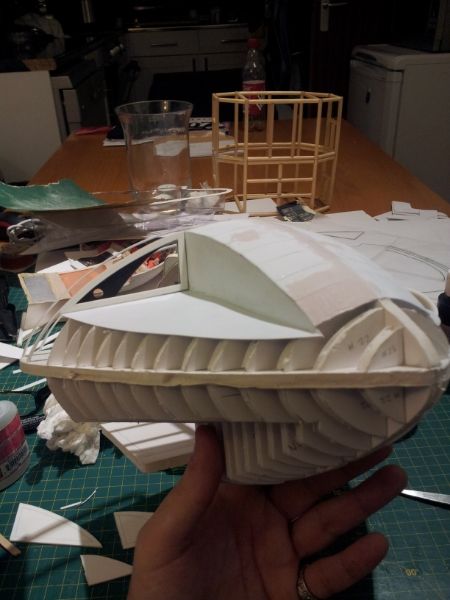
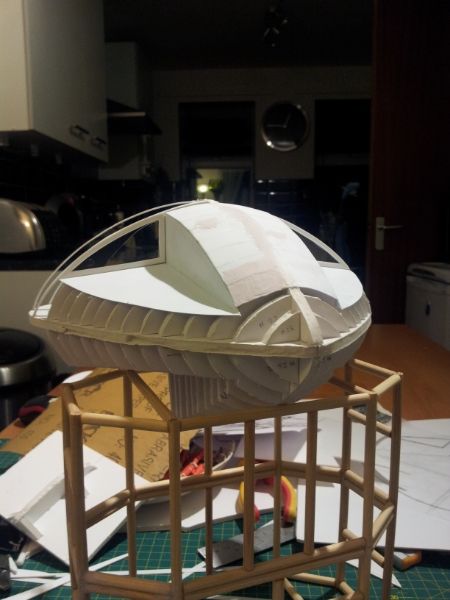
I started by cutting and fitting the ribs to both sides of the bottom half of my new Command Module and then made a start on ribbing the rear half above the cockpit area. I will be doing both bottom quadrants but only one upper quadrant , as the other side will be open for viewing of the interior.

20130303_223624_zps58e557f9.jpg


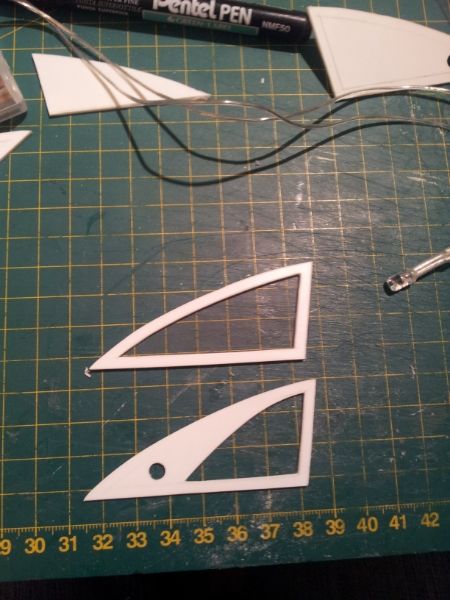
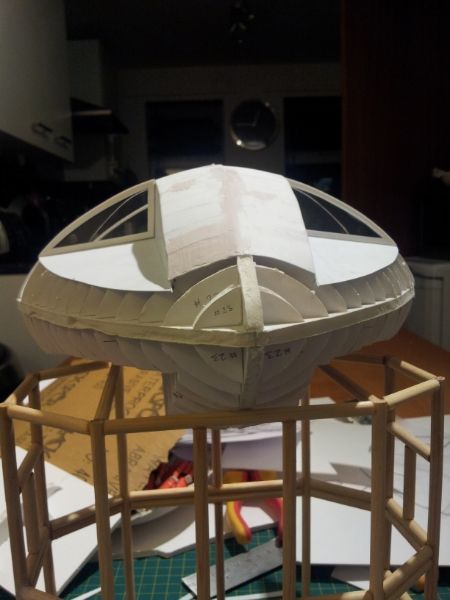
I also made the two cockpit windows. these are in three layers: The outer frame, the window glass and the inner frame, which has a blacked out area. This is to hide the gap between the cockpit wall and the outer shell.

20130303_222126_zps14cf9145.jpg


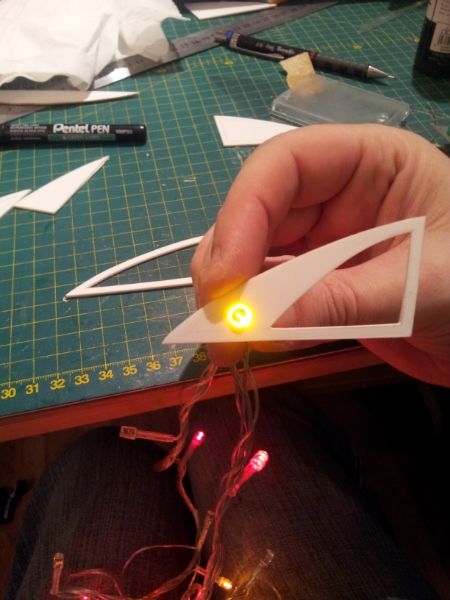
As discussed earlier in the thread, I have also drilled a hole on each of these and I will be installing a bright white LED on each side to act as "headlights." I just think that it add a little something of extra interest.. The LED used here is just for illustration purposes.

20130303_222645_zps42aa96e3.jpg


I know it's such a little aspect of the build, but I am so happy about how great these look. I even painted the insides of the frames black so that when glued to the glass, it looks like there is a black rubber seal inside and out.:rolleyes

20130303_225828_zps5480f678.jpg


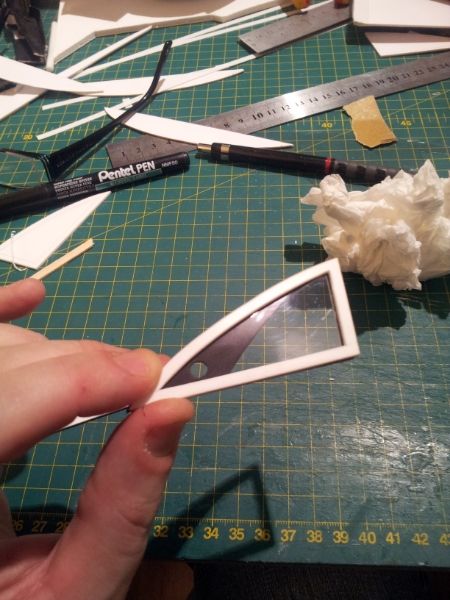
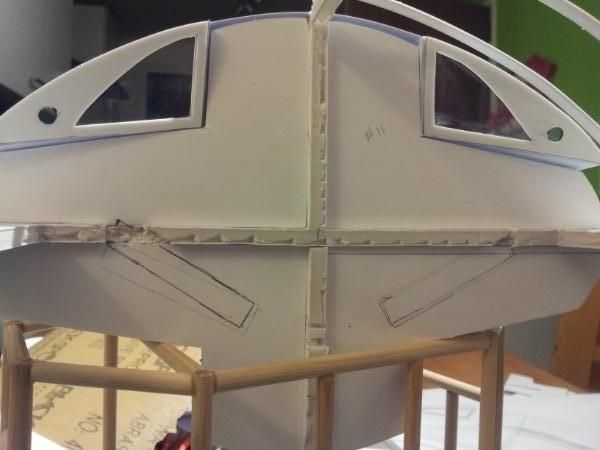
...and here it is installed.

20130303_232007_zps2869e860.jpg

20130303_232029_zps2796df43.jpg


The second one also went in a treat... I really like them..

20130304_004626_zps79eb05c6.jpg

20130304_004608_zps0fe2096a.jpg


Here is the view from the inside. The orange cockpit side panels will sit 1 or 2mm away from the edge of the curved part of the window frame..

20130304_004723_zps8febb7be.jpg


Anyway, that was my Sunday and I really enjoyed it! Hope you like the update. More soon!
Darren
 
Productive Sunday, Darren, and it looks like it was worth the time spent! :)

I look forward to the day when I get to the nitty-gritty details like the window frames...which you did a bang-up job on here! I like the led lights, too!!
 
Thanks, Bob..
I will put some really bright white LEDs in so that they are like searchlights.
I thought about putting two in the bottom half as well, but I think that would be overdoing it a little! :lol
 
Back
Top