Space 1999 Eagle Transporter Build Club (PIC HEAVY!)

Thanks, Bob..
I will put some really bright white LEDs in so that they are like searchlights.
I thought about putting two in the bottom half as well, but I think that would be overdoing it a little! :lol

Mmm..that's always half the challenge of creativity: knowing when to stop! :wacko
 
:) Awesome update, Darren. (y)thumbsup:thumbsup Very productive Sunday, indeed. Window glass looks terrific! I was the exact opposite today - one of those days I couldn't move a muscle and my mind was constantly blanking :wacko
 
Mmm..that's always half the challenge of creativity: knowing when to stop! :wacko

I agree. Plus, it allows for other bits and bobs such as blinking red and green external aviation lights etc...You know, I have a strong feeling that the new eagles in Space 2099 are going to have a lot of external lighting on them....:)

:) Awesome update, Darren. (y)thumbsup:thumbsup Very productive Sunday, indeed. Window glass looks terrific! I was the exact opposite today - one of those days I couldn't move a muscle and my mind was constantly blanking :wacko

I get days like that, too, Mate. I just sit and stare at it and then wonder where the time went. :unsure
 
:) Awesome update, Darren. (y)thumbsup:thumbsup Very productive Sunday, indeed. Window glass looks terrific! I was the exact opposite today - one of those days I couldn't move a muscle and my mind was constantly blanking :wacko

Sadly, in recent times I've had weeks and months like that... :unsure
 
No worries. Here are a couple of shots that kind of show it but the best episode is The Full Circle when they discover the dead caveman in the abandoned eagle...

podinterior2.jpg

podinterior.jpg
Here is a much beter HD rip of that


sp99911484.jpg
 
Hi there! Just a little update. I have been working on the new Command Module, and, again, I am pretty much following the methods that Bob has used, with a few changes here and there..
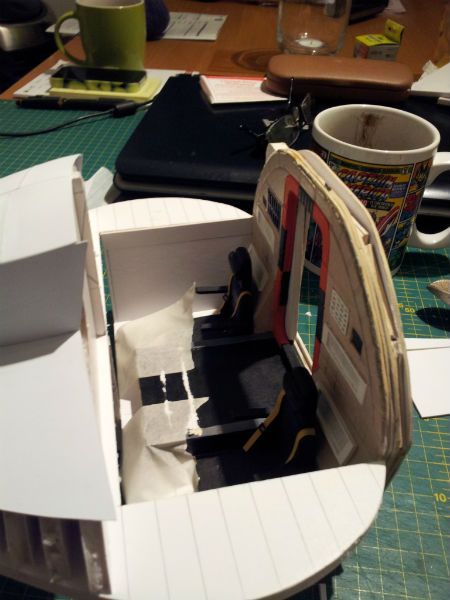
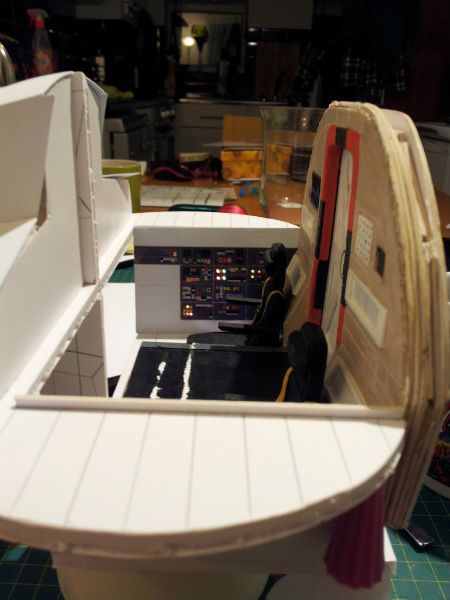
I spent two hours carefully disassembling my cockpit, and managed to salvage the back wall, the pilots' chairs and the floor. The rest I have scrapped as the new cockpit will be the same width but deeper from front to back. This is because I made an error in my calculations when I built the first one. No matter, as it is about to be improved upon, hopefully :)

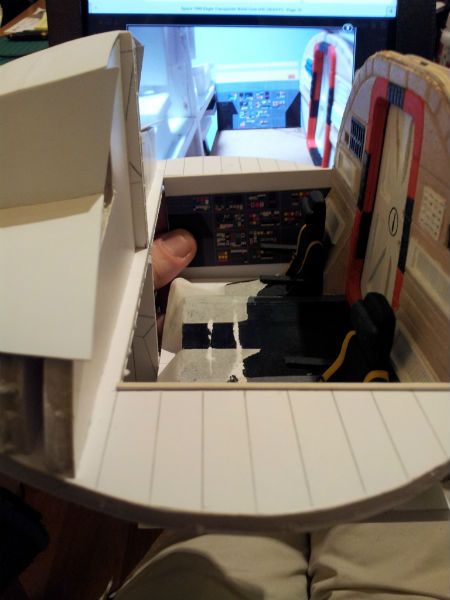
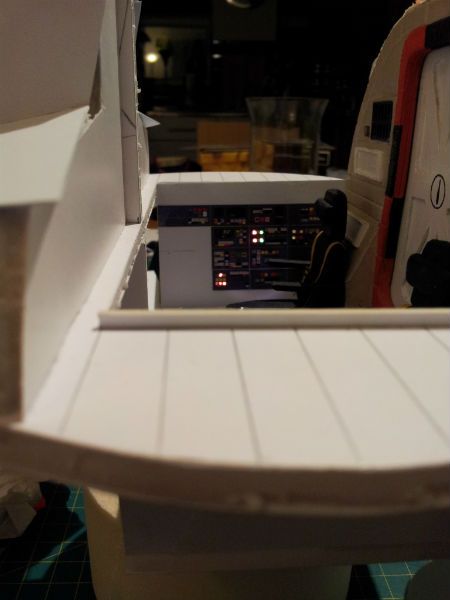
I have cut and glued in the cockpit platform upon which my cockpit floor will sit and be glued into position. I have also started test fitting the new side walls and after a bit of adjusting, they seem to fit reasonably tightly.

Untitled-19.jpg

That's LMFAOSchwarz's CM on the screen behind mine.
Untitled-18.jpg

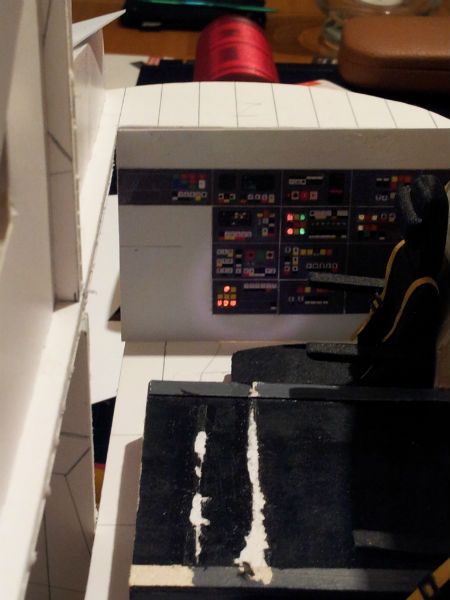
Then I had an idea for adding extra lighting to the cockpit. I am still going to illuminate the five TV screens as before, but I thought it would be cool if, just like on T.V. series, some of the side and front console buttons were illuminated, too. I made a mock up side wall and then took a draft print of the corresponding computer panels, and carefully cut out some of the little square lights with a scalpel. Then I placed the printed panels on the styrene side wall and marked the position of each cut out button. I then drilled the holes through the styrene and glued pieces of acetate over the holes, making sure that I used the right colours in the right places. Then I simply glued the printed computer panels over the top.
Untitled-20.jpg

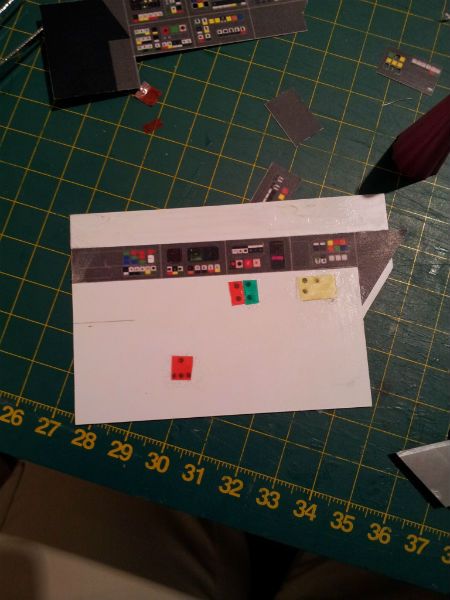
As I said, this is just a test piece to see if it works, and I have to say that the photos are bleaching out a lot of the colour. On the whole, I am happy with the result. All I have to do now, Is wire in a block of three ribbon LEDs behind the panel and enclose them in a box of mirror card, to bounce the light around.

Untitled-21.jpg

Untitled-22.jpg

Untitled-24.jpg

Anyway, hope you liked my little update, and I will post soon when I have something. Thanks for looking in! :)
sp990ne911.jpg
 
Many thanks, Ben, for the great images! The cockpit one especially is already of massive use to me, as that is where my attention is fully focused at the present time.
I am trying desperately to get enough work done to make a progress posting actually look worth while, but installing lighting and soldering makes it a slow old job. Maybe tomorrow evening if things go well....
 
Last edited:
Darren, that cabin is looking great!
With a little bit of luck, hopefully they are providing a glimpse into my own near future (well, except for the lighting...your build bravery exceeds mine! :thumbsup).
 
Darren - fantastic progress on cockpit and lighting! I thought electronics wasn't your strongest suit? That looks like expert work - you should be the one giving us advice. I remember answering some of your questions like I knew more - now I feel so ashamed of myself.
 
Whilst I appreciate your wonderful comments, as always, guys, you might notice that I haven't actually posted an update in a week. :)

BenCozine has "quoted" this posting from January 31. All you are seing here is a test that I did back then, with a torch held behind.

Sorry, guys..:unsure

I hope to have an update tonight, all being well.
 
Many thanks, Ben, for the great images! The cockpit one especially is already of massive use to me, as that is where my attention is fully focused at the present time.
I am trying desperately to get enough work done to make a progress posting actually look worth while, but installing lighting and soldering makes it a slow old job. Maybe tomorrow evening if things go well....
I have a thread in the Studio Scale Models section that is Bluray screens like the ones I posted on this thread. I have hundreds of them from season one. Check it out when you have time, I'm sure there is more refrence pics that would be useful to you.
 
This illustrates the problem I am having perfectly

In this picture, the front console is about six inches from the first vertical white line on the side instrument panels.
sp9972ses.jpg


Here, it touches that white line.
sp9972umu.jpg


And here, the front console actually crosses the white line by about two inches or so.
sp9972ymy.jpg
[/QUOTE]

This is making it very difficult for me to decide on the actual position of things and, therefore, the actual dimensions of the cockpit, as it seems to grow and shrink.....:unsure
 
Last edited:
Just watched Season One, Space:1999 must be in the air! And I went through the progress on this build - very cool!

I will be sticking to my 22" MR Eagle, but I'm glad to see there's bigger out there (he said with a straight face). Cheers!
 
Good to hear from you, Blackbirdcd, and I for one would LOVE to see some pics of your build; even if it is the separate parts laid out ready for assembly! Every eagle build on this thread is different and all of them show a completely unique approach to eagle building. Anyway, feel free to post a pic or two :)
 
Huuum!!

This is going to trouble us.
I can say with confidence that soon it's going to be impossible for us to identify which one is the actual filming set. Then it will be difficult for us to give it a fair evaluation, you know. You should build it as at least we can see it as a model.

Fantastic!:lol

Katsu
 
Darren, I know the feeling - but I'm sure whichever way you do it, it will turn out great and no one will notice the difference until you point it out. Viewers generally see the thing as a whole while the creator sees details individually. It drives us crazy thinking about such things, don't they.
 
My apologies, Katsu. I neglected to state that all three of those pictures are screen shots from the TV set and NOT of my model. I'm not THAT accurate! ;lol

Thank you Crackerjazz, nice to know that someone else is understanding my dilemma a little. :)

I do hope Bob gets on okay at the Dentist today. He's having all his teeth and his whole bottom jaw removed and replaced in solid Madeituptium. :D
 
Last edited:
Back
Top