Space 1999 Eagle Transporter Build Club (PIC HEAVY!)

Re: Space 1999 Eagle Transporter Build Club UPDATED Oct 22nd (PIC HEAVY!)

"Ask not who toils for thou, engine bells, Darren toils for thee."

Or something like that :lol

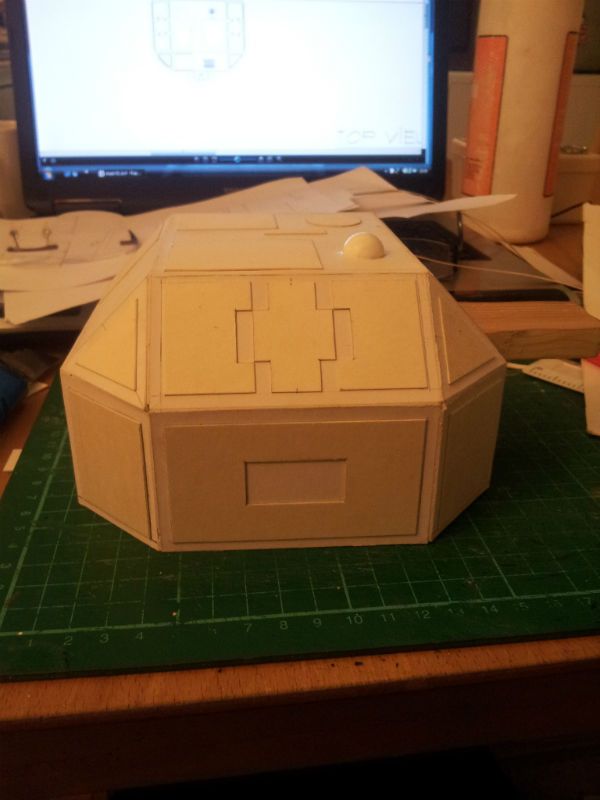
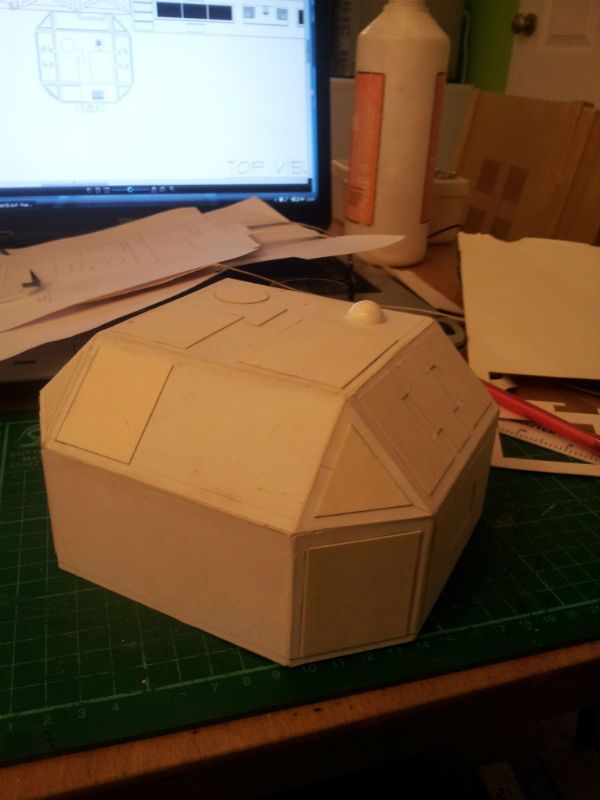
Looking good! There's no better way (to me, anyway) to make crude mock-ups to visualize where you're going, a nice visual/dimensional link between brain and build.

I was looking at you pictures, not envying you the task of making parallel grooves on the bells, but then it occurred to me that it's in my future, too!:eek

Luck to us both! (tho' I suspect you'll find a clever way of doing it!)
 
Re: Space 1999 Eagle Transporter Build Club UPDATED Oct 22nd (PIC HEAVY!)

You think???? :confused

As for the tolling/toiling bell, I think it toils for you if you keep cracking jokes like that one :lol

Good to see you Bob!


Good evening everyone, I hope you are all well?

A little update to end the evening...
I have found the time this evening to draw, cut and fit the paneling to the first shoulder pod. I just thought I would post it up to show how it looks.

ShoulderPodDetail2.jpg


ShoulderPodDetail1.jpg


I will need to second fill the pod to tidy up the joins and gaps a little but I think it will be okay. I have also made some advances on the suspension system and I will let you know more when I have fully ironed out the difficulties.
Thank you for looking in and I hope you enjoyed today's updates! :)
 
Re: Space 1999 Eagle Transporter Build Club UPDATED Oct 22nd (PIC HEAVY!)

Great-looking pods, Darren! Can't wait to hear about your suspension idea: I'm sure it's got its own innovative twists!

Now, to make up for my lame joke :sick ...

...here's an update! :)

I started adding pieces of square styrene rod to thicken up and strengthen the back edge, onto which I'll add a thin styrene skin to the outer layer...
View attachment 121276View attachment 121277View attachment 121278
But lo and behold, I used up most of my square rod building the two ellipses. :unsure
I thought about cribbing the two pieces I'm using for the sides of the cockpit walkway, but decided not to, since they are slightly thicker than the stuff I'm using on the back. That will add unnecessary work sanding them thinner, so I quickly abandoned the idea. I'll get back to the hobby shop to re-supply soon. In the meantime, I don't feel like just sitting here and getting nothing done!
View attachment 121279View attachment 121280
I'm going to begin adding skin to the module. I trimmed a slightly over-sized piece, and turned on the water pan on the stove. Heating the piece to a relatively similar curve, I traced the outlines of the of the piece and trimmed away most of the excess. Once attached I will sand the edges to a good fit.
View attachment 121281View attachment 121282View attachment 121283View attachment 121284View attachment 121285View attachment 121286View attachment 121287View attachment 121288View attachment 121289View attachment 121290
Well, that worked out okay, so I trimmed, heated, and attached another piece. Then another. This skin will have to be sanded to the desired contour, removing any bumps, seams and imperfections along the way (worry not: after all this, I'm not going to settle for a lumpy Eagle :$) The real challenge here is going to be the outer plates: those will have to be darn near perfect prior to attachment. :confused
View attachment 121291View attachment 121292
You can see that the module is slowly assuming a more "solid" look. It's also gaining heft and strength, which you can feel just by holding it! :)
View attachment 121293View attachment 121294

End of update...hope you enjoyed it!
 
Re: Space 1999 Eagle Transporter Build Club UPDATED Oct 22nd (PIC HEAVY!)

Enjoyed it!!!??? :eek :eek :eek

you just blew me out of the water, Dude!

So much so that I am seriously considering making a new CM from scratch...

Flawless workmanship, Bob. Your skills are leaving me in the dust! If I had the money to work with the materials you use, I would do so in a heartbeat.:unsure

Not that I am in any way "blaming my tools" :lol I just think that what started out as a build thread for me is turning into a massive learning curve as to just what can be achieved when skills I can only dream of are applied to materials I can not afford.

Seriously, I thank you for sharing your skills and build methods with me and the forum in general. It is a real shame that more people don't visit this thread and leave the comments that your incredible workmanship deserves!
 
Re: Space 1999 Eagle Transporter Build Club UPDATED Oct 22nd (PIC HEAVY!)

That's awfully nice of you to say, Darren...but darn it, I'm just not that good! Some days I feel like this module is just at the outer edge of my abilities. There is still much room left for me to screw it up!:unsure

When I look at your stunning side-by-side pics of model/set, that's where I get daunted by your abilities! It's funny, in fact, how we all motivate/intimidate on here. Crackerjazz does a bang-up job on his builds, intimidating me. Katsu's starship makes me feel like a child with crayons in comparison. Your work impresses me. What did I call it a while ago...a food chain of humility? I sort of think of it as weight-lifters 'spotting' for each other! After all, it would be so easy to give up, were we each on our own.

Initially I was embarrassed to even think of posting my work on here. I'd been out of the loop too long. My rusty, creaky talents are getting a real workout, which is good! I was convinced by a girlfriend years ago (in not quite these words) that it was "childish" to build stuff like this. Fool that I was, I believed her.

What I'm getting at is, I am eternally grateful to you for 'shaking off the cobwebs' in my mind. I don't have to be an outside observer! The plastic I'm using isn't that expensive, but it does help to have the cost spread out over time! It's one of my favorite mediums, and I'm happy to have my hands on it again. If the glue I was using didn't give me a runny nose every time I used it, I'd be in heaven!

The cut-away design is turning out to be a major challenge, with this command module being the most challenging of all. If I can get through this without botching it, I should be okay! I like your module, such wonderful contours. I'll be lucky to get mine nearly as good! If I screw it up, I too will be inclined to 'blame my tools'!:lol

I've got vague plans for another build when this is done (if it ever is! :wacko ), and I'm hopeful that this Eagle experience will be a great aid in challenging what I think is possible.
 
Re: Space 1999 Eagle Transporter Build Club UPDATED Oct 22nd (PIC HEAVY!)

Well, when this build is finally finished, I could quite happily build another model with ya! But that is up to you of course. Sometimes it's good to start afresh on a new project with new sources of inspiration around you.

I would love to know what you are cooking up though, in the recesses of your mind......hehehe!


I must just say that my router died this morning so to get online, I have had to buy a coffee in McDonalds! New router on the way and should be with us in the next ten days or so. I will try to get online as much as I can between now and then but please don't think I have gone AWOL again, okay? :lol
 
Re: Space 1999 Eagle Transporter Build Club UPDATED Oct 22nd (PIC HEAVY!)

Ye Gods, Mike! :eek

I was wondering where you disappeared to! How are you my old fruity!? :lol

BTW, have you rated our brilliant dual build thread yet??? :cool

Red Dwarf could be a possibility......


EDIT: Cheers For that Mate and Don't be a stranger!
 
Re: Space 1999 Eagle Transporter Build Club UPDATED Oct 22nd (PIC HEAVY!)

I most definitely rated this thread. Saw 4 and had to do something about that travesty.

Love the interior details, have my spacesuit and am ready for launch.

and stay out of McDonald's man.

-Mike
 
Re: Space 1999 Eagle Transporter Build Club UPDATED Oct 22nd (PIC HEAVY!)

...I would love to know what you are cooking up though, in the recesses of your mind......hehehe!

Well, at the moment I'm planning on something which may or may not interest you. It's just something that crossed my mind, and the idea doesn't seem to want to go away! All I'll say for the moment is that it promises to be a bit...unusual!

Oh, I was thinking of sending you a "starter kit" of styrene to play around with, if you're interested? :)
 
Re: Space 1999 Eagle Transporter Build Club UPDATED Sept 26th (PIC HEAVY!)

Thank you, Greylocke. I appreciate it :)


Again, I stress, that these are all just test pieces and will not feature in the final build. These parts are proving to be the single most difficult aspects of the whole build, for me and I need more time to really iron out the build method. The part that is giving me the most difficulty, are the rings that are cut into the surface of the bells; getting these straight, parallel and of even width and depth which mine definitely are not!!! Back to the drawing board....

Most welcome sir, as for the rings, there is a trick I used to use to make firing pins, push pins and spiral springs for guns. You need a vise a drill and your tool for the actual cutting. Mount the drill in the vise then figure a way to mount the bells in the drill, my drill has a speed control and a locking trigger so I can make it turn as little as 20 rpm or as much as 700 rpm. turn on the drill and lock the trigger after you adjust the speed to where you want it. You're probably going to want use 30 to 50 rpm. And then "Lathe" your rings. You can use files or you can make use dental picks to get very fine control. If I still had a shop I would set up my rig and take some pics for you. If you don't have a vise you can use some metal plumber strapping to mount the drill to a piece of plywood which you can then use c-clamps to mount it to a bench or a table.

Also if you have a drill press you can use a router speed controller to adjust the speed. Just be careful when using a drill press, their bearings aren't designed for lateral loads and can burn out if you put too much side pressure on them. When using a speed controller on a drill press though you don't want to use it too long maybe 10-15 minutes at a time then ramp it back up to normal speed for 3 or 4 minutes to dissipate some heat build up. When you are done let the drill press run for a few extra minutes like I said to dissipate some heat. I know it sounds weird but most motors for drill presses/lathes/washing machines have a fan built into the windings to cool the stator and windings. So letting it run with no load will help cool it down.

I hope that helps you Darren.

Mark
 
Re: Space 1999 Eagle Transporter Build Club UPDATED Oct 22nd (PIC HEAVY!)

I was looking at you pictures, not envying you the task of making parallel grooves on the bells, but then it occurred to me that it's in my future, too!:eek


On making the parallel grooves you can make a template and using the drill method set the template next to the bell as it rotates and use a marker to mark/score the lines you need.

Mark

ETA You guys are doing awesome work and if I quoted every message there would be whole pages of comments from me :LOL
 
Re: Space 1999 Eagle Transporter Build Club UPDATED Oct 22nd (PIC HEAVY!)

ETA You guys are doing awesome work and if I quoted every message there would be whole pages of comments from me :LOL

Which would be okay, g.l.: it's your thread every bit as much as it is ours! :)

Thanks for the input..and the suggestions. I may well end up doing as you suggest!
 
Re: Space 1999 Eagle Transporter Build Club UPDATED Oct 22nd (PIC HEAVY!)

Hey!!! Stop giving our thread away!!! :lol

Seriously though, Mark, thank you for some fantastic ideas and I will deffo be looking into that!

On a lesser note, I am going to have to totally cut apart my cockpit and start from scratch. I have finally figured out why the distance between the back and front wall is so short - I ballsed up the measurements....... Suffice to say that the whole cockpit is about 4/5 of an inch too short. What a cockup!!! I will sort it out and i will do better. I think i can salvage the back wall, the front wall, (with care,) and the seats if I really cut them loose with a surgeon's precision. Other than that, the rest is toast. No matter as now I can print all my instrument panels, as has Bob and they will be a whole lot crisper and that cannot be a bad thing!
Bob, thank you so very much for the generous offer of a starter pack. What a true friend you are! I have decided to invest in some anyway as I am tired of working with crap. It is really depressing sometimes trying to turn sows' ears into silk purses. You cannot sand card. You cannot heat it, boil it or do anything to it except cut it and glue it. So I will struggle to finish this build with the materials I started with and then I am going to make the leap to the grown-ups' play area!
 
Re: Space 1999 Eagle Transporter Build Club UPDATED Oct 22nd (PIC HEAVY!)

You're very welcome! I'm more than willing to do it. If there's any particular type of sheet you need/want/can't find, let me know. I also wanted to send you a bottle of the glue I'm using. It has superior adhesion and a quite fast drying time. Its only downside (in my case) is the fact that it gives me sniffles and sneezes. That's just something I have to live with. You, however, will likely be unencumbered by this..if so, I envy you! Let me know and I'll jet it off to you! :)

(They do make a "non-allergenic" version of the glue, at least that's what I call it. However it does not adhere as well. I dropped a piece of a build on the floor once while using it, and the parts broke apart. That would never happen with the regular stuff.)

Don't be so quick to knock your card, you work wonders with it. It was my main medium for many years as well. It still would be, if a happy accident had not led me to 'discovering' styrene.

Sorry to hear about the extra work on your module. It is a surprisingly complicated shape, made none the easier by having an interior as well! Frankly, it's much tougher than I had envisioned in the beginning!

However, it must be said that someone of your talent and devotion to detail, combined with styrene, promises to be a formidable pairing!
 
Last edited:
Re: Space 1999 Eagle Transporter Build Club UPDATED Oct 22nd (PIC HEAVY!)

You know, if we were working with the same materials, on the same model in the same scale, and we moulded all the parts, would make some killer garage kits to sell!
 
Re: Space 1999 Eagle Transporter Build Club UPDATED Oct 22nd (PIC HEAVY!)

Darren and Bob - it is amazing to watch your builds take shape. I always let out a "How'd he do that?!" Looking forward to more updates! :)
 
Re: Space 1999 Eagle Transporter Build Club UPDATED Oct 22nd (PIC HEAVY!)

Ugh on the rebuild of the cockpit, to cut it our are you going to use an exacto or a scalpel?
 
Back
Top