SLS 3D Printed Thomas Bangalter's Daft Punk helmet project.

Well today I got some spray filler on the print, and I must say it is looking quite good. Waiting for the 2 coats to get good and set before I start to dig my elbow into it. It will probably need one or two more goes with the filler after some sanding with 120.

I do think it would be easier to work up a resin copy, but I do not really have the funds to go about making multiple molds. Those supplies are pricey! I think it's pretty safe to proceed with finishing the print. May be time consuming, but I have got time.

Stay tuned for an update here shortly.
 
Total respect on how you approached this. I want very badly to build a CNC machine, and had thought of building layers, but ultimately went for sculpting instead as I wanted the helmet before the CNC machine.

Thanks for the comments on my Guy-Man thread!
 
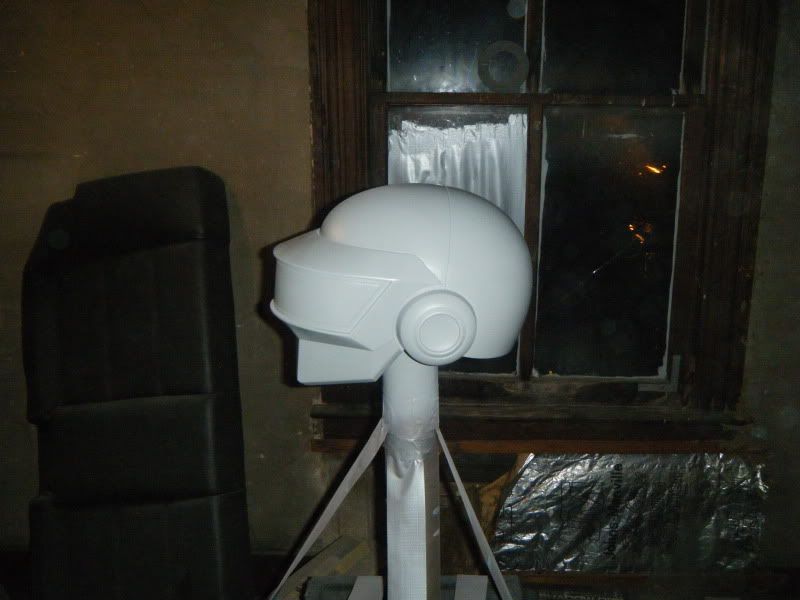
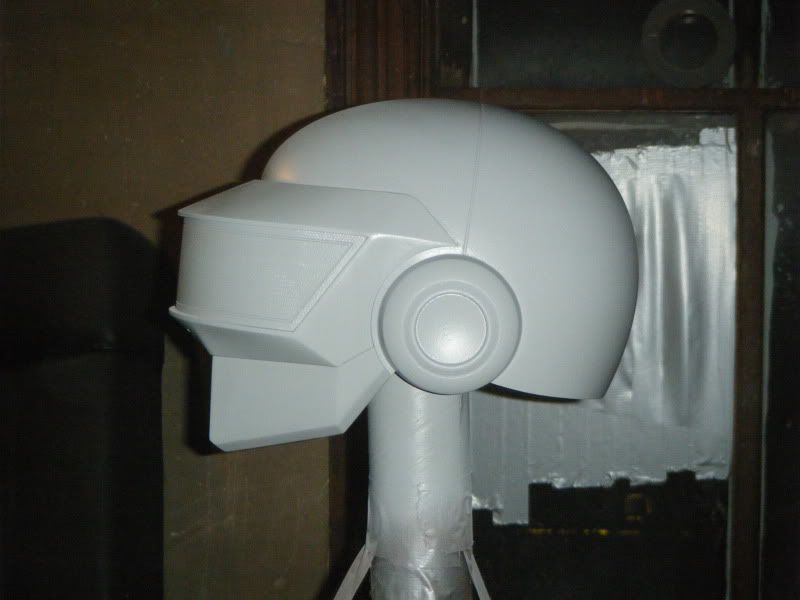
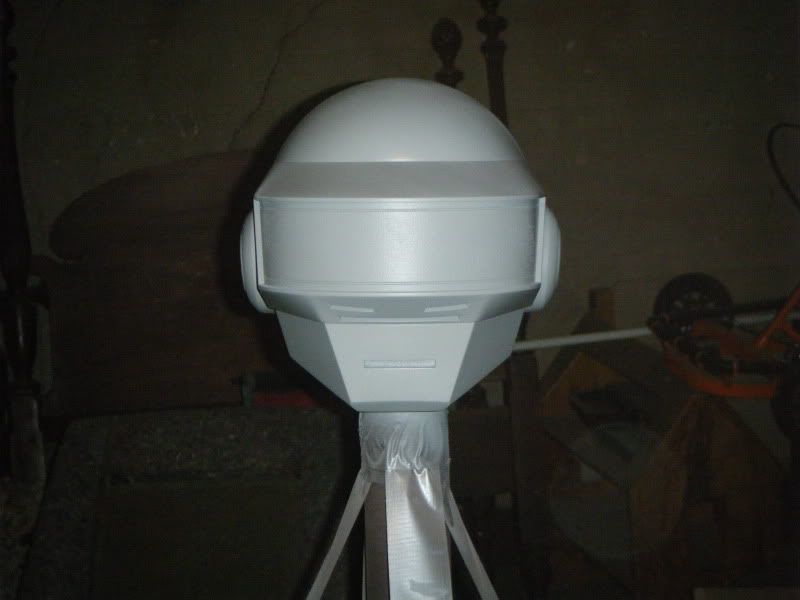
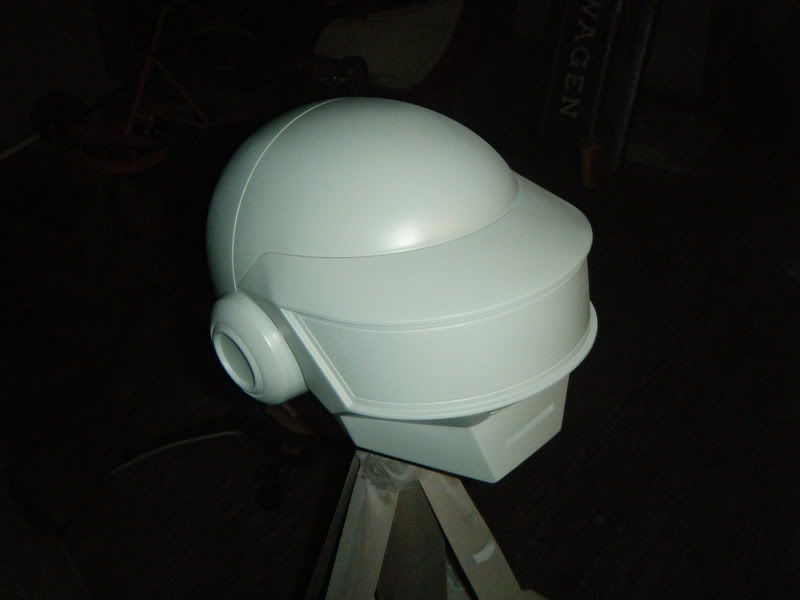
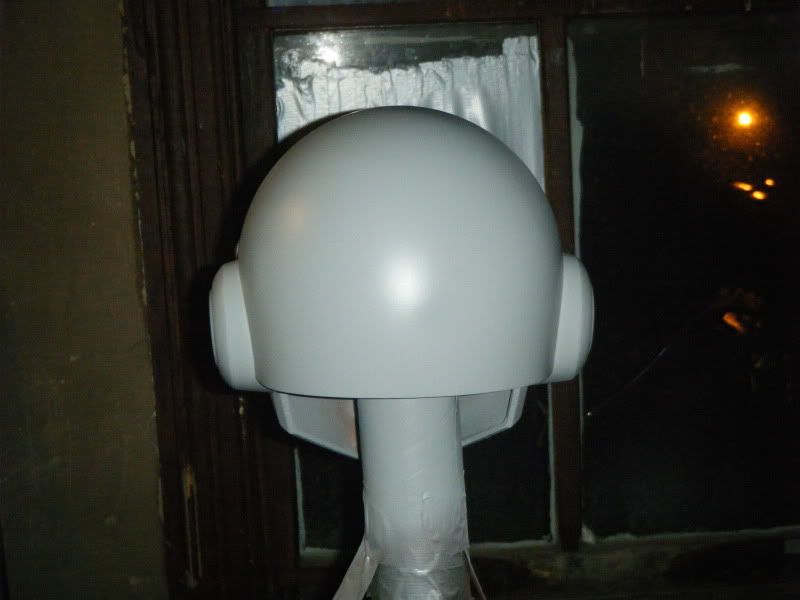
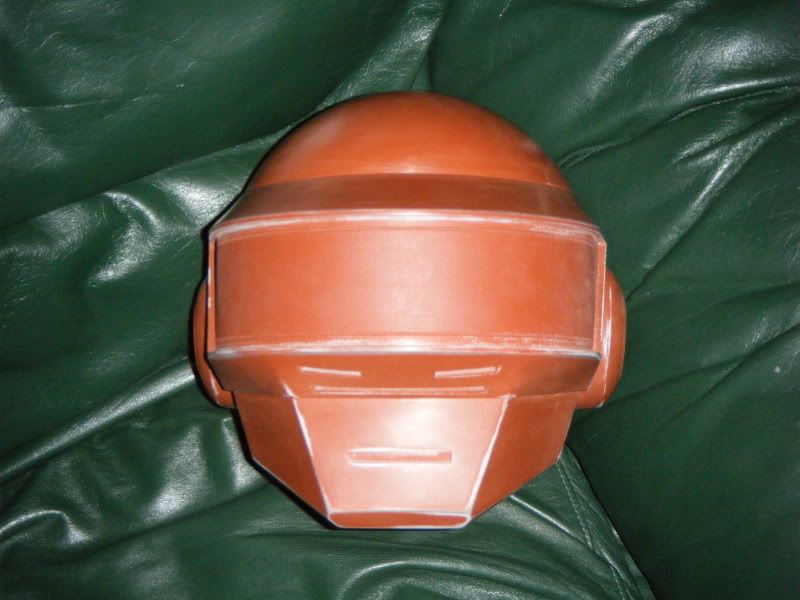
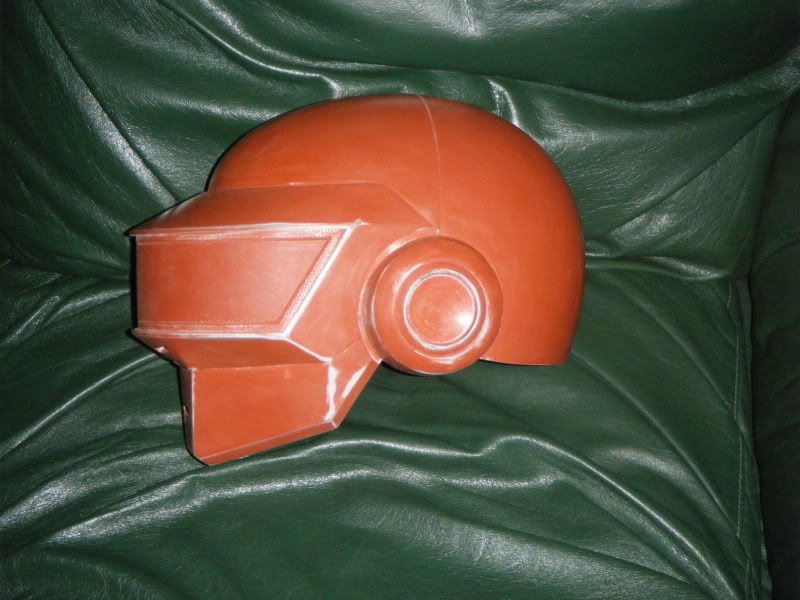
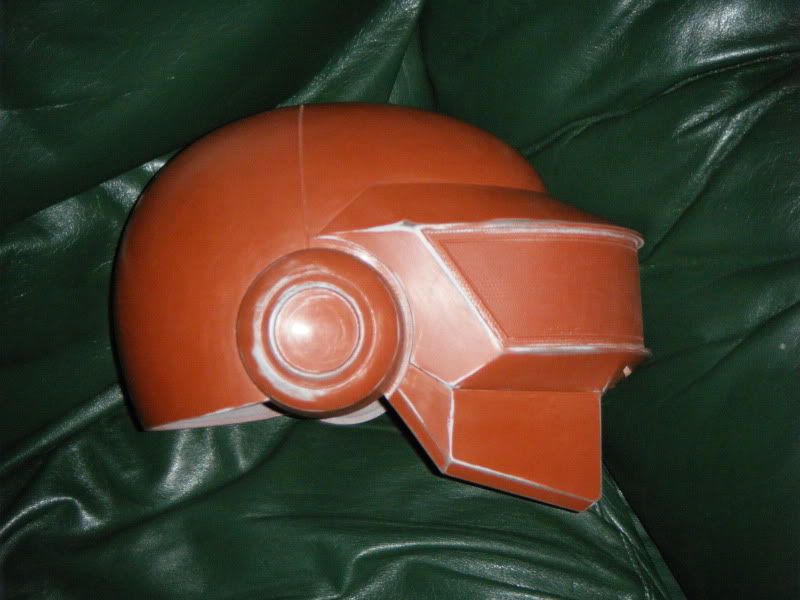
So I figure I'll chime in a bit here. Yah, that's my model.

And yes, I will get around to detailing my project in due time, but for now, let take care of the 3D printing speculation.

The quality of the print is a known quantity for those in the know. Like a real printer, you can only get so much resolution out of the system before it just doesn't work. I will endeavor to explain.

Theory: polygon count
Nope. This helmet was made from a 1M poly half model, reduced to 0.5M and then mirrored. So there are over a million triangles that make up that shape. Basically the wire frame is so dense you can't see through it on most 'full size' renders. And it wasn't made from interpolated polygons either. The original model was generated in proper CAD software. It's my tool of choice / part of what I do for a living. It's not a 3D 'art' package like say Blender, so there are no high/low poly count models, normal maps, or anything like that. A 5" radius is a 5" radius, and that's what is used to generate the STL file which goes to the printer. If I remember correctly my settings were around 0.03mm and 0.75deg on the STL generation tolerances.

Theory: not DLP SLA
Nope. This is SLS, which stands for Selective Laser Sintering, which is a fancy what of saying melting/binding together. SLA has a number of translations, depending on the company, but typically it's some like Selective Laser Addition. If you saw the link on MAKE Magazine's page about the DLP projector and a bath of blue goo that is true SLA (albeit hacked). Or there was the prototype figurine in the Small Soldiers movie (they got it pretty close though certainly 'Holywood-ified' the process). Wiki is pretty good on these.
SLS uses a powder that is melted by a laser very close to it's transition temperature, so a result is 'bleed'. As the heat from a region that has just been struck by the laser dissipates, it sinters nearby particles as well, causing bleed. It's unavoidable, and the gurus who work with these machines are constantly tweaking variables to try and mitigate this.

Theory: layer thickness
This ones is kinda close. The layers are normally under 0.1mm thick so you're not hurting for accuracy.

Hope that dispels any misconceptions.

Part of the brilliance and annoyance of SLS is that it's typically made of nylon and a 'filler' of glass or recycled SLS nylon. The result is something that is 'harder' than the overall parts 'strength and durability' would indicate. You have very, very hard particles that are 'weakly' (relatively speaking) glued together. So while a high enough drop will break a SLS part into adequately tiny pieces, sanding and finishing it is an absolute bugger. It's very slow going. Which is why the additive filler/primer method is ideal for working with SLS nylon. Fella I'm working with on my helmet design (also SLS nylon) said it took him 24 hours (he guestimates) to get to 1200 grit. Tis fun.
 
I understand that this model has already been printed; and that materials may become expensive fast.

However, I would like to ask the modeler if alternative approaches have ever been taken moldmaking.

Could the mold halves be printed directly? Unlike with metal molds for plastic injection, resin pouring uses very little pressure. To save on materials, the mold surface could be backed with an extruded or lofted honeycomb shape.

If positive molds were printed, one could pour silicone or plaster directly on. You would obtain negative molds thusly.
 
Sorry to go off topic, but your jacket looks great, are you the guy that ordered it from Magnoli? If so, how do you like it?
 
I think I see what you are getting at. The reason this approach was taken was so that scale could be identified correctly, by there being an actual wearable print. Even with this method it took two try's to get that right. Also this is basically the same result. Starting with a positive, then using silicone to create a negative, which then yields a positive. This is going to to be a one part silicone mold and two part mother mold. Just making mold plates would require making a complete helmet before you could judge the final scale, which in my opinion yields higher costs unless you get lucky on the first go round.

Yep jacket is from Magnoli. I really like it. Unfortunately since I had it made i have put on a few pounds which makes it fit a bit snugger, so I need to work on that. I owe Indy some pictures as well. I had them make matching pants as well in a rush, so they didn't get a chance to get them onto their site.
 
That's great, I'd be really interested in seeing a full body picture of the whole costume. What did he charge for the pants?
 
You got to use filler primer.

Glazing putty and spot putty are your friend as well.


Where are you located? I can recommend three brands.
 
I've been looking at Shapeways 3d printing to get several things done, the price isn't tooooo bad. Did you use Shapeways?

As he explains in his first post, and then in a later post, he had the opportunity to have that helmet printed at a company that gave him a huge discount on printing. Otherwise the helmets would have cost approximately 1500 US-$ or more per print.
 
I've been looking at Shapeways 3d printing to get several things done, the price isn't tooooo bad. Did you use Shapeways?


Yeah, Shapeways is definitely NOT cost effective unless you're made of money. You'd be better off finding some guys in your town that have a CNC milling machine and make friends with them.
 
The pants magnoli made for me were the first and so far only pair to be made. I am going to refrain from posting what I paid because I am not sure what they intend to sell them for once I get them a good photo shoot. I will post some pictures of the outfit once I can snap a few good pictures.

The prints would actually cost the average Joe a lot more than $1,500 USD, more like $4,000 + USD. I did not use shapeways. Guess I would have if I didn't use a company through my work. Same process tho.

Noble........ Please do recomend some brands. I am located near Baltimore Maryland. Thanks.

Before finding 3FF (my friend with access to 3D printing) I priced out my helmet at Shapeways. At 1.4mm thick, a half a helmet would have cost me high $300. This was before they went to their newer (more expensive) price scheme that charges you more if you model has lots of empty volume (because they can't fill that space with other peoples builds to make more money on a single printing run). And in the printing volume they allow, you could probably only fit 1/4 of a helmet.

You might be able to have a helmet printed at a reasonable thickness (say 3mm+) for around $1500 through shapeways, but it would be a stretch.
 
Update!!!!

So this is the result of 120grit plus 2 coats of filler followed by a go over with 220grit, and one last coat of filler. Tomorrow it's another go with the 220 in some spots then hopefully a coat of regular primer and some fine'er stages of paper. Here are the images.

DSCF2003.jpg

DSCF2004.jpg

DSCF2005.jpg

DSCF2006.jpg

DSCF2007.jpg
 
Last edited:
It still has A LOT of sanding to go. I need to get some sort of spot filler for a few areas that the spray filler just wont build up enough to fill. I am definitely pleased with the progress thus far tho.
 
Looking much better!

Don't be afraid to start going to 320+400 grit. If you stay with 220, you'll be sanding too much filler away, and wasting your time.


For light filling/easy sanding, I recommend:
Evercoat
Plus alternating hardener colors between applications.

For really small fills:
3M US: Acryl-Green Spot Putty


As far as paint goes:

Rattle can, this works really well:
SEM Products - Catalog - HIGH BUILD PRIMER SURFACERS


If you have a HVLP spray gun, catalyzed primer is the best:
http://www.autorefinishsupply.com/PCL-Poly-Primer-Gray-Gallon-p/pcl901-gl.htm


I get my materials from a company called finishmaster.

When using a cat. primer, always test paint a part. Some
other brands, might melt your part. This poly primer in CA works great!
 
Well used a bit of spot putty today, and got a coat of primer on. I have finished the day with a 1000grit finish. Here are the less than exciting images. Honestly you need to see this thing in person to tell how nice the finish is coming out.


DSCF2016.jpg

DSCF2015.jpg

DSCF2017.jpg
 
Last edited:
This thread is more than 11 years old.

Your message may be considered spam for the following reasons:

  1. This thread hasn't been active in some time. A new post in this thread might not contribute constructively to this discussion after so long.
If you wish to reply despite these issues, check the box below before replying.
Be aware that malicious compliance may result in more severe penalties.
Back
Top