Rey - Star Wars: The Force Awakens Build (open for everyone!)

Hi!

I'm Moe Hunt! I'm new to the RPF, but you guys seriously helped me out SO much on making my Rey outfit! I thought I would share some pictures of the progress on my costume! I ended up opted for a wig and just spraying my hair with brown hairspray. I thought it worked out pretty well and it was much more comfortable than a wig. :) Thank you, theladynerd, for your fabric suggestions. I ordered both of the Dharmatrading fabric and they worked wonderfully!

It's not perfect, but I made it in 2 days before Dragon*Con. :p So, I'll go back and fix things eventually!
View attachment 529042View attachment 529043View attachment 529044View attachment 529045

Hey guys! I am new to the forum and I'm so grateful for all of your hard work and attention to detail. I was at Celebration 7 in Anaheim, but sadly I didn't get to see the costume in person.

I'm looking forward to wearing the costume I'm making for Halloween, a local Comic Con and the movie premiere. Time is of the essence since it is almost October. Moehuntvoices would you mind sharing how you made your tunic? It is the only major part I'm missing. Did you use a ready made shirt or is this something you put together yourself? Thanks.
 
Last edited:
Looks like regular medical gauze.
I picked up some of the bubble gauze mentioned earlier in the thread but if it doesn't work out all my sisters work in a hospital.

Here's a question for those that have seen the costume on display.
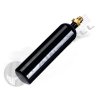
The bottom cylinder under the pack looks black and like it was wrapped in leather.
Can anyone confirm this?

cylinder.jpg
 
Last edited:
division6 from the picture it looks like a really dirty canvas to me due to the look of weave. Leather wouldn't have that woven texture generally. The bottle looks as though its painted and weathered like a gun would be, silver in the highlighted areas due to being rubbed, though the bottle looks like something that might be removed occasionally, so technically it should be mostly silver due to rubbing on the strapping and leather. Now, if its pretty much stationary, and the nozzle looking piece on the side is manipulated more for whatever reason, then it being more silver makes sense.

I hate having to guess, why do they make this so darn difficult for those of us who are trying to replicate it? I seriously think they sometimes love to add weird things just to get us guessing. "The costumers will have a field day trying to figure out what this piece is for"
 
It is wrapped in canvas that overlaps in the back and has an opening where there is a coupler area with an "O" ring.

Looking at some pix from D23 I can see dark brown (since it's a different pack) and it ends right before the silver coupler in the canvas window.
The C7 pix appear to have a leather type texture.
If you look at the left side the leather endcap and the dark band next to it have the same texture.

Originally I though it was just a PVC pipe till I noticed the texture.
 
The cylinder opens about 3" down and has ridges and an "O" ring.
The cylinder is about 2" diameter

Using a water bottle is a good idea.
I used to have a platypus water bag on my sand trooper pack.
 
I am getting ready to start ordering everything for Rey and was wondering how much fabric did y'all get for wrap dress? I saw on Dharma they have two different Viscoses: A silk blend and a light one. Which one did you get?
 
Thank you everybody for making such a great post! I'm just starting my own Rey project and this thread has been AMAZING.

I can't really add anything yet except for a few observations. It was noted that the pleats in the crossover/overdress were sewn in place. This will most likely help with the fullness problem people were having with some of the gauzy fabrics they were using. I use that fabric in some of my Roman reenactment clothing and I've noticed that a good ironing will take the fluff out too. Someone also noted that at D23 those same pieces had a seam at the bottom of the loop. Perhaps whoever dressed the mannequin put it on upside down? I've noticed that's happened at other exhibits like the ones at FIDM.

Some tips I can offer people who are having problems dying fabric-- Pre-wash your fabric to remove any surface finishes like starch that may effect your results. Test dye swatches, noting the dye to water ratio as well as the amount of time your fabric is in the dye bath. Use the right dye for your fabric. Rit dye is the one size fits all of fabric dye. It will give decent results for some things, others not so nice. If you've spent the money on silk and other expensive fabrics, spend a bit more on dye and get something meant for that fiber. Dharma Trading has been mentioned before and I highly recommend it for anyone in the U.S. Also on the subject of dye, it's worth looking into a leather dye like Ecoflow to use on your leather goods as it will give everything that lived-in look and if not all of your leathers are the same shade, it can help make them match.

I'm also curious about the staff. Has anyone seen the build your own lightsaber station at Disneyland? You can get the parts for the emitter, the grip, etc. and make your own. Maybe that could be a start for a PVC option?

Other than that, I will post anything I find that can help. I might have a lead on finding some of the chains and smaller buckles. There's a few places in Downtown LA's Fabric District that carry stuff like that. Unfortunately, the places don't usually have online catalogs so I'll have to look when I go down there. My time frame to get most of my costume done will be for the Ep. 7 premiere, so I'll be down there before then as I'm definitely getting some fabric from there. (If you can get there this store called Fabrics and Fabrics carries a lot of the specialty silks that are seen in Star Wars- off the top of my head I remember they have raw silk like the hood of Darth Maul's cloak and the kind of silk that Rey's pants are made out of.)

Thank you again and good luck! :)
 
Welcome.
Thanks for your insight on dyes and dying.

If you find the chain I'm definitely interested in a piece.
 
LL9437,

For the wrap you will need to make a full measurement of how it will go over your body using picture reference on where to start and stop.
If going with the pieced then you would only need to order half that length and cut it in strips then sew them together for the full length.

I bought 4 yards of the silk blend for my niece but probably only need less than 3 since I measured my self and she is a few inches shorter than me.
 
Someone also noted that at D23 those same pieces had a seam at the bottom of the loop. Perhaps whoever dressed the mannequin put it on upside down? I've noticed that's happened at other exhibits like the ones at FIDM.

This is possible, but I doubt it since the first full body shot we saw of her shows the gathered shoulder, as well as a darker line in the looped part as it flows out to the side in the wind. Granted the largest I found of that image isn't as high definition as some of the other shots we have, but if you zoom in, even though it is a little blurry, you can make out a darker line that runs along the loop.

I hope this makes sense, since I am unable currently to pull up the picture and circle the area I mean to illustrate.
 
Anyone have or know of a source for "fashion registry" chain in the US ?
I only need about 6" and don't want to buy 100' from China.

View attachment 530307

Why not just make a jig and make your own. There's only 19 links... not much of a problem and appears to be a simple bend so you don't have to worry much about soldering any ends together. I'd use large paperclips for the wire, straightened out and then bent on a jig to create each of the links. Doesn't look like it would be that difficult for such a small length of chain rather then purchasing 100' of the stuff.
 
Hadn't though of that.
I may just give it a try.
Thanks.

Almost done making the head wrap shirt thingy.
Just need to add some elastic to the opening since I miscalculated on it forgetting I had to fold over about 1/2. (can be seen in a couple pix)

I used the Dharma Handwoven Natural fabric 55".
Once you wash it it crinkles and takes on the appearance of the material they used.
It's a loose weave and my machine won't sew it unless I place paper under it so I had to hand stitch the whole thing.

- - - Updated - - -

Lady Nerd.
Sorry to hear things aren't going well for you.

Hang in there, well keep the light on for you. ;)
 
I used to make chain mail from paperclips. The one thing thou, make sure to coat the metal with Future Floor Wax after you bend it or it will loose it's metal shine.
 
Hello! Brand new Rey here! Well, I did a makeup test last month lol. Anyways, I want to do her basic costume, without the head wrap and goggles for now. I've read through the whole thread and you're all very resourceful. I was doing a bit of pattern research during my break at work today and I found that Simplicity 2777 would probably be great for her pants if you don't put in the ruffles.
827e0d7fbf9028dbbb2593281f072f24.jpg

And if you could, I don't quite understand the loop thing on her wrap dress? I tried testing two random pieces of fabric I had and couldn't figure out how to cross it, loop it, and have it touch the other piece in the back. Please and thank you! ^.^
 
Wrap starts front right knee, goes up over left shoulder, down to center back then down to left knee, loops then goes up over right shoulder down to center back then down to right knee.
In the back they just touch under the belt and could be sewn together there to keep it in place.

The additional wrap for when she has the head cover on is still a bit of a mystery.

There are some pictures earlier in the thread.
 
Back
Top