You are using an out of date browser. It may not display this or other websites correctly.
You should upgrade or use an alternative browser.
You should upgrade or use an alternative browser.
Rebel Blockade Runner Build
- Thread starter CutThumb
- Start date
General Anesthesia
Active Member
Amazing work! Can't wait to see the finished lighted project.
vaderdarth
Master Member
Stunning so far. ")
Dave
Dave
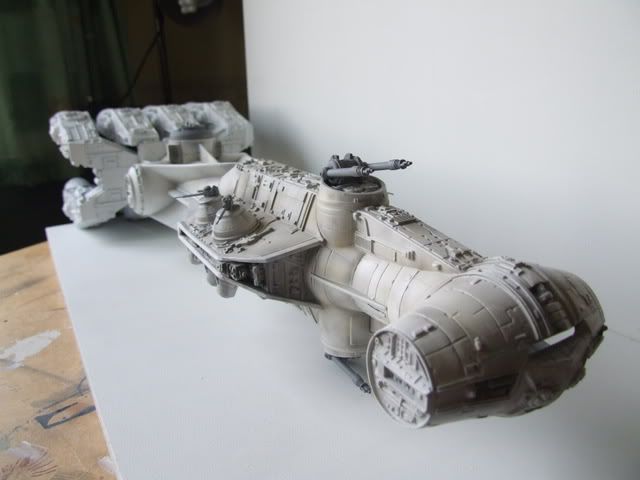
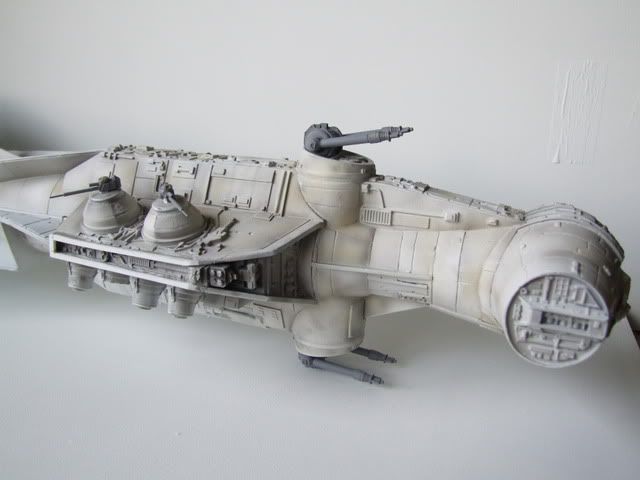
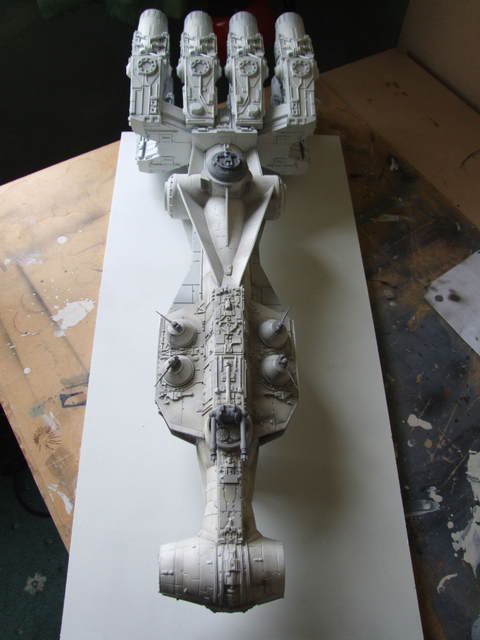
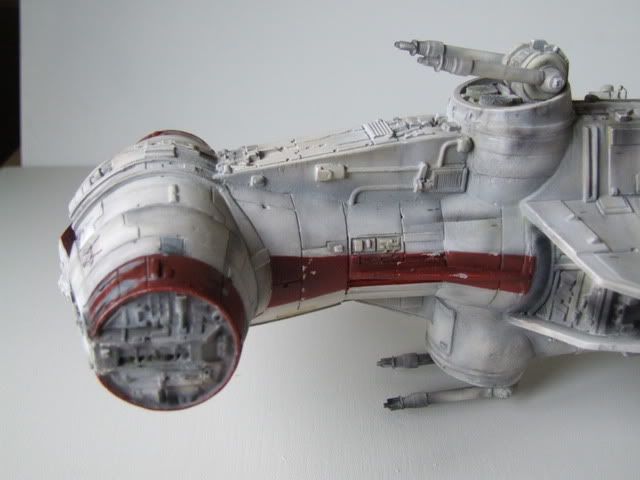
Getting closer- weekends work on the front half- engine block to follow later on. Pretty difficult to get the shading right- in natural indoor light it looks a tad heavy but in strong lamp and sunlight not as dirty.
Still some finishing off to do on front, mainly scratch work on paint and adding rust in spots
Still some finishing off to do on front, mainly scratch work on paint and adding rust in spots
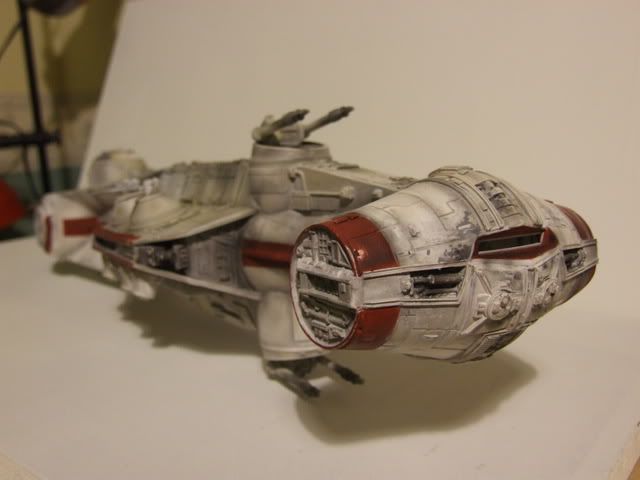
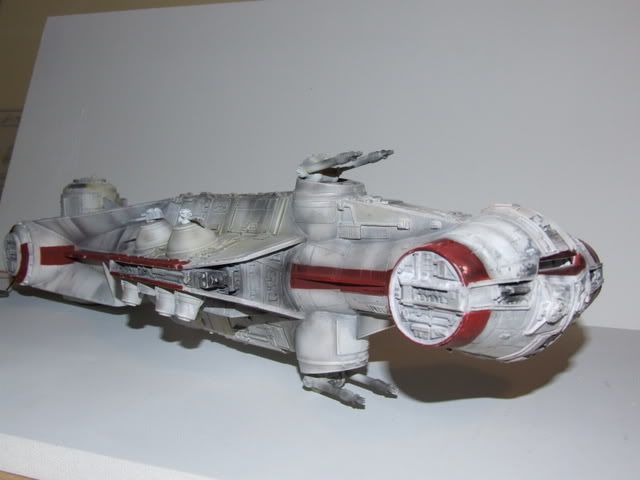
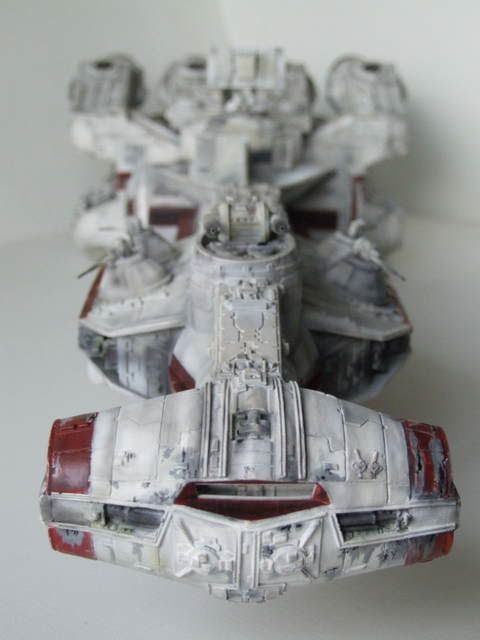
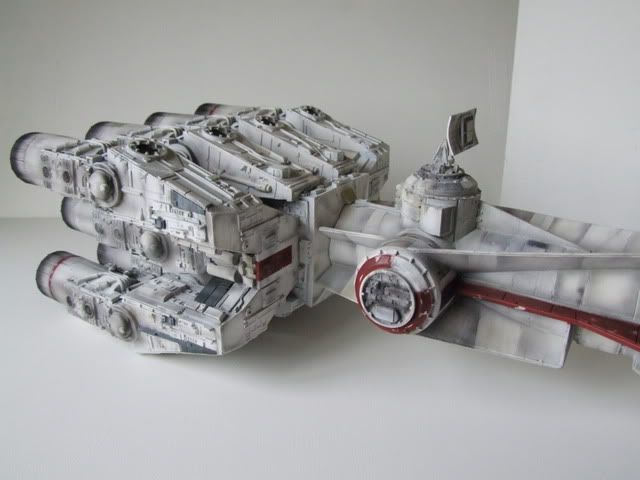
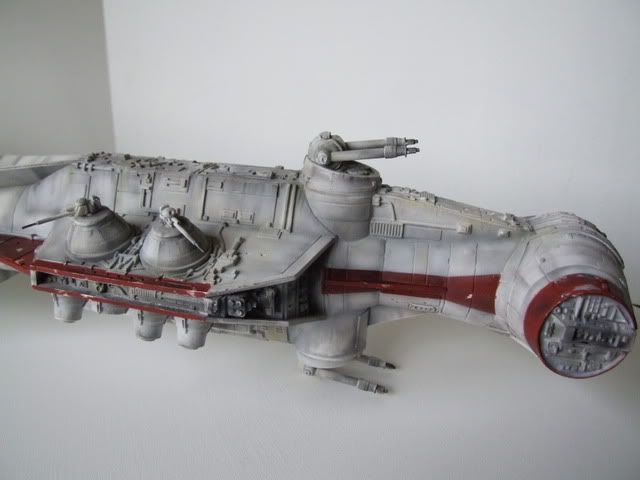
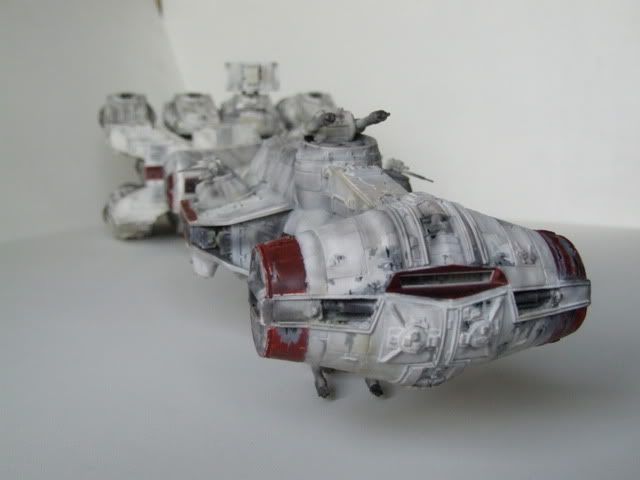
Well, shes pretty much finished. There is some light fine detail to get in and perhaps some slight repainting to do, but I'm basically done. All the lights work and I'll attatch photos of that when it gets dark .I've left the hull detatched from engine block as I've not finalised the power supply . I may plump for an internal battery pack, but I would like to mount the ship on a single stand as many people here seem to do with their models, but I cannot find anywhere in the UK that has anything like them. Where do you guys in the US get them? I made a few mistakes with the build but learnt a hell of a lot about working resin. At least the undercoats covered alot of the cuts and messes I made. I have come to appreciate the effects a dirty airbrush can give, though its difficult to clean them afterwards! Its the SD next after a rest.
vaderdarth
Master Member
Great looking BR there man. Everyone will be jealous of this one.
Dave
Dave
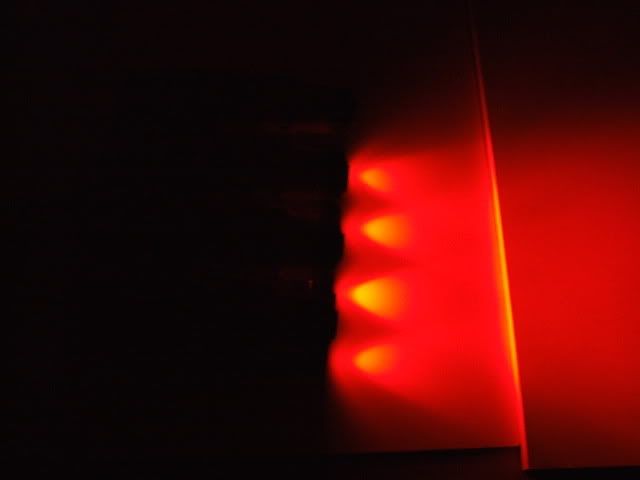
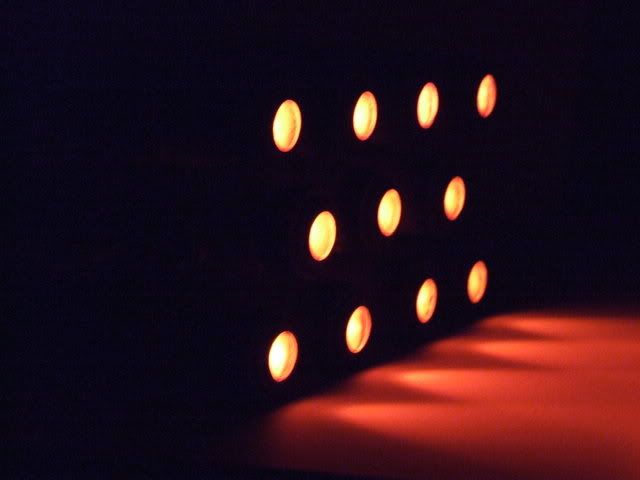
Light shots as promised. Those LEDs are very bright. The kit is Randy Coopers RBR. He has a website you can order it from when he comes back from filming at the end of October.Details and costs and other models are posted there. Go have agood look because he does amazing work! Cheers Dave for the comments !!! I doubt there will be much jelaousy - I've just had a look at the rest of your prop room!! Bloody hell, do you work for Lucasfilm or what?!! . And I thought that it was just your SD tht was good!!Stunning collection.
Junk Pilot
Sr Member
You leave me in awe, CutThumb. That is an awesome build of a great ship.
vaderdarth
Master Member
No, your BR will definitely outshine mine. I did not ever complete the lighting. Thanks for the kind words about my prop room. I should have some additions to photograph by next weekend. Again, outstanding job on your BR.
Dave
Dave
Bigturc, the diffusers were provided with the kit I'm afraid, Randy did resin inserts that do the job nicely. However, I am trying to light a revel vipers engines at the moment and I found that gluing grease proofed paper with epoxy over the very clear plastic inserts provided seems to work ok( but messily), but I am also trying different materials to get a better effect. Semi clear contact plastic ( used to mist clear windows in bathrooms etc) is also an option that I am considering but I 've got to get hold of that yet. I also want to get a stronger reflector behind LEDs to kick out more light (like the bursts in the original TV series) but haven't found one that easily fits ( unlike cutting up ping pong balls for the RBR!!) .May be the head of a cheap mini torch will do it.
Vaderdarth, I will wait with interest to see what else you can add to that room!
Vaderdarth, I will wait with interest to see what else you can add to that room!
SurfingDoc
Well-Known Member
Awesome job man :thumbsup
Thanks for the suggestion Phil.Maglites are a touch too expensive to canabalise just for the reflectors for the viper. The supermarkets have some cheap torches that may work but are out of stock at this moment in time, the darker evenings have bumped up demand I guess.
I' ve just started the RC SD anyway. The bottom hulls have gone together okay with a quite a bit of fiddling to get everything to square up but the top plates are proving more difficult.
I'm currently having a go at putting in strengtheners and supports into the bottom hull as a lot of the SD threads seem to worry about the resin sagging over time and I'll want to use these to help hold the plates more rigidly in place as I match them up.
They'll also do to hold the superstructure up as I want to leave that to be detatchable from the hull so I can get in and out to do the lighting if it goes wrong.
I don't know if I've got the guts to do Vaderdarths fibre optics though. There doesn't seem to be any fibre optic lighting around in the UK unless you want to pay really through the nose for it and it looks like an SD uses alot of it!. If anyones got any suggestions for suppliers I'd be grateful .
And I may need magnets to fix things into place. The thing with these builds is that they really do make you think out of the box. Fun, but in a deeply frustrating way at times!
Last edited:
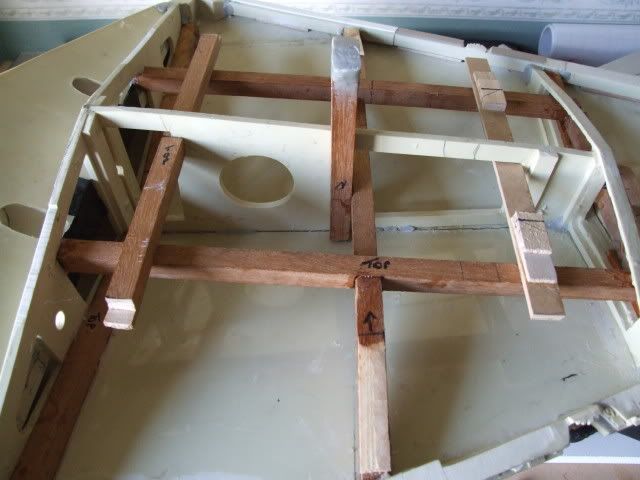
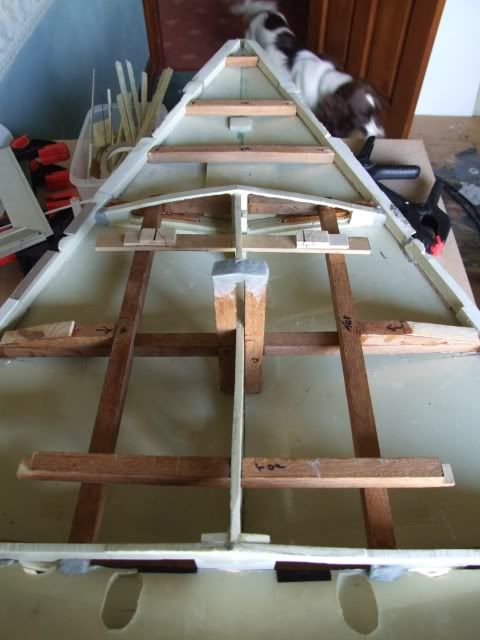
Spent the day fixing in supports and strengtheners for the SD. The front nose and the top hull look like they would suffer most over time and when I press on the plates they seem to have a lot of give in them, particularly between Randys supports.
And the weight of the tower superstructure is surprisingly heavy (once you glue it all together its a strong solid piece of resin though ) so I've added a central strut to help support it and take the wiring.
I've used 1/2 inch square hardwood. This has been in the garage for years and hasn't warped a bit. It also fits in between Randys supports as if he had built it for it and it gives a really solid feel to the SD hull. I've expoxied and screwed it in place.
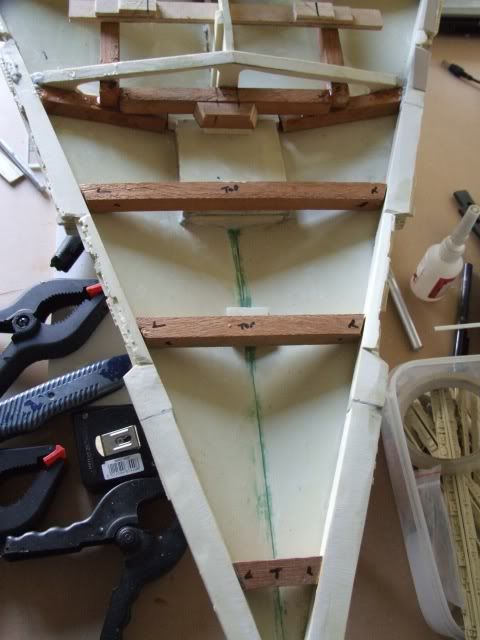
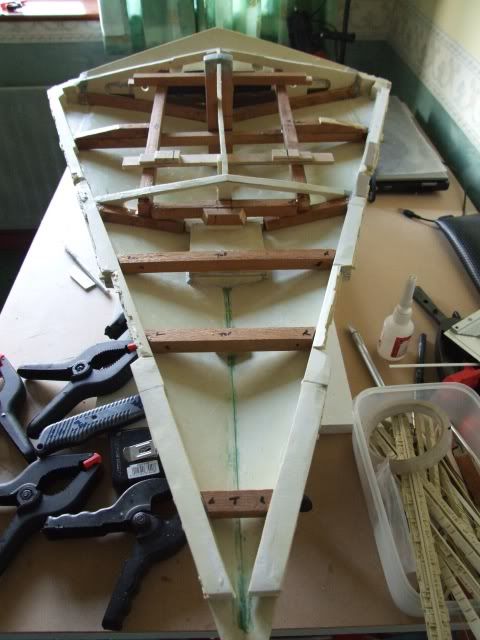
The nose is a bit more of a problem so I'm going to fit a 1/8 th metal rod through the centres of the three cross struts and back into the middle support. It may have to be hollow so I can get wire and lighting up there to the nose end but I want to keep all the LEDS as close to the back section as possible so you can get to them. I think you are also probably talking two or three circuits at least to to prevent the whole ship lighting system going down if one bulb goes.
I really intend to get the lighting properly planned this time unlike the blockade runner.
It looks a bit mess at the moment and more like a 16th century naval frigate than an imperial star destroyer but I'll spray the interior matt black before wiring.
Again, none of this has been too time consuming to do or expensive but I reckon a day spent getting this right could save you from a life time of pain later.
And the weight of the tower superstructure is surprisingly heavy (once you glue it all together its a strong solid piece of resin though ) so I've added a central strut to help support it and take the wiring.
I've used 1/2 inch square hardwood. This has been in the garage for years and hasn't warped a bit. It also fits in between Randys supports as if he had built it for it and it gives a really solid feel to the SD hull. I've expoxied and screwed it in place.
The nose is a bit more of a problem so I'm going to fit a 1/8 th metal rod through the centres of the three cross struts and back into the middle support. It may have to be hollow so I can get wire and lighting up there to the nose end but I want to keep all the LEDS as close to the back section as possible so you can get to them. I think you are also probably talking two or three circuits at least to to prevent the whole ship lighting system going down if one bulb goes.
I really intend to get the lighting properly planned this time unlike the blockade runner.
It looks a bit mess at the moment and more like a 16th century naval frigate than an imperial star destroyer but I'll spray the interior matt black before wiring.
Again, none of this has been too time consuming to do or expensive but I reckon a day spent getting this right could save you from a life time of pain later.
Last edited:
Similar threads
- Replies
- 4
- Views
- 827