Rebel Blockade Runner Build

CutThumb

Sr Member
Hi,
I've been reading alot of the threads on the forum for the past few months and trying to learn as much as I can from the skilled builders that are out there. There are some stunning pieces !!!!
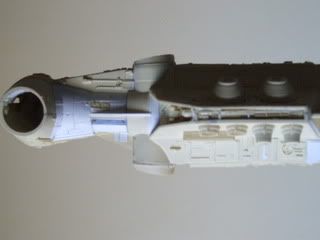
I've started on a Randy Cooper Tantive IV and I'm slowly adding to it as I go. Its a bit of a struggle sometimes because I'm not used to large resin kits so I'm making the odd mistake here and there. But I'm getting to the point where I can post some pics.
My thanks to a lot of the guys here who have already posted threads on this kit. You've saved me a world of pain when I was wondering what to do.
I want to rebuild the four small guns on the turrets and try to get it as accurate to the screen model as I can. I'd like to light it but haven't a clue just yet how to do it. For any hints and tips I'd be grateful.
Heres the build so far.
2008_0824Tantive0010.jpg

2008_0824Tantive0009.jpg

2008_0824Tantive0008.jpg

2008_0824Tantive0006.jpg

2008_0824Tantive0005.jpg
 
Thanks gents, its a demanding build at times but when its finished and painted it will be worth the effort I think. Randys kits are great to just gaze at and some of the results out there are just gobsmacking. Tony, nice to see a fellow Eaglet across on these boards. An SD like Eagles is the next up after this is finished. I hope mine turns out as good as his. Redid the guns as I basically snapped a couple of the ones Randy supplied trying to tidy them up -not quite right yet but getting there.
2008_0825portraitsDog0008.jpg

2008_0825portraitsDog0012.jpg
 
I do have one suggestion. On the main double cannons.........cut those tips off the resin emitters and drill a couple holes per emitter......side by side horizontally and add tubing to replace what's on the kit part. It really brings out that detail nicely. The original parts were rocket thrusters glued onto some tubing backwards if I recall. The pieces sticking out were the feed lines going into the back of the rocket thruster.

Dave :)
 
Thanks Vaderdarth, I'll try to find some detailed pics of that. I' ve been using a schematic I found for the panelling so far and some ref stuff . I've been watching your SD build since it started and that is just one unbelievably customized and enhanced ship and the fibre optic lighting, even down to including those individual red lights in the hull , was fantastic, infact downright bloody brilliant! Something to aim for, but very ,very difficult to match.
 
Thanks, I hope it turns out that way! I see what you mean about the ends being built from rocket engines,they look really strange with all the piping coming out.Not like lazer cannons at all , which is odd because I really did believe they were single nozzled. I'll need some more piping and a couple of thin washers to get it right.For now I've tidied up the end like you suggested. I might leave them like it if I cannot solder the bits together to make it look good enough. I quite like them like this, even though its not at all accurate, but they look like guns now! I'm going to finish the engine block up this week, pre wire it for LEDs and then start to paint it all, probably in two halves. Everybody says the engine block is by far the hardest bit so I'm prepared to sweat at it a bit.

2008_0825portraitsDog0026.jpg
 
One of those turrets appears on a Reaver ship in Serenity. Cute!

The kit is looking great.

Cheers,
Martyn
 
Last edited by a moderator:
Dang it... now you've gone and raised the bar on this build. :cool Your detailing is superb! Those guns look fantastic. :thumbsup
 
Thanks for the comments.OTnROTSfan, your TIE bomber in the bay is one of the cleverest things I've ever seen. Cooler than a polar bear in a fridge. Been working on those engines tonight , and they are a bit difficult to line up dead straight- but I guess like Randy says there is just a point where you will have to leave them and be happy with what youv've got. Ordered some 5mm Orange LEDs to light them. I'm curious about the clear inserts though. Do you drill out the centre and put the LED in or do you just light it from behind? I figured I might try and get some table tennis balls to cut out and use as shallow reflectors because those engines are pretty deep and I need something to hold and mount the inserts in.
 
Just hotglue the leds in back of the inserts. The clear hotglue will simply help diffuse the light into the entire insert. Works like a charm.

However, if you want to make it more "accessible" for bulb changes etc.........you can find some plastic tubing that fits snug to the LED and glue that to the rear of the clear engine inserts. That way the leds can just slip in. Again, use hotglue to fix the clear plastic tubing to the back of the inserts.

Dave :)
 
Last edited:
Cheers mate, thanks for that.Going to Maplin today to pick up the LEDS, so I'll play with the wiring tonight. The engines turned out OK (though I haven't glued the middle ones in yet because of the wiring job), and apart from a bit of tweaking on one of them , I'll push to finish the lot off once the lights are in. Undercoatd the front half of the ship and the paneling hasn't turned out too bad. Only problem is all the messy bits and pieces have showed up so I've got a bit of tidying and light sanding to do before starting the proper job.
2008_0827engines0004.jpg

2008_0827engines0003.jpg

2008_0827engines0005.jpg

2008_0827engines0002.jpg
 
Wow, your panelling looks fantatic! You got your engines lined up pretty nicely too. I'm quite impressed. :) This was a real pain to build, but you are making it look easy.

Dave
 
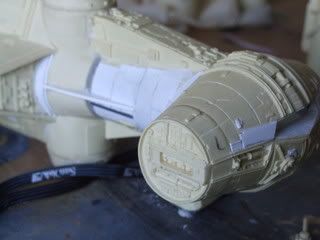
Cheers Vaderdarth,if only. The four corner engine blocks had been partially test fitted by Randy so I got lucky with that part of the build. It didn't need much to get them dead on then epoxyed into place. I then got some massive elastic bands and two very straight pieces of wood and attatched the other blocks by pressing them into modelling putty and then splinted them all into place with clamps. See the photos for an idea how it looks.
I also drilled a hole into the block and the hull so the putty filled this in and this gave me a place to line things up when I glued them back in again. Then I pretty much followed the directions as Randy gives on the disk, except that before I attatched the engines I tried them in each block to try get a best fit. It was odd but some seemed to fit better than others into each block but I really couldn't say why. I then used elastic bands and the splints again. Lots of epoxy and putty again.
I had done the four corner ones first anyway (see the first thread photos) so I used them to hold the middle ones in straight.

2008_0828nextengines0003.jpg


2008_0828nextengines0002.jpg


2008_0828nextengines0001.jpg


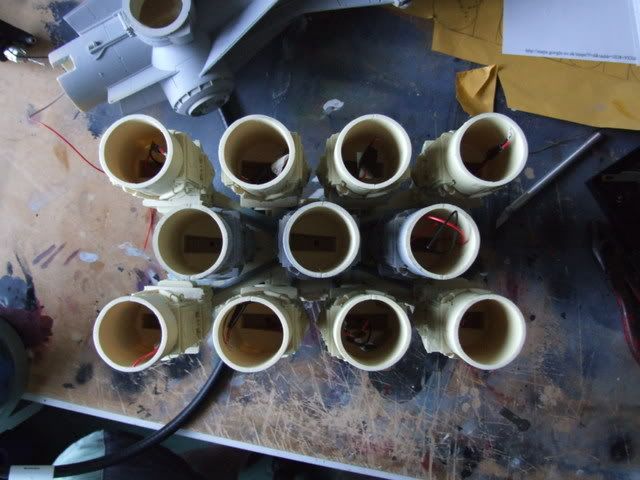
All well and good but if I'd really thought this all out the wiring then wouldn't have been such a pain. I had to wire all the engines through the centre of the engine hull and then cover them with a duct. I just simlpy couldn't get them done any other way. Luckily the engines are so close together you don't really notice it with all of them in. So for the future I will think wiring first then build next !! I still think I'm going to have to put something behind the LEDS because when they make the whole engine glow when lit. And I'll have to think about the power source too.
 
Last edited:
Getting things finally pulled together before I start to paint proper.
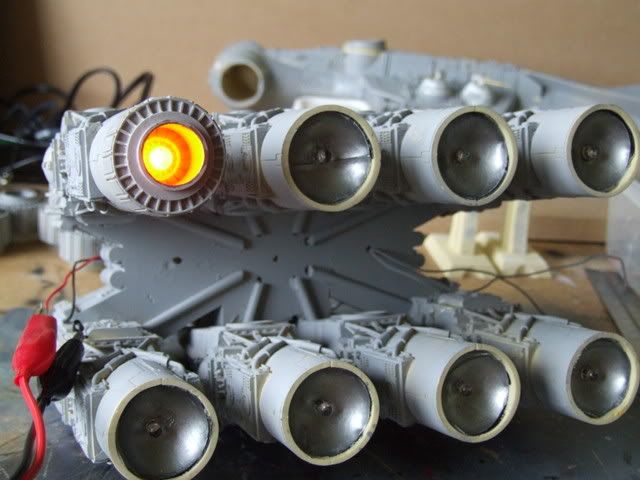
The LEDS leakage problem I solved by cutting a table tennis ball up and painting the inner. This helped reflect light back from the bulb and out through the engine and stopped the tube glowing. I did add some duct tape just to make sure.
Test assembled everything and it all looks pretty true. I still don't know whether to leave it in two halfs and put a battery pack in or to seal it and run wires out. I'll worry about that at the finish.

[
2008_0829nextsteppnt0003.jpg


[
2008_0828nextsteppnt0004.jpg


2008_0829nextsteppnt0005.jpg


2008_0829nextsteppnt0006.jpg
 
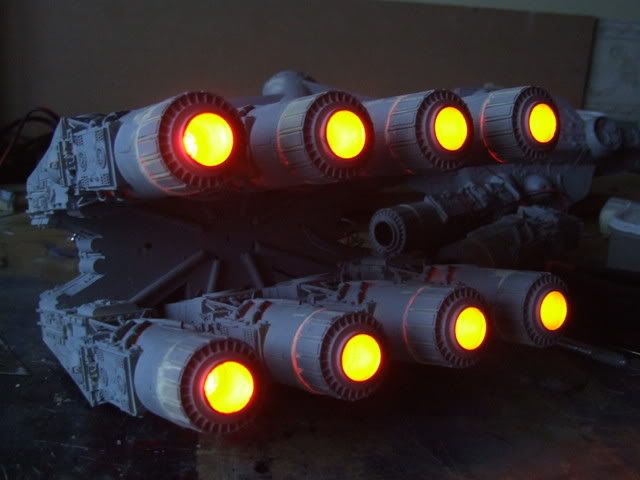
Didn't get too much done this weekend. Attatching the engine cowls proved to be a pain as making them all fit well and level took alot of work. And they have left me with very fine lines of light leakage once the lights went on. Shouldn't have used a clear epoxy I guess. Still the lights look good once they went on and look pretty true to the film colour. At some point I'm just going to have to give up on tweaking everything and start the painting.

2008_0831nextsteppnt0002.jpg


2008_0831nextsteppnt0005.jpg
 
An easy way to kill your light leaks is to take a piece of foil tape (aluminum) that is cut to size and placed just inside sealing off the seam. Then just hand paint over the surface in there......with your primer paint. :)

Dave

PS if the innards stop you from doing that, just prime the outside, spray silver or black on top of the primer then more primer. That will usually kill the leaks from the outside and not mess up too many details.
 
Last edited:
Back
Top