bbroerman
Active Member
okNot much functionality is needed. A holotape mechanism would be nice to have, also that USB screw-in thing from zap's design.
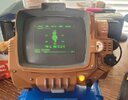
Functionality-wise I only want some LEDs, working radio dial, and hopefully a small powerbank somewhere in there.
Generally I just want that pipboy to feel "mechanic", so you can rotate a knob and it'll feel like a knob that does something.
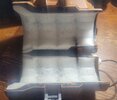
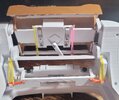
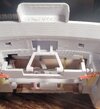
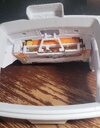
Well, I'm re-working the holotape mechanism, since I found that the push-to-eject portion I just finished doesn't fit in with the tape deck lock/eject I did months ago, so that's going to be a couple weeks, and then I'll try to scale it down to a 100% model.
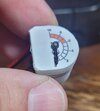
I started looking at the radio dial from the 115% on the 100% and as i said before, I'm going to have to re-work it to make the gears fit in the smaller space, and yet keep the 2mm pins and the M1.6 screws since there are only so many sizes of that hardware available. That'll be a few weeks of work too.
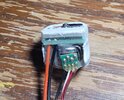
I think the take-up reel has a smaller space to work with too. I'm not sure just yet. Once I get that working on the 115% I'll see if I can scale it down. Now, with that one, talking to zapwizard, it's going to take heating the coil spring with a torch to be able to soften the metal and bend it. I'm also kind of concerned with how much space there is in the cavity for the USB cable, so that one may need to get thinner cable, not sure yet.
The other knobs and LEDs will be fairly easy. If you're wanting a battery pack, you may want to get a small LiPo battery from amazon, and then get the Adafruit charger and "push-button power switch beakout" from Amazon of DigiKey as well, and then use the same lighted pushbutton power switch (Mouser and DigiKey have it).
") Constructive feedback, as always, is a gift. Again (and I know I keep saying this), Read YTECs instructions first, then mine... and look at all of the Meshmixer .mix files. That's where I put together the assemblies and check how they fit, and they will show how everything goes together.
Constructive feedback, as always, is a gift. Again (and I know I keep saying this), Read YTECs instructions first, then mine... and look at all of the Meshmixer .mix files. That's where I put together the assemblies and check how they fit, and they will show how everything goes together.