Old Rex Armor [Rebels] - W.I.P.

Prototypical

Active Member
And so it Begins... Today my Big Brown Box of Plastic Happiness arrived.

Before I start I want to thank a couple of people. First, Jon Farmer. He is the gentleman that did the Old Rex Armor for San Diego Comic Con. He is the one that figured out the various components of this build. Second, is Kevin at KWDesigns / Imperial Warehouse. He is the one that cast the components of this armor.

I took a whole bunch of photos and discovered my first problem. Camera Compatibility Issues (Re: Old Digital Camera). So lets try this with a camera from this century
blush.png


The Unboxing...
DSC_0001.JPG


As I was unboxing this stuff, I started to get a feel for some of the parts. Namely the parts that need the most modifications. Primarily, the Chest/Back at the shoulders. Forearms at the elbows. Shin Guards, filling seams. And a suspension system to keep everything in place.


As Always with any of my builds... Comments, Criticisms, Creativity, ect. are Welcome.
 
Well, I ran into my first BIG hurdle today.

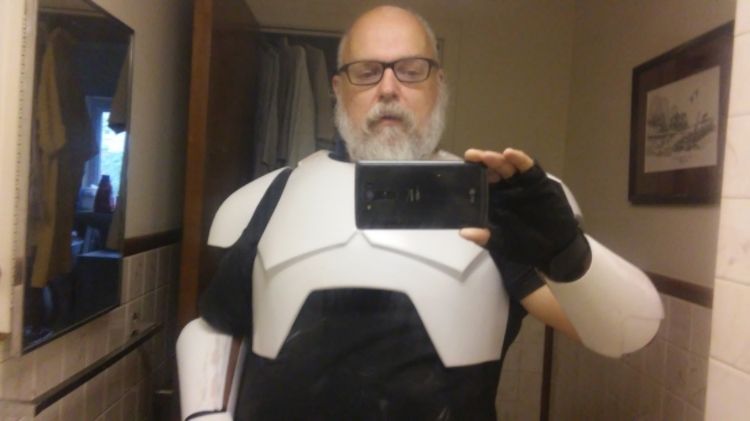
I have most of the parts trimmed, and I decided to test fit the chest piece. One piece at a time worked out even though it was a bit tight around my ribs.

I connected the shoulder pieces to the chest and back with blue tape and tried to put it on. Well, my BIG HEAD would not fit through the neck hole. :angry ARGH! [insert other not so nice expletives] I have some extra material I can remove but my worry is that will not be enough. :(

The only option I can think of is to velcro the connection between the shoulder connector and chest/back. that way I can separate them to get my FAT HEAD through. The problem with that is Rex's armor has no seams between the chest and back (unlike the Phase 2 clone armor).

EDIT: I should of expected this, but the belt is way to small. This is what I get for buying my armor from someone thin (especially when I'm not). Time I broke out my 3D modeling skills & designed my own.

Ok, experts. What are your ideas... :confused
 
Last edited by a moderator:
Either you can 'fix' the aforementioned issues as you said with velcro, build some new parts if the costume requires it to fit properly or ... go change your old habits so you can wear this costume as intended with no hassle whatsoever ... sorry in advance for being blunt :$

Chaim
 
I did a little playing around with Solidworks, and I think I have a belt design that will work.

rexbelt.JPG

It is put together much like a chain conveyor. I just have not figured out the buckle mechanics yet. I would like to make the buckle functional, but I think I may end up some kind of latch behind. The whole thing will be 3D printed except for the pins which will be 1/8" dia steel.

My other idea is to attach everything to a belt of some kind.

What do you think?
 
My first successful test fit after doing a proper trim job.

0904151344.jpg

I know, I know... trying on White Armor with a white undershirt doesn't reveal much. But this was more about "If I can get the Breastplate on?" and "How Does it Fit on me?" than what it looks like.

Now that this is done, I can focus on gluing everything together and patching up those shoulder pieces. I foresee fiberglass dust in my future. :cool
 
OMG, I finally got around to doing an update.

What can I say, it was so blazing hot that I couldn't motivate myself. And since I'm working on my back porch/sun room...

I started working on the chest first.


Assembling the inner straps. They are not going to be seen, but should add strength to this seam.

Hmmmm, strange how I forgot to take pics of putting in the patch sections. :wacko Oh Well...


Added Fill, and yes I know I put it on a bit thick. The Bondo started to kick as I was applying it, so there was not enough time to get fancy. :eek


After Sanding... A lot better! :cool

Now all I have to do is a bit of research (ie. look at pictures) and then I can mount the shoulder straps.

And as always. Compliments, Critiques, Complaints, or just a plain old "YOUR DOING IT ALL WRONG" are always welcome. :cheers

Note: If I am doing it "Wrong", please let me know how to do it right.
 
And the fun continues...

This time the Shoulder Straps

b96ebf56-05c1-41b9-a895-a7f855ace890.jpg

In the Beginning, We had a pair of AT-DP Shoulder Straps (Before I viciously sliced them all up :devil )

205b2d04-c36e-4932-bc75-ea4271928cb5.jpg

The remains of the shoulder straps before I Frankenstein them together.

2b559094-a2c0-41fc-a3ee-36e2f636024f.jpg

And then they became one... Again... somewhat.

DSC_0021.jpg

Gluing them into their final location.

DSC_0026.jpg

And a bit of Bondo nicely covers all the sutures. :cool
BTW - The Green Marker is showing all the divets in the Bondo. I was going to fill and then decided it was "Distressed" parts of the armor. :D

Now I have to finish the other side. Then I work on the Shoulder Bells.


Stay Tuned!!!

b96ebf56-05c1-41b9-a895-a7f855ace890.jpg


205b2d04-c36e-4932-bc75-ea4271928cb5.jpg


2b559094-a2c0-41fc-a3ee-36e2f636024f.jpg


DSC_0021.jpg


DSC_0026.jpg
 
Last edited by a moderator:
I am love everything about this build! Your doing a great job, I really respect all the hard work done by scratch. Awesome work buddy!
 
Ok, I got a little distracted for a while. I hope to do updates a bit more consistently.

First of all, here is the chest nearly finished

All I nee to do is trim the sides and install a couple of restraining straps (probably after painting)


I know I said I was going to do the Shoulder Bells next. Well flaky me decided to do the Fore Arms.

Everything laid out and ready to be carved up.


I'm using the cutout to make a template.


Added glue tabs and radius detail before trimming this part up.


Elbow Detail glued in place.


Interior view.


Added Glue Tabs


Assembly is finished. It just needs a bit of Bondo the seam, Paint, and add Velcro. :love

OK, now I have to admit something. I may of messed the Forearms up. :facepalm I planned on having about a 1/4" between my arm and this armor piece. I know I checked my measurements at least twice. But after I glued the pieces together, the armor is right up against my skin. :wacko Well, I'll work with it for a while and if doesn't work out I'll remake it then.

More to come...
 
It's that time again...

I know, I know. I said I was going to do the Shoulder Bells next. Well I did them, but I didn't take any in process pics.


Not much to this process though. Rough trim, glue together, final trim, add velcro DONE.

Next is the Holsters.


I added a glue tab to one side.


The 2 halves. The other half has a 1/8" x 1" Aluminum bar attached to it. This bar is what will attach to the Belt (once I figure out what I'm doing with it, of course)


I'm holding the 2 halves together with Rare Earth Magnets. I quickly realized that I would be able to clamp these puppies together.


Final gluing. I'm glad I screwed the aluminum bar on before. I would of never got my hand inside this holster.

Once I get everything glued together, it will be Bondo time again.

I have to admit, for a project where I am completely ignoring the instructions... It's coming out surprisingly well. :love


All that is left to do is the Belt, Shin Guards, more Bondo, even more Bondo, and finally painting. I have to admit that the shin guards are giving a bit of concern. I'm not 100% sure how to assemble them at this moment.
 
Last edited:
Minor Update today

I have been covered in Bondo Dust, so I didn't want my camera anywhere near.

Teat Fit #2


I wanted to try the armor on before I painted. I did learn something with this test fit. the fact that I need to attach the shoulder bells before I put on the breastplate or I am going to need help putting them on (ie I can't reach my shoulders to attach them).

Now if the weather holds out, I should start the base coat today. Unless someone can tell me that painting in the rain, unprotected, will add the weathering I'm looking for.


We have pouches! Specifically, M16/AR15 pouches for MOLLE type gear (found on Ebay). This is one of the only pouch setups, that I found, that will fit over the 3" wide belt found on the clone armor.

I removed the elastic band and stuffed them with Styrofoam to open them up. Now for the paint...


Don't it make my Tan pouches White. I'm finding that fabric paint is AMAZING and a Pain In The A_ _ (yes a PITA) at the same time.

The fact it can recolor fabric is AMAZING. The fact that it does not coat evenly, soaks in rapidly (without color change), which makes me want to spray it on thick (which causes drips) is a PITA.

On another note, my Soon-to-be belt material "should" be here next week. but more on that later...
 
I haven't forgotten about you...

I've been doing a lot of painting lately. And the only thing less interesting than watching paint dry, is watch White paint dry.

today I did a bit of fabrication. Since Rex's COM is a bit different in Rebels, I had to make one from scratch.

And to that end, meet Arther...
DSC_0045.jpg

He is a Tick toy from Taco Bell. He graciously donated his wings to help me build this COM Pad.

DSC_0046.jpg

Can't you see the excitement in his face. :devil

DSC_0047.jpg

The finished COM. All I have to do is glue it to the Right Bracer and attach the oval button. Weathering comes next.

Speaking of Bracers...
DSC_0048.jpg

I just finished the third Blue on the stripe. I have to say, precision painting, with a Rattle Can, Outside, with a Breeze is interesting. Also amazing how 3 shades of blue can blend together in a picture.

I should have the Blue done on the Shoulder Bells & Hand Plates tomorrow. I may even start on the Belt & Shin Guards. We'll see.


UPDATE - I just pulled off the masking tape, and the bracers are looking good. I'll post more picks when I get the Hand Plates and Shoulder Bells painted.

DSC_0045.jpg


DSC_0046.jpg


DSC_0047.jpg


DSC_0048.jpg
 
Last edited by a moderator:
Yes, I'm still working on it...

Two of my original goals have come and gone. The first was to be done BEFORE the Monroe Comic Con on Oct. 5. And the second was to be done BEFORE Season 2 of Rebels aired. Both were realistic goals, but things came up that prevented me from working on the armor. No worries, My last goal is still a ways off (Ep.VII premier).

I know, I can hear you... on with the build.


COM Pad mounted on the right bracer. Now all I have to do is the Detail Work and weathering (or is it weathering and then detail work). :confused


The Shoulder Bell with my Handy-Dandy, High Precision, Measuring Device (Masking Tape scale) :thumbsup


All ready for paint.


Added the shoulder strap details tonight.


Also Added the back panel details. Now on to weathering.

Things left to do. Assemble Belt, assemble Shin Guards, 3D print Blasters, and finish the holsters. The Belt, pouches, and Shin Guards are mission critical. The Blasters and holsters can wait (considering that Rex did not wear his blasters the whole first episode).
 
So am I on the right track?

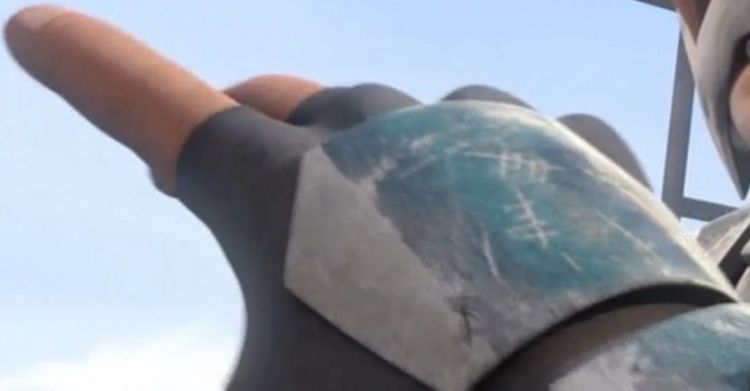
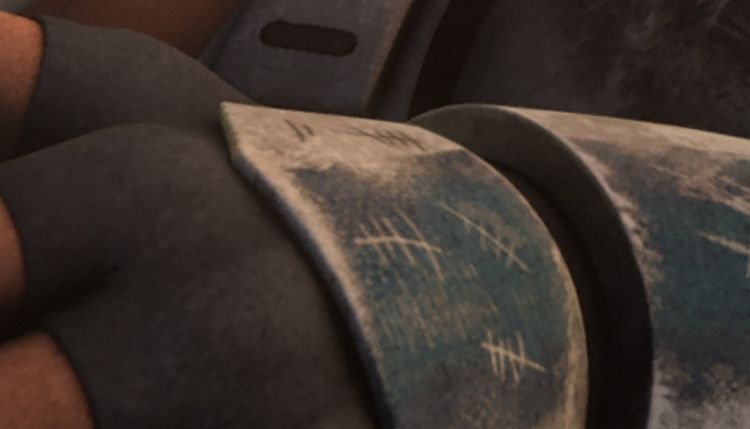
This is my first attempt at weathering. Sooooo...

Mine


Screen Grab


I still want to mist it with Grey, and possibly Tan, to add to the weathered look.

Sooo... What Cha Think?
 
More work...

My Left Hand Plate

I'm not sure why everything in my pic looks so bright and vivid. Maybe its the flash.

Screen Grab


Not the best screen grab. But good enough to see detail on. I'm hoping for better in tomorrows episode.
 
Hey all.

I know I haven't updated this in a while. I started a new job recently, and had a bit of trouble balancing my free time to include this.

enough of the excuses, on to the build.


The Hand Plates after an acrylic wash. Since this was the first attempt at this sort of weathering, I think it came out pretty nice.


The Shoulder Bells after the acrylic wash. Nice start, I still have to sponge on some light gray & black to finish up the look. More to come...


And finally the Bracers, pre-weathering. I added all of the scratches and hash marks. Now all I have to do is an acrylic wash and a bit of sponging and they'll be done.

Right now I'm working on the weld lines on the Breatplate. More updates will be coming considering that I would like to finish this weekend.
 
This thread is more than 6 years old.

Your message may be considered spam for the following reasons:

  1. This thread hasn't been active in some time. A new post in this thread might not contribute constructively to this discussion after so long.
If you wish to reply despite these issues, check the box below before replying.
Be aware that malicious compliance may result in more severe penalties.
Back
Top