So I
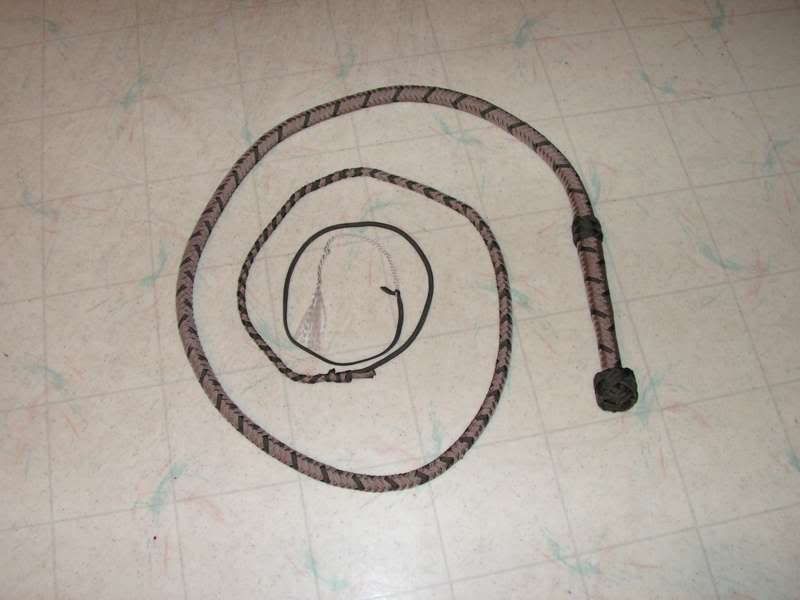
finally finished my first whip.
It came out much better than I expected. BWC, this is a fantastic tutorial you have given us! And Nexus6, thanks for putting it all together, along with the supplemental materials. :thumbsup
A few random notes:
I eventually came up with two ways to quickly and effectively flatten the paracord. The first was to wrap it very tightly around a cylinder (in my case, a wine bottle) and leave it in the sun for a couple of hours. The heat seems to soften the cord quickly so it can flatten. The second method was to run the cord quickly through a folded piece of leather. Then the leather gets abused, rather than my fingers. This was key, as...
I have blisters. Keeping things tight was really was hard on the hands.
It cracks beautifully, even in the hands of a total tyro.
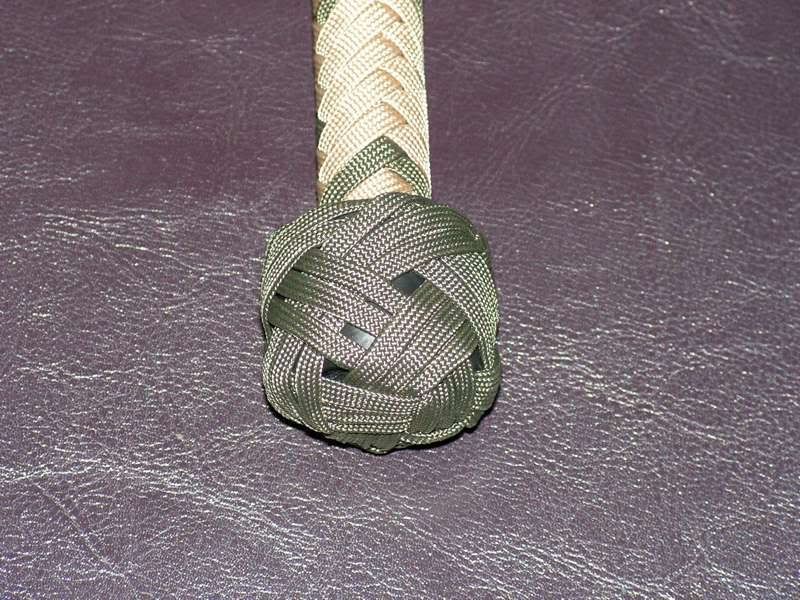
I just cannot, for the life of me, tie a Turks Head knot directly on the whip. I had to tie it on my fingers, ala the tutorial, then slip it onto the handle and tighten it with fingers, finishing with needlenose pliers.
I think I must have built up the butt of the handle too much. The knot does not cover it too well.
I'll either have to redo the end, or tie another knot, perhaps with four strands rather than three. Size-wize, it feels pretty good.
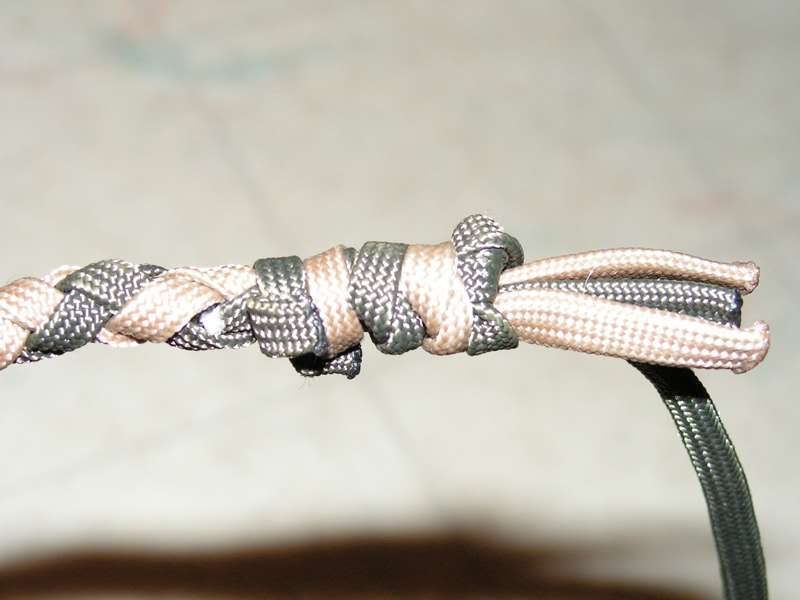
My fall knot turned out to be more of a "fail" knot. It looks like heck, though it holds the fall plenty tight.
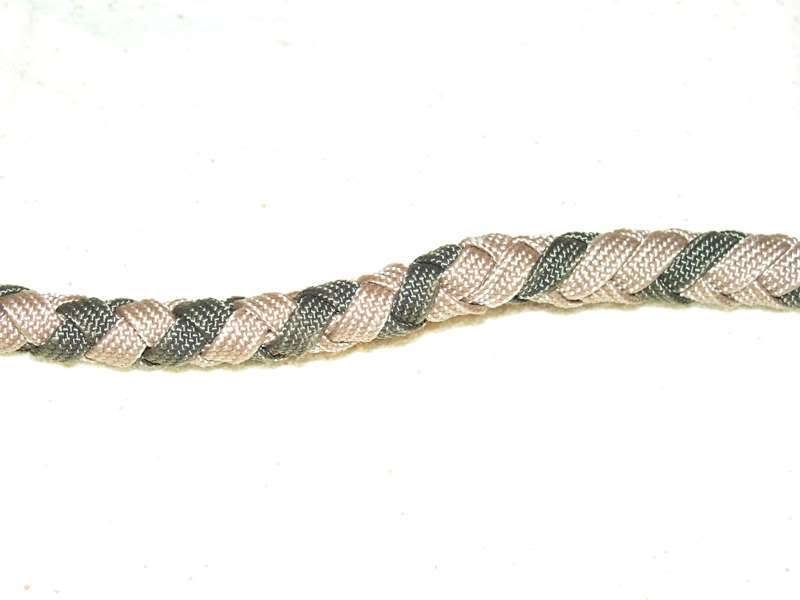
I spent a lot of time trying to figure out dropping strands. I think I have it down finally.
Not too bad, considering the only other braiding I've ever done is for a loaf of challah bread.:lol
Having one of the strands be a different color really did help keep the braiding straight, and I do like the look of it. (Idea stolen directly from NavMidn - thanks!)
I had some close calls in terms of cord length. I came dangerously close to running out early while doing the belly. Cord is cheap. I learned to cut generously, and then trim off what I don't need. Fifty cents worth of cord is cheap compared to having to redo six feet of braiding. (Again NavMidn, I should have paid better attention to your notes from the beginning.)
I swore at every turn that I would never do one of these again. But of course, now that I have actually finished this one, I am itching to do do another, perhaps an eight-footer this time. Again, thanks for the new hobby!
")