New Star Trek TOS Phaser coming November 2014

Sure, look closely at the cross section of the emitter. About 1-2mm in from adjustment ring or about 5mm in from the metal front of the emitter you can see where the gray plastic seems to lock into the metal nozzle as though the nozzle is pressed into place.
View attachment 412762
Greg


Cool! that makes perfect sense. thank you Craig. and i can say your suspicion's about the fins are probably correct too. there seems to be a little hook deal attached to both side's. on the Inside of the fin's. I would ad pic's but I only asked permission for that one. and Richard's a really nice guy and I would prefer to not rock the boat. but you can find more pic's at the TPZ.
 
I would say there three separate pieces held in place by the middle core which would be the part attached to the body.
 
I'm betting the outer emitter moves in and out as follows - In the cut away of the nozzle there are 4 arcs above and below the emitter. I believe these arcs to be the profile of coarse threads. I bet there is a plastic nub which protrudes off the emitter into these threads. When the nozzle it turned the nub moves forward and back in the threads moving the connected emitter in and out. If this is true then for those with an emitter which no longer moves in and out, I'm betting this nub has been broken off.

In the illustration if the nub(s) are oriented vertically then they won't show up in the cut away, If oriented horizontally the same is true. If horizontal, you have to imaging a nub protruding back into the illustration. A front facing horizontal nub would also not be visible.

Greg

This makes perfect sense. I bet there are two protruding nozzle tabs oriented horizontally driven by the course threads of the adjusting ring.

Nice bit of deduction Greg..

- - - Updated - - -


Thanks!
 
So now I'm thinking that the front of the nozzle press fits and snaps onto the front of the Phaser2. I'm also assuming that the metal grill on the back press fits on as well. Once removed I'm thinking the two halves should come apart. I'm not willing to try too hard to open it up just yet. Maybe someone else is brave?

Greg

I wonder if the manufacturer put a small dab of adhesive on the hexagon shaped pins on the left half of the housing? If that's true, getting it apart without damage will probably be impossible.
 
I bought two phasers. If there are ten of you that would contribute $10 each to the cause I'll tear one apart. Photo and measure everything and post it all here. I'll also polish the metal to the point it works through to the copper. See how fragile the outer plating is.
 
I bought two phasers. If there are ten of you that would contribute $10 each to the cause I'll tear one apart. Photo and measure everything and post it all here. I'll also polish the metal to the point it works through to the copper. See how fragile the outer plating is.


I'm game. come on guy's. we can get a dissected look at one first hand. and If anyone can dissect this phaser properly. it would be Dave.
 
Last edited:
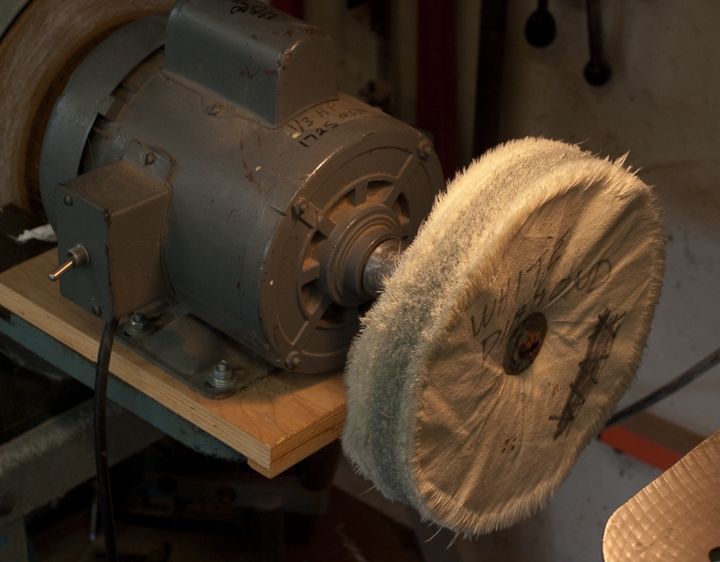
Took a pass at polishing the metal parts. Most of the polishing was done with a big 8 inch muslin buffing wheel mounted to a motor spinning at 1725 rpm.


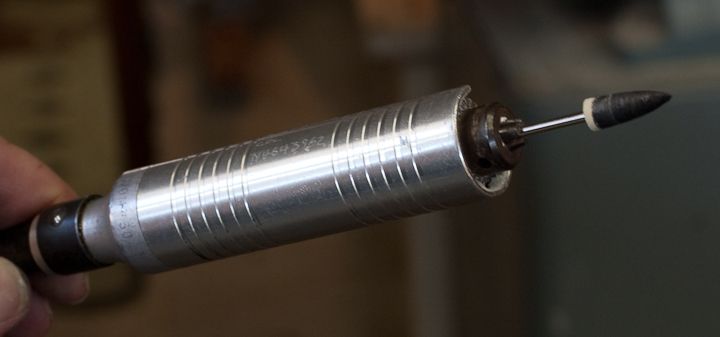
I also used several small muslin and felt buffing bits on a Foredom Flex shaft.


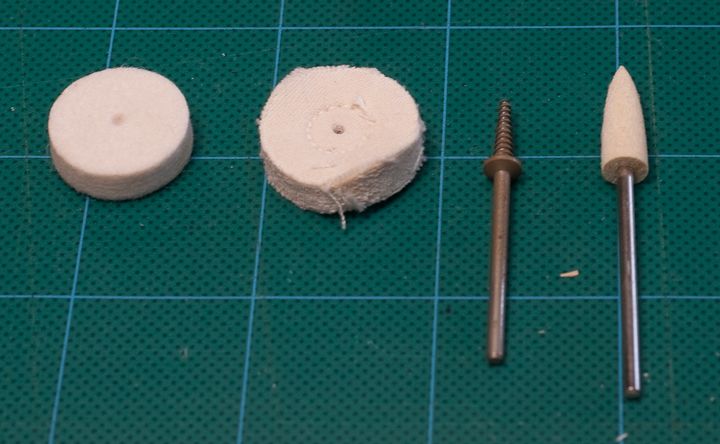
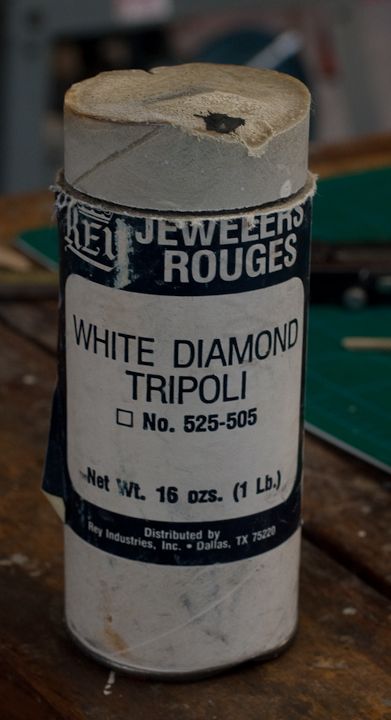
I used White Diamond Tripoli dry polishing compound. It comes in stick and block form and you charge the spinning wheel with a bit of the compound and then hold the metal piece to it. There is actually no diamond dust in White Diamond. There are quite a few different polishing compounds available, dry and wet. White Diamond is frequently used for plashing white metals like silver and nickel, so it seemed like a good choice here.


These materials and buffing wheels are widely available from jewelers supply sources. You could use the small wheels and tips in a Dremel, just be careful, as I've warned before, Dremels spin way fast and can burn through plated surfaces if you are not careful.

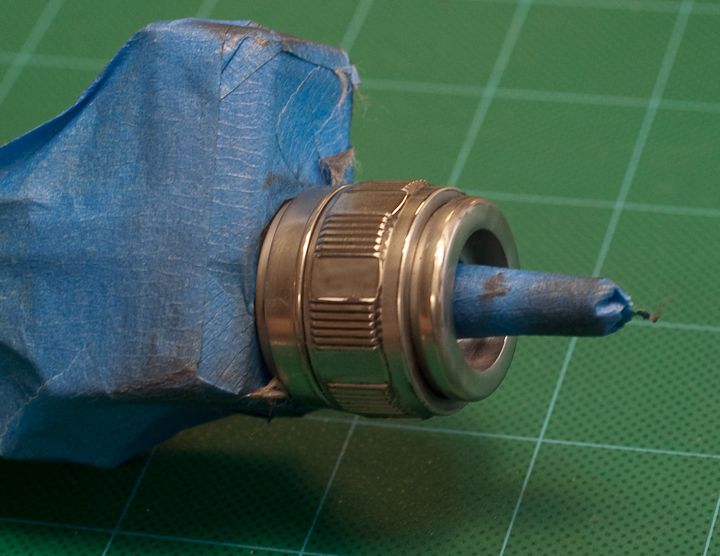
Before polishing I masked off the plastic phaser body with blue painters tape.


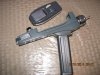
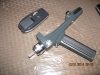
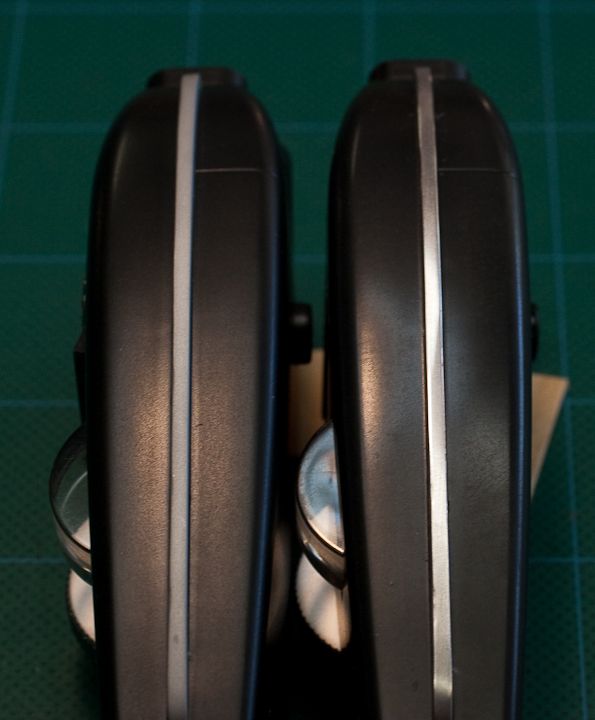
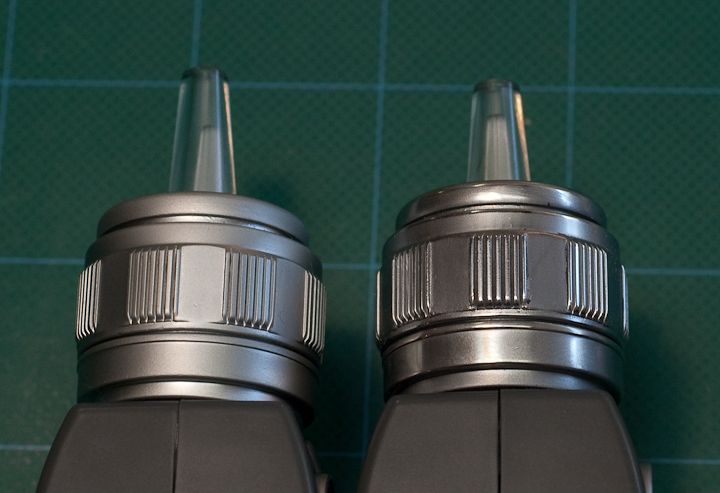
And here are the results, before and after. It didn't take too much effort. The results are actually much more visible to the eye than the camera.


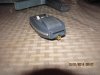
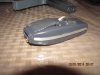
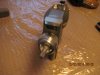
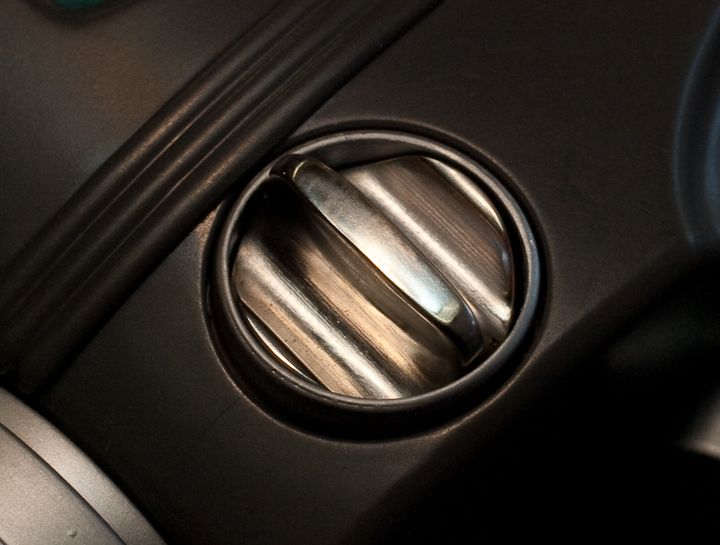
And the crystal compartment cover. Since it could be removed it was easier to be a little more aggressive with the polishing. I used the smaller felt wheel and tip a lot on this piece. I also tried on the back area to bear down and burn through to the copper sub plating. but the top plating held up really well.


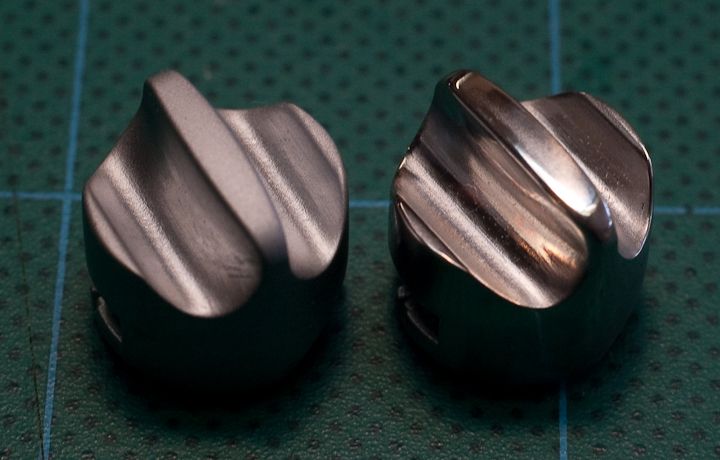
I particularly like how the polished cover looks in contrast with the matte finish of the surrounding ring!


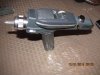
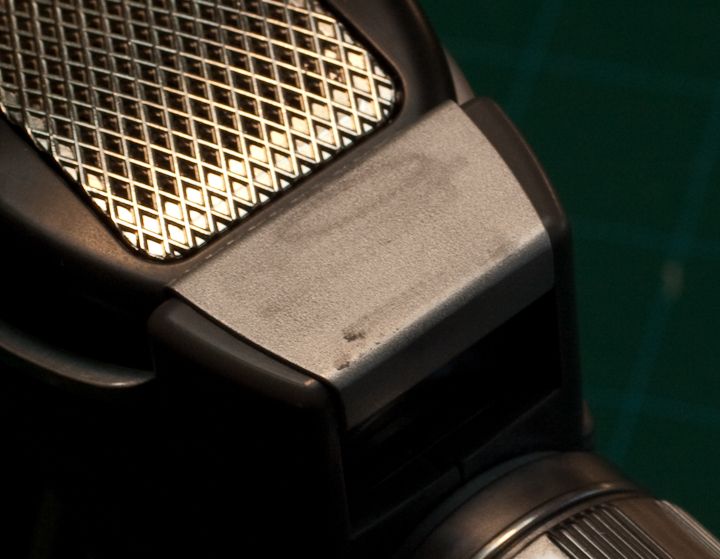
Masked off the P2 emitter and polished it up, first with the big wheel, then with the smaller tools to get around the edges.


WARNING! the bent metal plate on top of the P2 is treated differently than the other cast and plated parts. It might even be painted. The buffing wheel left grey marks on the surface instead of polishing it. I ran out of time to investigate further.


I also did not get to polishing the fins on the back of the P2. Will try to get to that tomorrow.

As I said earlier, you can probably get good results with a Dremel if you are careful. Also there are smaller 3 and 4 inch muslin buffing wheels and arbors that you can use with a drill motor clamped down to your workbench. I happen to have a big polisher for doing silversmithing, but it's not required. The trick when polishing metals not to try to get every surface polished. The contrast of dull recessed surfaces to highly polished outer edges looks better and more realistic. I saw the pre production version of this phaser at Comic Con last summer when all the metal plated surfaces were bright and shiny. Looked a little cheap. I'm glad the Wand Co. went with the satin finished plating. Now we can polish or not to taste.

Be sure to wear eye protection and watch your fingers, though generally speaking the spinning wheel might only give you a bit of a burn. Gloves are usually not recommended as they can get caught in the wheel.
 
Last edited:
Wow, that turned out a lot better than I would have expected. It's looking more like the prototype from Comic-Con.

Greg
 
I bought mine last week, it came with a defective beam emitter--the inner tube "wobbled" and the outer emitter was pretty crooked, as well as the trigger. called up TG, they sent me a return tag, sent it back, and as of today I got a notice a replacement is on the way. I will say the unit is OUTSTANDING, and in my opinion, much better than the MR. I never liked the Frankenstein head on the P2 unit , and that reproduced indent near the back fins, which was an obvious mistake from the original prop maker, so I always wondered, why anyone would reproduce that?. My MR was somewhat of a lemon anyway, so I sold it ,made a profit, and was glad to be rid of it. I tricked out a Diamond select phaser with all of the correct parts, totally refinished it side fins,Hand unit and all, and comparing it to the Wand, it was almost identical...I got my parts from Tony cannino..Looking back, its a shame that MR dropped the ball when they produced their phaser, however, I do like their Tricorder very much, and kept that. But its great that wand picked up the ball and made their phaser , even after all this time..Here are some pics of my reworked Diamond select phaser
 

Attachments

  • PH01.JPG
    PH01.JPG
    139.4 KB · Views: 150
  • PH06.JPG
    PH06.JPG
    106.5 KB · Views: 109
  • PH05.JPG
    PH05.JPG
    99.2 KB · Views: 122
  • PH04.JPG
    PH04.JPG
    160.6 KB · Views: 113
  • PH03.JPG
    PH03.JPG
    159.3 KB · Views: 135
  • Ph02.JPG
    Ph02.JPG
    108.4 KB · Views: 131
Dave,

The plate does seem to be treated differently, but just keep at it and whatever it is tretaed with will come off to leave a nice brushed aluminum finish, not too shiny at all.

Sorry for the poor=ish pics but I have some bad lighting right now, raining in SF. Phaser is pictured next to my other Wand that has not been touched...yet:

One.jpg

Here are some other pics, of the finished 'polished' phaser. I tried fine steel wool first which did nothing. Next I tried the DREMEL with various polishing aattachmentsand different RPM's, still nothing except wearing down my polishing tools. Finally tried the Scotch-Bright green pads...Viola! I cut them into little squares to get around the phaser parts easily. Took some elbow grease, but in about 45 min. I had the phaser finished, everything except the thumb-wheel and trigger.

two.jpg

Next to the unpolished Wand, sorry again for the bad lighting, in person the difference is pronounced. The polished phaser just looks like a more 'real' phaser.
None of the parts are too shiny at all, just classes the phaser up a bit imho.

three.jpg

And for kicks I took a picture next to a JLong P1, quite a difference in length. Side dimensions are more uniform to each other, though the rails are quite a bit thinner on the JLong, kinda hard to tell in the pic. I won't be modding a wand to accept a JLong. I though that would be kinda cool if possible.

four.jpg

five.jpg

All in all though Wand Co killed it with this phaser, especially at the price point, so I'll add my HUGE thanks to all of the others.
:thumbsup
With a little elbow grease and a cheap Scotch Brite pad, you can even make the phaser look a little better. It's really worth the effort!
 
I hit my nozzle with polishing pad on dremel -- mine has variable speed and I set it on lowest. It did not do much and I did not want to push it, but it might have been okay if I just kept at it longer.

Switched to scotchbrite pad and very fine steel wool -- this did the trick. It may not be quite as polished as the guy a few posts back who had the keen industrial wheel polisher, but for those on the fence, just the fine steel wool made it look a heck of a lot more like aluminum. The way mine came from factory, it just looked, well, like silver paint.

I'll see how it holds up to handling, but my guess is it will keep it's more metallic look for a long time...and should I need to touch it up, I have more fine steel wool at hand.

I also did side rails on hand phaser and the inner portion of dilithium knob. Also, I DID use blue painters masking tape to protect the nonmetallic parts from getting scratched up.

I'd post pics, but they look similar to others who have done the same. I would advise you to take it slow at first and not apply too much pressure -- you will start to see results within the first minute or so and, if not, you can start to gently apply a little more pressure to the polishing.
 
I may or may not attempt it...since the one I got in, didn't seem all that flat. Since my DS has all the shiny aluminum, that may be good enough for me..But it is good information for the future..I wonder how long Wand has on the license?? Hopefully they will do another run, when these run out of stock...

- - - Updated - - -

So Teddy, boy, you decided to give it the ol' Elbow Grease after all???..I seem to remember :" I'm not going to bother with that"..LOL
 
FYI -- I am pretty sure the original hero prop had a BRASS thumb wheel on hand unit that was painted silver, as you can see scratched on it that reveal the brass metal beneath. So, if you are a purist to that prop, you should leave the thumb wheel the more matte silver colorant not polish it.
 
This thread is more than 5 years old.

Your message may be considered spam for the following reasons:

  1. This thread hasn't been active in some time. A new post in this thread might not contribute constructively to this discussion after so long.
If you wish to reply despite these issues, check the box below before replying.
Be aware that malicious compliance may result in more severe penalties.
Back
Top