You are using an out of date browser. It may not display this or other websites correctly.
You should upgrade or use an alternative browser.
You should upgrade or use an alternative browser.
Narcissus Builders Club N Stuff.
- Thread starter jedimaster
- Start date
jedimaster
Sr Member
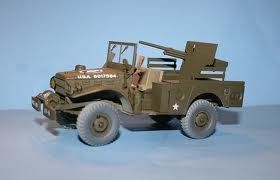
The CENTER is from a late model (1944-45) ish from what I can gather. The early ones had the two piece combat rims. I have the 3 axle 1 1/2 ton peerless max and it has the early ones.
jedimaster
Sr Member
I found the italeri 1/35 dodge m6 that has these wheels. Gonna see if I can find better pix.
I think you have a winner, even though it's molded into the rim...
Italeri Model Kit Anti Tank Dodge Vehicle 1 35 Scale 245 Army Truck | eBay
http://www.ebay.com/itm/Italeri-1-3...D&orig_cvip=true&rt=nc&_trksid=p2047675.l2557
Italeri Model Kit Anti Tank Dodge Vehicle 1 35 Scale 245 Army Truck | eBay
http://www.ebay.com/itm/Italeri-1-3...D&orig_cvip=true&rt=nc&_trksid=p2047675.l2557
jedimaster
Sr Member
Not convinced it's the right kit but were on the right track. Still looking.
Last edited:
jedimaster
Sr Member
Trouble is with some of these kits the box art doesn't match the kit. Different wheels are quite common.
Quick question re the hatch insert for Paul. The floor of it is well below the 'scale' floor line; any particular reason for that or am I missing something obvious? I think there's an opportunity to make a mod here - extend the side walls to the bottom hull piece, relocate the bottom of it upwards to form a platform for the Centurion grilles, and truncate the top corners of the sides slightly so it can still be slid into place.
The assembly would then form a structural part of the main hatch section and add quite a bit of strength, not that it especially needs more but it can't hurt. Just a thought, any interest?
The assembly would then form a structural part of the main hatch section and add quite a bit of strength, not that it especially needs more but it can't hurt. Just a thought, any interest?
jedimaster
Sr Member
Ja get the SMS I sent?
Quick question re the hatch insert for Paul. The floor of it is well below the 'scale' floor line; any particular reason for that or am I missing something obvious? I think there's an opportunity to make a mod here - extend the side walls to the bottom hull piece, relocate the bottom of it upwards to form a platform for the Centurion grilles, and truncate the top corners of the sides slightly so it can still be slid into place.
The assembly would then form a structural part of the main hatch section and add quite a bit of strength, not that it especially needs more but it can't hurt. Just a thought, any interest?
Hi Martyn,
The insert was added purely as an "extra", based on MB's replica build (as I don't believe it was on the original model).
As a reference, here is MB's pic that I based it off:
Looking at it, I don't think there is any need to extend the sidewalls down to the hull. As you note, we have plenty of stability in the design as it currently stands. If you reduce the height (and angle if required) of the insert side walls (which would essentially raise the "floor"), you then simply glue the insert to the inside face of the hatch panel.
Of course, not having it on the SU ship means you can make whatever artistic license you choose :lol.
How's the rest of the build going?
Did you manage to get the missing/duplicate/unfinished pieces sorted out?
Yep, I do plan to glue it to the inside face of the hatch panel. Hey, we don't have an actual hatch, do we? Wondering whether it's worth CGing one.
Build's going great! I'm being deliberately sloppy in terms of squaring up and so on so I'm getting small issues here and there. The idea is to anticipate problems on a 'worst case scenario' basis: if I build as badly as I know how, will this still be a stable and presentable model? Because if I do get good results then *nobody* should be able to **** it up. :lol So far so good.
I found I managed to get an approximately 1mm taper on both engine mount boxes - they flare slightly towards the stern. It's bizarre - both of them are the same, it manifests as toe-out when fitting the rear quarter panels but also toe-in when fitting the hatch assembly. Figure that one out, cos I can't. :lol
It doesn't have any major impact though, hatch assembly can still be jammed in there. I'll be busy tomorrow but I'm nearly ready to start fitting the main hull plates.
Nope, I haven't marked up and cut replacements for the missing bits yet; haven't needed them so far.
Correct, we don't have the actual hatch yet. As it was more of a detail than a structural element, I did not model it. I could model it to be cut from plastic, or the CG method would certainly work too. I did talk to Simon about this early in the piece, but never finalised a plan of attack.Hey, we don't have an actual hatch, do we? Wondering whether it's worth CGing one.
Having that whole section as a push fit, means it can be added after the fact (mine is yet to be glued in place for that reason).
Did you end up modelling the engine mount bracket pieces or the cone pieces behind the rear panels?
I guess that makes sense! :lolBuild's going great! I'm being deliberately sloppy in terms of squaring up and so on so I'm getting small issues here and there. The idea is to anticipate problems on a 'worst case scenario' basis: if I build as badly as I know how, will this still be a stable and presentable model? Because if I do get good results then *nobody* should be able to **** it up. :lol So far so good.
Thats very odd. I didn't see that on mine. That would seem to indicate that the edges on the horizontal engine mount pieces were cut not quite perpendicular??I found I managed to get an approximately 1mm taper on both engine mount boxes - they flare slightly towards the stern. It's bizarre - both of them are the same, it manifests as toe-out when fitting the rear quarter panels but also toe-in when fitting the hatch assembly. Figure that one out, cos I can't.
Cool. Are you planning on having the top panels removable or fixed (ie are you having a cockpit)?It doesn't have any major impact though, hatch assembly can still be jammed in there. I'll be busy tomorrow but I'm nearly ready to start fitting the main hull plates.
If you need dimensions for any of the missing pieces, just let me know.Nope, I haven't marked up and cut replacements for the missing bits yet; haven't needed them so far.
Yep, I've done the cones and the bracket bits. Is the hatch included on the styrene patterns?
The mounts seemingly tapering can't be due to the horizontal pieces alone. It's way too weird that both are identical, though. About bang on 1mm's difference.I haven't glued the hull quarter panels in as yet though, which might require a fix though so far it's purely a minor fit issue. I suspect some of the problem may lie in the hatch assembly too.
Yes, cockpit for sure! I'll use the magnets approach.
Actually thanks, that'd save me a bit of nutting out - yes please, dims for T5, and the hole in T4. Easily enough worked out by why not go straight to the horse's mouth, so to speak.
Yep, I've done the cones and the bracket bits. Is the hatch included on the styrene patterns?
Nope, have not done anything on the hatch piece itself.
I've just checked the model and all internal pieces of the engine mount assembly are exactly the same width. This would have to indicate an error in either the cutting, or when the pieces have been fixed together. The fact that the both have the identical taper would seem to indicate the cutting. When all is said and done, we are only talking about 1mm tooThe mounts seemingly tapering can't be due to the horizontal pieces alone. It's way too weird that both are identical, though. About bang on 1mm's difference.I haven't glued the hull quarter panels in as yet though, which might require a fix though so far it's purely a minor fit issue. I suspect some of the problem may lie in the hatch assembly too.
")
Yes, cockpit for sure! I'll use the magnets approach.
Cool. That was probably the trickiest part of the buid for me. I will be interested to hear you thoughts when you get to it.
Actually thanks, that'd save me a bit of nutting out - yes please, dims for T5, and the hole in T4. Easily enough worked out by why not go straight to the horse's mouth, so to speak.
I'll email you through some dimensioned drawings for those parts shortly.
I might whack a hatch together for casting then. Save cutting in those tapers on each one, though it's not that difficult or anything.
The taper has to be something I've done, IMO. I didn't sort the parts for symmetry or anything like that - so there's no way I'd achieve a consistent taper using tapered parts, by accident, if you see what I mean. And yep - 1mm over about 300mm is almost unnoticeable.
Cool, thanks!
The taper has to be something I've done, IMO. I didn't sort the parts for symmetry or anything like that - so there's no way I'd achieve a consistent taper using tapered parts, by accident, if you see what I mean. And yep - 1mm over about 300mm is almost unnoticeable.
Cool, thanks!
Trouble is with some of these kits the box art doesn't match the kit. Different wheels are quite common.
Ah..... before anyone spends money on new kits...... you should have the parts in your stash already.
(Bear in mind the shots against the red background are of Martin's 1st replica, and are a bit misleading. At that time the front bits hadn't been completely identified so he used some substitute parts to get the model finished on time).
Correct ones below:
Keith
jedimaster
Sr Member
Well I'll be a .......ok then we're almost bloody done then. Keith.... Thankyou very much. You just saved me hours of pain. Front end almost done then. Just need to I'd the little parts top and bottom of the VT part. And finally another use for the Bedford.
Last edited:
Similar threads
- Replies
- 23
- Views
- 1,199
- Replies
- 10
- Views
- 651
- Replies
- 10
- Views
- 1,185