Rebelscum
Sr Member
re: My New Series Dr Who Tardis Build (image heavy)
As I worried earlier, I did run out of blue paint right as I was finishing the first coat of the very last panel. I'll have to get a quart of it on Monday to finish up.
I thought to take some photos of the painting process to show the steps.
Starting with the sandblasted wood from earlier, I blow it all off really well and put down one coat. I try to get it on even, a medium coat. I'm very careful to not put down so much paint it runs, but I do want it completely covered with paint.
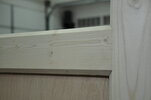
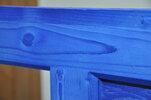
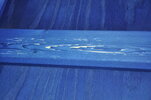
Since it's lacquer, it dries really fast, especially where there's soft wood removed by the sandblasting, and that means in 15 minutes I can move to the next step, which is to go over the entire surface with a green Scotch-brite pad. This removes any fuzzies that were raised by the sandblasting, but also there are many places where the grain is flat and peaks on the surface. These places are very annoying because where the grain meets the surface it peels up, sometimes even lifting an entire piece of the surface. The photo below is what this looks like after I've used the pad in an area like this. I first run the pad across the board, then along the board, many times and eventually it will stop catching splinters. I blow it all off again and get ready to apply the second coat.
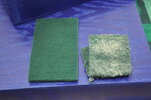
Here you can see the Scotch-brite pads. Notice all the splinters in the one I used. Even doubled over I've had quite a few of the splinters in my fingers since I don't like to sand with gloves on. Not the most fun part of the build
Then I apply the second coat. First I'll go over any area that bare wood is showing with a light coat, then the entire piece, and then back to see if there are any places that need filling. The nice thing about this paint process and the lacquer is it allows you to go back and add paint without worries about uneven finish.
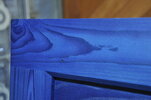
As I worried earlier, I did run out of blue paint right as I was finishing the first coat of the very last panel. I'll have to get a quart of it on Monday to finish up.
I thought to take some photos of the painting process to show the steps.
Starting with the sandblasted wood from earlier, I blow it all off really well and put down one coat. I try to get it on even, a medium coat. I'm very careful to not put down so much paint it runs, but I do want it completely covered with paint.


Since it's lacquer, it dries really fast, especially where there's soft wood removed by the sandblasting, and that means in 15 minutes I can move to the next step, which is to go over the entire surface with a green Scotch-brite pad. This removes any fuzzies that were raised by the sandblasting, but also there are many places where the grain is flat and peaks on the surface. These places are very annoying because where the grain meets the surface it peels up, sometimes even lifting an entire piece of the surface. The photo below is what this looks like after I've used the pad in an area like this. I first run the pad across the board, then along the board, many times and eventually it will stop catching splinters. I blow it all off again and get ready to apply the second coat.

Here you can see the Scotch-brite pads. Notice all the splinters in the one I used. Even doubled over I've had quite a few of the splinters in my fingers since I don't like to sand with gloves on. Not the most fun part of the build

Then I apply the second coat. First I'll go over any area that bare wood is showing with a light coat, then the entire piece, and then back to see if there are any places that need filling. The nice thing about this paint process and the lacquer is it allows you to go back and add paint without worries about uneven finish.

Last edited:

