Rebelscum
Sr Member
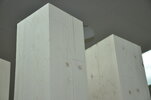
This is how it ended up.

Overall Build Drawing
This drawing can be scaled to exact measurements.
I've been researching Tardis builds at the Tardis Builders forum. The process has been somewhat painful as the BBC, who owns the rights, approaches sharing of information in a polar opposite fashion to Lucasfilm, who embraces fandom in areas like R2 building and costuming.
Anybody that's ever tried to build a Dalek knows exactly what I'm speaking about.
Edit: I originally said that in the builder's forum, there is no real exchange of information there, which wasn't really fair in retrospect. There is a lot of information there that will help a build. But nothing like openly and freely shared drawings such as Star Wars R2 Builders have access to.
Anyway, off my soapbox.
At its most fundamental, a Tardis build is a woodworking exercise. As with any woodworking project, the more tools you have, the easier it is, but you can do it with relatively few tools as well.
After quite a bit of research, I started my NST knockdown build recently. This is being built like the show prop and never intended to be out in the weather. This is important because the actual show prop build method could never withstand rain.
After a lot of consideration on materials, I settled on wood that I believe matches the wood shown in a photo at the builders forum of the Matt Smith Tardis before it was weathered. I selected #2 spruce from Home Depot, which is a dry, generally straight, white wood with tight red knots because it appears to match exactly. It happens to come from Sweden. By and large it's a nice piece of wood.
It's my plan to show quite a bit of detail on the build hoping that others can see the process and feel less intimidated by the project.
In case anybody has missed it, you can also check out Deck5's very nice classic Tardis build here: Classic TARDIS (picture-heavy)
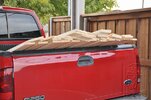
First trip home from Home Depot with boards.
I started with the posts as I plan to have the bottom of the posts *plug into* holes in the base and wanted to ensure they would fit snuggly.
Board selection started first. The board all have some defects, so I spent some time orienting each to minimize the visible defects.
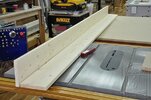
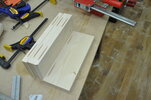
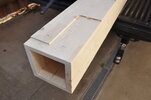
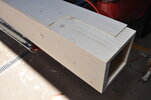
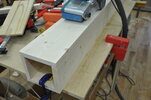
I decided to use only biscuits and glue to make the posts.
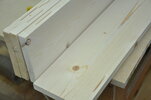
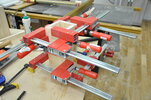
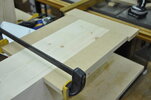
It's definitely a handful gluing and clamping a post because though the boards are pretty straight, they aren't perfect and there are many gaps to close.
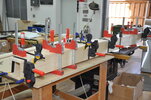
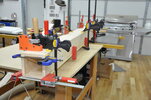
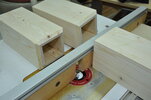
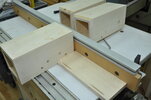
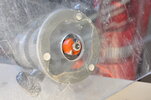
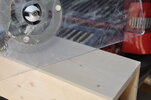
Both ends of the posts have to be trimmed square. I made up a sled for my portable circular saw with a carefully set square board on the bottom to aid in this process.
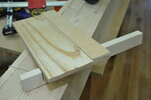
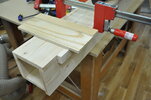
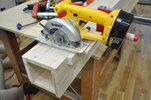
Once trimmed, I sanded all the glue off and edges even.
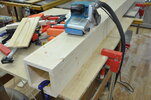
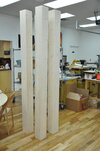
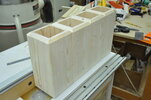
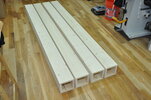
And so far, all I have is 4 square posts. Whew.
Overall Build Drawing
This drawing can be scaled to exact measurements.
I've been researching Tardis builds at the Tardis Builders forum. The process has been somewhat painful as the BBC, who owns the rights, approaches sharing of information in a polar opposite fashion to Lucasfilm, who embraces fandom in areas like R2 building and costuming.
Anybody that's ever tried to build a Dalek knows exactly what I'm speaking about.
Edit: I originally said that in the builder's forum, there is no real exchange of information there, which wasn't really fair in retrospect. There is a lot of information there that will help a build. But nothing like openly and freely shared drawings such as Star Wars R2 Builders have access to.
Anyway, off my soapbox.
At its most fundamental, a Tardis build is a woodworking exercise. As with any woodworking project, the more tools you have, the easier it is, but you can do it with relatively few tools as well.
After quite a bit of research, I started my NST knockdown build recently. This is being built like the show prop and never intended to be out in the weather. This is important because the actual show prop build method could never withstand rain.
After a lot of consideration on materials, I settled on wood that I believe matches the wood shown in a photo at the builders forum of the Matt Smith Tardis before it was weathered. I selected #2 spruce from Home Depot, which is a dry, generally straight, white wood with tight red knots because it appears to match exactly. It happens to come from Sweden. By and large it's a nice piece of wood.
It's my plan to show quite a bit of detail on the build hoping that others can see the process and feel less intimidated by the project.
In case anybody has missed it, you can also check out Deck5's very nice classic Tardis build here: Classic TARDIS (picture-heavy)
First trip home from Home Depot with boards.

I started with the posts as I plan to have the bottom of the posts *plug into* holes in the base and wanted to ensure they would fit snuggly.
Board selection started first. The board all have some defects, so I spent some time orienting each to minimize the visible defects.

I decided to use only biscuits and glue to make the posts.

It's definitely a handful gluing and clamping a post because though the boards are pretty straight, they aren't perfect and there are many gaps to close.


Both ends of the posts have to be trimmed square. I made up a sled for my portable circular saw with a carefully set square board on the bottom to aid in this process.


Once trimmed, I sanded all the glue off and edges even.


And so far, all I have is 4 square posts. Whew.

Last edited:

