Thanks, folks.
Cutting out the cocking slot is a good idea. It hadn't occurred to me before, so I haven't even tried removing the endcap (at the butt end).
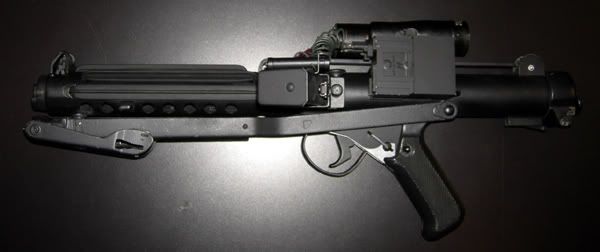
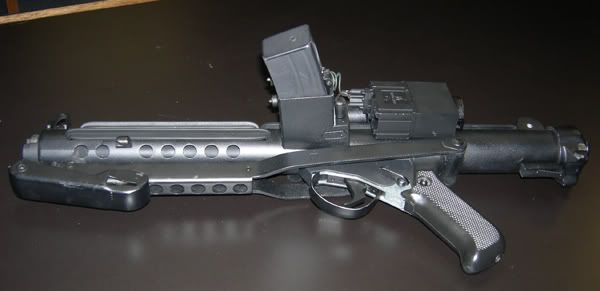
All three allen bolts were stripped of paint and then blacked/blued with some stuff from Brownells. Also the brass hex bolts.
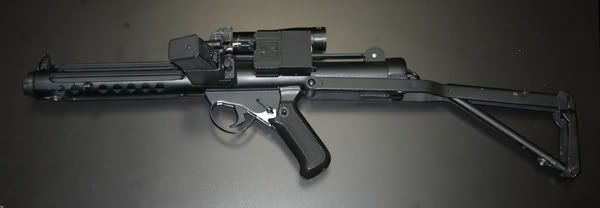
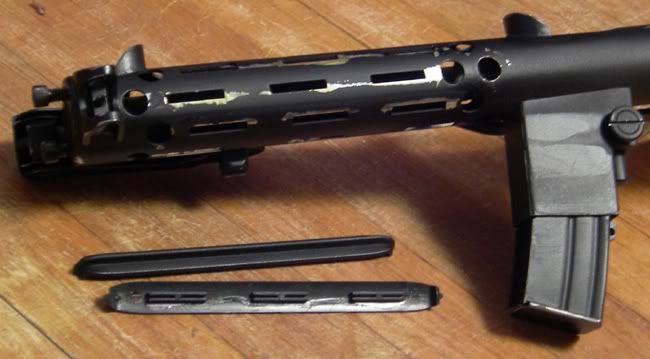
Paint: bulk of it is satin black, with semi-flat for that plate on the trigger assembly, and flat for the magazine. I gave it somewhat of a krinkly texture by sputtering spraypaint at it from about 3 feet away (a tip BobaDebt posted years ago). Note I also painted that rectangular area around the slot for the trigger, which was left silver on the MR.
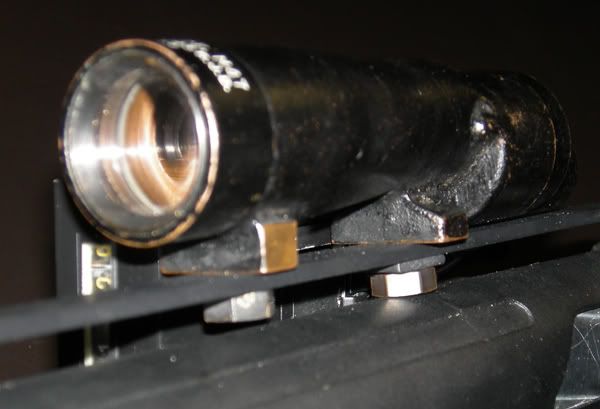
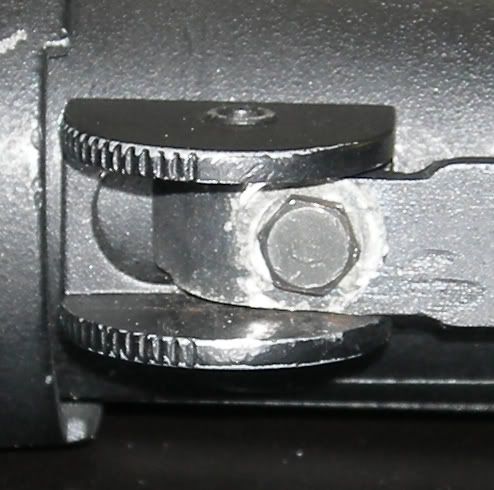
The scope rail is just 1/2" aluminum bar, bent by hand with pliers and dremeled as needed to hook it into the vent hole and the sight. I used the same screw hole in the sight that MR used, but needed to replace the screw itself since I needed it to be longer. Found a hex bolt of the correct size and threading (and can dig up the package for that info if anyone needs it). There is a spacer under the rail in the rear sight, as tightening the bolt tended to bend the aluminum. I tried using aluminum black on the rail but I never have much luck getting even finishes with that. So I painted over it.
There was nothing wrong with the MR grip, but I had a real Sterling one, so why not? Plus, the real ones have a different look and feel, being a lighter colored bakelite (I think), as opposed to the glossy black ABS of the MR. The Sterling grip did require modification to fit. I had to remove material at the top and in the inside. As it is, the retaining pin is still a little off-center.
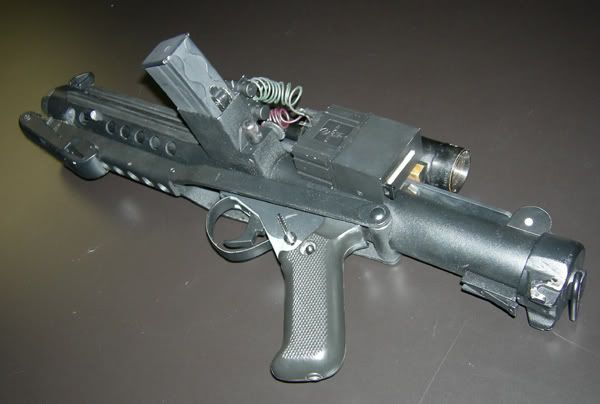
The stock was a bit of a PITA. It is screwed on from the inside of the shroud, and access to that screw is blocked by the barrel. Contrary to reports from others who apparently were able to get the front endcap off the shroud, mine was quite soundly welded and wouldn't come off, not even after being heated with a propane torch.
So I had to get the barrel out of the way. To do that, you have to remove the allen screw at the bottom of the grip, which enables you to remove the trigger assembly (at which time you can make the trigger workable). Inside the area where that assembly goes, is a little screw that goes through the reciever and keeps the "bolt" in place. Remove that, and you can slide the bolt, and the attached barrel, back into the reciever and allow yourself access to that screw keeping the stock in place. Be careful as you slide the bolt around, as there are screws going into the receiver from the magazine well, and they will scratch the bolt. (As they did mine.)
A rectangular piece on the stock sticks up into the receiver, and as I recall I had to dremel that down to size to get the stock loose.
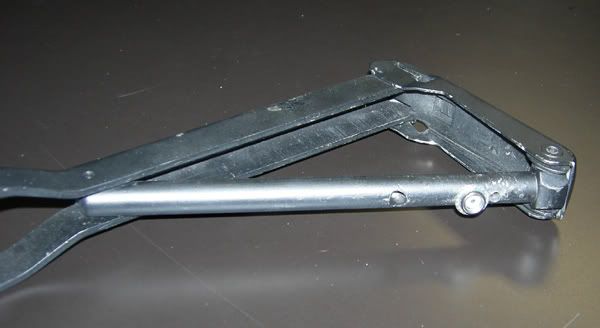
The stock will now unfold somewhat, but not all the way without dremeling away some material. Hard to describe, but you'll see what's in the way when you get there. In the end, unfolding it into a shoulder stock is a little clunky (a real Sterling has a spring that helps the process) but you can do it.
When you flip it around to the rear of the blaster, the arms will not fit around the endcap as they should. I simply dremeled some material off the lower sisides of the endcap, as well as bent the arms somewhat. Now it locks in snugly.
But then I faced a problem: to free up the stock I'd had to destroy the means to keep it stuck to the shroud when folded all back up. A real Sterling (and even the Asahi airsoft version) has a spring/latch thingie that I had no idea how to create from scratch. After failed attempts at using magnets and homemade clips, I finally settled on using a snap fastener. Not particularly elegant but it works.
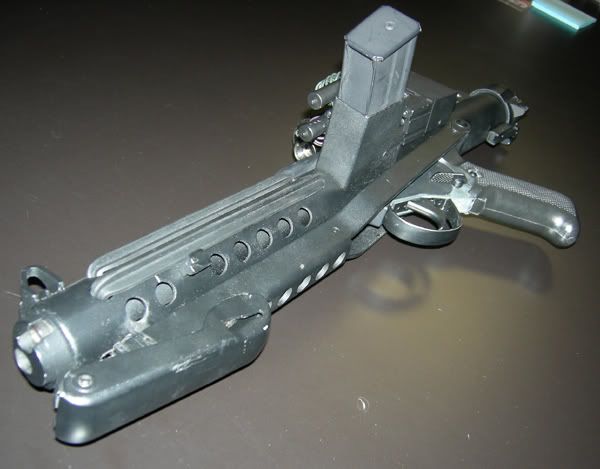
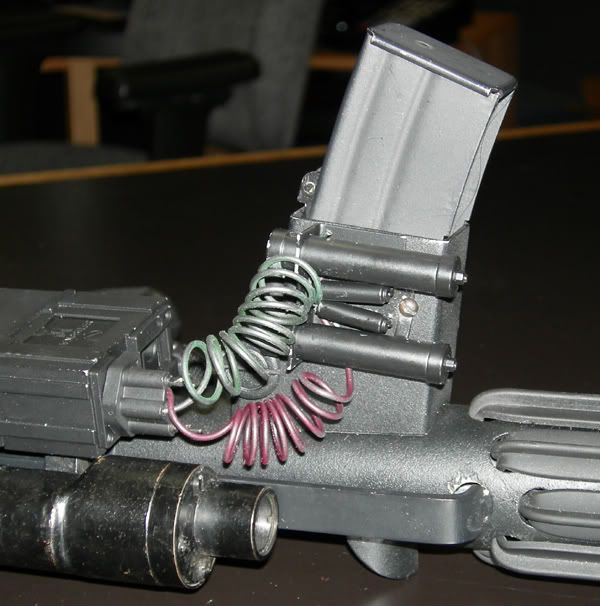
I wanted to be able to remove the magazine so the blaster would fit in a padded gun case. This took some doing.
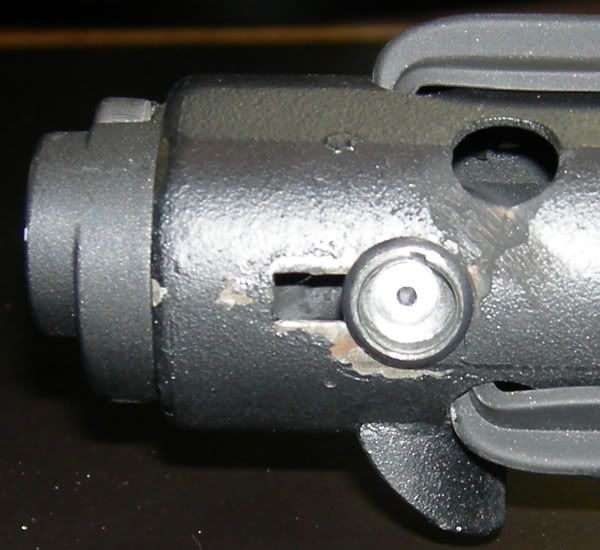
Ignore the big thumscrew on top of the magwell. Ignore the little oval insert on the bottom of it. What makes the magazine non-removable is a little screw hidden behind the cylindrical piece that sticks out to the left on the back end of the mag well. That piece has a hole in it--almost. It doesn't go all the way through, which is too bad, because that would make access to the screw easier.
I did it the hard way, by trying to unscrew that cylinder. Turns out a screw is attached to it from the inside of the magwell, and instead of unscrewing I broke the thing off. But hey, this allowed access to the screw.
But the proper way would be to loosen the bolt as described above, then, accessing through the eject port, remove a couple of screws on the inside of the reciever that attach the magwell. Once the magwell's off, you could access the screw inside that attaches the cylinder thing.
Either way, though, once the cylinder is off, and then the screw into the magazine is removed, you'll find that the magazine might still not come out. This is because there is a ton of silicone sealer inside this thing. Ultimately I used a blowtorch to heat up the metal and subsequently soften the silicone. All the parts are metal and can take the heat EXCEPT at the very end of the magazine. See the hole and the little round nub? That nub is ABS plastic. Keep the fire away from it and you'll be fine.
I did not reinsert that screw into the mag, and I made a peg for the cylinder and epoxied it back on. Now my mag was removable, but it did have a wee bit of play. So when I attached the plate with the cylinders (both epoxy and a screw), I drilled the screw hole through both the mag well and the mag. So to remove the magazine I will have to remove that screw, but that's fine, as it is easily accessible unlike the one hidden behind the cylinder thing.