My Mad Hatter Thread - Mickey's Trick Or Treat 10-29-2010

Re: My (Hijacked) Mad Hatter Thread - W. I. P. Pants done! 02-10-10

Actually yes I laid out all the leathery hat pieces onto a board and then burned away. if you are super careful you should be able to do it while on the hat, just be super careful.
 
Re: My Mad Hatter Thread - W. I. P. Pants Pics 02-13-10

OK folks! I'm just bringing this thread back "home" since it is my thread and IT IS ALL about me, savvy?:lol:lol:lol:lol:lol

MY finished pants with lace, stripe down seam, and embroidery!!! I left the pants the color they were dyed because I think they look closest to the color of the SDCC display. Taken with and without flash so you can see the slight color difference.

CIMG9683.jpg

CIMG9685.jpg

CIMG9690.jpg

CIMG9691.jpg

CIMG9692.jpg

CIMG9693.jpg

CIMG9694.jpg

CIMG9695.jpg

CIMG9696.jpg


I guess the next pics should be with my shoes, shirt, and vest. I should be receiving my finished vest, hat scarf, and frock coat template (made of muslin and just for size) sometime today!!!
 
Re: My Mad Hatter Thread - W. I. P. Pants Pics 02-13-10

Very cool dude, they look excellent! :D

And they're from 2 days in the future, so that adds even more awesome! :lol :p ;)
 
Re: My Mad Hatter Thread - W. I. P. Pants Pics 02-11-10

The embroidery portion of the pant was the most difficult. I first sketched out the outline with chalk and matched up each color stitch for stitch. I had to modify the scale several times because I tended to go too big in some areas. You can still see the chalk outline in the background on the pant leg. That has since been cleaned up.

Still wondering how difficult it would be to take in the pant leg a bit to give it more of a narrower look. I would probably need to do it on the backside of the pant leg but there is no seam!!!! I may need to consult with my Master!
 
Re: My Mad Hatter Thread - W. I. P. Pants Pics 02-11-10

OOooh! I LOVE the colour you achieved for them! They do have a lot of resemblance to the CC display, which, without anyone being able to match the exact fabric, is a great plus for you! I'm jealous! We just used brown pinstripe pants but the pinstripes are so thin that they barely even show in photos. :( oh well...we know they're there.

And I did the EXACT same thing with my embroidery ! :D I love chalk. Especially for something like that. I looked at tailors chalk at the fabric store and they wanted like $10 for one piece. Heck no! Crayola chalk works just as well! $3 for a box! lol

Currently working on the coat...lining is done being put together, just need to iron the seams and put it in the coat...but I'm waiting for that 'til after I'm done the tie up flaps on the back ( I have 0 skill in terminology ) and installing the lapel and pockets, which is next. >_< I want this thing done TODAY. O_O

Oh, and for the pants, HOOK UP THAT SEWING MACHINE! and just follow the inseams even 1/4 inch and ( slant in near the knee to keep the flare ) and you'll see a difference. It can make some SLIGHT puckering at the top, without detaching and re-attaching the waistband, but only if you take them in too much. I've done this tons of times and it looks fine. :)
 
Re: My Mad Hatter Thread - W. I. P. Pants Pics 02-11-10

i found the stitching to be easier than i thought
it was fun to do actually

i want to do it on another pain of pants now

the embroidery on the hat though
now THAT sucked
 
Re: My Mad Hatter Thread - W. I. P. Pants Pics 02-11-10

This is a great thread!! Lots of helpful info!! My wife and i are wanting to do a replica of this costume... Were gonna start with the hat of course lol.. oh well, here we go!! ;)
 
Re: My Mad Hatter Thread - W. I. P. Vest and wig 02-15-10

I finished sewing on the brass buttons to the vest and now have tried the shirt and vest together. I can't wait to get that wonderful looking tie coming soon!!!

CIMG9765.jpg

CIMG9766.jpg


Styled the wig too. I still think it needs to be thinned out but that will have to come after the premiere! The hairs at the temples still hang down too low and they need to be straightened a bit as well.

CIMG9767.jpg


OK so the hat is really kicking my arse! I have given up on the wire frame and will just go with the leather pieces stitched to a wire frame. Hopefully the leather for the top hat part will be stiff enough to hold the shape. A wire frame will be used for the top of the hat as well. Back to the drawing board!!!:eek
 
Re: My Mad Hatter Thread - W. I. P. Vest and wig 02-15-10

Looks like you used the same buttons I did on my chadvest. Turned out great!
 
Re: My Mad Hatter Thread - W. I. P. Vest and wig 02-15-10

That looks awesome dude, excellent job! :D
 
Re: My Mad Hatter Thread - W. I. P. Vest and wig 02-15-10

wire frame??
you know theirs a real easy way to make an awesome hat frame with some left over craft stuff and some plastic potato salad containers that works really well

and i love your vest, once the purple stitching went on you cant even tall you painted it
its brilliant
 
Re: My Mad Hatter Thread - W. I. P. Vest and wig 02-15-10

I am trying to create a wireframe (as in the ole milliner days) and stretch the leather onto the frame. The wire I am using is fine but the support wires are not rigid enough to hold the crown portion. I am going to experiment with thicker leather 2-3 ounces (same that I use for tricorns) and see if that will hold the shape.

My original intention was to use goatskin 1-2 ounces that will be stretched over the frame. Using this method!
Hatframe1.png
 
Re: My Mad Hatter Thread - W. I. P. Vest and wig 02-15-10

try heavy craft foam
you wont need to worry about ruining the shape cause it bonces right back
thats the only think im worries about looking at this
that something will happen and the whole frame with get messed up
 
Re: My Mad Hatter Thread - W. I. P. Vest and wig 02-15-10

how many of you are looking forward to shaving off the goatee?
 
Re: My Mad Hatter Thread - W. I. P. HAT HAT HAT 02-17-10

My wifey is already getting me the MH and she will getting the Alice!!!

So onto the HAT HAT HAT! After playing with designs and cutting up artboard I came up with two concept ideas for making the hat.

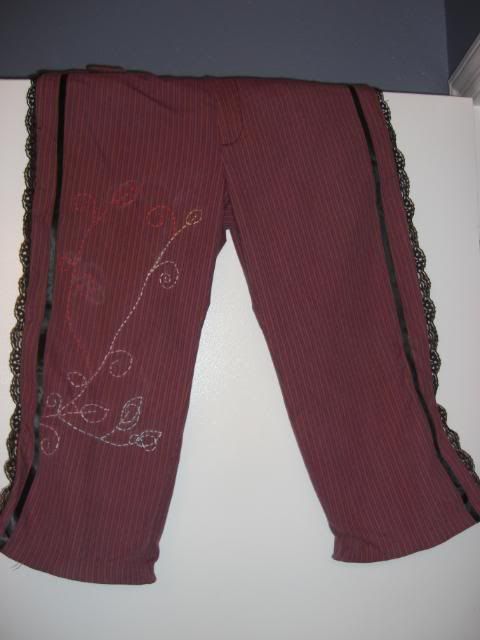
The first is probably the one I am going to use because it is the easiest and doesn't require much thought. I fell back onto my Captain Jack tricorn making techniques and implemented them into the MH hat. I am using 2-3 ounce veggie tanned cow leather which is very thin and flexible however when wet molded and dried it holds the shape fairly well. I am also going to use a wireframe in brim and at the top of the crown. This will allow me to have structure to weave the thread around and fold over the leather edge to achieve a nice rounded look. The crown and brim will be glued with barge glue. I am not too sure if I am going to put in the paisley pattern due to time constraints but if I do it will be before staining and construction. I also chose not to go with an oval shaped hole because it would require too much thinking, calculating, etc. Easier to go with a round hole and it is not really noticeable when worn. Plus some of the images of MH hat the head hole appears to be circular.

CIMG9771.jpg


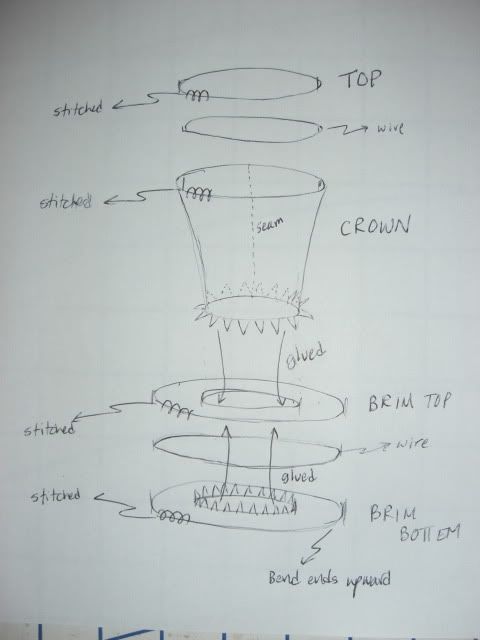
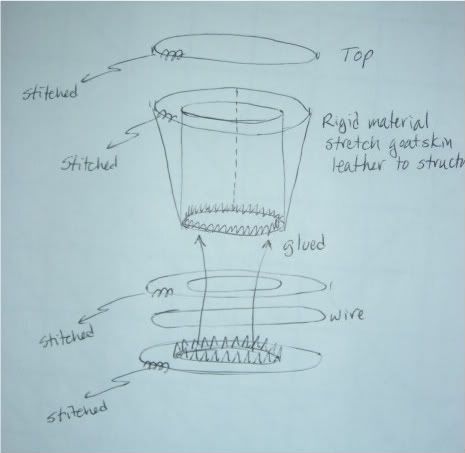
The second concept was to developed after watching a few YouTube viddies on making cheap Abe Lincoln hats with a twist. I would need to use some sort of rigid material and construct the tube and top to serve as a foundation to stretch and stitch very thin goatskin leather. This structure would allow the goatskin to be stretched and shaped in order to achieve that curved look just under the top of the hat. The brim would be constructed the same way. I may use this method for a more SA MH hat but at a later date, time, month, year????

CIMG9772.jpg


The brim was finished. I made the diameter of the inside 7 1/2 inches to give me a diameter of 24 inches. I am going to use a 2 1/2 inch brim. From a few pics of JD holding the brim of his hat the scale of his thumb makes the brim appear to be 2 1/2 to 3 thumb widths wide. I added an additional 1 cm on the edge to wet mold and wrap around the wire frame for stitching.

CIMG9768.jpg

CIMG9769.jpg


Now I am looking for some type of container (small garbage can) that can be used to wet mold the crown. I thought of making a hat block out of cork sometime in the future but time is a problem now. I may try some other type of rigid material to make the hat block but need to work fast!!! :confused

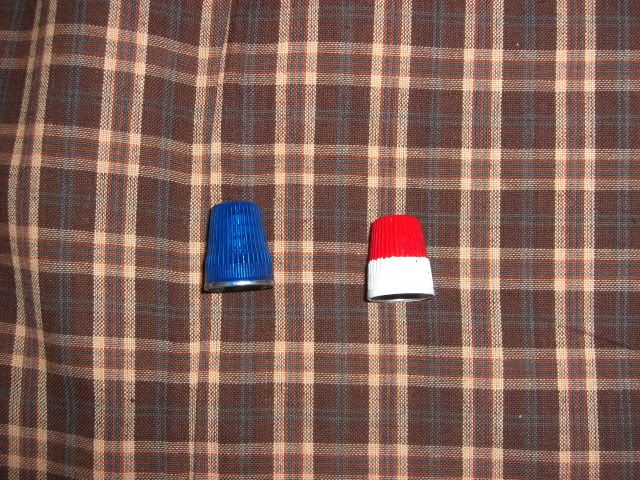
Also finished painting the thimbles (like that is difficult) BUT I did find a better material at JoAnns for the gloves!!!!
CIMG9773.jpg
 
Back
Top