My Indy Collection

Hey Tom! It's Michael (tundrarider) in case you don't recognize me in my avatar....:angry:)

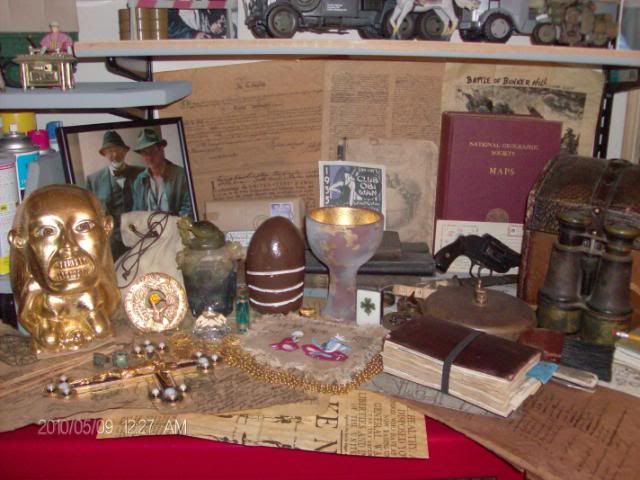
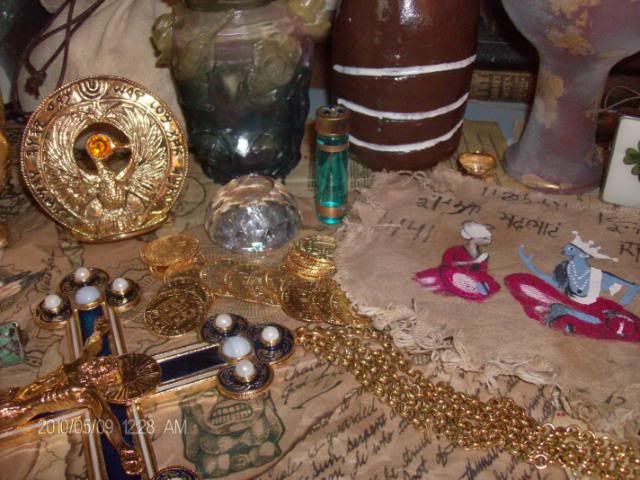
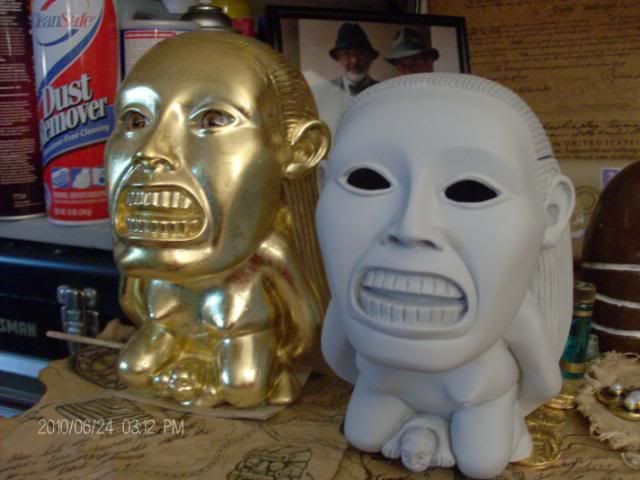
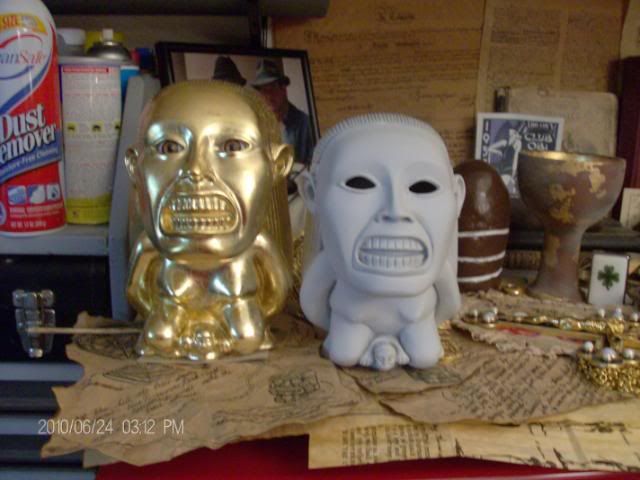
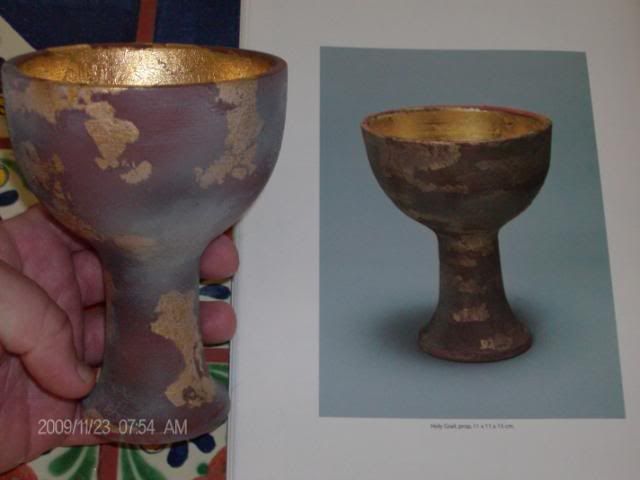
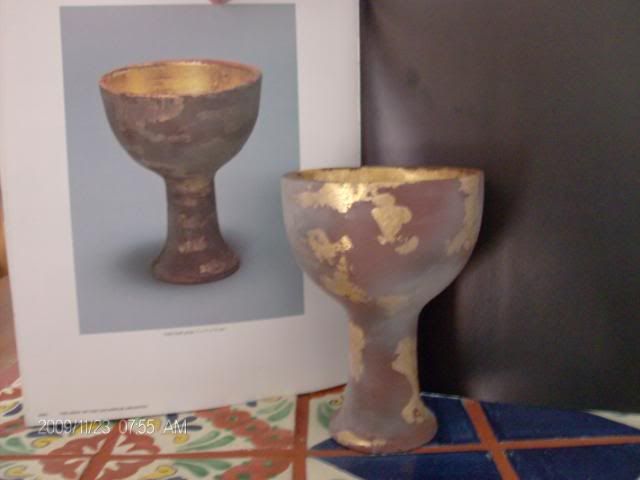
Thanks for pointing me here. I really enjoyed your Indy collection and your Raider's Journal is a fun glimpse at our favorite hero's life. Nice job on the cover distressing. :thumbsup


Makes me want to make one of my own when I finish my Grail Diary!!!

Michael
 
I feel the need to point out that several videos are brought up for viewing at the end of both parts of my Raiders Journal videos. These are not mine and have no idea who's they are and why they are there.
 
Anyone know where to get a cheap mannequin that would work for Indy????

Ebay has many for about $100 but then it's another $60 for shipping and I'll my money is tied up in other props right now. Indy gear and clothes need a body

It's not a bad total and I probably can't do better but I thought I would ask
 
Update with new additions. Coins and a certain ring Indy found

BenplusBladeRunnerpropdisplay067.jpg


BenplusBladeRunnerpropdisplay068.jpg


BenplusBladeRunnerpropdisplay069.jpg
 
"Update with new additions...a certain ring Indy found."

Nice pictures. By the way, what's the ring supposed to be from?
 
Sorry,
Pics did not come out very good. It's the ring from Lord of the Rings. It's got the writing on the inside and outside of the band.

It's a $30 version I thought would be fun to have in the Indy display.
 
Can you give us a tutorial on your Idol bank mods?

I'm thinking of gold-leafing mine, but I've never done it before...

I'd also like to add some eyes!
 
Can you give us a tutorial on your Idol bank mods?

I'm thinking of gold-leafing mine, but I've never done it before...

I'd also like to add some eyes!

The eyes I got from a Doll place. I posted the link here or in the new Blue Five Idol thread. They are not dead on but I like them.

I cut out a large section of the back of the idols head. I went about an inch over on the side from the coin slot and then down a hair line to the bottom of the back. You really need a wide open hole to get the eyes in. So you end up with the bulk of the hair cut out in a large square folding piece on the back. Getting the eyes in after that is easy. Take your time trimming around the eyes. Glue in the first one and make sure it is looking where you want. The hard part is getting the second one to line up and allign with the first eye. This part seemed to be the hardest. I used Hot glue.

Then just seal the hole and fill with plaster but make sure your eyes are sealed or you will have your idol crying plaster tears like I did.

Gold leafing just requires a little practice. Buy two $9 kits from Michaels and use one to practice with.

More to come. Got to go now.
 
I was concerned about Gold Leafing and so I bought two Idol banks so I could practice all this on one. The gold leafing is really pretty simple it's just nerve racking but just be sure to practice on something a lot so when you do your idol you know how the leafing will behave so you know what to do.

I also primed my idol with standard grey primer and then painted it with a bright metalic gold. That way anything missed or scratched by the leafing still has gold showing. This is really important because some areas like the teeth are not going to have gold leaf in every little spot.

Don't hesitate to post or PM any other questions.
 
Can you give us a tutorial on your Idol bank mods?

I'm thinking of gold-leafing mine, but I've never done it before...

I'd also like to add some eyes!


Couple things I forgot.

Filling with plaster-Make sure after you have sealed your big hole in the back up after putting in your eyes then you have to duck tape the hole/flap closed by wrapping it completely around the idol numerous times. It will look like you have kidnapped your idol and are trying to keep his mouth shut. Otherwise no matter what glue you use the weight and force of the plaster will bust open your eye access hole.

That hairband- I got rid of mine with a dremmel, files, sandpaper, and steal wool. I DID NOT extend the hair line. Someone on COW did that but on my practice one I could not make it look good so I skipped it and it was the right thing to do as it looks fine.

I do wish I spent more time smoothing the hairband area. As I mentioned the pics show it much worse than it is (Darn digital clarity) but although it's not very noticeable in person and you really have to look to see it I still would make it smoother if I was to do it again.
 
Doll Eyes from Mini World

Above is where I got my idol eyes. They were 22mm Hazel "Life like eyes"

The Round Acrylic in light brown I think it more accurate with a more accurate size pupil. I want to use these on my Blue five Idol but they are always out of stock.
 
Last edited:
I realized looking through the pics I did not show enough of my incredible BazzanoJones Grail. As Indy prop fans know the Grail looks very different through the end of the movie and I wanted the first one we see that Indy grabs when he has to "choose."

No offense to any other Grails but I think Bazzano's Grail is the best one made. From wood. A carpenter's cup. I know it says ceramic but I always thought it was and should be wood. "That's the cup of a carpenter."

Okay this one shows my Grail next to the archive book. This archive book pic is slightly different than mine as the archive shot is not the one from the Grail we first see. If you compare Bazzano's/My Grail to a screen shot from when Indy sees and grabs the Grail you are not going to find a difference. The camera makes the grey show up more than it really does and like soooo much else the pics don't do it justice.

HPIM4409.jpg


HPIM4415.jpg


HPIM4414.jpg


Close up Grail/Relicraider Zippo

HPIM5085.jpg


BenplusBladeRunnerpropdisplay069.jpg


The two "Holy Grails"

bottle004-1.jpg


HPIM4356.jpg
 
Back
Top