You are using an out of date browser. It may not display this or other websites correctly.
You should upgrade or use an alternative browser.
You should upgrade or use an alternative browser.
My Early Disasters pt 2 - A Biker Scout Helmet - How hard can it be?
- Thread starter Dtrasler
- Start date
Dtrasler
Sr Member
I should remember that social media isn't real life - I follow a lot of cosplayers and prop builders on Instagram, and they're forever printing fabulously detailed things that just...print. They press the button and wander off, and the thing is perfect twelve hours later.
So I had a twelve hour print to do. Both machines have been behaving relatively well this last week. I got up early (for a Sunday) and set the Tink off. An hour later I checked in wit it and found that no, it HADN'T actually registered the "Go" command. Soo, an hour lost. I started it going. Twenty minutes later I dropped by, and there was just spaghetti everywhere. Print attempt one was a bust.
Swapped out the PLA reel, which I should have done at the start. Set print attempt two going. Stayed to watch it, which was wise, because it laid down the first layer, then tore it up with the second. The third collected both previous layers and strew them across the plate, while laying down a random stream of stuff that didn't even adhere to the plate. I stopped it there. Attempt three did the same thing, but sticking just enough to make it worth trying to fix it as it was printing. I admitted defeat after fifteen minutes of carefully cutting bad areas and smoothing down lines.

I KNOW 3d printers aren't magic. I don't expect perfect results every time, but equally, it should not be a lottery as whether the thing works at all. The temperature today is similar to yesterday, when the prints turned out fine.
The bed is set right, and what's more, it's set the same as the last print. There's no logical reason that today it won't print. I know I should recalibrate, I know there's probably a dozen techy things to tweak and check and manipulate, but that's not me. I didn't get a 3d printer because I wanted 3d printer maintenance to be my hobby.
What's the Klingon for "Today is a good day to whine"?
So I had a twelve hour print to do. Both machines have been behaving relatively well this last week. I got up early (for a Sunday) and set the Tink off. An hour later I checked in wit it and found that no, it HADN'T actually registered the "Go" command. Soo, an hour lost. I started it going. Twenty minutes later I dropped by, and there was just spaghetti everywhere. Print attempt one was a bust.
Swapped out the PLA reel, which I should have done at the start. Set print attempt two going. Stayed to watch it, which was wise, because it laid down the first layer, then tore it up with the second. The third collected both previous layers and strew them across the plate, while laying down a random stream of stuff that didn't even adhere to the plate. I stopped it there. Attempt three did the same thing, but sticking just enough to make it worth trying to fix it as it was printing. I admitted defeat after fifteen minutes of carefully cutting bad areas and smoothing down lines.
I KNOW 3d printers aren't magic. I don't expect perfect results every time, but equally, it should not be a lottery as whether the thing works at all. The temperature today is similar to yesterday, when the prints turned out fine.
The bed is set right, and what's more, it's set the same as the last print. There's no logical reason that today it won't print. I know I should recalibrate, I know there's probably a dozen techy things to tweak and check and manipulate, but that's not me. I didn't get a 3d printer because I wanted 3d printer maintenance to be my hobby.
What's the Klingon for "Today is a good day to whine"?
Dtrasler
Sr Member
I took a day or two out from the printing, but had a lucky find at Canadian Superstore. I've been on the lookout for the wookiee pelt that the armorer wears over her shoulders. I know the cosplayer I was referencing on the Dented Helmet went through three sheepskins before she found the right one that accept the dyes to make it exactly the right shade. I however, have different criteria. Primarily, it must fall within my budget of "Hiding it in the grocery purchases". So when I spotted a fake fur Christmas Tree skirt in the discount bin at Canadian Superstore, it didn't bother me in the slightest that it was jet black. The point was, it was only $10!
I still don't have a picture of it, but this means of all the stuff I need, I now have:
The Helmet
The Wookiee pelt
The chestplate (mostly I'm printing the bottom row on the other machine, having to cut each piece in half again, so 6 pieces instead of 3)
The belt tools.
The hammer.
I still need to make:
The boot tips
The boot sleeves
The skirt
The belt
The Gauntlets.
Mrs Dim can probably arrange the undersuit, and it will be for convenience, rather than accuracy.
Dtrasler
Sr Member
I've been thinking about my last print failure, and looking back through various projects. The Tink doesn't do well with bargain PLA, from what I can tell. Anything $30 and up, it's ok, mostly. Anything I find for under $30, it doesn't like. Unless it does. That's bad news for me, as I don't have a huge stock of PLA. Right now I have a nearly new reel on the Tink, an almost-done reel on the Finder, and one new reel in reserve. That was also a bargain, and claims to be biodegradable, so I'm not betting on it working in the Tink at all. Then again, with the Chest plate all but done, I only have the toe tips to print - maybe the shoulders? And my eldest kid's boyfriend is hoping to get my help building lightsaber hilts too.
One month to go until I have to have this kit ready for Mrs Dim to wear to Fan Expo Vancouver. Still have to get the dalek ready too, and Tiny Weasel's Hollow Knight Cosplay. Why not take on lightsaber hilts too?
One month to go until I have to have this kit ready for Mrs Dim to wear to Fan Expo Vancouver. Still have to get the dalek ready too, and Tiny Weasel's Hollow Knight Cosplay. Why not take on lightsaber hilts too?
Dtrasler
Sr Member
Anyone who bet on "spraying it badly when I should have done at least two more coats of spot putty and a lot more sanding", please give yourselves a prize.

But don't worry, I'm not done. I've already sprayed two more coats of paint on top of this. Two of the paints reacted badly, so I pretty much need to sand the whole thing off and start over......Once again, I prove the rule that cutting corners does not save time, without actually learning anything.
But don't worry, I'm not done. I've already sprayed two more coats of paint on top of this. Two of the paints reacted badly, so I pretty much need to sand the whole thing off and start over......Once again, I prove the rule that cutting corners does not save time, without actually learning anything.
Dtrasler
Sr Member
Sanded it right down. Applied spot putty. Went away and did other things. Then this morning, sprayed it black again.

Obviously still had issues. Sanded it down a bit more.Applied bronze paint again, but with a lighter touch this time...

You can still see some of the seams, but my thinking is this: no one is expecting me to have forged this from beskar, and I have small beds on both my printers. That fact that we got this far is a tremendous success. And, using a sentence I really never thought I'd need, today I hemmed the cut-down bearskin Christmas tree skirt to use as a wookiee-pelt shrug.
Obviously still had issues. Sanded it down a bit more.Applied bronze paint again, but with a lighter touch this time...
You can still see some of the seams, but my thinking is this: no one is expecting me to have forged this from beskar, and I have small beds on both my printers. That fact that we got this far is a tremendous success. And, using a sentence I really never thought I'd need, today I hemmed the cut-down bearskin Christmas tree skirt to use as a wookiee-pelt shrug.
Dtrasler
Sr Member
With the Tink still refusing to work, I had to cut the shoulder pieces in half to print on the Finder. Without supports, each one would be a 3 hour print, but that print would fail. With supports, they're nine hours for each half. 36 hours to print two epaulettes. Still, I refuse to be down cast, as these are almost the last bits I will need to print for this outfit. There are still the toe caps, but I need to adjust the models first - they have a piece across the underneath, that would sit under the shoe. That makes no sense to me, but I can't remove it in the slicing program I have. I'll have to load the model into Blender and try and adjust the mesh. I have done this before, and it did not end well.

Dtrasler
Sr Member
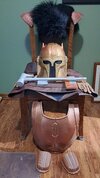
OK, here's what we got so far:
A helmet, a chestplate, two shoulders, a hammer and one toe cap. I also have the wookiee shrug, not pictured because I don't keep it in the workshop.

I have one more toe piece to print, but it takes nine hours, and I have a request for a lightsaber print to take care of first. Once that's done, I think I'm finished with the printing part (the back plate isn't going to make it, I don't think - too many parts if I print it on the Finder, and the Tink is mothballed for the moment because it makes me angry.) Trouble is, the next part is all needlework really - Mrs Dim is planning on wearing jeans, rather than a jump suit (which is good, because we don't have one, or a budget to get one.) I have a vague plan for modding a top I have to use as her undergarment for the top half. Might work, might not. But then I have to actually MAKE the skirt. I have a lot of pleather, bought from Fabricana, and another vague idea that might work out, if I can get my head around the pattern I have to make.
On the plus side, the dalek is sorted and ready to roll - he speaks, he lights up, he fires compressed air through his gun.... We are going to be a hit!
A helmet, a chestplate, two shoulders, a hammer and one toe cap. I also have the wookiee shrug, not pictured because I don't keep it in the workshop.
I have one more toe piece to print, but it takes nine hours, and I have a request for a lightsaber print to take care of first. Once that's done, I think I'm finished with the printing part (the back plate isn't going to make it, I don't think - too many parts if I print it on the Finder, and the Tink is mothballed for the moment because it makes me angry.) Trouble is, the next part is all needlework really - Mrs Dim is planning on wearing jeans, rather than a jump suit (which is good, because we don't have one, or a budget to get one.) I have a vague plan for modding a top I have to use as her undergarment for the top half. Might work, might not. But then I have to actually MAKE the skirt. I have a lot of pleather, bought from Fabricana, and another vague idea that might work out, if I can get my head around the pattern I have to make.
On the plus side, the dalek is sorted and ready to roll - he speaks, he lights up, he fires compressed air through his gun.... We are going to be a hit!
Dtrasler
Sr Member
Got the last toe cap printed and ran the apron/skirt up in an evening. It's mostly guesswork and improvisation, and there's another part to make before it's wearable, but I'm happy with it.

Given the number of shortcuts and "That'll do" issues in this build, I have a feeling the whole thing is going to end up a bit like that meme that was going around social media in October - the Spirit Halloween costume thing? This one would be "Space Blacksmith". But I'm also keeping in mind that Mrs Dim is still recovering from her stroke, and may not be up to attending FanExpo at all, let alone in costume. If she is, it'll be there, if not, then it's ready for whenever or just a useful learning opportunity.
That sounds remarkably adult for me. Is this....maturity?
Dtrasler
Sr Member
Ok, I think I'm actually done with sewing, and I have a week in hand! Next Saturday we go for a look around at the FanExpo, and next Sunday (the 19th Feb) we take Derek along. I don't know which of those days Mrs Dim is planning to change her mind and not wear this outfit, but whichever one it is, the outfit will be ready for rejection!
Attachments
Dtrasler
Sr Member
We're ready for FanExpo, though Mrs Dim won't actually be attending until the Sunday. Today she was good enough to try on the full rig for the first time:

It looks pretty good, even if it wouldn't meet the 501st standards. We're not going to use the toe armour, since it wouldn't stay in place and she's keener on comfort than accuracy. I'm ridiculously happy with how it all turned out, even if I might wish for helmet fans, mic systems and actually finishing the surfacing on the helmet before painting it... Ah well.
If I really want to work hard on a suit, I can drag my Hunter from Bad Batch armour out of mothballs and try and get it to actually stay together.
Fantastic!
Dtrasler
Sr Member
Thank you!Fantastic!
Dtrasler
Sr Member
I really thought it was going to be longer before i started my next project. For one thing, one of my two 3d printers is practically useless, and it's the one with the larger print bed.
But the voices in my head started up again, dismayed that my budget built Stormie helmet got a bit smushed when the car door closed on it. WHy didn't I 3d print a "proper" one, the voices wanted to know.
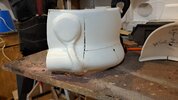
I have no idea, so I started in. The first piece I printed was part of the dome, and to get it to fit on the small machine, I cut it into four. I didn't pay attention when I was doing it, so I'm pretty sure I have reassembled it incorrectly. I put it to one side.
Printing all the other pieces has taken about two weeks.
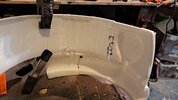
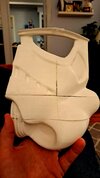
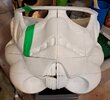
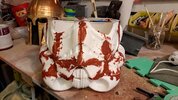
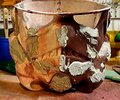
So I'm hoping to complete maintenance on the bigger machine in the next couple of days and have a second go at printing the dome pieces intact. Menwhile, I shall attempt to restrict myself to sanding and filling, and NOT reaching for the paint can. Yes, I've already done that once, and it was a silly idea.
But the voices in my head started up again, dismayed that my budget built Stormie helmet got a bit smushed when the car door closed on it. WHy didn't I 3d print a "proper" one, the voices wanted to know.
I have no idea, so I started in. The first piece I printed was part of the dome, and to get it to fit on the small machine, I cut it into four. I didn't pay attention when I was doing it, so I'm pretty sure I have reassembled it incorrectly. I put it to one side.
Printing all the other pieces has taken about two weeks.


So I'm hoping to complete maintenance on the bigger machine in the next couple of days and have a second go at printing the dome pieces intact. Menwhile, I shall attempt to restrict myself to sanding and filling, and NOT reaching for the paint can. Yes, I've already done that once, and it was a silly idea.
Attachments
Dtrasler
Sr Member
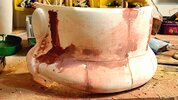
Having got the lower half together and pretty smooth, I'm working on the dome. I had to do some maintenance on the Tink to fix a stuttering problem, but now I have the whole thing printed. Only three of the four parts in place, and to get them to stay (and fill in some gaps) I had to use an old soldering iron and spare filament to "weld" the pieces in place. Just means more ugly seams to sand and fill....

Dtrasler
Sr Member
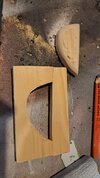
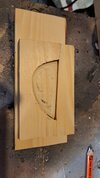
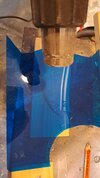
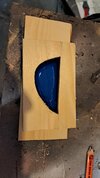
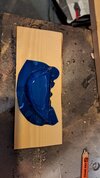
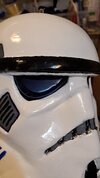
I've worked really hard on this (for one of my projects) and the results are nearly visible. But what I'm proudest of right now is that I sat and thought about how to make the eye lenses, then actually went and did that. The first one wasn't right, so I tried again, and I like this one. There's nothing revolutionary in the method I chose, just that I actually pursued it myself, and followed through with it.


Similar threads
- Replies
- 19
- Views
- 1,709
- Replies
- 0
- Views
- 186
- Replies
- 33
- Views
- 2,087
- Replies
- 5
- Views
- 617
- Replies
- 9
- Views
- 1,087

