You are using an out of date browser. It may not display this or other websites correctly.
You should upgrade or use an alternative browser.
You should upgrade or use an alternative browser.
Kit of the USS Daedalus NCC-129?
- Thread starter SteveNeill
- Start date
- Status
- Not open for further replies.

SteveNeill
Sr Member
Thanks Richard but that's just pushed together. The parts fit really tight but I still think I need to place some base support in there across the nacelles and down the pylons to the secondary hull. Problem is space or lack of it at this size.
Steve
Steve
SteveNeill
Sr Member
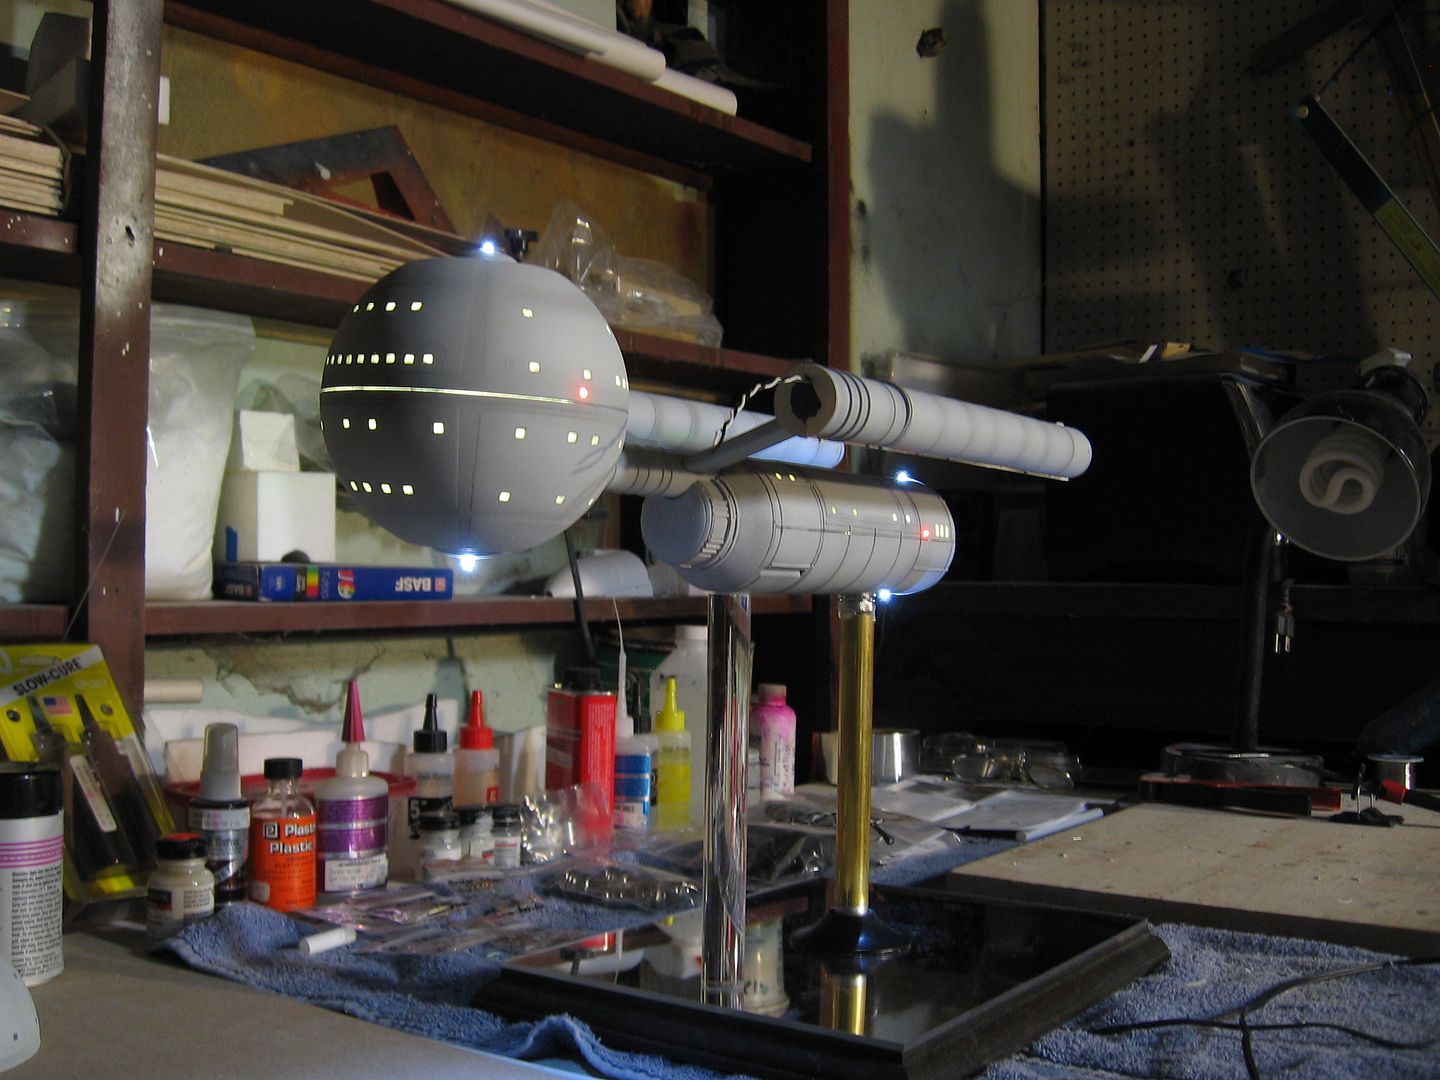
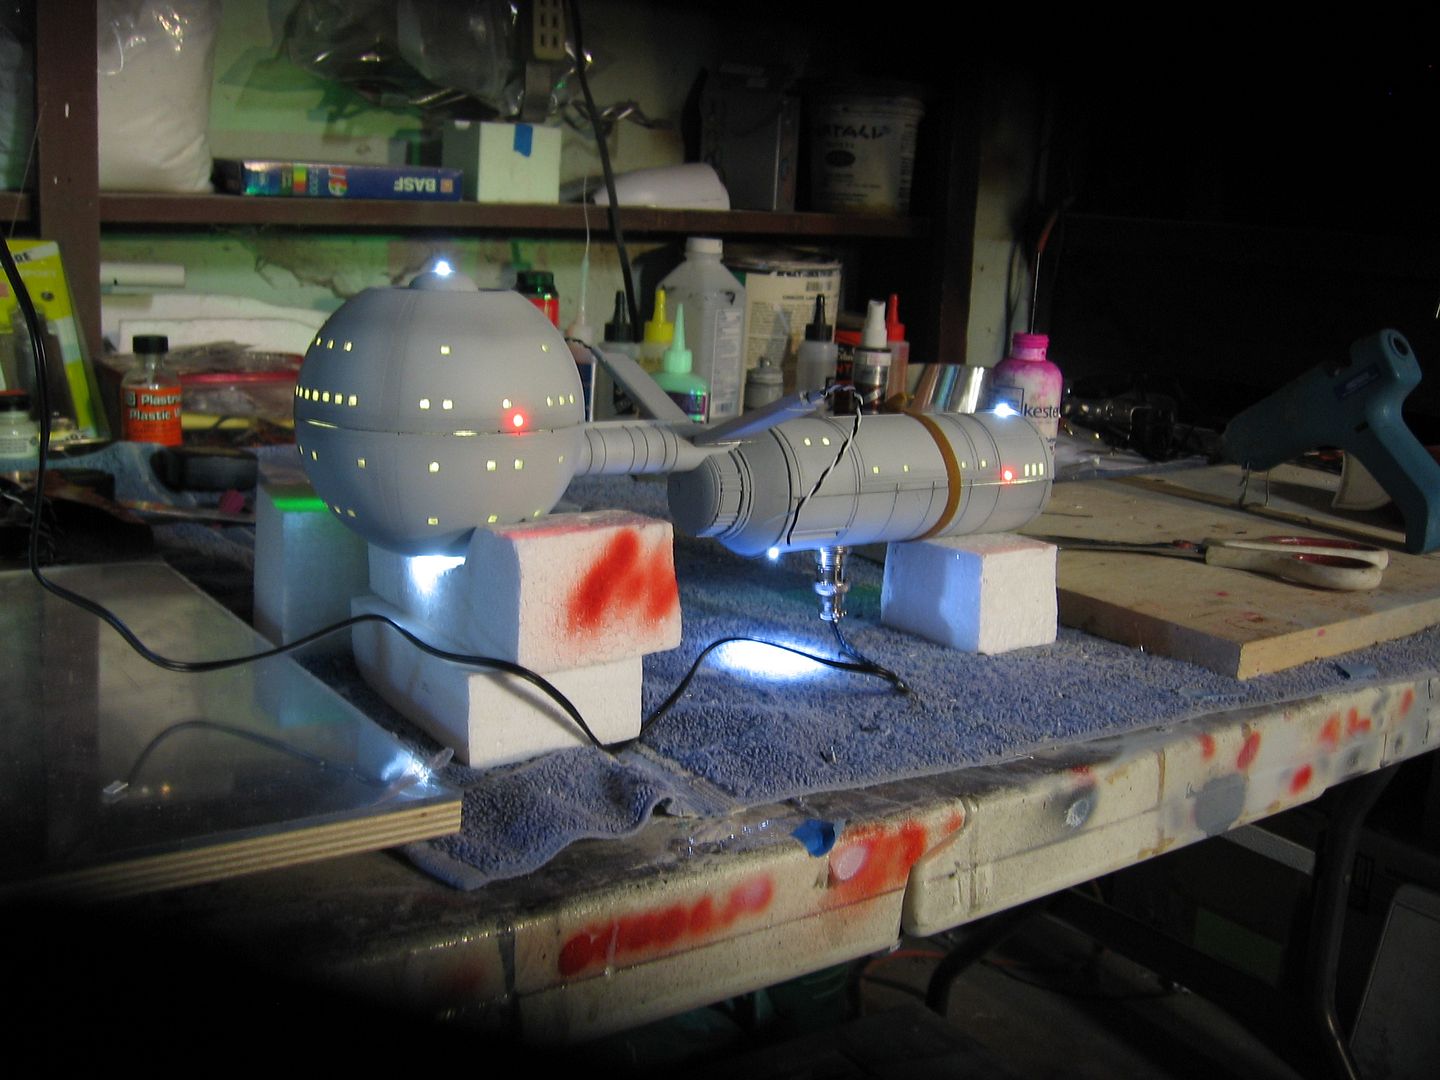
So I got one of them wired up and lighted today. But dummy here in his rush drilled the pole location in the wrong spot! It should have been just behind the deflector area. I thought I did but when I went to assemble the secondary hull the panel lines didn’t match! OOPS! So this first model will be mine. Thus the clear pole for support. Check and check again because the fore and aft look about the same.
I still have to block some leaks and seam the ball. Nacelles RBG LEDS are inbound. Decals are inbound.
The Voodoofx lighting kit is awesome! Randy made these up special and they will be available from him.
Tomorrow I’ll construct Doug’s and get it lighted too.
More tomorrow.
Steve

And here is the video:
YouTube - 1/350 Daedalus lighting test‏
I still have to block some leaks and seam the ball. Nacelles RBG LEDS are inbound. Decals are inbound.
The Voodoofx lighting kit is awesome! Randy made these up special and they will be available from him.
Tomorrow I’ll construct Doug’s and get it lighted too.
More tomorrow.
Steve
And here is the video:
YouTube - 1/350 Daedalus lighting test‏
asemblyrequired
Well-Known Member
continued clean work. amazing in a short amount of time.
-James
-James
falcondesigns
Well-Known Member
Saw this on you tube.............great work!
SteveNeill
Sr Member
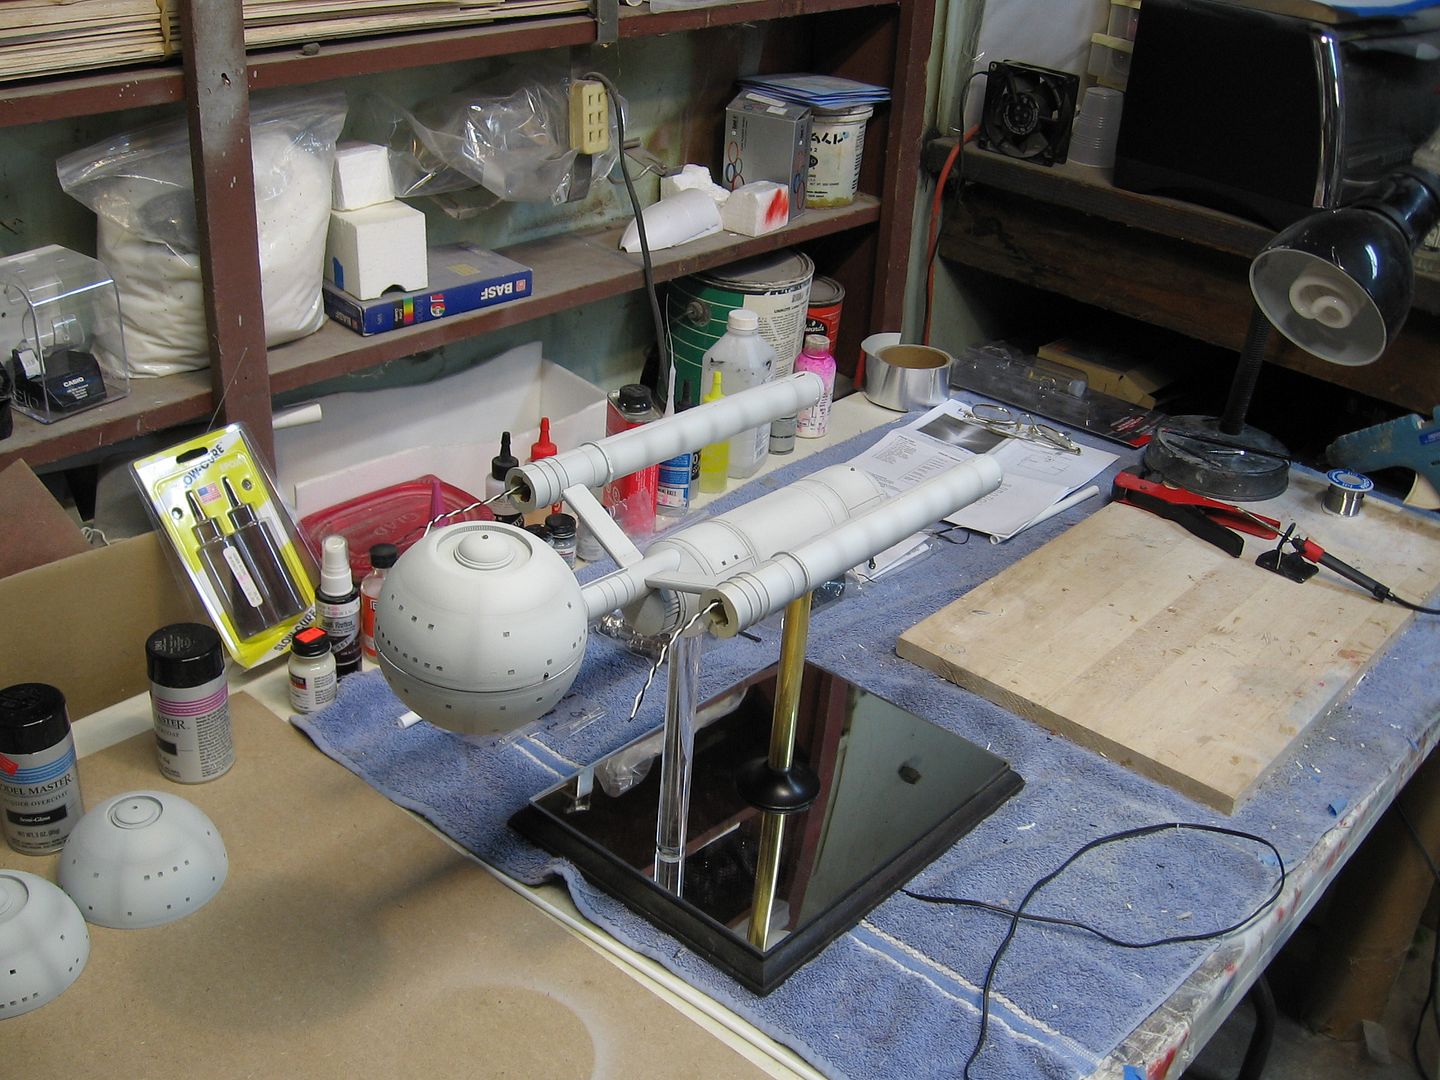
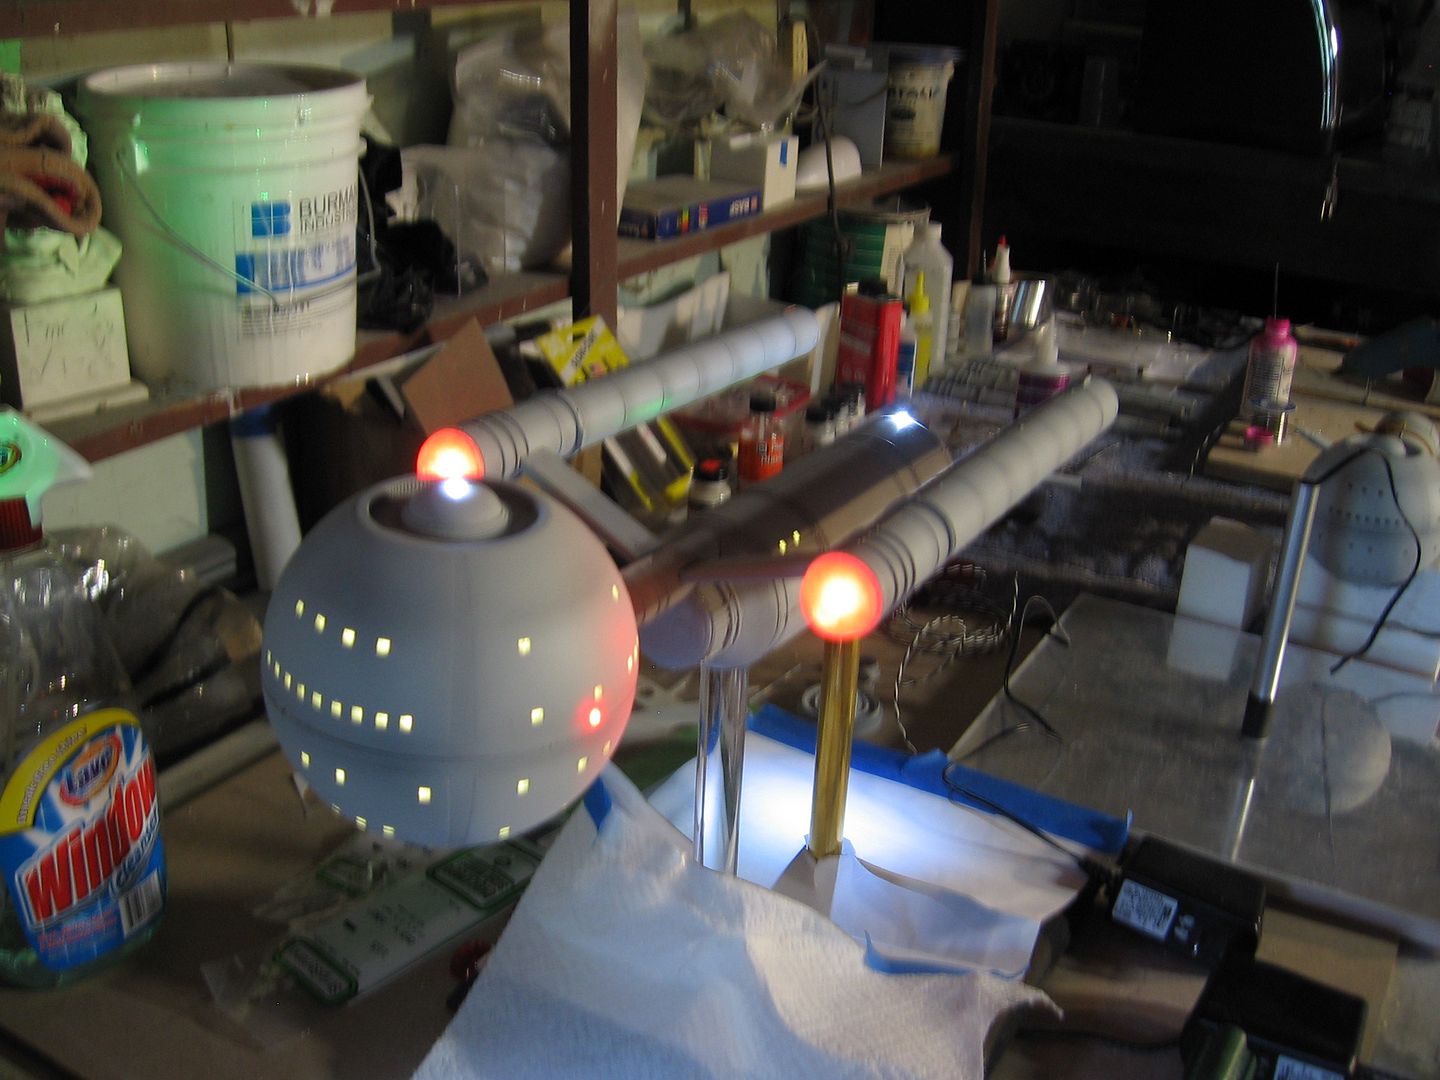
Today I got Doug’s model all wired up. It was a lot easier after doing the first one. Got Doug’s base made and the pole made.
I got the RGB color changing LEDs today from Randy. They work nice but don’t look anything like the TOS bussards. And until I can raise some serious money to have Randy design me a proper board they will have to do. I made the domes removable to experiment later with a few ideas for them.
Tomorrow I can finish them off and close the seams. Clear coat them for the decals which should be here early this week and both will be done.
I’ll do a proper video then. A little green screen and some CGI backgrounds. I really pleased at the assembly of the second. They build well.
Steve
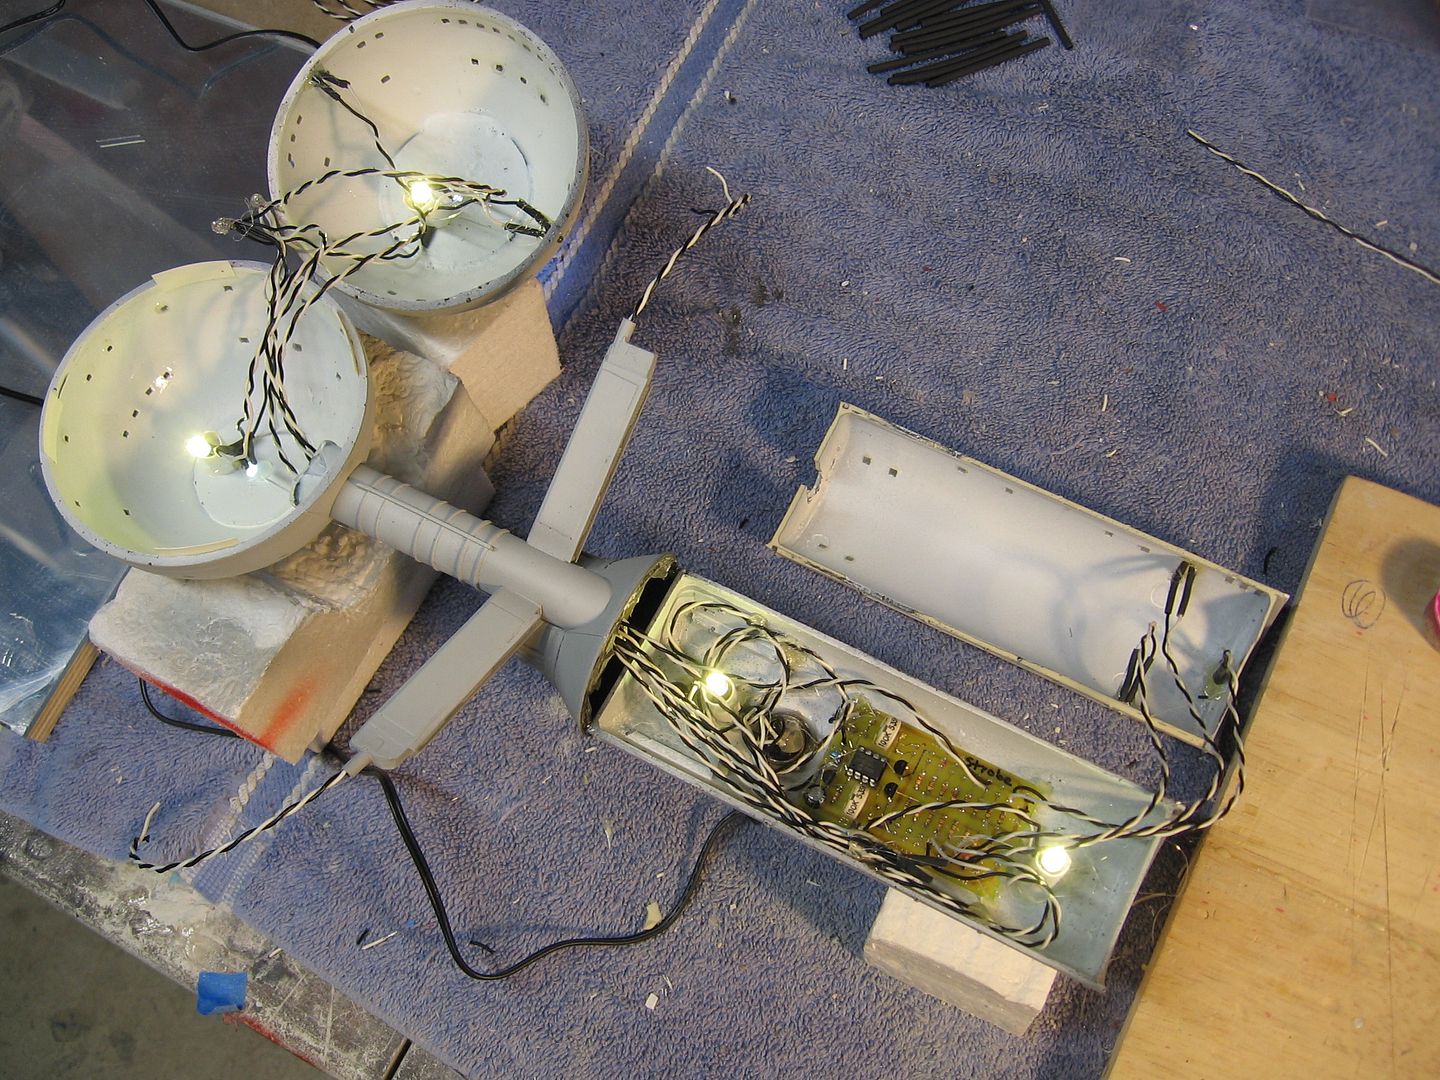
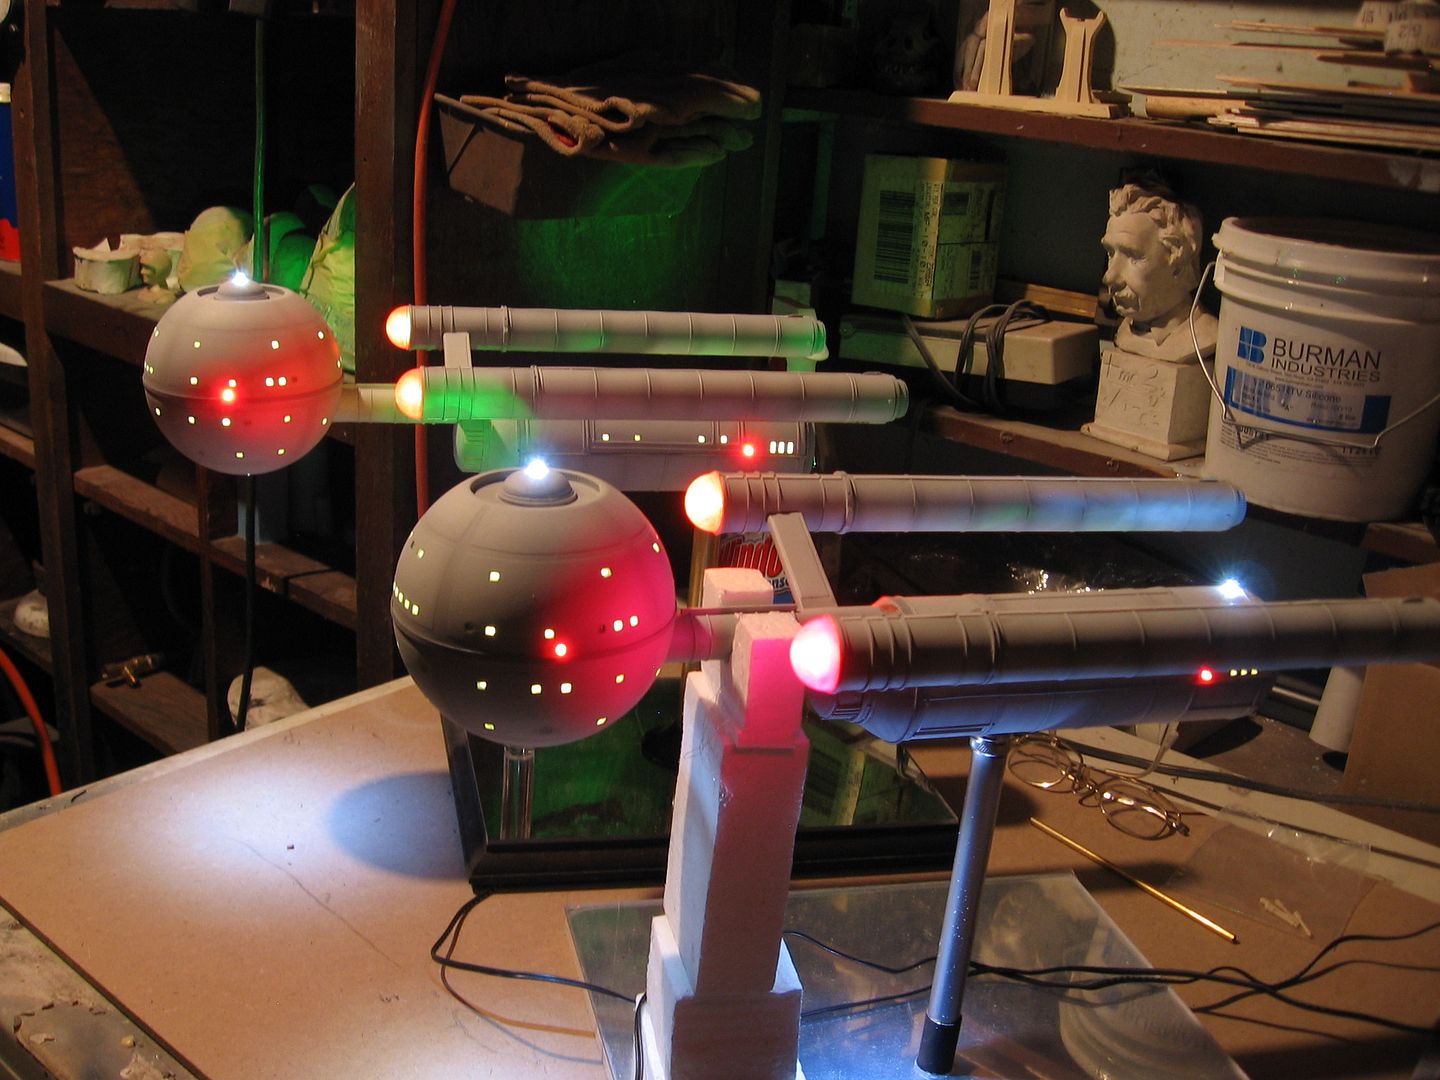
Here are the internals of the lighting with the VoodooFX boards.
2 Daedalus models under construction.
Doug's model. Getting there.


And a sequence of the Bussards color change. They turn many ore colors than seen here and who's to know what they might have looked like for sure.
I got the RGB color changing LEDs today from Randy. They work nice but don’t look anything like the TOS bussards. And until I can raise some serious money to have Randy design me a proper board they will have to do. I made the domes removable to experiment later with a few ideas for them.
Tomorrow I can finish them off and close the seams. Clear coat them for the decals which should be here early this week and both will be done.
I’ll do a proper video then. A little green screen and some CGI backgrounds. I really pleased at the assembly of the second. They build well.
Steve
Here are the internals of the lighting with the VoodooFX boards.
2 Daedalus models under construction.
Doug's model. Getting there.
And a sequence of the Bussards color change. They turn many ore colors than seen here and who's to know what they might have looked like for sure.
SteveNeill
Sr Member
And thanks guys for all the kind comments!
Steve
Steve
SmilingOtter
Master Member
I'm not really in love with the color-changing bussard lights, but depending on how fast they cycle, I could probably get used to it.
Other than that it looks top notch, and I can't wait to see it with the decals. I know Doug will flip when he gets it.
Other than that it looks top notch, and I can't wait to see it with the decals. I know Doug will flip when he gets it.
SteveNeill
Sr Member
Thanks guys and that's funny about the DS!
As for the Bussards you guys building the kit can do what ever you want. If I get some more work soon I'll have Randy make me up a custom board for it. But the R&D will cost.
In time. Got to get the Big E done next.
Steve
As for the Bussards you guys building the kit can do what ever you want. If I get some more work soon I'll have Randy make me up a custom board for it. But the R&D will cost.
In time. Got to get the Big E done next.
Steve
Afrakkking amazing. I sometimes wondered if the NX-01 Enterprise had been replaced by the Daedalus, would it have worked? I know I like the Frontier look, but damn Steve, talk about bringing it to the table and serving it up nice and hot. The model is beautiful, I wish I had any kind of knowledge to put together a model as cool as that. Afrakkking amazing.--trying to keep it clean. Thanks for making a dream a reality.
Hope your wife is doing well.
Hope your wife is doing well.
Aztek Dummy
Well-Known Member
Steve,
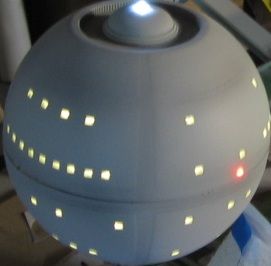
I'm relieved to see the formation lights on the ball are actually above the centerline on the top piece.
Getting a nice, clean join between the two halves will be a lot easier if you don't also have to worry about keying in the leds at the same time
I'm relieved to see the formation lights on the ball are actually above the centerline on the top piece.
Getting a nice, clean join between the two halves will be a lot easier if you don't also have to worry about keying in the leds at the same time
SteveNeill
Sr Member
SteveNeill
Sr Member
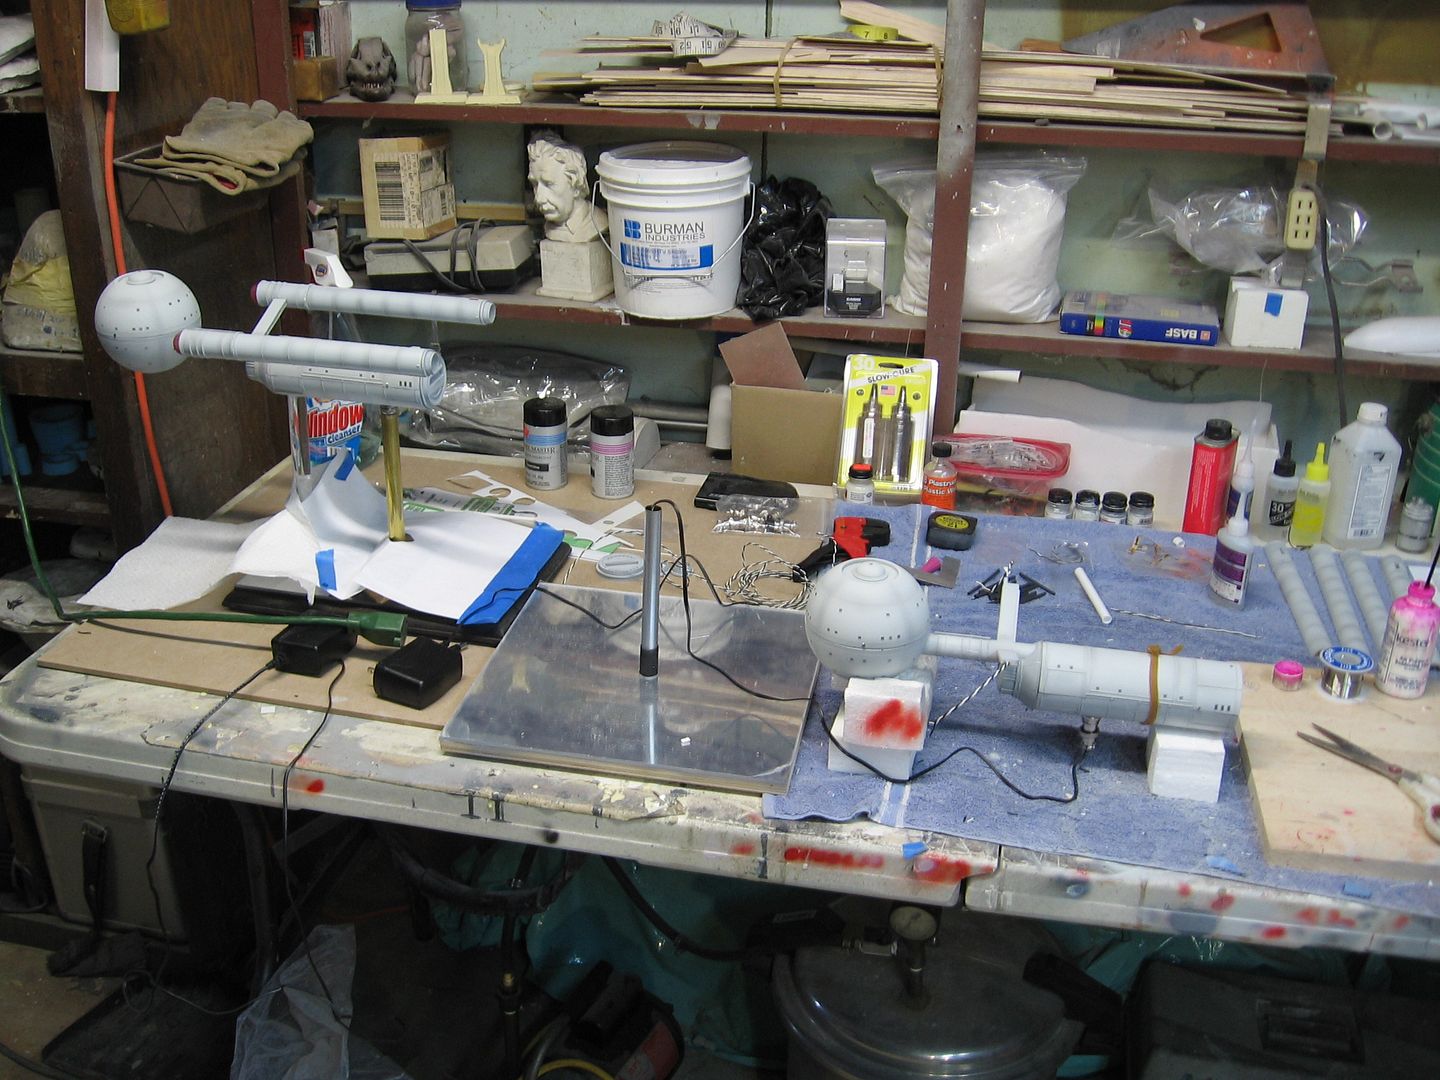
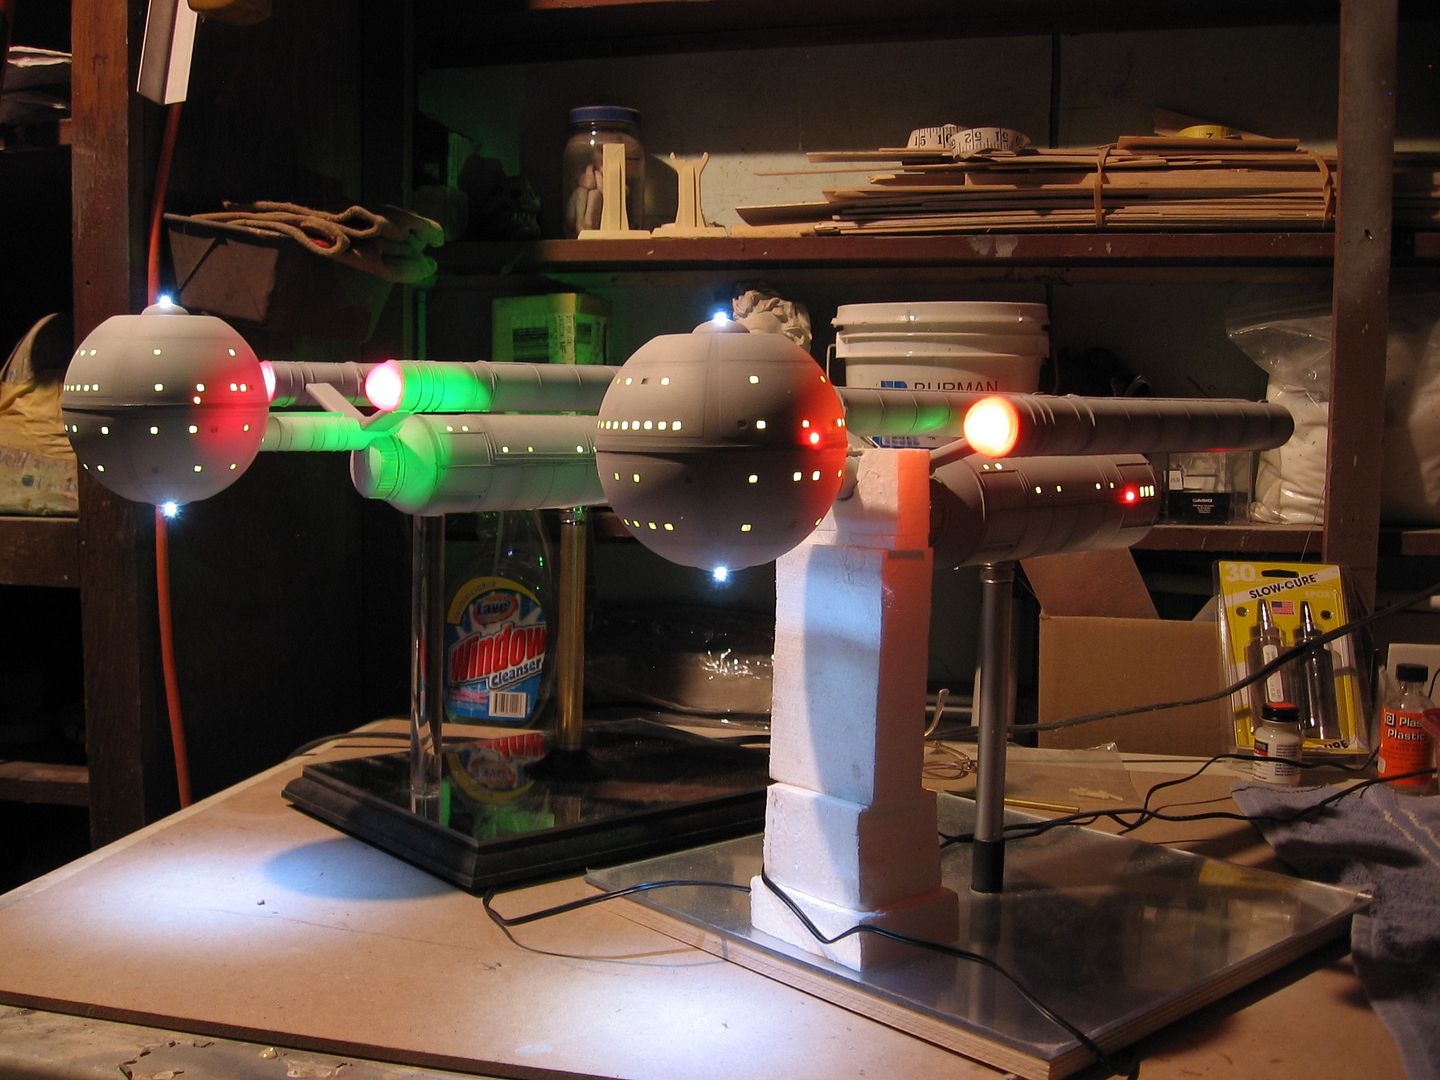
Both girls ready for final paint and trim-decals. All light leaks are plugged. The pylons have brass tubing running through them and for some reason I can't explain there's a slight twist to them. So I mounted the nacelles and glued them. Took a heat gun to them and gave them a twist back. Once it cooled they were perfect.
I also placed a brass tube the length of the Nacelle that attach's to the tube inside the plyon with a spot of solder. Additionally I place another running from the main ball through the neck and back to the secondary hull so hopefully over time gravity will not work on it.
Tomorrow final paint and clear.
Steve
SteveNeill
Sr Member
Got the bussard collector effect solved. Video soon. I LIKE IT!!!
Steve
Steve
Onigiri
Sr Member
I was thinking the same thing. Is there a way to scale down the brightness. Can you imagine looking out that window just above those nav markers? Arghhhhhh! Im BLIND! lol
As they stand in those last two pictures, those lights look really bright... should they be bright enough to reflect that much light off themselves (and each other?).. scaled up, that has to be the equivalent of 10KW spot light or something...? :cool
- Status
- Not open for further replies.
Similar threads
- Replies
- 36
- Views
- 4,982
- Replies
- 251
- Views
- 40,045
- Replies
- 100
- Views
- 16,171
- Replies
- 2
- Views
- 1,800