Iron Man MK 3/ Fem. Capt America WIP (Couples Cosplay)

Doomster,
I couldn't help itm but I need to comment here about the eyebrow.

I have posted in other thread the same problem that you had.
http://www.therpf.com/attachments/f24/first-time-foam-iron-man-project-eyebrow.jpg-105307d1343388426

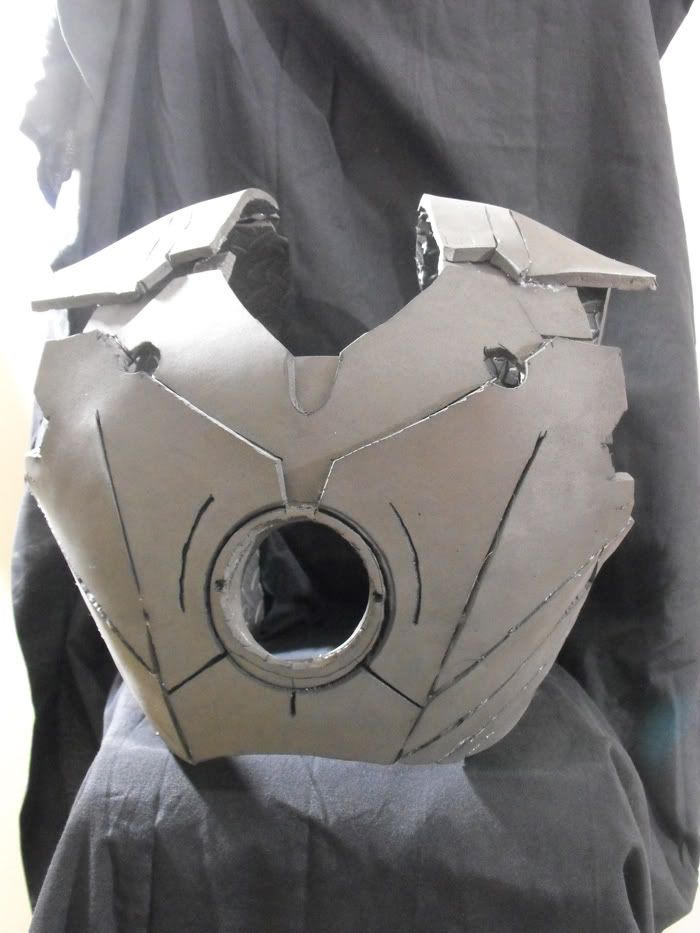
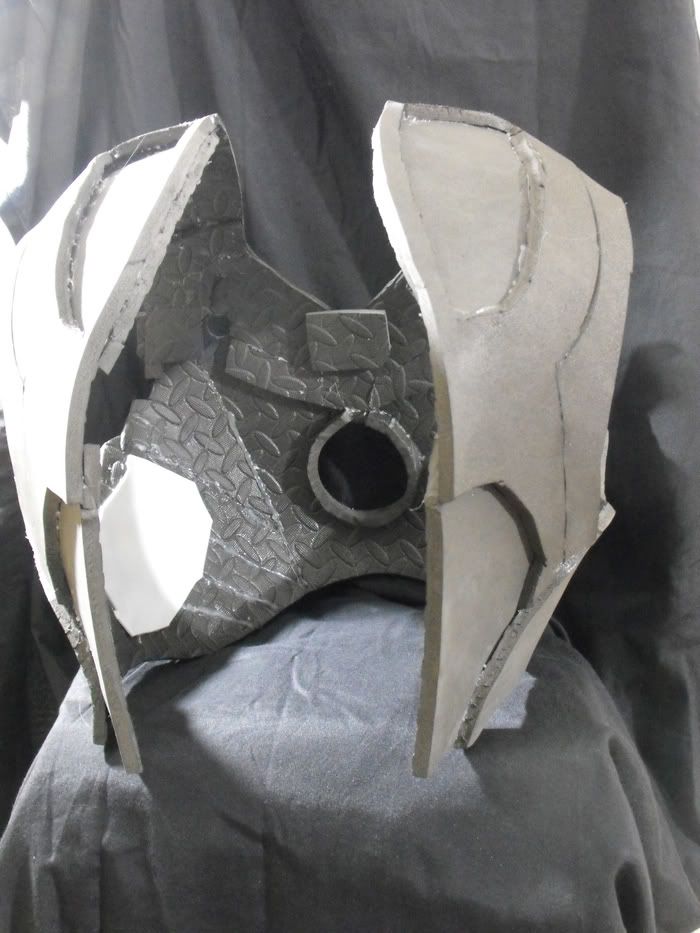
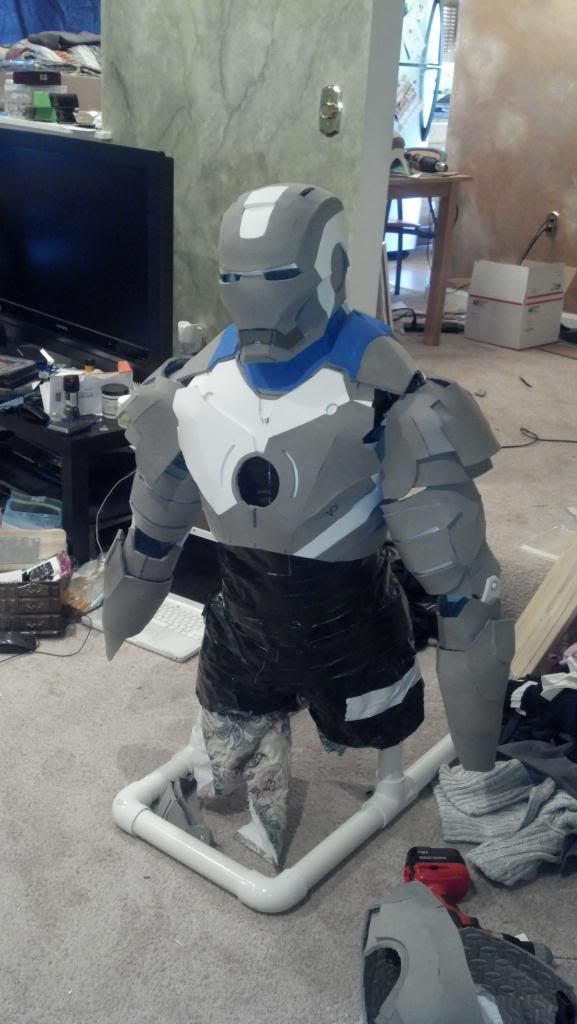
Do I have my eyes wrong, but seems that the lower faceplate a bit too short?

Nice bending on the lower faceplate, should've done the same for the upper one.

Thanks for the link. Your tips for beginners is definitely helpful information, as always. I appreciate the helpful comments!

I was looking at the brow and I did think it should be at an angle, but I guess I forgot to do it. I'm using JF Custom's files and I cut it with the paper attached to the foam, so I think that the face plate is the right size. I'm going to try and bend the upper plate today. But I think I'm going to up the scale by 20%, so hopefully I can learn a few things from the one I'm making now.
 
heres the dl link.

captain-america-shield-24_inch-jimmy da moose-cama900-unfold.pdo - 4shared.com - online file sharing and storage - download

and heres the thread it was in for pics/info

Jimmy Da Moose presents- Captain America's Shield!!

you can see in the first few pics it looks huge, because it is. the comics state caps shield is 30in, so thats what he built it at, but the avengers/TFA model is only 25in, so he scaled it down to 24in, which is relatively accurate since many of us arent 6ft like chris evans. ive seen many shield pep files and this is the best i could find. there was one even better made by Fierfek but i couldnt find the link, just a pic of his model from another thread. also the link i gave you is great because the parts are small so youll save on paper. prior files ive seen were complete rings so the entire shield would take up 50 pages.

Thanks for the additional info. It's a great help. I swung over there and took a look at the files, the fact that it saves paper is great. Do you have pictures of your shield?
 
I'm making a new helmet that's bigger than the original. It should fit my electronics and hair. I'm getting kind of down on this project. I feel like I'm making a lot of mistakes but I'm not a quitter, so I can't help but keep doing it until I get a good suit. I guess practice makes perfect.
 
oh i didnt make it haha, just downloaded the file. i think i will build one though, i have a lot of experience with bondo from when i painted cars. however i did see here

http://www.therpf.com/f24/my-own-captain-america-build-thread-155151/

that amazon has steel saucers, so i will most likely just sand the paint off one of these babys. ill weld my own handle to it or something, temporarily affix it to my fan so it spins like a pottery maker, so i can etch grooves in and give it that brushed movie style glare, similar to the bottom of cookware
 
I don't think that I discussed this in an earlier post. Here are some photos of
Hot Toys gunmetal grey Iron Man, which is what I'm aiming for. I like this edition's gun metal look because it's one of my favorite colors. I want to give it more of a beat-up, war-torn look, maybe even a mud type, rusty effect.
htironmanmkiiitk03.jpg

htironmanmkiiitk04.jpg


ETA: I got these pictures from the showcase forum from BLU Falcon post.

Holy crap I love that suit color!! Mate grey .. very nice!! BUT it doesn't have accurate bolts on his chest! hahaha :D

Keep up the good work Doomster! :thumbsup
 
Holy crap I love that suit color!! Mate grey .. very nice!! BUT it doesn't have accurate bolts on his chest! hahaha :D

Keep up the good work Doomster! :thumbsup

Hahaha, good eyes, Big Turc. You're absolutely right. That's funny. Now I'm freaking out about the Mark III that I purchased. Well, at least you won't do me wrong like Hot Toys did me. lol.

Thanks for stopping by with encouragement, it got my spirits up; I think I got my second wind.
 
Hi there, your build looks great! I saw you got the foam rolls at amazon, could you provide a link to it? I've been trying to find one for forever. That would help me tons! :D thanks
 
Hi there, your build looks great! I saw you got the foam rolls at amazon, could you provide a link to it? I've been trying to find one for forever. That would help me tons! :D thanks

I actually bought my foam at a store called Ollie's Bargain Outlet, for $17.99 a 36" x 48" roll. I really lucked out on that. I had to return the stuff I bought for the original card stock build through Amazon. I did find some foam that may be similar for sale on Amazon:

Amazon.com: anti fatigue mat foam: Sports & Outdoors

Amazon.com: We Sell Mats Interlocking Anti-Fatigue EVA Foam Floor Mat: Sports & Outdoors

*Note: I am new to this, but found several threads saying that they use this type of foam.
 
Thought I would check in and let everyone know I'm still working on my suit. My summer classes have ended and our area just recovered from a power outage, so back to building.

I have finally resolved the sizing issues which have been plaguing me. My RL friend (hateyou2-- also on rpf) advised me on a better way to measure. It seems the pepakura designer doesn't take into account curves. When you measure yourself, you have to measure from point A to point B, in a straight line, without bending the tape measure around your body. Using this method, I finally got a chest piece that fit (finally, on the fourth attempt)!
 
I finally finished the chest/ back piece. It looks pretty good so far. I read that someone used a soldering iron for the details (I'm sorry, I don't remember which thread, or who said it). I tried that technique and I'm really happy with it. There are still some places which I need to fix-- like the shoulder which needs to be more angled and do more bending to get a more rounded shape. But I have the spine done, and the flaps done by the end of the night. Tomorrow I am going to start hardening and sanding so that I can add even more detail when that is finished. Now I'm just contemplating if I should connect the spine now and dremel it after hardening or harden it separate and then add the spine.

I'm happy with how it turned out but I feel like it looks like junk compared to some people's on the RPF. After trying it the fourth time because of measurements, bloopers... I'm going to just say this is a keeper.

Back2.jpg

Back1.jpg
 
stick with it man! looks heavy duty n battle hardened as per the desired look.

Thanks, I was afraid that it was looking pretty bad. But the more I get into it, the more it starts to take form. I'm hoping that I can get it finished and make it look battle worn, not crap worn. The real tricky part will be the paint job, I think, so it looks worn, not poorly painted.
 
Status update: I've been busy with a lot of things, but things have slowed down recently. I've completed my chest, back, and spine, with half of the arms done. Hopefully the arms will be finished by the end of the day, and I'll upload some photos.
 
I am not dead... Between school, moving to a new house, and life in general, Iron Man got put on hold, but I'm back! I've been doing a speed build using JF Custom's files. I need to get everything done by this weekend, in time for the convention I'm going to.

Right now, I'm worried about the proportions. I keep going back and forth in my head about whether everything looks decent or some pieces are hideously over/under-sized.

2013-02-12_10-28-57_919.jpg

Excuse the mess; I've been up for nearly three days straight working on this.
 
Last edited:
Back
Top