I've made enough progress on this I think it's about time I share it with everyone!
Inspired by those before me, I had to have my own Captain America shield... Early this year I followed Valor's lead and made a budget shield using a Flexible Flyer steel saucer sled (like this one). I was very pleased with what I was able to come up with on such a small budget. My final tally came in under $100, which was the goal for me. Plus, it only took me two days to complete!
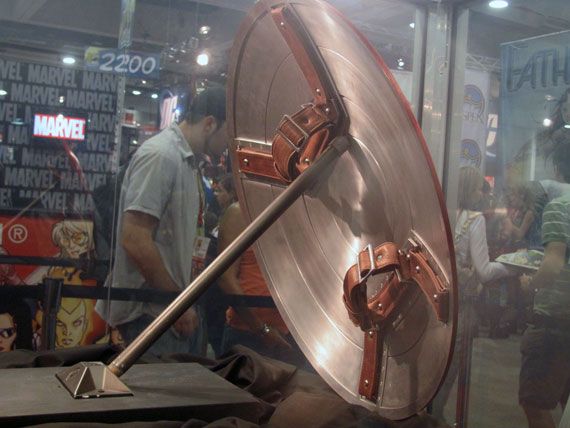
But that wasn't quite good enough for me... I knew however I would never be able to obtain one of high quality replicas that were available. Just not within my budget, especially with a newborn! So my wife and I made a deal. Any money I make off of my props, be it pieces I have made or acquired, or commissions I do, can go back into the collection in the way of "upgrades." :love
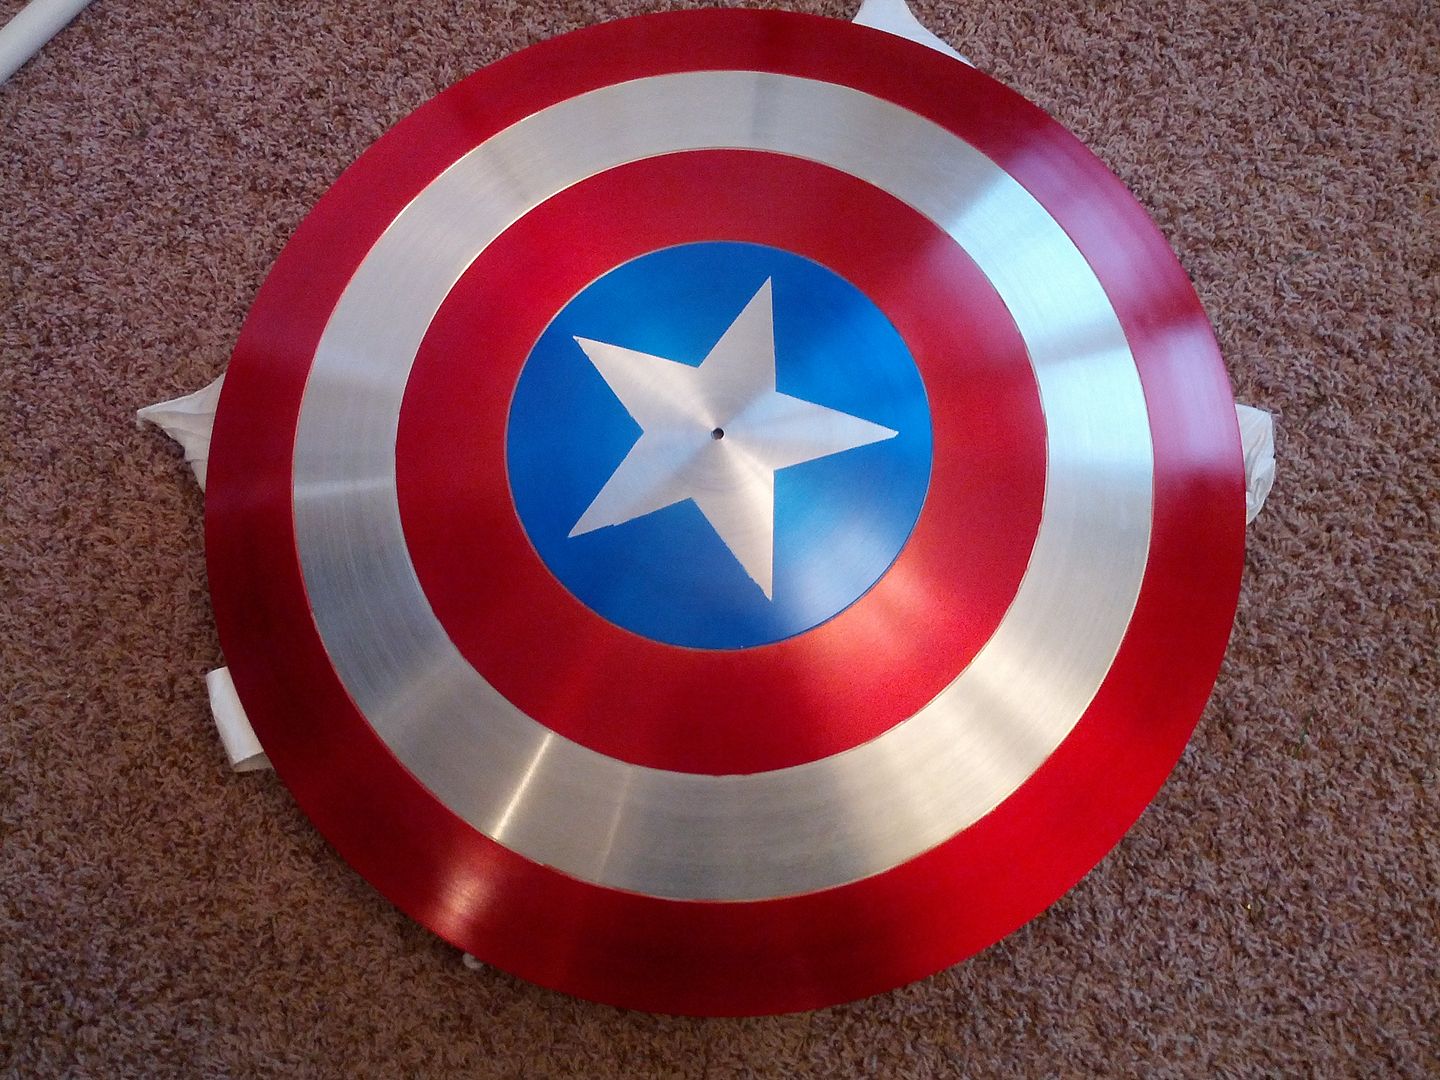
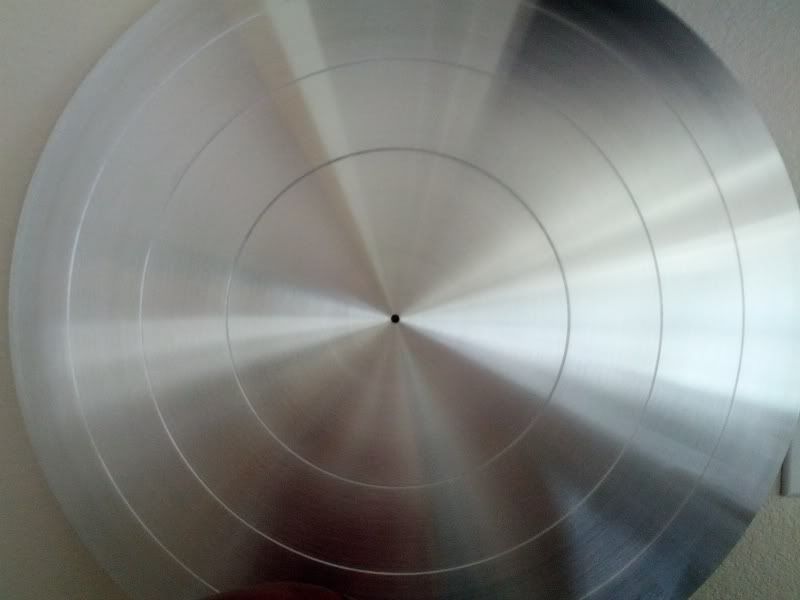
So I sold that first shield I made and used the money to fund this project. I bought one of the spun aluminum blanks from eBay (Accurate Metal Spinning in Miami)
I wanted the brackets and straps on the back to be a bit closer to screen accurate than my first attempt, so I drew up a quick sketch using Photoshop. The movie version has the brackets that angle in (which Valor does an amazing job with!), but also a ring that connects the two pieces together.
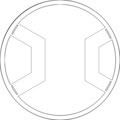
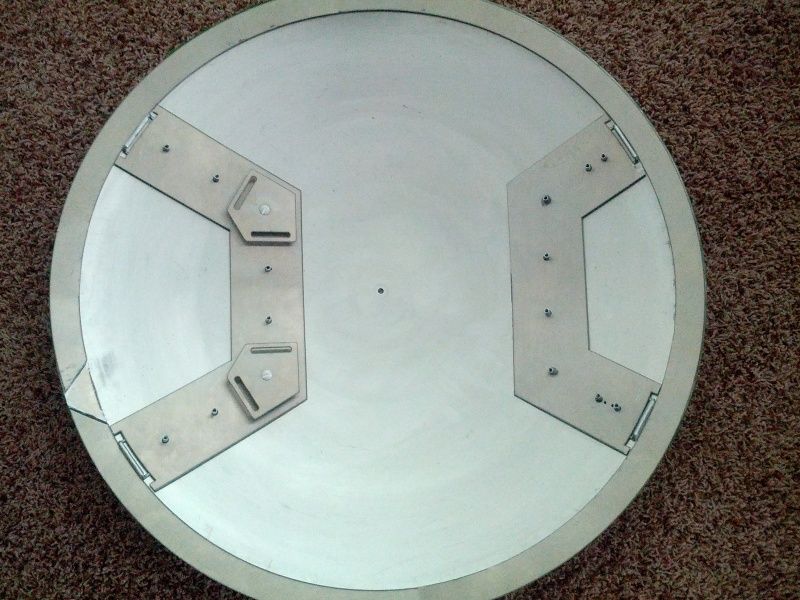
I was going to get the bracket water jet cut out of aluminum, so I needed to have my drawing converted to a vector drawing for the machine. Andrew (epilepticsquirrel) was nice enough to whip those up for me quickly (thanks again bud!) and I sent them over to my local cutter. A week later the pieces were ready for me to pick up:
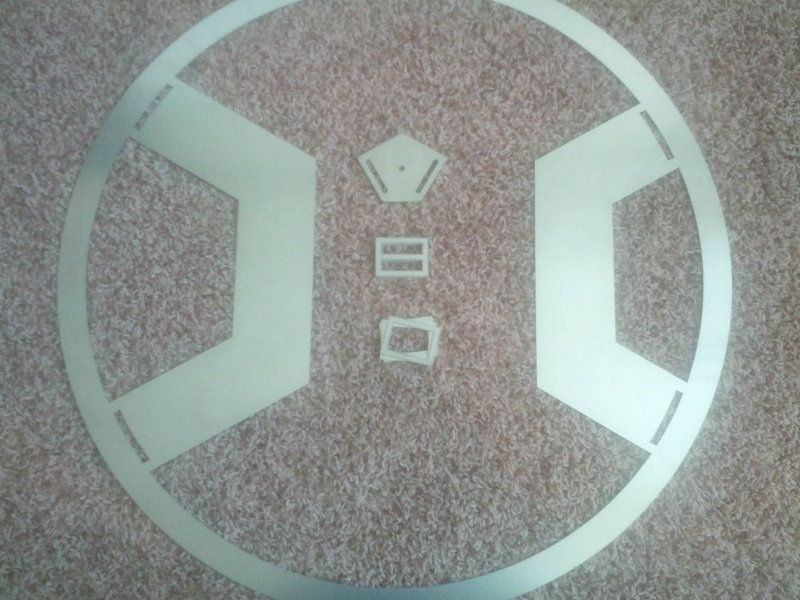
I also had the pentagonal clips, rectangular D's, and slide buckles cut out as well. The pieces looked great! Just need some slight filing around the edges to clean them up.
Now this is when I ran into some problems... I needed to figure out how to bend the piece to fit the concave shape of the back of the shield. I'm no metal worker, so this wasn't the easiest thing to do. After messing with it for a while, I was able to get the rough shape, but it just wasn't fitting like I thought it would. Turns out I was wrong on two counts here: when Chris made his brackets this way, he used a second spinning to cut the brackets out of so the bracket would already be perfectly shaped. Secondly, my measurements were slightly big, and the ring was about half an inch to big. I was never going to be able to get it to fit this way.
My solution was to separate the brackets from the ring, and cut the ring down a little in order to fit the perimeter of the shield properly. This also gave to more leeway in getting the pieces bent to shape properly. However, cutting the ring this way created tension in the piece, almost like a spring. So I had to get a little creative on attaching it to the shield.
I used 3M outdoor mounting tape (just as I did on my first shield) to secure the ring and brackets to the back. The first attempt didn't yield great results... Because of the tension I mentioned, the ring didn't want to stay in place, even after being clamped for 48 hours. The ring kept wanting to slide towards the center of the shield, instead of staying in place along the perimeter. So I created a keystone using the section of the ring I removed when cutting it down. Basically I cut the section into a trapezoid, and cut the ends of the ring section to match the angles. I secured the keystone in place first, and allowed the tape to set overnight ensuring it wouldn't slide under the pressure of the ring. Once that was set, I taped down the rest of the ring and clamped everything down for a few days.
At this point I can't obtain 100% screen accuracy, but I'm OK with that :thumbsup
A little filing around the edges will help blend the pieces together and make it a little less noticeable, but since it will just be on display nobody will pay attention to it. Now I could proceed with the rest of back!
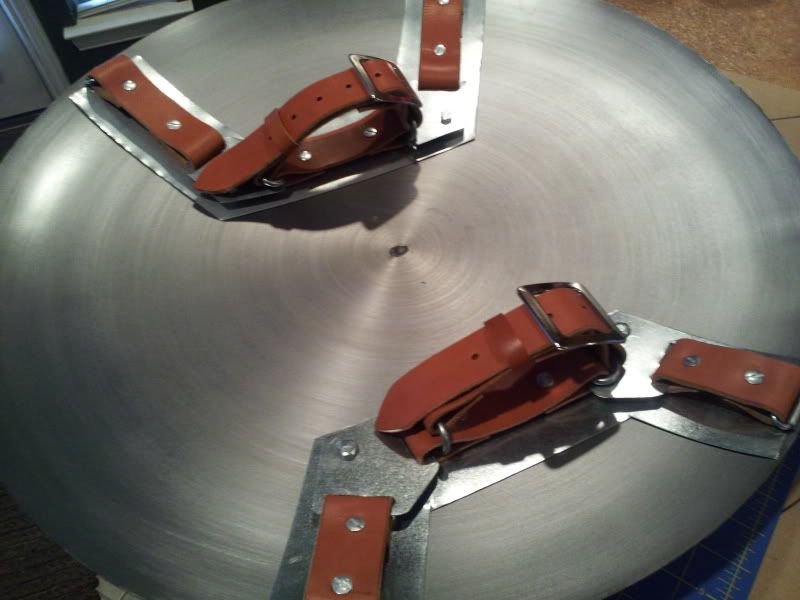
Before I attached the bracket pieces, I drilled holes to accept the screw posts I would be using for the leather straps and pentagonal clips. Once all the holes were drilled, I inserted the screw posts from the bottom and glued them in place using some epoxy. Once that was set, I added the adhesive tape to the brackets and secured them to the shield.
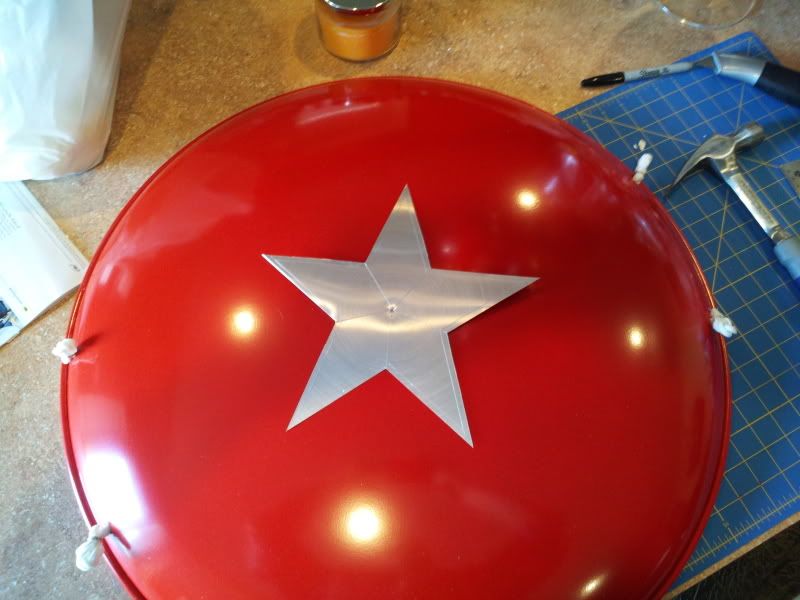
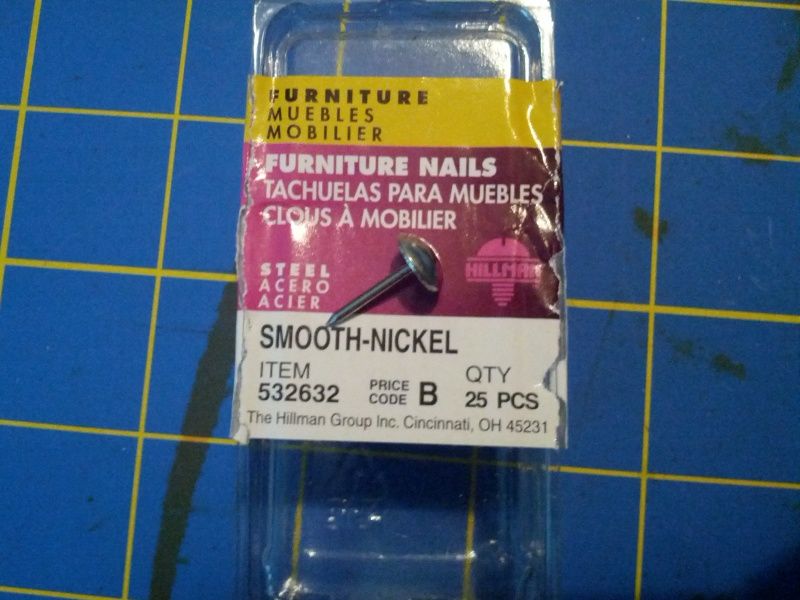
Next up was to add the rivet details around the brackets. To accomplish this I was going to use the same method used for the spun rivets on the stars: a small piece of aluminum rod inserted into the drill press. However, I had already attached the brackets so there was no way I would be able to go that route. I went to Lowe's looking around the hardware section to see what I could come up with, and found these: furniture tacks
I used my nail nippers and clipped the heads off them, all 48!
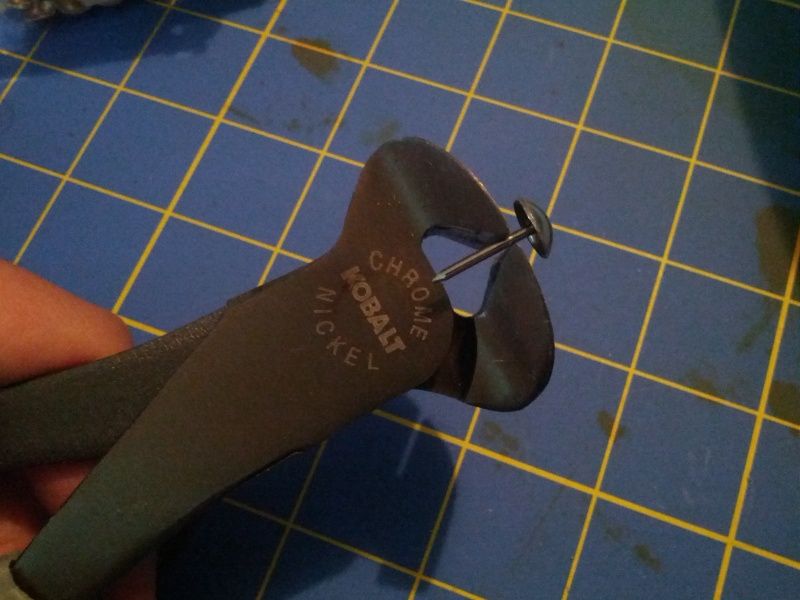
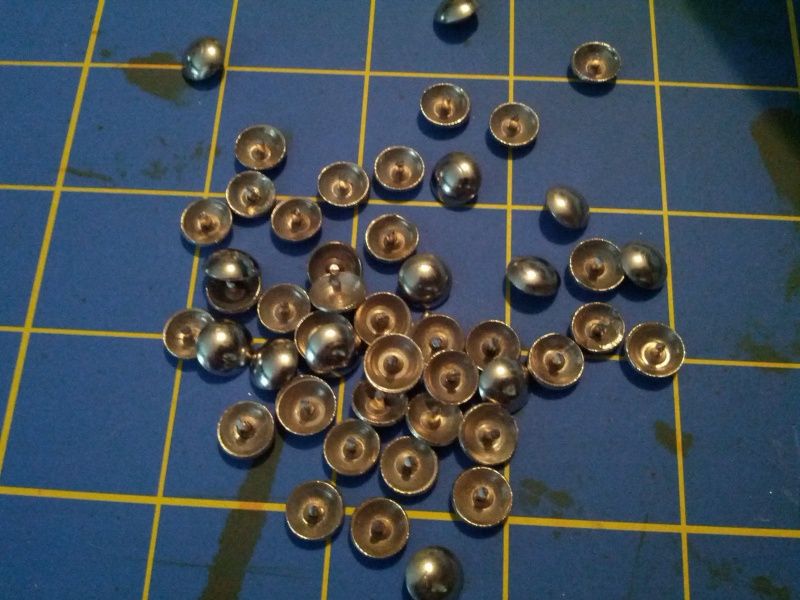
I left a little bit of the shaft attached so I could drill a hole into the bracket and insert the tack head in.
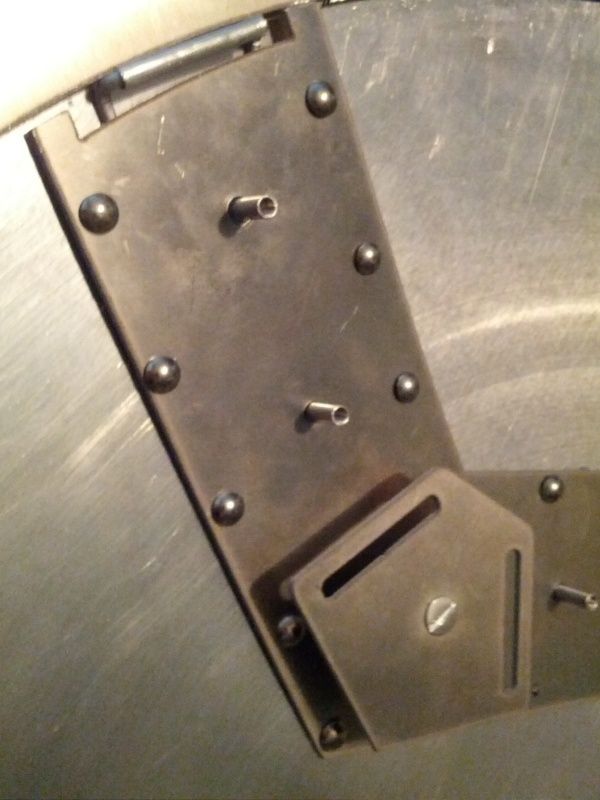
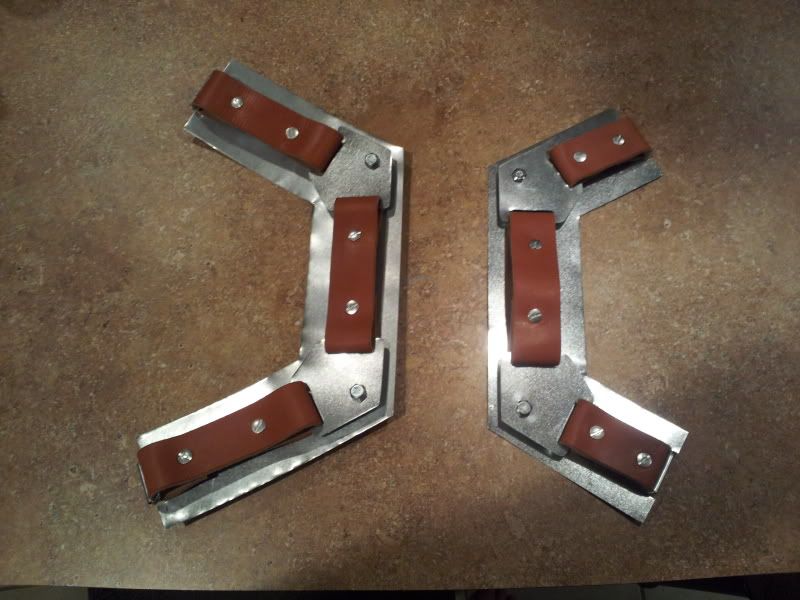
I liked the look! Gives it a slightly more industrial feel. With that done, I tackled the leather straps. I used some leather I had left over from my holster rig build, and cut out several 1.5" strips. After measuring for each strap, I began cutting them to length and punching the holes to accept the screw posts. Once everything was cut and punched, I used my stitch groover to get the detail along the edges of each strap, and then began dying the pieces.
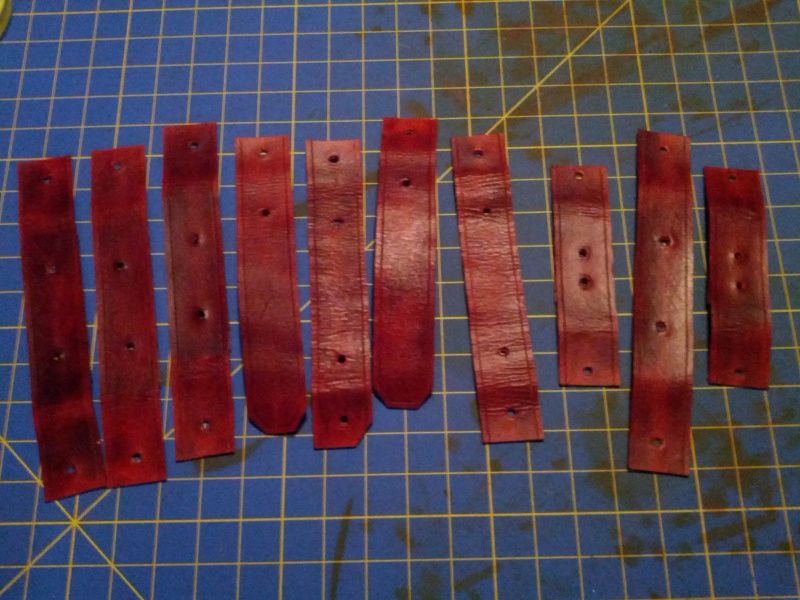
Once these were dry, I wiped them down with a protective sealer and worked them a bit to soften them back up. Attached each piece to its proper place and secured them using the screw posts.
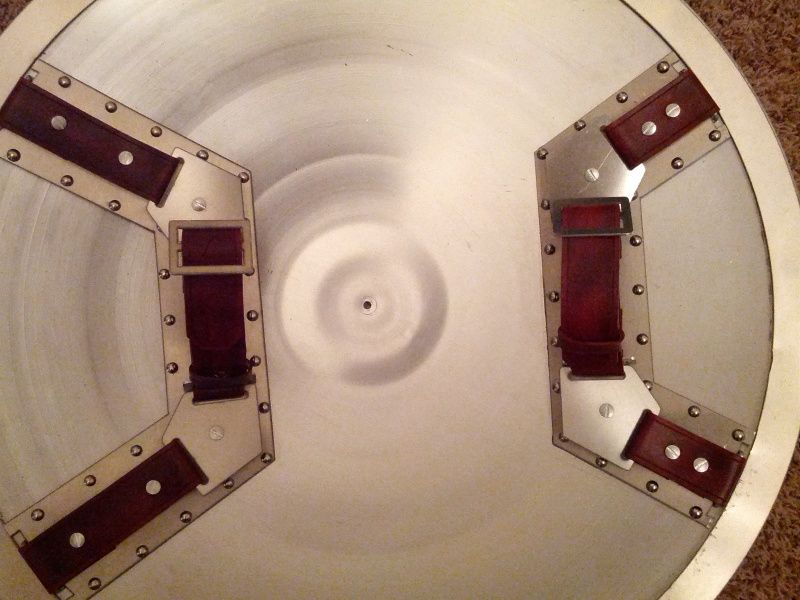

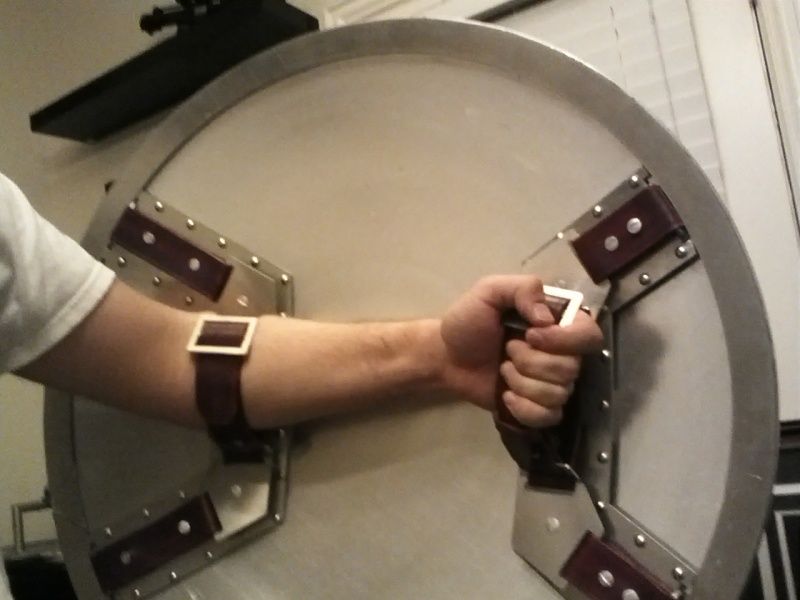
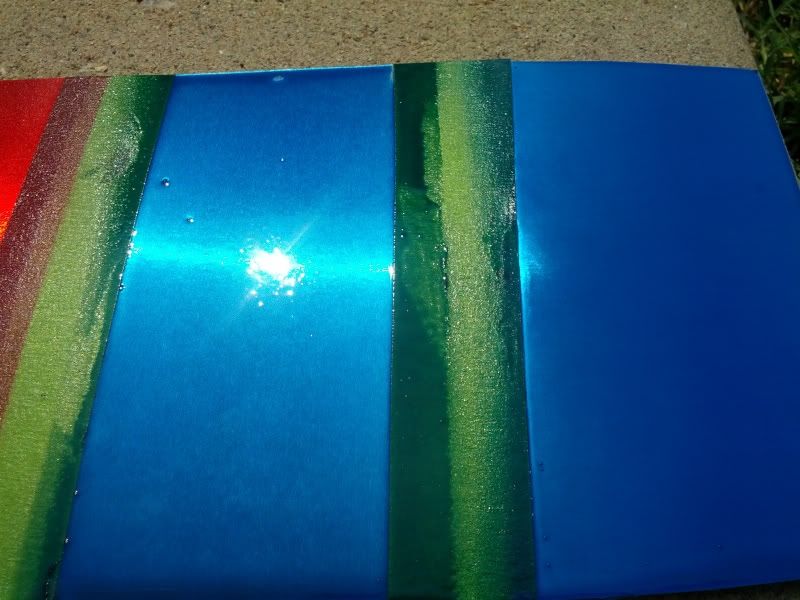
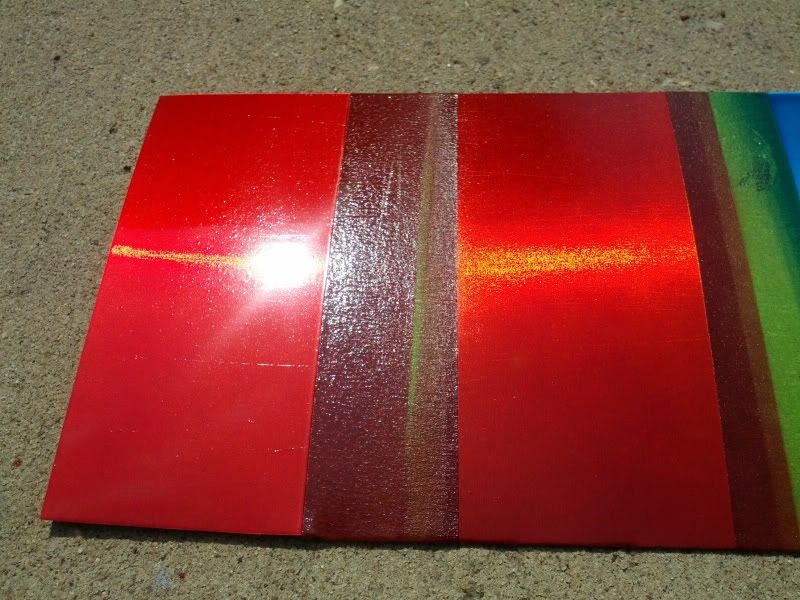
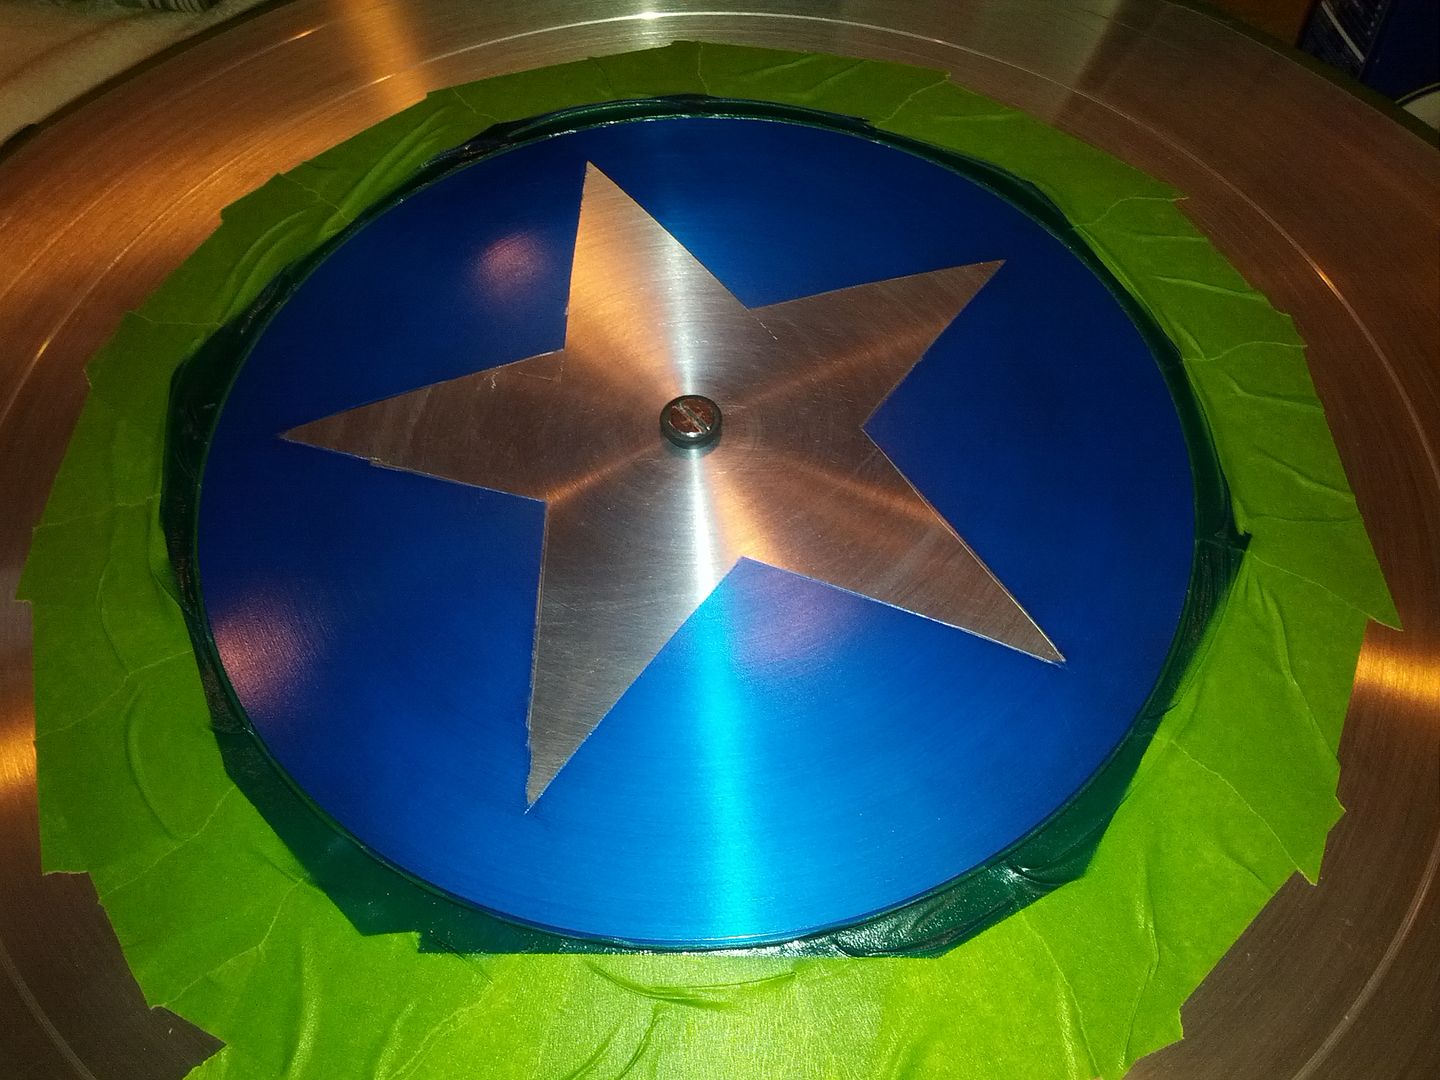
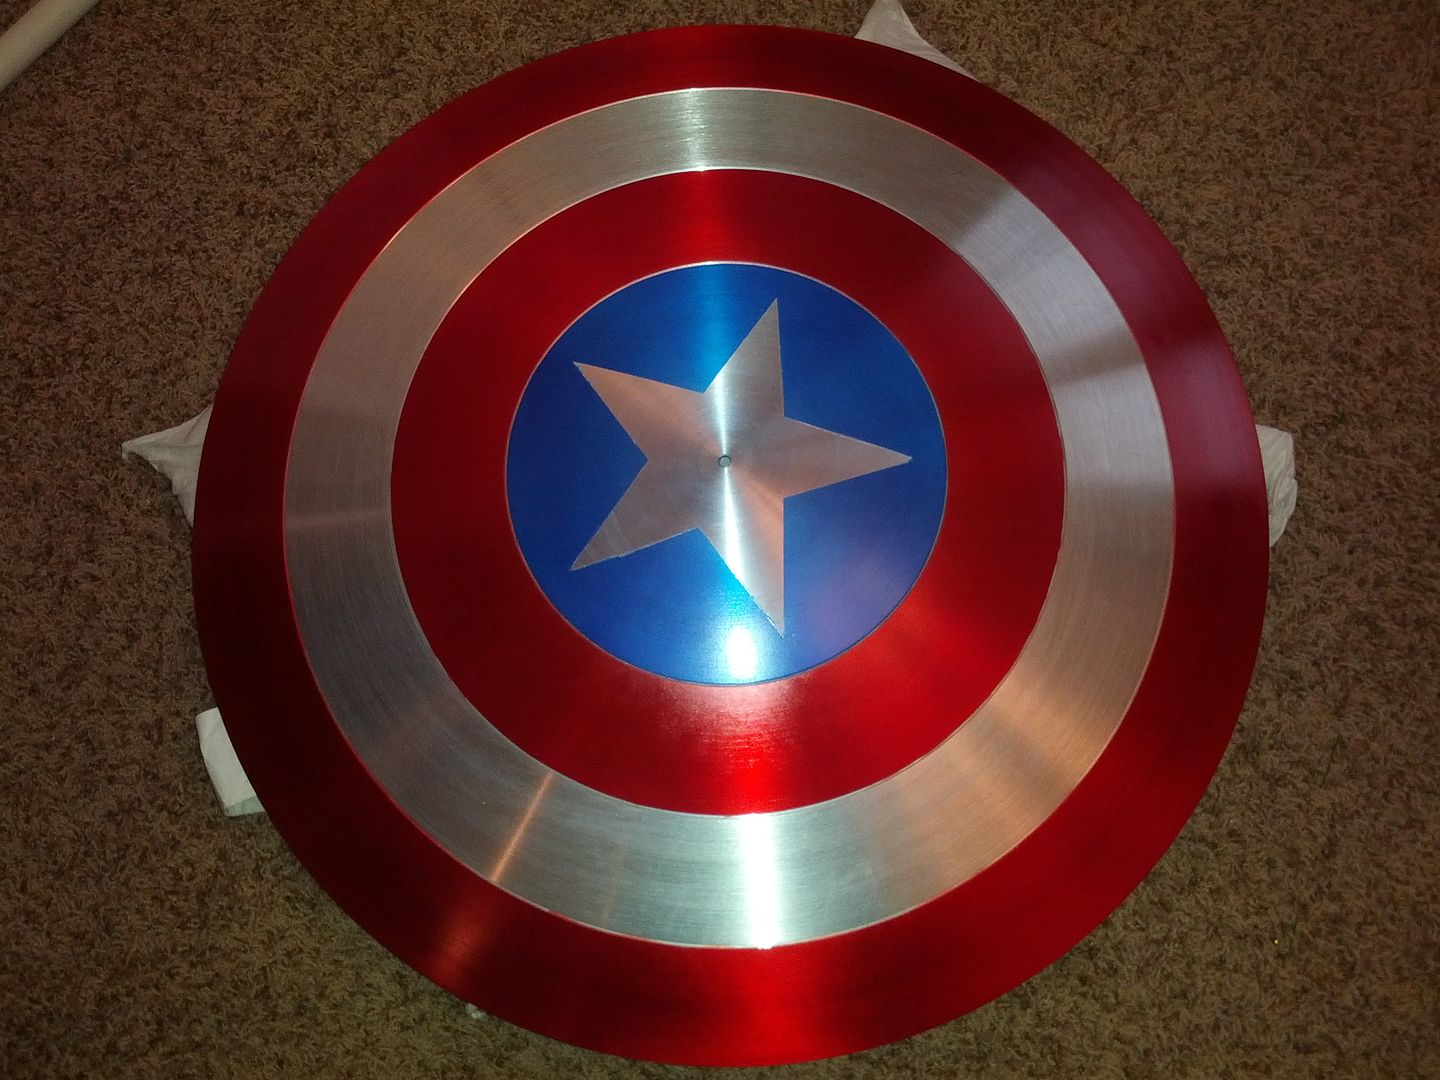
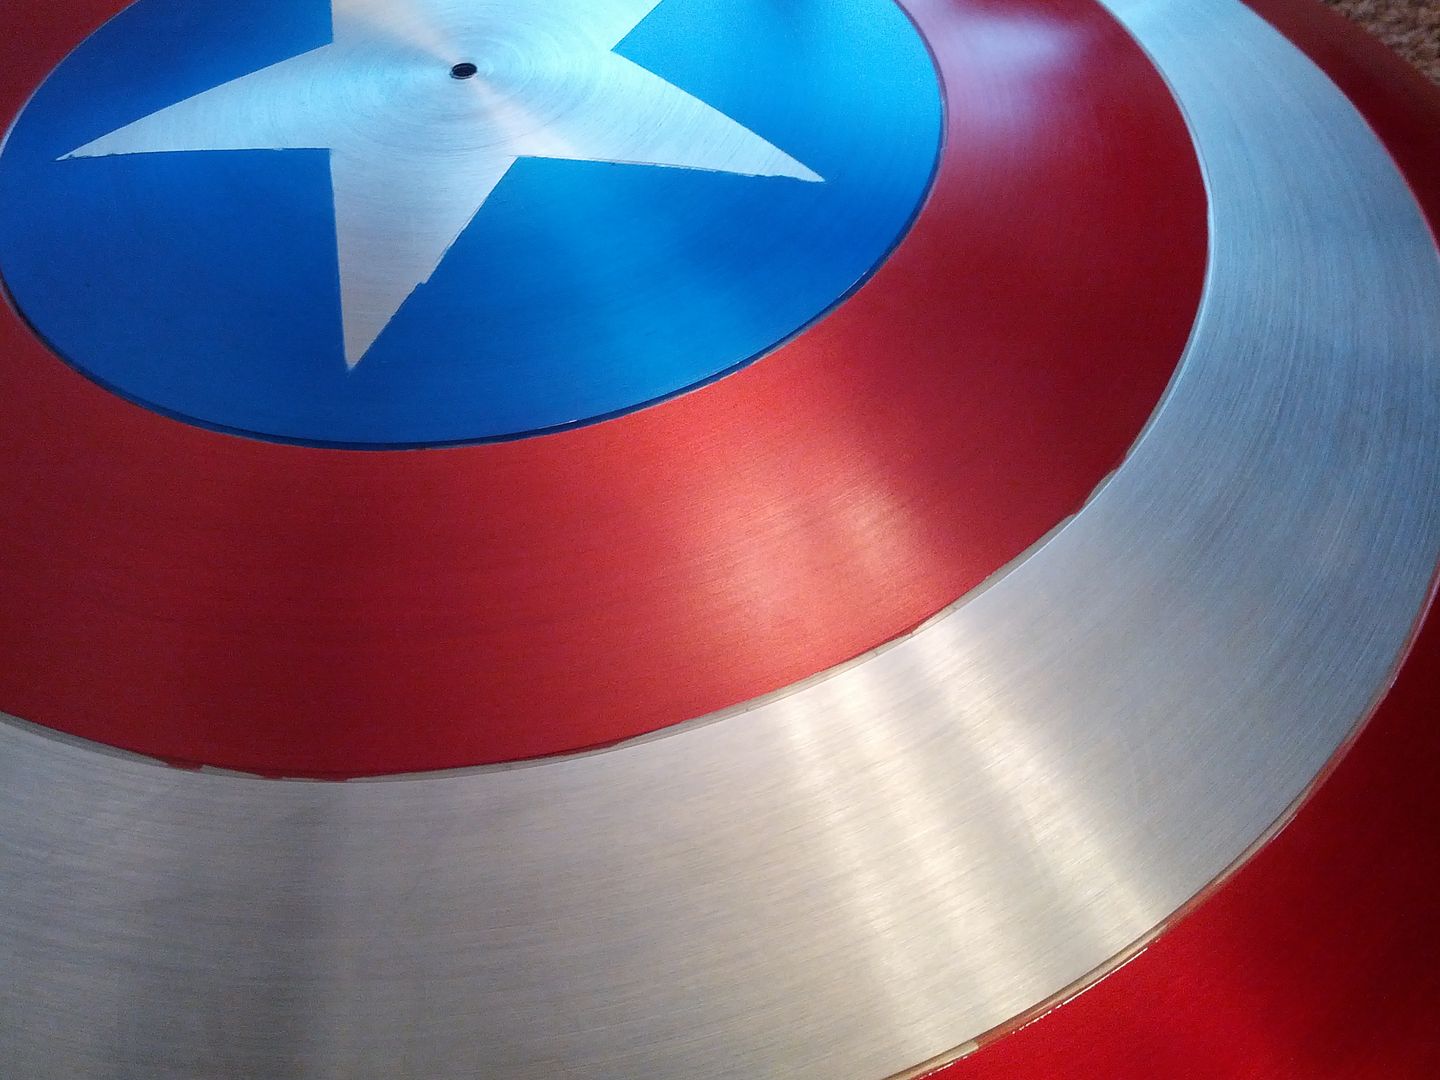
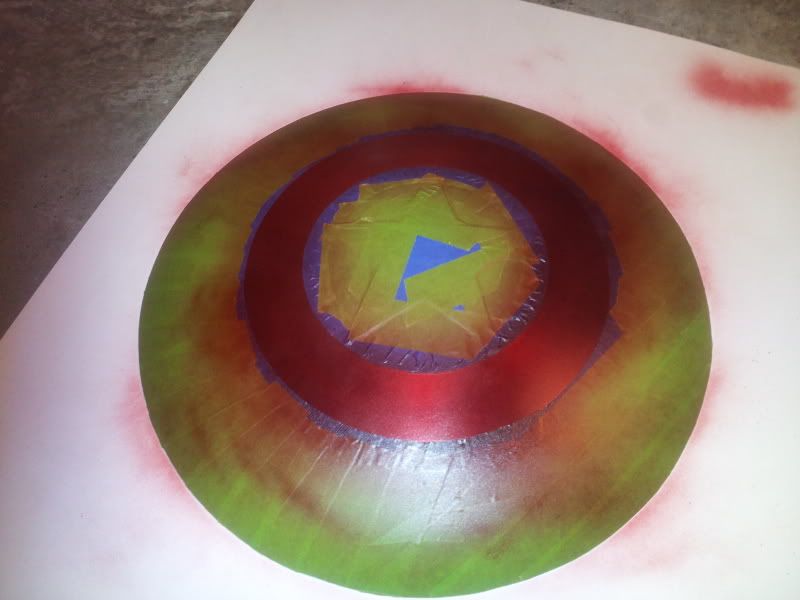
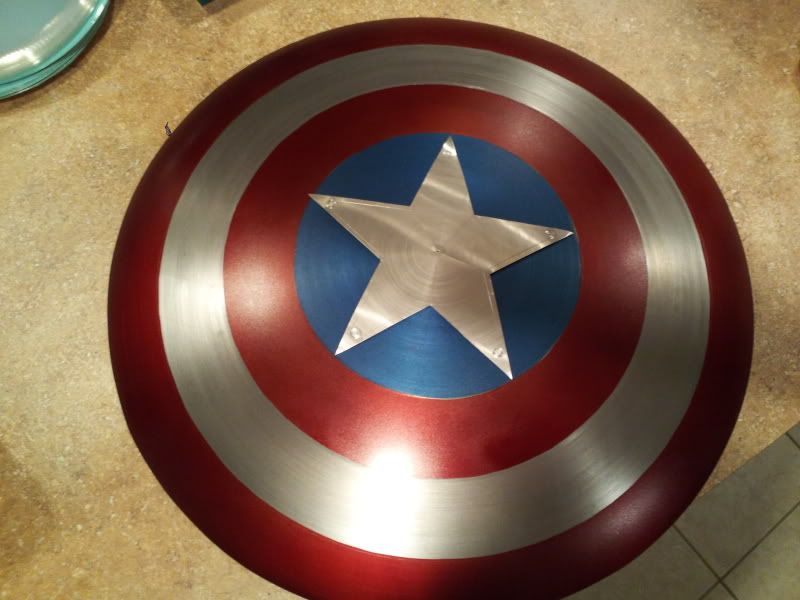
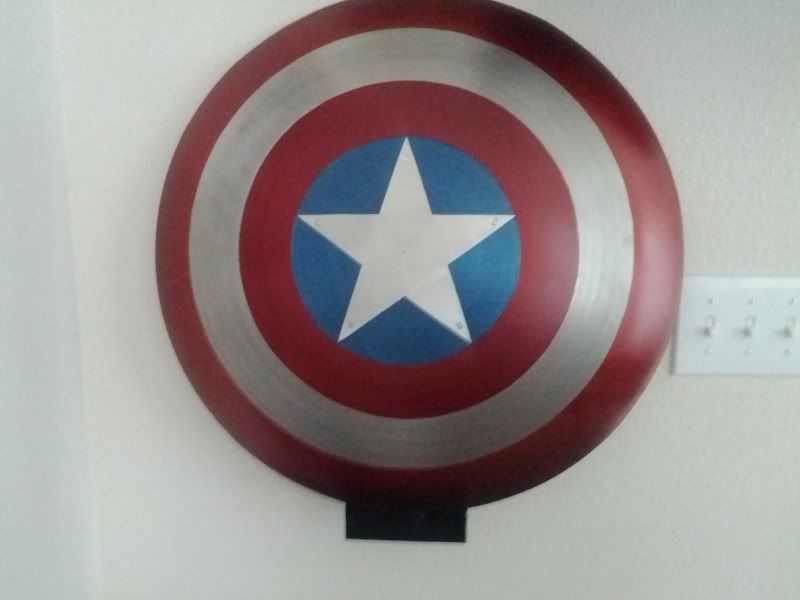
So there we have it! The back is done. Now I can focus on the fun part... the painting! It's a bit muggy and humid today, so I don't think I'll be able to do any painting. Before I start painting there are some scratches on the front that need to be cleaned up. I'll try sanding those out today and cleaning it really well with acetone. When it heats up this afternoon (105 anyone? :cry) I might be able to get the blue done. We shall see :thumbsup
Inspired by those before me, I had to have my own Captain America shield... Early this year I followed Valor's lead and made a budget shield using a Flexible Flyer steel saucer sled (like this one). I was very pleased with what I was able to come up with on such a small budget. My final tally came in under $100, which was the goal for me. Plus, it only took me two days to complete!
But that wasn't quite good enough for me... I knew however I would never be able to obtain one of high quality replicas that were available. Just not within my budget, especially with a newborn! So my wife and I made a deal. Any money I make off of my props, be it pieces I have made or acquired, or commissions I do, can go back into the collection in the way of "upgrades." :love
So I sold that first shield I made and used the money to fund this project. I bought one of the spun aluminum blanks from eBay (Accurate Metal Spinning in Miami)
I wanted the brackets and straps on the back to be a bit closer to screen accurate than my first attempt, so I drew up a quick sketch using Photoshop. The movie version has the brackets that angle in (which Valor does an amazing job with!), but also a ring that connects the two pieces together.
I was going to get the bracket water jet cut out of aluminum, so I needed to have my drawing converted to a vector drawing for the machine. Andrew (epilepticsquirrel) was nice enough to whip those up for me quickly (thanks again bud!) and I sent them over to my local cutter. A week later the pieces were ready for me to pick up:
I also had the pentagonal clips, rectangular D's, and slide buckles cut out as well. The pieces looked great! Just need some slight filing around the edges to clean them up.
Now this is when I ran into some problems... I needed to figure out how to bend the piece to fit the concave shape of the back of the shield. I'm no metal worker, so this wasn't the easiest thing to do. After messing with it for a while, I was able to get the rough shape, but it just wasn't fitting like I thought it would. Turns out I was wrong on two counts here: when Chris made his brackets this way, he used a second spinning to cut the brackets out of so the bracket would already be perfectly shaped. Secondly, my measurements were slightly big, and the ring was about half an inch to big. I was never going to be able to get it to fit this way.
My solution was to separate the brackets from the ring, and cut the ring down a little in order to fit the perimeter of the shield properly. This also gave to more leeway in getting the pieces bent to shape properly. However, cutting the ring this way created tension in the piece, almost like a spring. So I had to get a little creative on attaching it to the shield.
I used 3M outdoor mounting tape (just as I did on my first shield) to secure the ring and brackets to the back. The first attempt didn't yield great results... Because of the tension I mentioned, the ring didn't want to stay in place, even after being clamped for 48 hours. The ring kept wanting to slide towards the center of the shield, instead of staying in place along the perimeter. So I created a keystone using the section of the ring I removed when cutting it down. Basically I cut the section into a trapezoid, and cut the ends of the ring section to match the angles. I secured the keystone in place first, and allowed the tape to set overnight ensuring it wouldn't slide under the pressure of the ring. Once that was set, I taped down the rest of the ring and clamped everything down for a few days.
At this point I can't obtain 100% screen accuracy, but I'm OK with that :thumbsup
A little filing around the edges will help blend the pieces together and make it a little less noticeable, but since it will just be on display nobody will pay attention to it. Now I could proceed with the rest of back!
Before I attached the bracket pieces, I drilled holes to accept the screw posts I would be using for the leather straps and pentagonal clips. Once all the holes were drilled, I inserted the screw posts from the bottom and glued them in place using some epoxy. Once that was set, I added the adhesive tape to the brackets and secured them to the shield.
Next up was to add the rivet details around the brackets. To accomplish this I was going to use the same method used for the spun rivets on the stars: a small piece of aluminum rod inserted into the drill press. However, I had already attached the brackets so there was no way I would be able to go that route. I went to Lowe's looking around the hardware section to see what I could come up with, and found these: furniture tacks
I used my nail nippers and clipped the heads off them, all 48!
I left a little bit of the shaft attached so I could drill a hole into the bracket and insert the tack head in.
I liked the look! Gives it a slightly more industrial feel. With that done, I tackled the leather straps. I used some leather I had left over from my holster rig build, and cut out several 1.5" strips. After measuring for each strap, I began cutting them to length and punching the holes to accept the screw posts. Once everything was cut and punched, I used my stitch groover to get the detail along the edges of each strap, and then began dying the pieces.
Once these were dry, I wiped them down with a protective sealer and worked them a bit to soften them back up. Attached each piece to its proper place and secured them using the screw posts.
So there we have it! The back is done. Now I can focus on the fun part... the painting! It's a bit muggy and humid today, so I don't think I'll be able to do any painting. Before I start painting there are some scratches on the front that need to be cleaned up. I'll try sanding those out today and cleaning it really well with acetone. When it heats up this afternoon (105 anyone? :cry) I might be able to get the blue done. We shall see :thumbsup
")