You are using an out of date browser. It may not display this or other websites correctly.
You should upgrade or use an alternative browser.
You should upgrade or use an alternative browser.
Hero Phaser Scratchbuild
- Thread starter robn1
- Start date
Tiberius Kirk
Sr Member
Can't wait to see the result.
robn1
Master Member
Molds are cured. Pressure makes the top of the rubber very smooth and glassy. The light spots are reflections of the shop lights.

I taped the buck to the bottom of the box. Some rubber seeped underneath, but it's not a problem.

Molds with bucks removed.

Here's a look at the problem I'm having with the wood buck. The styrene sheet skin was sanded down and blended into the edge, but the wood has shrunk making the styrene extend beyond the edge. Every time I sand it down it happens again.


I have casting epoxy curing in the molds now. When it's set I will clean up the mismatches on the edges, and make new molds.
I taped the buck to the bottom of the box. Some rubber seeped underneath, but it's not a problem.
Molds with bucks removed.
Here's a look at the problem I'm having with the wood buck. The styrene sheet skin was sanded down and blended into the edge, but the wood has shrunk making the styrene extend beyond the edge. Every time I sand it down it happens again.
I have casting epoxy curing in the molds now. When it's set I will clean up the mismatches on the edges, and make new molds.
nwjedidave
Sr Member
I *love* this thread.
Great work, keep it coming!
Great work, keep it coming!
LoneWolf Models
New Member
Nice build!
Chrisisall
Master Member
Ouch! Feel better SOON!Thanks guys!
Sorry for the delay, but I've been down with a bad toothache. I'll have more this week.
robn1
Master Member
Ouch! Feel better SOON!
Feelin' better, thanks!
I decided to put off corrections to the P2, so I can finish the build for Western. Once it's done I'll decide how to proceed with the P2.
I cast up the shells for Western, I'll just have to fix the P2 castings. The P2 was a tough one to cast, I had to use a brush to get the full mold gel coated with resin. I allowed the resin to build up kinda thick at the front where I'll need to do some sanding and filling.

And fiberglass was also tough, because of the many corners and narrow areas. I cut the mat into square and rectangular patches to get it to conform.

Zombie_61
Master Member
I think I need to wear my glasses when I'm perusing the RPF in the morning. I was re-reading the previous posts on this page to refresh my memory, and I read this as "Molds are cruel." Or maybe I was just picking up on what you really wanted to say. :lolMolds are cured...
robn1
Master Member
Shells pulled from the mold, looking good.
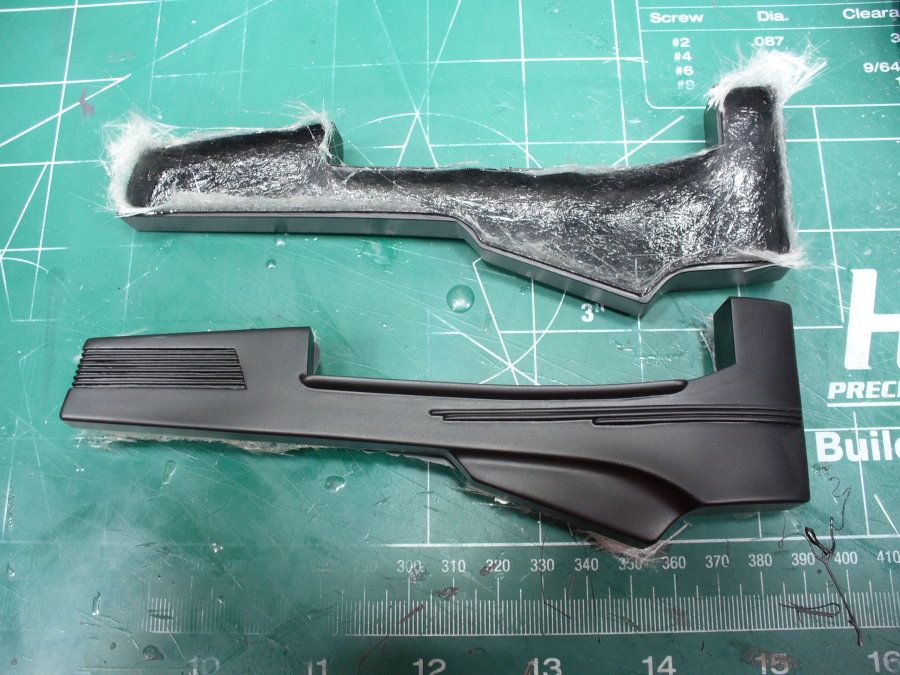
The only problem being the open seems I mentioned before. Here you can see the worst of them. Also see hoe the lower side bulges out, that's from the styrene sheet lifting up on the master. I'll have to sand this down, which is tough with the side ribs in the way.

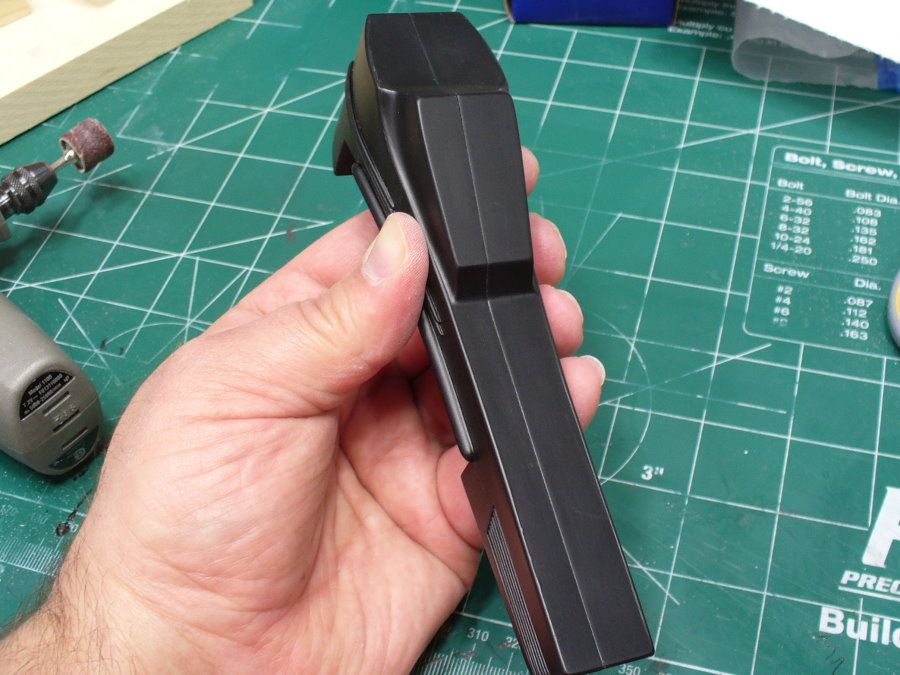
The two halves fit together just fine.


The only problem being the open seems I mentioned before. Here you can see the worst of them. Also see hoe the lower side bulges out, that's from the styrene sheet lifting up on the master. I'll have to sand this down, which is tough with the side ribs in the way.
The two halves fit together just fine.
Chrisisall
Master Member
No human can do stuff like this.
Come to think of it, we've never seen your ears...
Do you call 40 Eridani A home-?
Come to think of it, we've never seen your ears...
Do you call 40 Eridani A home-?
")
Chrisisall
Master Member
Shells pulled from the mold, looking good.
http://i145.photobucket.com/albums/... Phaser Scratchbuild/P1030599_zps698ba330.jpg
The only problem being the open seems I mentioned before. Here you can see the worst of them. Also see hoe the lower side bulges out, that's from the styrene sheet lifting up on the master. I'll have to sand this down, which is tough with the side ribs in the way.
http://i145.photobucket.com/albums/... Phaser Scratchbuild/P1030605_zpsbde7eecb.jpg
The two halves fit together just fine.
http://i145.photobucket.com/albums/... Phaser Scratchbuild/P1030606_zps6f91ace2.jpg
http://i145.photobucket.com/albums/... Phaser Scratchbuild/P1030608_zps639b6106.jpg
http://i145.photobucket.com/albums/... Phaser Scratchbuild/P1030609_zpsbc5eb3c5.jpg
Seriously though, Rob, your work on this has been so freaking impressive... 'awesome' is just too simplistic a word.
Last edited:
Ghost Host
Sr Member
Awsome!
NakedMoleRat
Legendary Member
Need to get back to my P1. I got 2/3 done, then got distracted with another project...
Similar threads
- Replies
- 1
- Views
- 1,117
- Replies
- 9
- Views
- 1,437