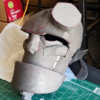
Hellboy ( comic book version ) costume. WIP.

Rocket Rider

Active Member
Hello Everyone,
Here is a few pictures of a cosplay I have been working on lately. I've always wanted to do a version of the character that'd be closer to the printed version ( comic book ) than the ( first ) movie one, which I really like anyway.

I have been working on another costume also, unrelated to Hellboy, that i will introduce in another post. One that's more on the long run as I am busy with work and that other projects takes wayyyy more time than the Hellboy one.

I choose Hellboy; like I said, because I am a huge fan of the character, but also because I realized I had a lot of the material and outfit at hand, which was going to make it look like something pretty quick. Another advantage was that not all the body needs to be trapped in a "portable sauna " suit. The left arm can be pretty much left alone, the legs can be only partially covered in ( either ) red spandex or foam prosthetics.

This should be easy... Yeah, right...

I wanted to get a good result quick so I went for an easy base for the head shape. I followed Adam Savage " Tested " tutorial video on how to build a helmet
from the " For Honor " game and emulated from there...
 

Attachments

  • Hellboy-WIP-01.jpg
    Hellboy-WIP-01.jpg
    87.8 KB · Views: 301
  • Hellboy-WIP-02.jpg
    Hellboy-WIP-02.jpg
    80.8 KB · Views: 305
  • Hellboy-WIP-03.jpg
    Hellboy-WIP-03.jpg
    100.6 KB · Views: 317
Then I reinforced the chin underpart with a horseshoe shape, glued underneath, to conceal my own chin and keep a narrowing shape to the overall head, as foam unchecked tends to warp back into a wider shape than necessary. Hellboy's lower jaw has to be massive but no wider than the skull, when seen from the front.
 

Attachments

  • Hellboy-WIP-04.jpg
    Hellboy-WIP-04.jpg
    81.2 KB · Views: 221
Last edited:
The following first picture doesn't do justice to the lower jaw protruding like it should. My phone camera lens sucks for that. The profile view ended up looking more like WIP-06 where the bottom of the chin is pointing forward more, keeping the strong dynamic lines of the nose, eye brow and chin aligned.

At this point in the process, I came to realize I wanted to go more for a comic book design that yet retains some of the organic, realistic aspect of a head that is going to be somewhat in movement. It wasn't all too clear but that's when I started questioning my inital idea and define the limits of where I wanted to bring it.
 

Attachments

  • Hellboy-WIP-05.jpg
    Hellboy-WIP-05.jpg
    92.6 KB · Views: 387
  • Hellboy-WIP-06.jpg
    Hellboy-WIP-06.jpg
    89.8 KB · Views: 286
As I progressed, I started experimenting with different options. I was tempted with the real life accurate punched hair for the sideburns but even though I was initially going for the cut out flat silhouette, bringing it closer to the printed version's vibe. I was really happy with how sharp and angular the features turned out. My only problem was that even with the couple of ideas I had to texturize it and suggest liveliness later on, it still looked a little too much like erratic rocks. True, the foam's color didn't help. But I wanted to try something different. At any rate, if I screw up or if I am not happy enough with the result, I can always make another head piece later.
 

Attachments

  • Hellboy-WIP-07.jpg
    Hellboy-WIP-07.jpg
    87.2 KB · Views: 283
Last edited:
I decided to take the devil by the horns and perform a little plastic surgery at that point. I removed the bags under the eyes and went for a flat, thinner sheet of foam that would be closer to my own eyes under the mask, allowing for more peripheral vision. As for the cheeks, the twisted curve from top ( back ) to bottom ( front ) was a plus. I lost some of the sharp edges I liked so much, but I figured I could get a little bit of that with darker paint underneath the cheekbone ledge. The fitting test with the coat finished to sell me on it.
Also, by removing the goatee I was definitely opting for " real " hair and not cut out flat sideburns or bullet shape open cell foam of various sizes and lengths. I was still firmly on the path of making it look like the comic book version, but in the real world!
 

Attachments

  • Hellboy-WIP-08.jpg
    Hellboy-WIP-08.jpg
    132.4 KB · Views: 344
  • Hellboy-WIP-08-2.jpg
    Hellboy-WIP-08-2.jpg
    48.6 KB · Views: 357
Aaaaaand... This is where I am so far. I mixed some wall paint sand to my base for the red paint ( a mix of vermilion red, carmine red, whichever orange I had at hand, a touch of Payne's grey and some transparent mixing white is what gave it that grainy texture. I wish I had poked tiny pores with a woodburner but it would've taken too long and even with a protective breathing mask, I couldn't afford to spend that much time doing it.
I didn't paint the side burns area red either. keeping it in a darker tint would help blending the hair together too and under the ponytail ( wig, most likely ) it would be extra time spent that again, I can't afford to waste.

A note on the constant usage of a protective mask and safety googles: sanding foam generates microscopic particles that are nasty to inhale. So is the fume generated by burning foam. Carving dents and scratches on the head, to make it look more like the comic book version and the use of wall sand can be harmful, So I always use the suggested protection and then some. I am fortunate to have an extremely well ventilated workshop. Even in those circumstances, I decided to not use Plastidip and the likes. It stinks to the point you are convinced it is not healthy. I don't need to seal myself inside that headpiece anyway. I need to breath so, whichever chances I get to have enough air circulate, I'll take! Besides, if the piece gets wet, the acrylic paint is plastic. Should it peel off or not hold as well as expected, it still allows the grainy texture of the foam to show. I would use spray black matte paint from time to time, but I don't think it's necessary. Wear and tear will occur, no matter what and there will be touch-ups and fixes down the line.

Punching and gluing hair takes forever!!! First off, punching holes with a pair of scissors was NOT fun, but it allows for a full strand of hair to be plucked/glued in one go. The random punching and heating ( with a heat gun, later ) of the synthetic brush hair would provide irregularity in the growth and positioning of the hair.
 

Attachments

  • Hellboy-WIP-09.jpg
    Hellboy-WIP-09.jpg
    132.8 KB · Views: 297
  • Hellboy-WIP-10.jpg
    Hellboy-WIP-10.jpg
    134.9 KB · Views: 310
  • Hellboy-WIP-11.jpg
    Hellboy-WIP-11.jpg
    212.1 KB · Views: 310
Last edited:
Absolutely superb work!

Stunning idea to use the bristles for a realistic look that is totally in keeping with the comic appearance.
 
Absolutely superb work!

Stunning idea to use the bristles for a realistic look that is totally in keeping with the comic appearance.
Thanks, I wish heating the bristles with a heat gun would have allowed me to direct them back and upward... it just went randomly ... in all directions! Not a bad thing, makes it look more real. I might try it a little bit more, once the hair is properly trimmed.
 
Also worked on gun that goes with it... I will take liberties with the original designs, for example on the gun's barrel ( and overall shape ). Specifically, the barrel will - for now - be translucent, with LEDs glowing in. The barrel is a cap for a facial soap from " L'Occitane " and fits a 1 1/2" PVC pipe I had in the garage. Could’ve been wider but I didn’t have one. That’s what I like about the process. Doing with what you have at hand.
 

Attachments

  • Unpainted-Sam-02.jpg
    Unpainted-Sam-02.jpg
    216.9 KB · Views: 218
  • Unpainted-Sam-01.jpg
    Unpainted-Sam-01.jpg
    238.9 KB · Views: 216
  • Unpainted-Sam-03.jpg
    Unpainted-Sam-03.jpg
    195.8 KB · Views: 222
Last edited:
Had to cut out the guard for the trigger. The planes were completely off. Glad I spotted it before I went any further. Guess it wouldn't have happened if my base had been a toy gun but I wanted it as scratch built as possible.
 

Attachments

  • Unpainted-Sam-04.jpg
    Unpainted-Sam-04.jpg
    216.9 KB · Views: 209
  • Unpainted-Sam-05.jpg
    Unpainted-Sam-05.jpg
    143.8 KB · Views: 211
  • Unpainted-Sam-06.jpg
    Unpainted-Sam-06.jpg
    182.2 KB · Views: 198
  • Unpainted-Sam-07.jpg
    Unpainted-Sam-07.jpg
    163.7 KB · Views: 220
I realized at some point that my basic built - I'll probably make another one that actually opens so I can load- couldn't technically have the barrel rotate and do that. So I had to cut a piece under the canon, in a curve, before I considered painting it. I simply slid, for now, a battery powered El wire all the way down the barrel as a test.
 

Attachments

  • Painted-Sam-08.jpg
    Painted-Sam-08.jpg
    152.1 KB · Views: 248
  • Painted-Sam-09.jpg
    Painted-Sam-09.jpg
    171.5 KB · Views: 236
  • Painted-Sam-10.jpg
    Painted-Sam-10.jpg
    148.2 KB · Views: 253
Couldn't do much this week end. So I started on another weapon for big red...
 

Attachments

  • Hellboy-sword-01.jpg
    Hellboy-sword-01.jpg
    353.7 KB · Views: 238
  • Pommel-excalibur-WIP-01.jpg
    Pommel-excalibur-WIP-01.jpg
    441.9 KB · Views: 218
  • Pommel-excalibur-WIP-02.jpg
    Pommel-excalibur-WIP-02.jpg
    332.9 KB · Views: 241
I made some progress over the past few weeks. I decided it was about time to tackle Big Red's Right Hand Of Doom. I used Odin Makes tutorial for it, followed all the steps - except articulating the wrist - and yet struggled with a few hurdles. Namely, the strings running inside the fingers' Ice maker tubing. These babies require some mean pull! also, I had tried various type of foam and depending on the cuts on the tubing some fingers worked and others didn't.
 

Attachments

  • RHOD-Foam-00.jpg
    RHOD-Foam-00.jpg
    155.5 KB · Views: 232
  • RHOD-Foam-01.jpg
    RHOD-Foam-01.jpg
    248.4 KB · Views: 221
  • RHOD-Foam-02.jpg
    RHOD-Foam-02.jpg
    293.9 KB · Views: 237
  • RHOD-Foam-03.jpg
    RHOD-Foam-03.jpg
    365.4 KB · Views: 240
Back
Top