You are using an out of date browser. It may not display this or other websites correctly.
You should upgrade or use an alternative browser.
You should upgrade or use an alternative browser.
Hasbro Legacy Millennium Falcon Conversion
- Thread starter crackerjazz
- Start date
crackerjazz
Sr Member
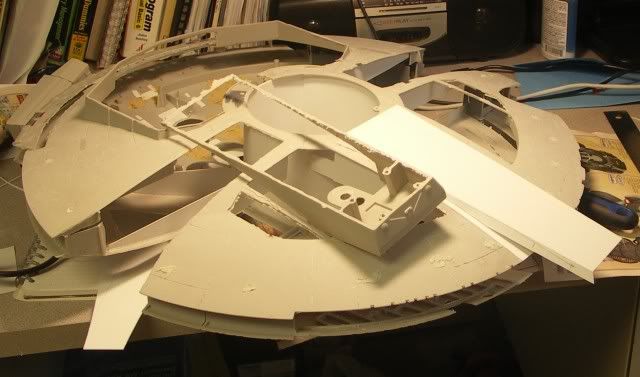
Thanks, guys. Hi Eric, the ribs are doing a good job of keeping the curvature of the hull, but the hull still flexes a lot from the middle where the turret was, making the ship sag when you lift it up and flatten when you set it down. After I removed the turret the hull just seemed to have lost its spine, much like a jellyfish. And I doubt if my styrene turret replacement will do much to bring back the original structural strength. I may need something similar to John Martin's AMT Falcon in his article where he attached a cylinder down the middle. I'll use it to support the ribs. I'm on the lookout for a 5.75in dia cylinder.
crackerjazz
Sr Member
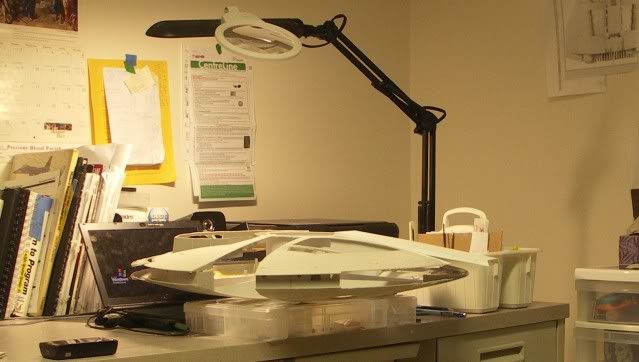
Put the styrene cylinder in and she's holding up really well - nice and rigid and still so light.
tek2graphics
Sr Member
NICE!!!! :thumbsup
avianoguitarist
Active Member
That's coming along nicely! The Falcon will ALWAYS be my favorite movie ship--always was. I love your conversion.
clancampbell
Sr Member
Amazing stuff! You're going to have one impressive Falcon when this is finished!
Rich
Rich
crackerjazz
Sr Member
Thanks guys, really appreciate your comments. They inspire me to plod on. Sqbiedoo I wish you were detailing this BMF, what with the tricks you have up your sleeve.
Junk Pilot
Sr Member
That looks like it's going to be one helluva mod job, Crackerjazz. Making me want to grab my nephew's BMF and rip into that like you have.
Engelnicht
Well-Known Member
This looks great, CJ! Can't wait to see the next update!
crackerjazz
Sr Member
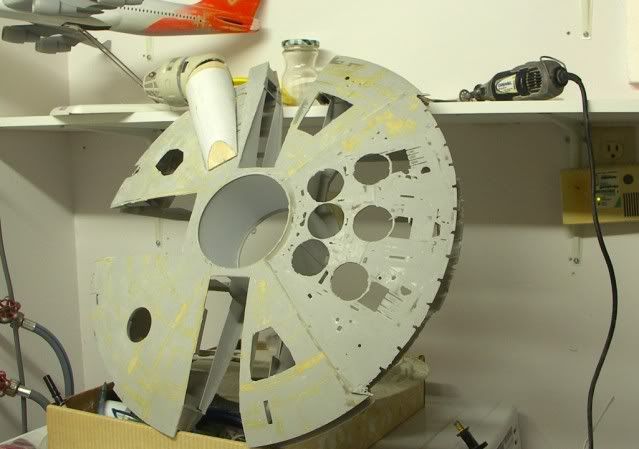
Thanks, guys. What do you know - It's been more than a year since this project started (sigh). What's left of the Hasbro is practically nothing - just the curved shell because the Hasbro has nothing in common with the 5-footer except for the hull curve, not even the plating and everything had to be sanded off. Did a good job with the top. Lost all my energy sanding the bottom, but I havent given up. Still, as someone mentioned, I could've started the shell from pizza slices. Oh, well... i'll have to make do with what what I've accomplished so far.
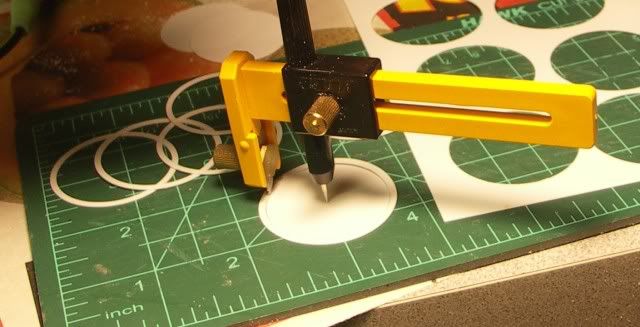
Cut and sanded off the tops of the exhausts and brought out the circle cutter.

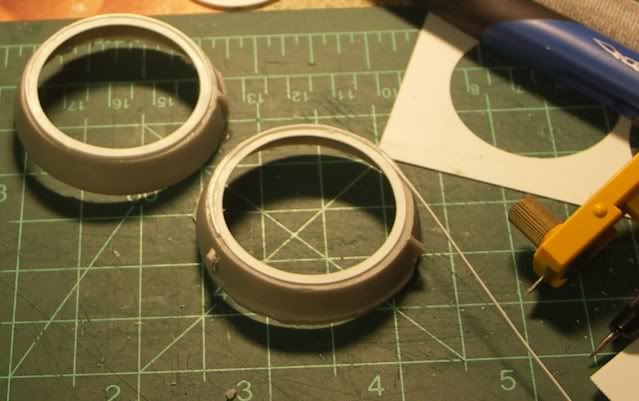
Added the lips:
Started gluing the guitar string pieces from underneath:
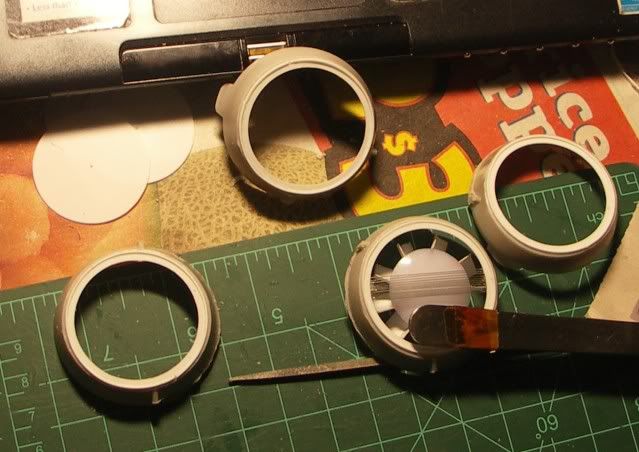
Fashioned the jawbox. The original Hasbro jawbox
was gigantic:
Cut and sanded off the tops of the exhausts and brought out the circle cutter.
Added the lips:
Started gluing the guitar string pieces from underneath:
Fashioned the jawbox. The original Hasbro jawbox
was gigantic:
Last edited:
Engelnicht
Well-Known Member
Awesome Work!
tek2graphics
Sr Member
Ahhhhhhh, beautiful!!
SurfingDoc
Well-Known Member
By "conversion" you mean "practically built from scratch". On hell of a job though.
PHArchivist
Master Member
I just laugh when I see this... Because with your talent and dedication, (and the amount of work you put in), you could have scratch-built the whole damn thing! ")
Last edited:
crackerjazz
Sr Member
I thought so myself, that it would be easier to use the Hasbro hull as a jumpstarter :cry At least I've gone over that hurdle of building the dome and learned quite a few lessons in the process about what you can and can't do with the Hasbro. Anyway, I'm at the point I would've found myself in had I built the hull in styrene. I'll just make believe that's exactly what I did.
It's just not the 5-footer without the Koolshade and the cooling fans - always wondered how my crude guitar-string koolshade would lend itself to looking the part. So I grit my teeth and kept myself glued to my seat until I finished one - I've never been more surprised about my willpower. These exhausts should look good enough once cut down to proper height:
By the way, I would be so happy if anyone can tell me what the real fans on the 5-footer were. And it's so hard to make out from the photos whether the fan tops were domed or not. (Photo by Frank Wire/ studioscale.com):

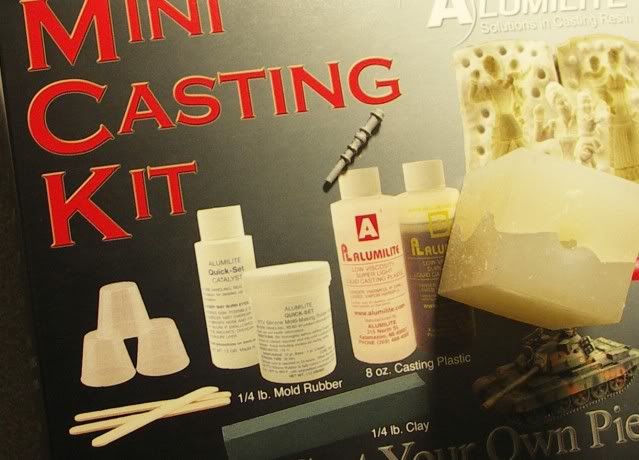
I finally bit the bullet and bought some Alumilite to try my hand at casting - the little actuator leaves me no choice but to learn how because I doubt if I can scratchbuild the 52 pieces of these that I need and still keep my sanity and my eye vision.
It's just not the 5-footer without the Koolshade and the cooling fans - always wondered how my crude guitar-string koolshade would lend itself to looking the part. So I grit my teeth and kept myself glued to my seat until I finished one - I've never been more surprised about my willpower. These exhausts should look good enough once cut down to proper height:
By the way, I would be so happy if anyone can tell me what the real fans on the 5-footer were. And it's so hard to make out from the photos whether the fan tops were domed or not. (Photo by Frank Wire/ studioscale.com):
I finally bit the bullet and bought some Alumilite to try my hand at casting - the little actuator leaves me no choice but to learn how because I doubt if I can scratchbuild the 52 pieces of these that I need and still keep my sanity and my eye vision.
superjedi
Sr Member
Guitar strings? :confused That's what I call committing to the project!
Or maybe you should just be committed. :lol
That vent came out great! Look forward to seeing how your casting efforts come out. That's one thing I wish I had been able to do with my scratchbuild years ago.
Or maybe you should just be committed. :lol
That vent came out great! Look forward to seeing how your casting efforts come out. That's one thing I wish I had been able to do with my scratchbuild years ago.
cayman shen
Master Member
I'm sorry, you MADE the mesh out of guitar strings?! Am I understanding that correctly? And that people, is why I will never make a good scratchbuilt model. That kind of patience is an alien planet to me!
Similar threads
- Replies
- 70
- Views
- 7,669
- Replies
- 24
- Views
- 3,319
- Replies
- 3
- Views
- 1,725
- Replies
- 4
- Views
- 1,708
Done / Completed
The Expanse - MCRN pistol - machined aluminium conversion kit
- Replies
- 103
- Views
- 8,494