Hasbro Legacy Millennium Falcon Conversion

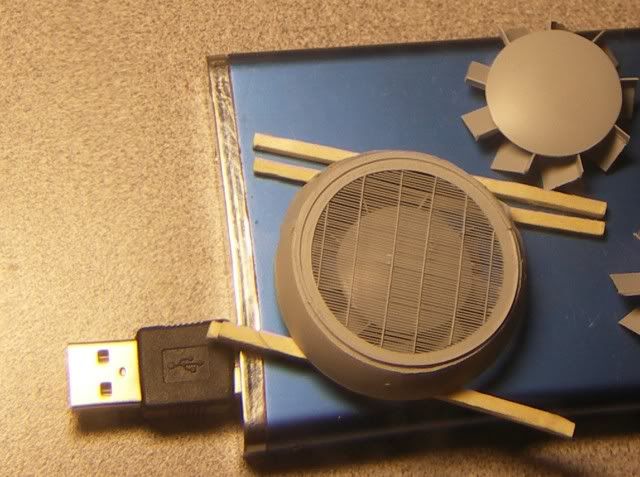
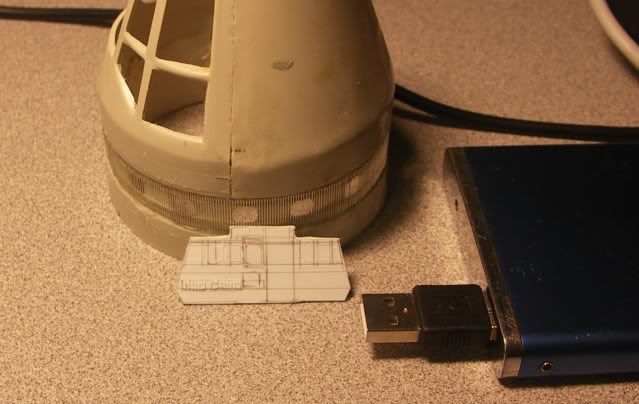
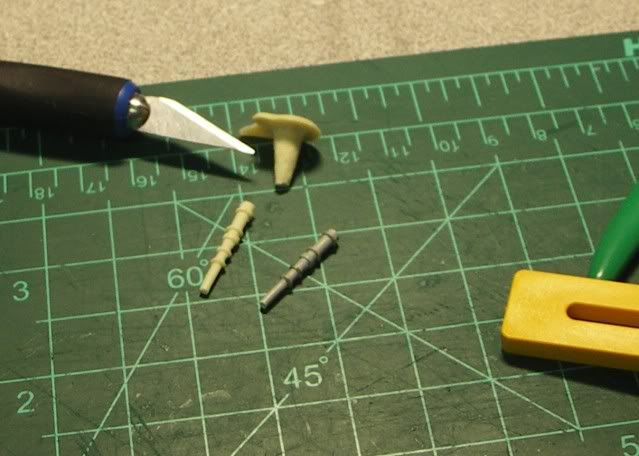
Hey John, thanks. Yes, electric guitar strings. I used 0.23mm gauge. :) Eric, I'm surprised at how well the alumilite casting turned out. And dries hard quickly too - 7min as mentioned in the instructions but I pried it out at 10min. My very first cast (yipee!).

001Firstresincast.jpg


002Cuttheexcess.jpg


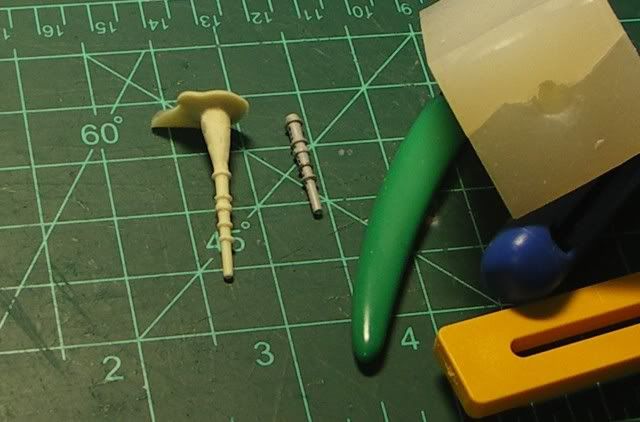
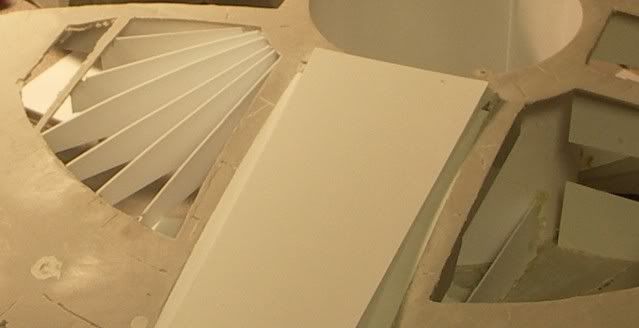
Scratchbuilding that first actuator took me more than 2 hours - rolling the two-part putty, spacing the ribs and gluing wrong, retrying, etc. Originally thought about building the 52 actuators by hand. Just imagine how imperfect each one is going to be in its own way so this alumilite's gonna be a real timesaver. As soon as I cast 5 pieces I'll probably make a new mold of 5 in a row.

Right now I'm just marvelling at how well the resin took the shape of the mold like magic. To the resin oldtimers, excuse my excitement but it's a Eureka moment for me.
 
wow! i look at all the pages and stunned how much work has gone into this and how such simple things like part of a model motor was used to make the falcon.
 
Joseph, that molded part came out great!
Like you say, once you get a few done, making a gang mold will save even more time.
 
Thanks, guys! Cut up some mandibles today:

005Mandibles.jpg


006Cuttingcirclesfrommandibles.jpg


Strange thing about that 5-footer top-view photo: The left-side mandible
maintenance wells are a bit higher than the ones on the right. I wonder
if it's the photo that's distorted or the actual model was like that? Anyway,
patterned the holes after the right side one.

004Cuttingmandibles.jpg


003Falconflying.jpg


008Topbackview.jpg


I know it's going to be a tough job to scratchbuild the details, but as long as I've got the basic shape of this starship done, I'll do that slowly, adding a few details at a time. I have to learn a few techniques from squbiedoo and superjedi.

http://i469.photobucket.com/albums/rr52/crackerjazz/004Cuttingmandibles.jpgf
 
Last edited:
The maintenance wells don't seem level. Could it be due to distortion in the photo? Even those boxes attaching to the hull look off. The top of the mandibles look level, though.

Topviewmaintwells.jpg
 
Last edited:
Patched bottom (front landing gear boxes). Need to correct the shapes of the maintenance wells too, which are different for port and starboard on the ANH 5-foot Falcon.

001Patchedbottomlandinggearopening.jpg


002Patchedbottomopening2.jpg
 
Last edited:
Wouldn't it have been easier scratch building this? :rolleyes

Hi Vandark. Yeah if I were to do a second one I'll definitely take the pizza slice bulkeads route to scratchbuild the hull. My son is watching me, though, with crossed arms and a scowl on his face to keep to my promise after tearing his toy apart.
 
LOL
What a dad would do for his boy! :lol
That's wonderful! :thumbsup

Hi Vandark. Yeah if I were to do a second one I'll definitely take the pizza slice bulkeads route to scratchbuild the hull. My son is watching me, though, with crossed arms and a scowl on his face to keep to my promise after tearing his toy apart.
 
Hi Vandark. Yeah if I were to do a second one I'll definitely take the pizza slice bulkeads route to scratchbuild the hull. My son is watching me, though, with crossed arms and a scowl on his face to keep to my promise after tearing his toy apart.

It's awesome work! I've been following since you started and it's gonna look great when it's done.

I've got an idea! You could use all the parts you take from it and scratch build all the missing parts to re-construct the toy version!
 
Thanks, guys! Hi Vandark, thanks...I'll try :)
Patched bottom (front landing gear boxes). Need to correct the shapes of the maintenance wells too, which are different for port and starboard on the ANH 5-foot Falcon.

I take that back.....looks like the port and starboard front landing gear openings are the same on the ANH 3-gear version. It's the colors/weathering and plating arrangement around them that makes the other one odd-shaped. I wanted to build that version but couldn't find too many photos of the underside, haha. .....:behave
 
Last edited:
I thought this was the fun part. Crazy plating.

My first plate had too large notches.
002Triedfirstplate.jpg


Measured better and made a template for the rest of the notches.
001Experimentedwithnotches.jpg


Many a time the glue would grab and I couldn't reposition the plate. Not too happy but i couldn't start over - plating is too laborious. Tried removing these plates but they are clinging on so well - and when I tried to pry one off with the knife the plate gets bent out of shape and a portion of it just won't let go; the plate then has to be ripped out and what's left sanded off - making the surface too uneven for replating. So I'll just leave these on. But I'll try to devise a better way to achieve the tighter and more even spacing they require.

005Done.jpg
 
Slogging on....I'll get there yet.

Primed the "koolshade" to see what it will eventually look like:
Primeredkoolshade.jpg


The .05mm styrene I used to patch the bottom was showing the ribs liked the stretched skin of a WWII biplane. I should have used 1mm. Really love that original curved belly of the ANH Falcon sans the front landing gear boxes - I'm gonna get there yet....

FalconCurve.jpg


Puttied up, bondoed and sanded smooth:
003Puttiedupthepatches.jpg


002Roundedbelly.jpg


Tried making the front panel with bits of styrene using ozzy's and stevestarkiller's panels as references. Maybe I'll eventually just end up printing them out like decals but wanted to see how far my patience will take me cutting and gluing styrene details before I finally give up.

Cockpitpanel.jpg
 
Last edited:
Awesome. An update. :)

Will you be doing the plating overhang where the mandibles meet the saucer as well?
 
Last edited:
Hi JunkPilot, yes that's exactly what I'm planning to do. I've sanded off all the plating from the Hasbro and will be cutting off all overhang to re-plate the whole thing as the plating patterns are different on the bigger model. And I've always wanted to see if I could copy the dilapidated overhangs on the 5-footer. Hmm, wonder if they were that way in ANH or was that done by the movers?

Forbidden Plastic photo:
Dilapidated.jpg
 
Look what I now have. :D I had to hand over $20 to my nephew for it but I'm wondering who really got stiffed! lol

The thing that surprised me was the SIZE. I measured it out and it's damn near studio scale with the 32in Falcon, and even though all of the detail is based on the 32in, it makes wanting to convert it to a replica 5ft'er even more daunting.

Crackerjazz, if you pull this one off you'll be a GOD in my eyes.
 
Last edited:
Hi JunkPilot, yes that's exactly what I'm planning to do. I've sanded off all the plating from the Hasbro and will be cutting off all overhang to re-plate the whole thing as the plating patterns are different on the bigger model. And I've always wanted to see if I could copy the dilapidated overhangs on the 5-footer. Hmm, wonder if they were that way in ANH or was that done by the movers?

Forbidden Plastic photo:
Dilapidated.jpg

Joseph, you have to do the damage! That's what gives the Falcon her character. :cool
One of my favorite damage sections:

stbd-hit.jpg
 
Back
Top