Hasbro Legacy Millennium Falcon Conversion

Thanks, Amish Trooper. Jefifye, thanks. You have a good point there heheh. The MR is a model of the 32-inch ESB version though, and I'm after the 5-footer version.

Recently, I just figured something out. With the Hasbro degutted, the hull is actually slightly flexible. Need less dome? Push the hulls together at the top and bottom very slightly and you get the 32-inch dome shape. Better yet, cut off the landing gear boxes completely before you do that.

Find a way to fix the shape in place from inside and you're off to a good start.

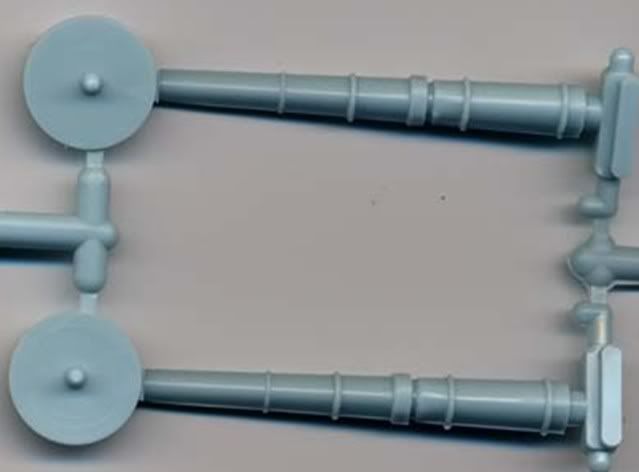
So for those who have the Hasbro and are thinking of building a 32-inch model out of it, some details are actually pretty good already. Slim the sidewalls (not by as much as the 5-footer's of course) and mandibles, cut the mandibles and toe them in, cut a bit off the jawboxes, rebuild the cockpit and tunnel, rebuild the landing gear boxes, and scratchbuild the sidewall and mandible details. You can leave a lot of things alone -most of the rear panel details, the piping, the rear underside panel details, the docking arms and rings - I have to modify all of those.

Of course, the wizards over at the studio scale forums might soon come up with a kit form of the 32-inch ESB version so it might be a better idea to just wait.
 
Last edited:
Thanks, Joero6!

I've been doing more comparisons of cockpit photos (courtesy of Jedilaw and Nwerke)

Photos can be so deceiving about shapes. The 5-footer especially is more prone to distortion than the 32-inch. Long barrels and a good distance I guess is necessary. You lose detail but you get the shape right. Details will need really close shots of course. Here the cockpit, although having the same diameter in the photos, show one as elongated and the other stubby. Here lies the difficulty of scratchbuilding using photos. And, someone who has seen only the "long" photo might incorrectly judge a model by that standard.


5183410285_403b3a22ab.jpg


Same case as below (Chronicles photo on left).

5184008248_5b9451b4a5_m.jpg


I've begun test-fitting the mandibles. Lots of work required on them. I might have to use the inner side and re-plate them to follow the plating arrangement on the 5-footer more closely. Left mandible has properly shortened length and correct toe-in, based on the Chronicles photo. Right one is how the toy's vertical mandibles originally look. Those holes will need patching up....

5183410327_b7eab36448.jpg
 
Last edited:
Thanks guys! Got some balsa blocks and glued them together. Made a template from the blown-up photo.
Took this route instead of my initial plan to cut up styrene bulkheads as it seemed easier.

5285282381_e0d9f89208.jpg


5285282263_6c7e438466.jpg


5285282543_d49e3193e2.jpg


5285880250_554b8b646b.jpg


A bit more filing, sanding and puttying up and she'll be ready to plate.
 
Glad to see you back at it crackerjazz.

Have you given any thought to building a "plug" in the general shape of the cockpit tunnel and them vac forming it in styrene? Just a thought.
 
Thanks, Weezer! I sure wish I knew how to vacuform. Anyway, I thought the cockpit tube's styrene armor plates would hide the wood grain and no one would be the wiser. Although I really kept wishing there were some type of foam that can be easily cut and carved up to shape then dipped in some magic liquid to harden it.
 
I was thinking of PVC pipes as well. I've heated PVC pipes in the past and pulled them over a tapered wooden form it work quite well. Although this maybe too big to try it.

You can use foam (the pink or blue stuff at the hardware store). You just need to paint it with latex paint first and glue a styrene skin over it.

You already have the wood version done. Maybe find some really thin styrene and skin your wooden form with it. Then your styrene plates will be easier to glue down.
 
I'm new ish to this board, but a method I use for things like this is to just get some Smooth Cast resin from Smooth-On, prop the wooden object up in a disposable tupperware container, mix up small batches of resin and pour it over the top and let it flow over it and just layer it slowly. Once I've built up enough thickness I take it and sand it smooth and start detailing!

Either way, I've been watching this thread for a while and I just wanted to chime in and say this project is freaking sweet!
 
You guys really gave me something to think about. I guess I'll have to slice up the wood in cross sections and make those bulkheads after all. There's a portion of the tube that curves though - both lengthwise and crosswise and I don't know if the styrene will follow those bends well.
Maybe Weezer is right in that I should start learning how to vacuform.

I wonder if Coolbutpointles' method will seal up the wood enough to make it resilient to humidity changes and subsequent warping.

I know countless models that have used balsa - Guillows flying models have always used them and even Jason Ware mentions using mostly wood on his Refit (not sure what kind, though - maybe the type does matter):

http://www.galaxyphoto.com/jw_ent.htm
"It was scratch built, mostly from wood and features the same pearlescent Aztec paint patterns as the 8 foot original painted by Paul Olsen in 1979".

Hmmm...what is the key to seal it up enough. Paint, I'm sure, is porous and will not hold up enough over time. Oh, didn't anyone mention the TOS Enterprise was made entirely of wood?
 
I've never had issue with sealing/coating balsa in this manner, though, admittedly, I haven't done it that many times.

Alternately, while you're grabbing the resin you could just get some silicone and make a casting of it once it's coated lightly in resin, then detail that cast piece. Plus if it breaks you can replace it with a duplicate.
 
I set out to build the actuators for the Falcon's engine feathers.

Reference photos from Studioscale:
The venerated Bandai Messerschmitt BF-109 part. What is it anyway - is it
rudder actuator?
005Kitscan.jpg


006Refphoto.jpg


001Tamiyaputty.jpg


Rolled up some putty to the right cone shape using a transparent ruler:
002Rollingtheputty.jpg


003Finalrolled.jpg


Detailed it with styrene bits and brass wire:
004Puttingthedetails.jpg


The final product:
007Finalactuator.jpg


Now, all I need to do is come up with 52 of these actuators ...hmmmm....:wacko Help, anyone.....can I make a one-piece (vertical) mold or will I need to make a 2-part mold? Hearing the word resin gives me the shivers as I've never tried it. Now I understand why it's an integral part of scratchbuilding.
 
Last edited:
Back
Top