You are using an out of date browser. It may not display this or other websites correctly.
You should upgrade or use an alternative browser.
You should upgrade or use an alternative browser.
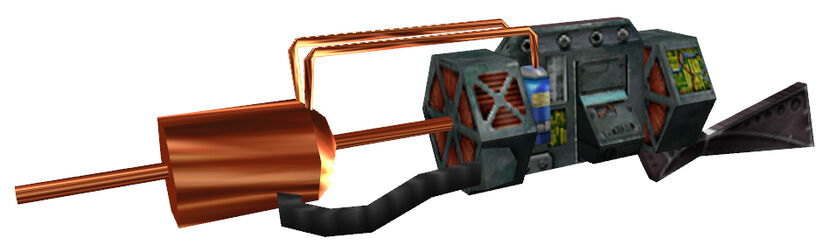
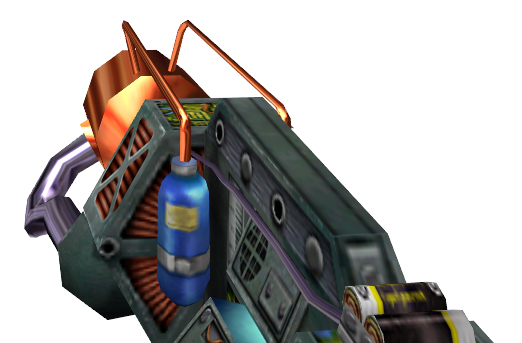
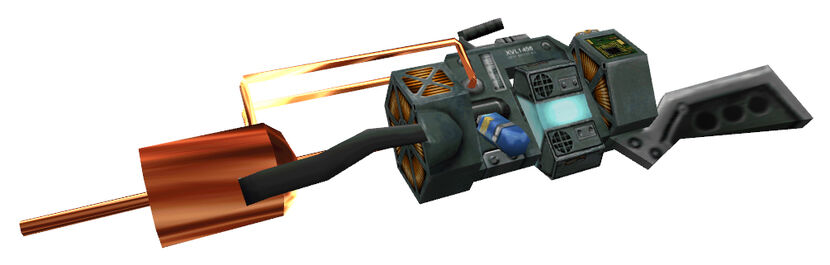
Half Life 2 Gravity Gun build (tons o' pics!)
- Thread starter Volpin
- Start date
What going on that the deadline is December 1st?
Its a bit hush-hush for now, but I'll be able to let you know later this month
I always assumed the orange stuff was Xen crystal
Good call! That's the explanation I'm going with from now on. Also gives me a few ideas about how to paint it.
Speaking of the crystal, I decided to scrap the MDF idea I had with layered laser cut parts. Despite my best efforts, I couldn't get everything together seamlessly, and part of this is because the laser cutter doesn't trim at an exact 90º angle. After sanding the MDF crystal bar for a while, I decided to just scratch the thing together with some sintra and my router. Much faster.

Mockup of how the front ring will illuminate. The two barrel "fan" parts will sandwich this clear disc so only the cutouts will illuminate. I'll also frost the clear insert to help with light diffusion. The three rectangular cutouts are where the prong actuators poke through the disc.


Mockup of where things ended EOD yesterday. I should be molding the crystal bar and the bar cage in the next couple of days, so the whole thing should look a bit more fleshed out soon.

IronCostumer
Well-Known Member
Looks awesome! I've been waiting for someone to make this; never had enough confidence to try it myself.
michelmoermans
Active Member
Awesome! Go man go!  Curious about the 1 december deadline now to...
Curious about the 1 december deadline now to...TMBountyHunter
Well-Known Member
This may be jumping a bit ahead but what kind of base/stand do you plan to have for it? D:
Seems like it will be a lot more troublesome to put down or store than the Portal Gun.
Seems like it will be a lot more troublesome to put down or store than the Portal Gun.
This may be jumping a bit ahead but what kind of base/stand do you plan to have for it? D:
Seems like it will be a lot more troublesome to put down or store than the Portal Gun.
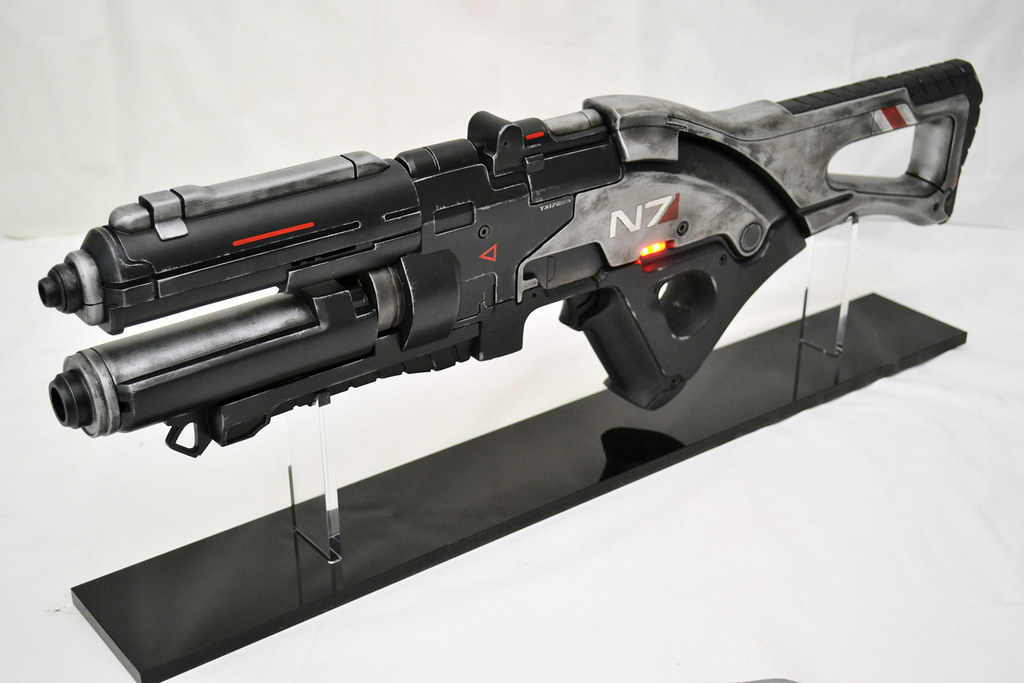
I was planing on doing an acrylic stand similar to the one I designed for my N7 rifle. There's a shop here in Atlanta that takes custom orders for stands like these. They're a bit pricey, but they really show off the finished piece well:
Been fighting a cold off and on, so progress has been a mite bit slower than I'd hoped. Nonetheless, progress continues.
Added the battery tray to the upper side of the gun. The illuminated "vent" will cover this eventually, and will be held in place with magnets. Still needs the actual battery holder, but I forgot to order that with the rest of the parts from DigiKey a few days ago, so its on hold.

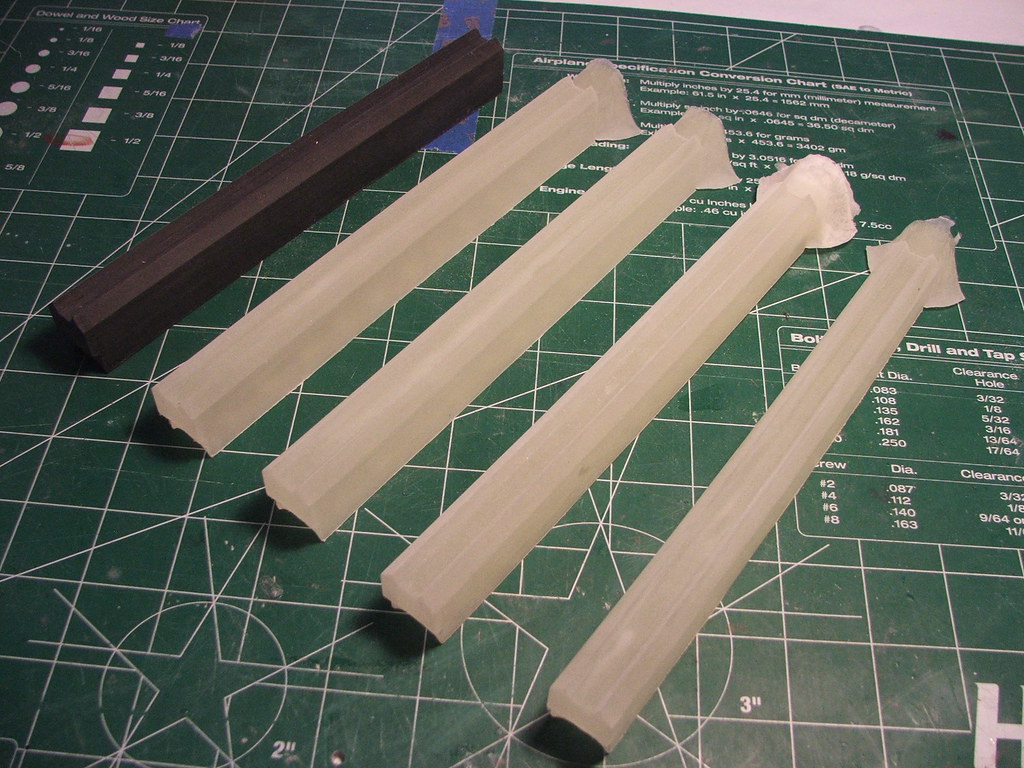
I had been struggling in my mind with the best way to get the rear pucks to fit into the back angled portion of the gun body. Trimming cutouts on the body itself had me worried, because I don't think I could get the two to line up perfectly. I decided the pucks themselves needed to be cut.
The blueprint here was based on the 3D model giving me the exact profile shape of the rear body. The jig slips over a PVC pipe, and I used my bandsaw to trim out the pucks to shape.


(These were test pucks; dud castings. I swear my rotocast skills don't suck that much!)
The finished result:

As much as I loved the Portal game and the amazing build you did of AS Portal Device... I think the Gravity Gun will be my favorite. Seeing a game weapon like this come to life is just thrilling to watch!
thumbsup
_THIS_ is the type of threads deserving of Rep points!!
thumbsup_THIS_ is the type of threads deserving of Rep points!!
That bandsaw jig is a brilliant solution for making that cut accurate. Color me impressed!
Nick
Nick
Slowly plugging away. I seem to have gotten a really nasty cold that pops up every couple of days and renders me near dead for about 24 hours. I wouldn't mind the bed rest if it wasn't cutting into my build time!
Circuit boards came in on Monday and I got all the components installed and tested. The PWM glow effect still might need a little tweaking, but I'll wait until I have all the lights in the gun before making those adjustments.


The boards sit into the light bars like so:


That piece and the light bar "cage" went under rubber a couple days ago. Poured the second half of the molds yesterday and should be ready for casting today. Yes, I used Legos. I need to make a second scalable mold box for when I have to make more than one mold at a time...


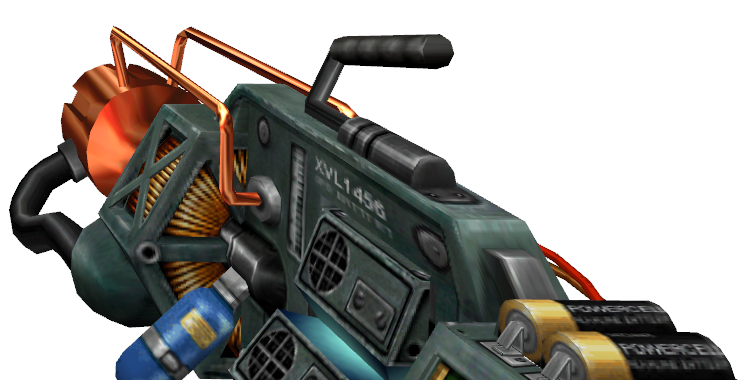
The grip has also been shaped, but just the basic form so far. Laminated sintra with a cavity in the center to hold a threaded rod to support the weight of the gun. I have no idea what the little cylinder is supposed to be, but its in the render!


2 weeks left! YIKES
Circuit boards came in on Monday and I got all the components installed and tested. The PWM glow effect still might need a little tweaking, but I'll wait until I have all the lights in the gun before making those adjustments.
The boards sit into the light bars like so:
That piece and the light bar "cage" went under rubber a couple days ago. Poured the second half of the molds yesterday and should be ready for casting today. Yes, I used Legos. I need to make a second scalable mold box for when I have to make more than one mold at a time...
The grip has also been shaped, but just the basic form so far. Laminated sintra with a cavity in the center to hold a threaded rod to support the weight of the gun. I have no idea what the little cylinder is supposed to be, but its in the render!
2 weeks left! YIKES
Lego mold making, genius!
Seconded. If that had occurred to me while I was still doing castings it would have solved so many headaches.
Great looking project. I can't wait to see the finish.
Mo' work!
The molds came out very well, some of my cleanest yet:


And the results!

(need to pull 2 more light bars but I ran out of resin...)
Started working on the illuminated "vent" thing that sits over the battery tray. 2 magnets will hold this in place and the 2 orange LEDs in the back provide the lighting.

Lighting is blown out a bit here, but you get the idea. The light is a lot less yellow than this in person but my camera is unpredictable at best.

Also, the board jumpers are done and I hooked up one to the arduino to see how the glow effect looks. I'm pretty happy with it!
video here!
The molds came out very well, some of my cleanest yet:
And the results!
(need to pull 2 more light bars but I ran out of resin...)
Started working on the illuminated "vent" thing that sits over the battery tray. 2 magnets will hold this in place and the 2 orange LEDs in the back provide the lighting.
Lighting is blown out a bit here, but you get the idea. The light is a lot less yellow than this in person but my camera is unpredictable at best.
Also, the board jumpers are done and I hooked up one to the arduino to see how the glow effect looks. I'm pretty happy with it!
video here!
KevVader
Sr Member
Also, the board jumpers are done and I hooked up one to the arduino to see how the glow effect looks. I'm pretty happy with it!
video here!
Very cool, well done! Love the glow sequence.
madmanmoe64
Well-Known Member
Awesome light effects. I was going to suggest LED light strips, but now I can see why you needed custom ones.
Similar threads
- Replies
- 4
- Views
- 313
- Replies
- 3
- Views
- 305