Ghostbusters Ecto-1 Project: The Largest Ever

Ultimate Badass

Well-Known Member
Well, I'm new here, and I figured to gain at least some credibility I would post the biggest project I will ever tackle. Most of this stuff is already posted over on the Ghostbusters Fans forum, but as only a small portion of people who might appreciate this actually go there and track my build, I wanted to share it here.

I hope you guys enjoy this project as much as I have...this is a true labor of my love for Ghostbusters and their car and a day doesn't go by where I don't talk about this with at least someone.

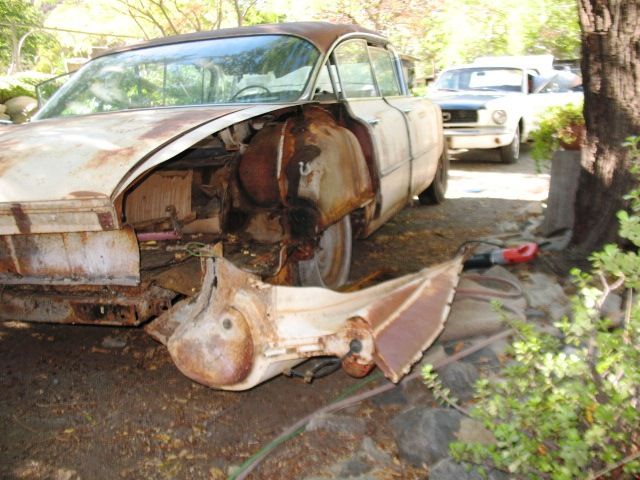
The story begins back on April 10, 2011. I got a text message from a good friend of mine about a 1960 Miller Meteor hearse for sale in California on Craigslist. Everyone knows that the Ecto-1 was made from a 1959 Miller Meteor, but the early 1960 M&M has essentially the same chassis, and is the best alternative for an Ecto. With this in mind, I contacted the seller right then and within a few hours had an agreement to buy this car which I was hoping was in as nice of shape as I was led to believe through my conversation with the seller and the photos he supplied to me (I would ultimately find out that the car was in immaculate shape for its age, probably due to the fact that it was in New Mexico and Arizona for most of its existence)...

Pic2_zps94586f14.jpg


Pic1_zps41e7b3aa.jpg


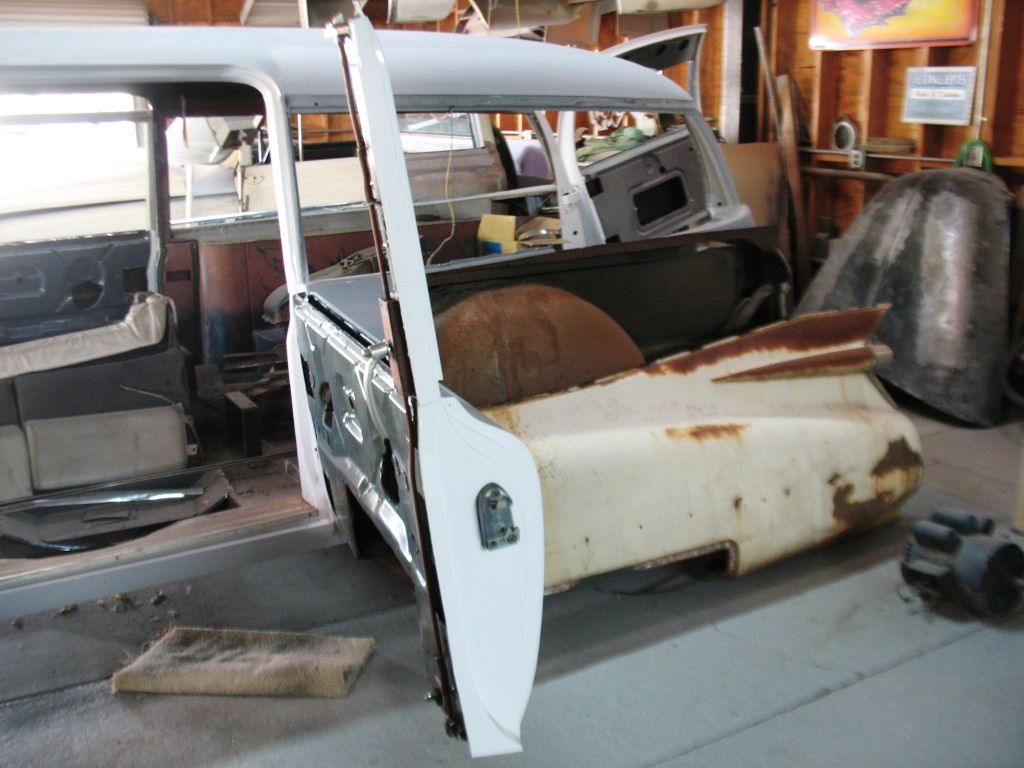
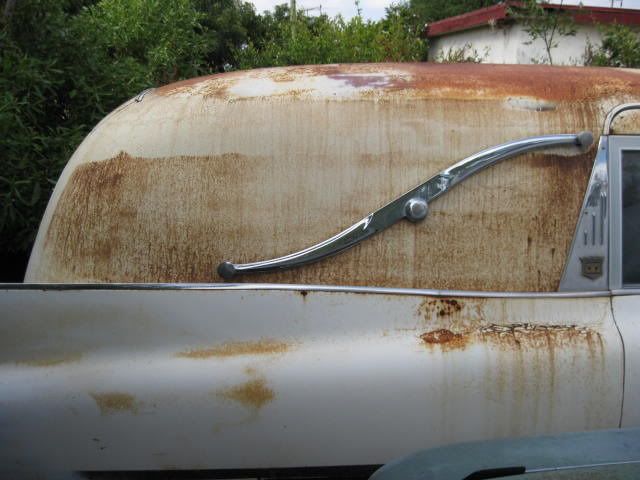
Now, as I said, this was a Landau hearse, which does not have the rear windows...so I had a RIDICULOUS task ahead of me...I had to find the window moldings and the rear curved glass windows for the back of my car. With a ton of luck and a few weeks of intense hunting, I found the ONE GUY in the world who had everything I needed. He would ultimately drive these parts to me peronsally from Wisconsin (yes, he wouldn't even risk shipping something impossible to replace...).

As this was all unfolding, I had preliminary discussions with a few people about how it would be one hell of a project to convert my 1960 M&M into an ambulance (which was being arranged already) and then into a 1959 (no small task)...well...it had to be done. I was connected to someone who was skilled enough to complete such a project - the guy is probably the only person from all accounts that could make my car an indiscernible 1959 from a 1960. When he agreed to take on this project, it was time to get the car ready for the rear glass...

Pic3_zps64020adb.jpg


Pic4_zpsecacf782.jpg


As you can see, the window spaces were cut perfectly, using the inside window seams that were actually present on all of the M&M's, even the Landau hearses that did not have windows.

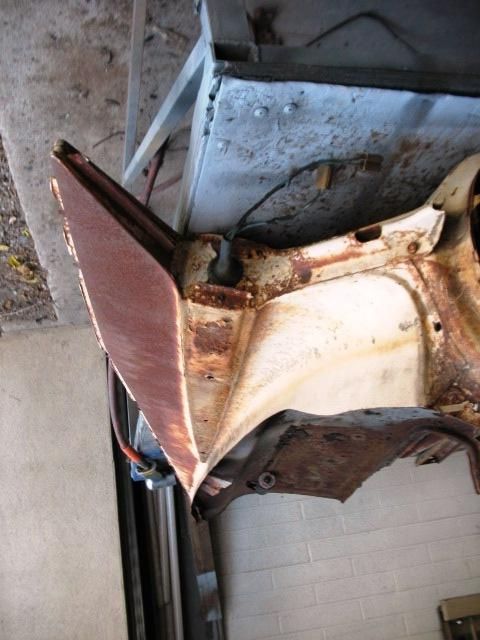
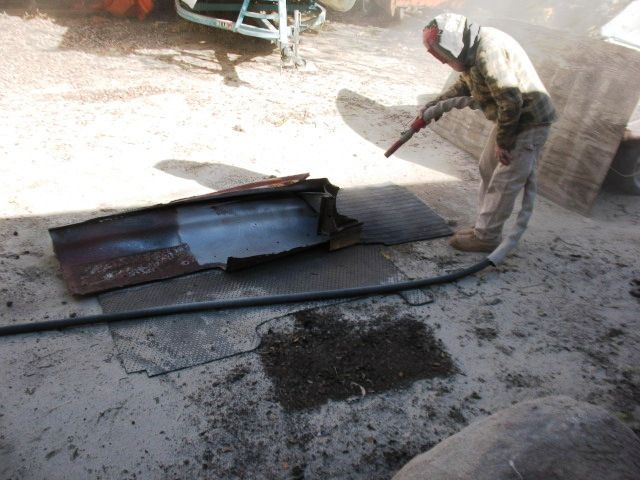
Next it was time to remove the rust. Thankfully, my car was in terrific shape. The floors were not rotted out like most of these cars you'll find. Also, the guy in California who is working on my car (yes, it's still in California while I admire from across the country in Pennsylvania) said "This is the nicest 1960 car I've ever seen...I can't believe how little surface rust there actually was". It sure cleaned up nicely...

Pic5_zpsfdb3ad67.jpg


Pic7_zps369a8dbe.jpg


Pic10_zps9d4ad582.jpg


Pic6_zps526587fd.jpg


Pic9_zpsbe39a2b4.jpg


The car was starting to come together...and my excitement continued to grow with each passing day as my wallet continued to become emptier and emptier by the second (this process has been extremely expensive).

I will break up my posts so that I can keep track of all of the photos I am posting...this concludes post #1!
 
So the story continues...

The next matter of business that was approached was the front end of the car. I actually bought a 1959 Cadillac parts car to take every single part I needed to replace everything that was different on the 1960 - my Ecto at this point has everything 1959 it needs to essentially be one.


Here are the 1959 front fenders I would be using:

1959FrontFenders_zps8b6c6fce.jpg


Here is the original master cylinder (nasty, I know):

MasterCylinderOld_zps3d43a5d4.jpg


Here is a shot of one of the original brakes (also nasty):

BrakeOriginal_zps3e52e658.jpg


Well, all of this was cleaned up to get to work...

Pic8_zps082b66a9.jpg


Now we can get going!

Remember that ugly front brake I showed you? Well, I had talked with my guy about converting the front brakes from drum to disc brakes for safety (when you've got a car that weighs a few tons you want to be able to stop it). Well, it had to be done (actually, it already has been done)...


The new disc brake conversion kit:

DiscBrakeKit_zpsed08f9c0.jpg


BrakeUpgrade_zps00f615d1.jpg


Obviously, these look way better than the originals...

I also got a new master cylinder:

MasterCylinderNew_zps25c478bb.jpg


Also, I wanted an engine that doesn't suck. Unfortunately, the stock engines in these cars do suck and lead to lots and lots of headaches for the people that own them. Being that my car was being heavily modified I did not care about having a stock engine (mine didn't even function correctly anyway). Instead, we decided to go with a new Chevy 454 BIG BLOCK - something badass to pull this massive beast with power...

Chevy454BigBlock_zps540fff95.jpg


Also, remember those front fenders? Well they were fully restored:

1959FrontFenderRestored2_zpsb3d194c9.jpg


1959FrontFenderRestored_zps87e7e24f.jpg


And once they were applied, I got the first glimpse of something that resembled the car I would ultimately have:

Pic11_zps92d4c903.jpg


At this point in time, it was already August of 2012. Time flies when you're having fun...I guess?
 
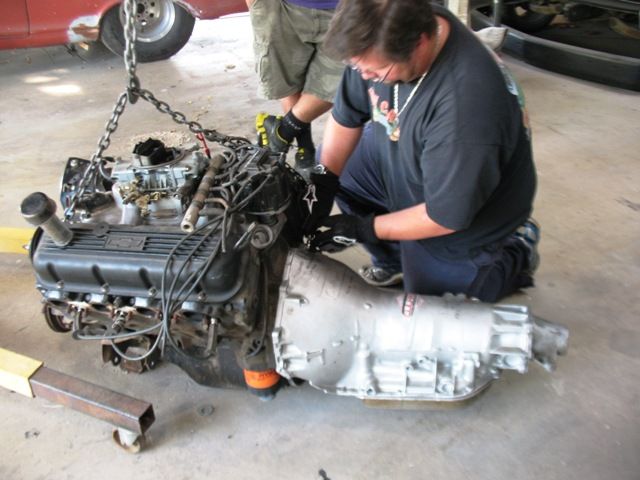
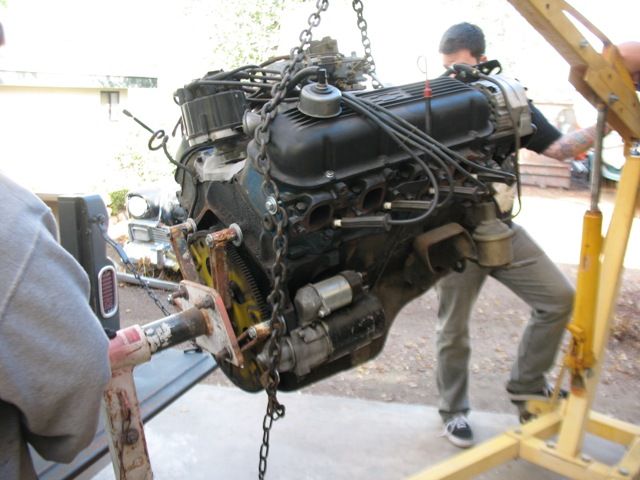
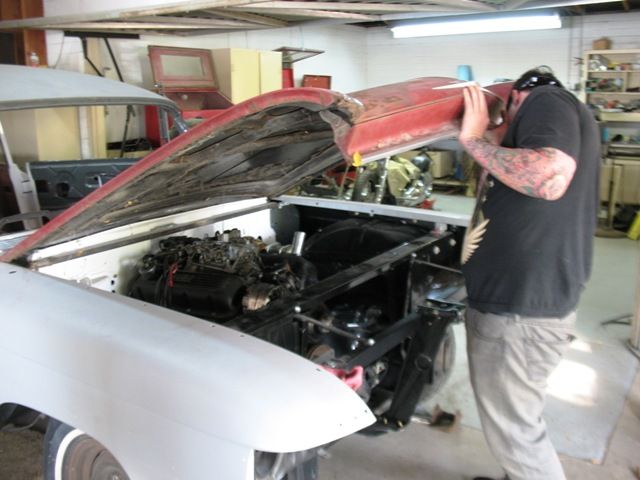
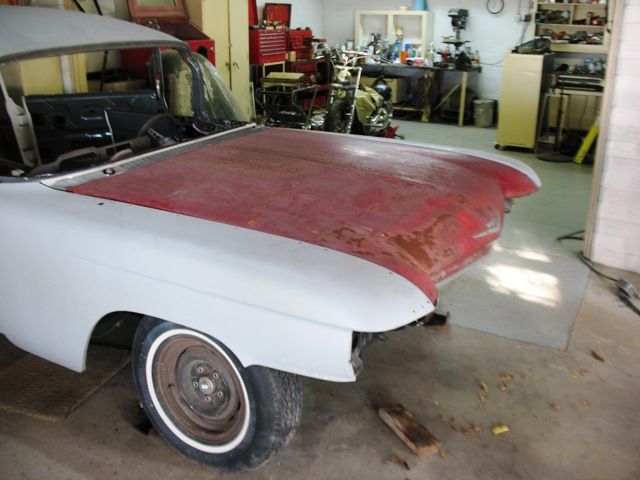
Next it was time to get the engine in and make sure it would all fit. Some modifications have since been completed after these photos were taken, but I can tell you that everything does indeed fit, and also, the hood has been fully restored, so don't mind the ugly, rusted red appearance as you see below...


See, told you it fits...

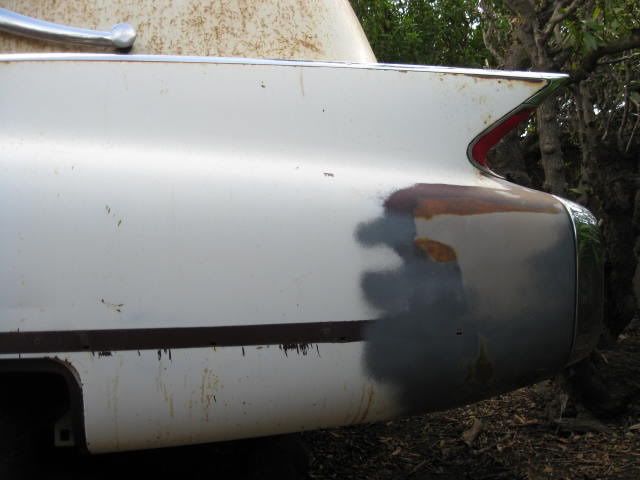
Also, around this time, the rear conversion was started. Obviously, the tailfins from a 1959 are much more impressive than from a 1960. Some people simply cut the fins off of one year and graft it on the other. I, on the other hand, wanted my entire rear-end of the car to be accurate to a 1959 (this would turn out to be a HUGE, time consuming conversion...but awesome nonetheless).


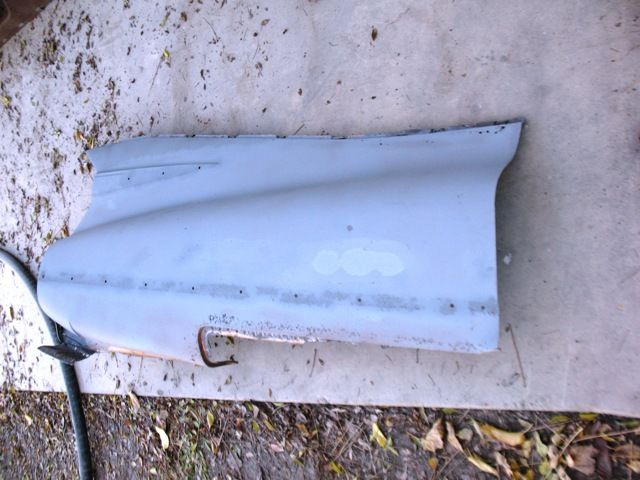
And now, the 1959 rear quarters...


Obviously, these needed to be cleaned up quite a bit...


And, remember the hood? Well, it god an initial makeover as well...


Last edited:
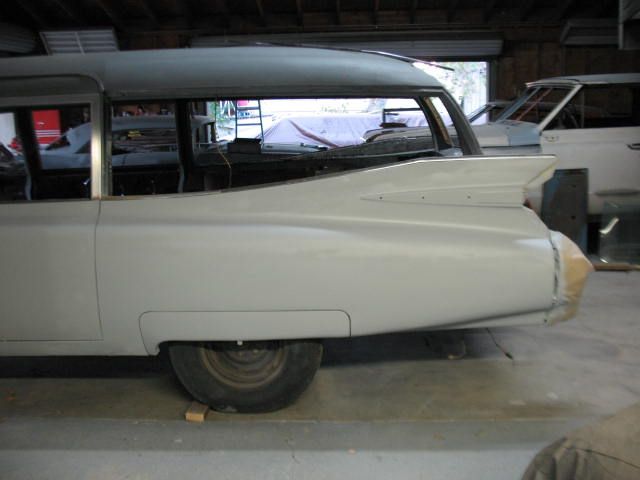
It was now January - March of 2013 and the 1960 to 1959 rear conversion was officially the focus of attention.

The first step was to line the 1959 rear quarter panels up, and it had to be perfect...

59Conversion_zpsa041e43a.jpg


59Conversion3_zps426bebff.jpg


The driver side looks to be lined up pretty well...and so did the passenger side:

59Conversion1_zpsfa610a20.jpg


Here are a few photos of how the car was looking overall at this point (these pictures blew my mind when I saw them)...

59Conversion4_zps6812cead.jpg


59Conversion5_zps7536be62.jpg


The rear quarter panels were not yet grafted on and welded in place as of yet as some other work had to be completed first...

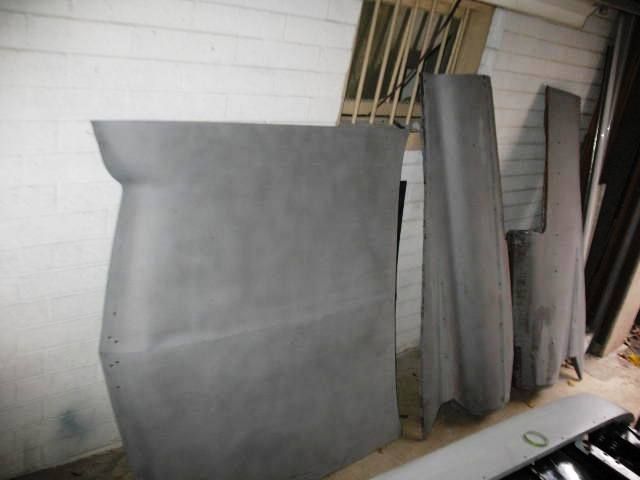
The inside of the rear quarter panels had to be cleaned up and then they received a nice rust-proof coating as you can see below.

InsideRearQuarter2_zps2dce3ec4.jpg


InsideRearQuarter3_zpsc11ec9ec.jpg


InsideRearQuarter_zps65ca1fff.jpg


Also, if things weren't technical enough, the height of the fins on a commercial 1959 Cadillac are slightly higher with a slightly different steepness to the angle they come up off of the quarter panel. We used another 1959 Miller Meteor to get the appropriate measurements, and my 1959 fins were adjusted using parts of the fins from my 1960 rear quarter panels which had already been removed...

FinHeight1_zps5bc9ce60.jpg


FinHeight2_zpsea031294.jpg


FinHeight3_zpsb1cd9fde.jpg


And now the fins were correct and looked badass! Feast your eyes:

FinHeight4_zpsd7409406.jpg


May 2013 was approaching, and a very special trip was planned - I was going to California with three good friends to finally see my baby (yes, I didn't actually see my car in person until over 2 years after I bought it). The trip would turn out to be the ultimate Ghostbusters dream...and the pics and brief summary from that trip will follow in my next post, but for now I must step away from the computer for a bit.

I hope you're enjoying this so far.

- Adam

 
Yikes! I didn't actually think anybody would be ballsy enough the swap out the 60 fins for the 59 Fins. How long have you been working on this thing?
 
Go big or go home!!! Good choice on the new engine and disc brakes. The vintage pieces would never have held up under regular use. I will follow with interest!
 
I didn't swap out the fins - the entire rear quarter panels were swapped (the rear inner quarter panels and tail-light shape from the 59 and 60 are different)...everything had to be taken, not just the fin.

This project began in May 2011 and is still ongoing...I'll be posting more photos shortly. Thanks for the posts!

Yikes! I didn't actually think anybody would be ballsy enough the swap out the 60 fins for the 59 Fins. How long have you been working on this thing?
 
I didn't swap out the fins - the entire rear quarter panels were swapped (the rear inner quarter panels and tail-light shape from the 59 and 60 are different)...everything had to be taken, not just the fin.

That's what meant. Still, that's one hell of an undertaking. Can't wait until you get the roof equipment started.
 
Alright guys, I am back with some more photos (it may take me a couple days to get them all up on here from GBFans). As I mentioned in a previous post, I took a trip to California in May 2013 with 3 of my good buddies to finally see my car. It didn't disappoint...

EctoTrip1_zps634dc20c.jpg


THE CAR IS HUGE...AND AWESOME.

EctoTrip2_zpsa84221c2.jpg


Here I am with my buddies (I'm the tiny guy on the right):

EctoGroup_zps4e8608bc.jpg


And here I am with the guy working on the car (he's the shorter, older guy on the left) and the guy who sold the car to me (obviously he's the tall guy on the right):

EctoTripRoger_zps4ec6f04d.jpg


Another photo of the mastermind behind the actual body work...

EctoTrip_zps318b30fa.jpg


My buddies and I eventually took a trip to Sony to take the backlot tour because we knew the movie car was on display...

EctoTrip3_zpse699d8ca.jpg


She's still a sweet ride, but, sadly, it still has a lot of issues. A number of the roof accessories were changed or "restored" very poorly back when they last had the car redone. I wont' go into specifics, but let's just say that for the money it reportedly cost, I think Sony got fleeced a bit.

My buddies and I also met up with Michael Gross, who was a producer for both films...

MichaelGross_zps3b9cc6ed.jpg


We visited a number of locations in Los Angeles used during filming and took this next shot in the lobby of the Biltmore Hotel (where Slimer gets his ass kicked)...

GroupBiltmore_zpsc37a39ae.jpg


Oh, and just to say it, ANYONE who goes to Los Angeles has to eat at Manuel's El Tepeyac Cafe (best burritos you will ever have), Roscoe's House of Chicken n' Waffles (so ridiculously good), and House of Pies (get the key lime pie...trust me).


The summer of 2013 would then begin, and that would involve officially grafting the 1959 rear quarter panels onto the car (again, this was not simply taking the fins...we took the entire rear panels from a 59 to build around the chassis of the 1960, which, as I said before, is the same to the 1959). Actually, I should point out that during the 1960 production year, the roof of the M&M changed, so only early 1960 M&M's like mine share the same chassis as the 1959...but that's beyond the scope of this thread.
 
So now the fun really began...and the car started to become the Ecto I've always dreamed of having...

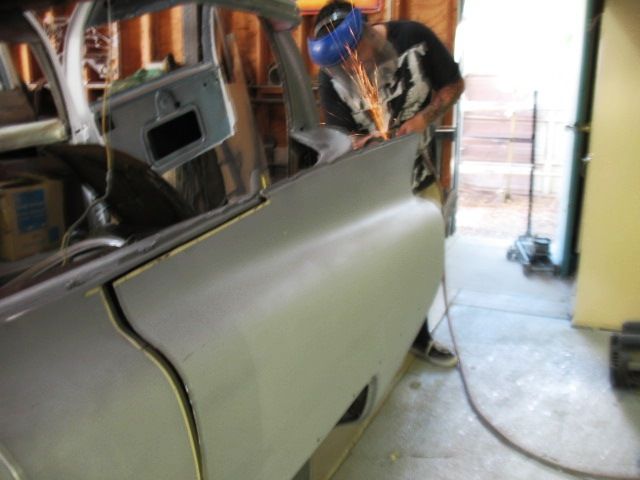
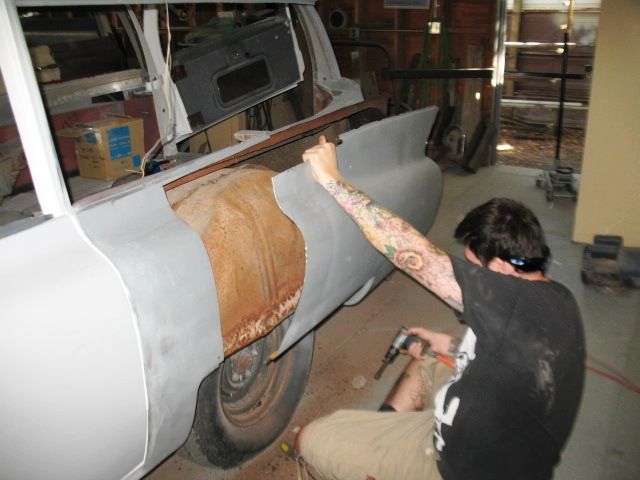
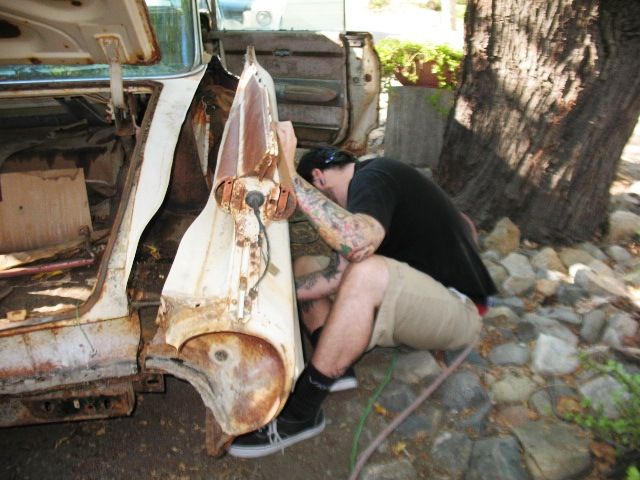
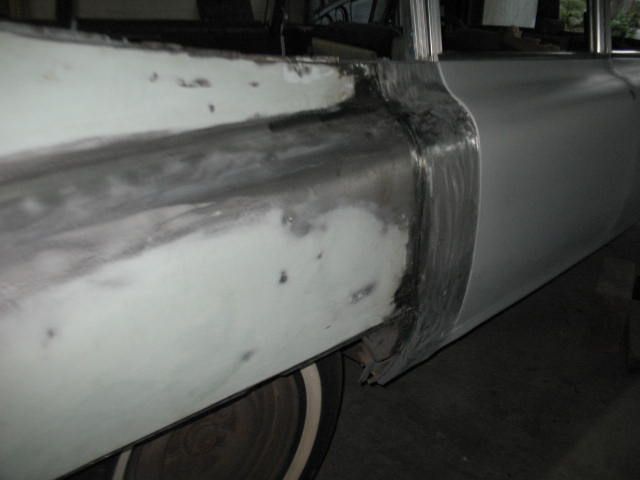
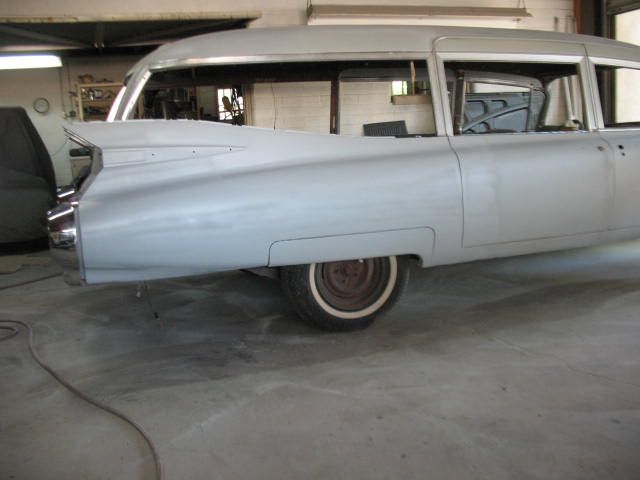
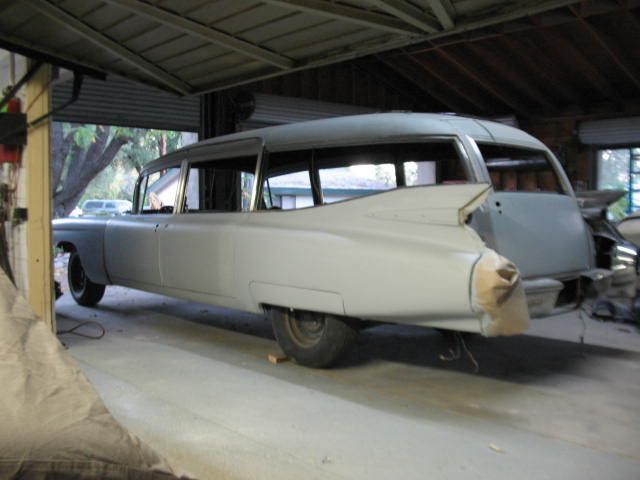
The rear quarter panels officially became a part of the car over the summer of 2013. These photos document it as quickly as I can condense the process, but I assure you it took a LONG time to make this happen correctly.


Passenger quarter grafted (the driver side photo looks the same but is blurry so I left that one out):


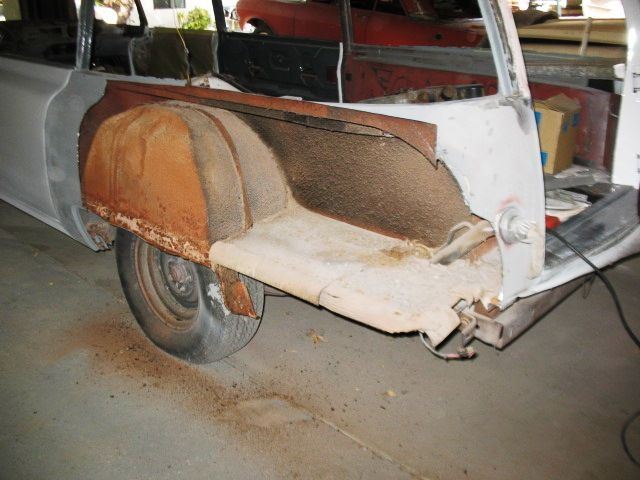
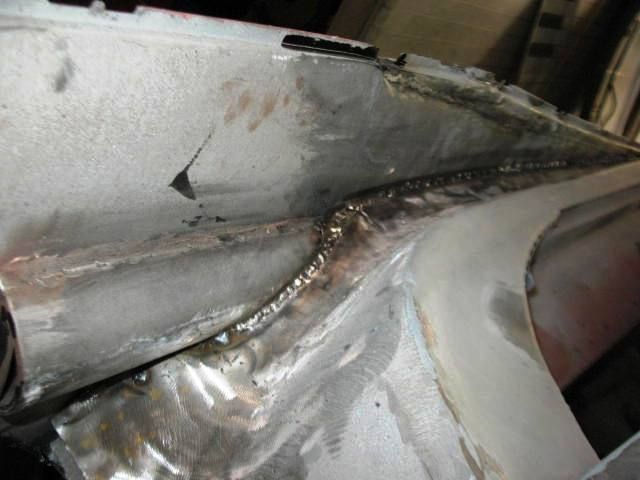
Here's one of the early photos of the inside of the rear quarter panel welding process:


And now...get ready...this is where the awesomeness of this really sinks in...


DRIVER SIDE BEFORE & AFTER:


PASSENGER SIDE BEFORE & AFTER:


Yes, the car sure got prettier...


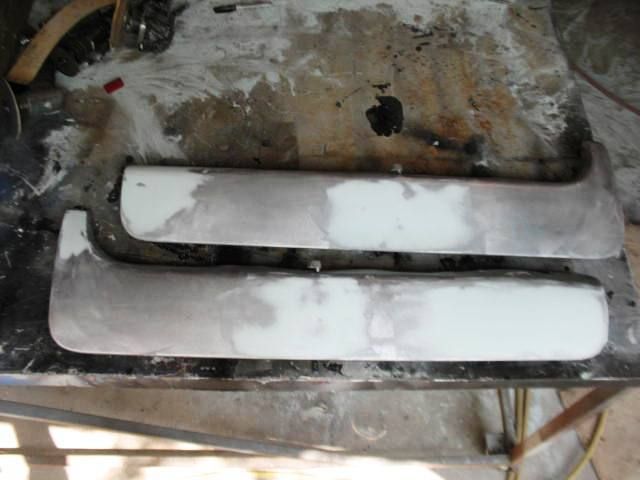
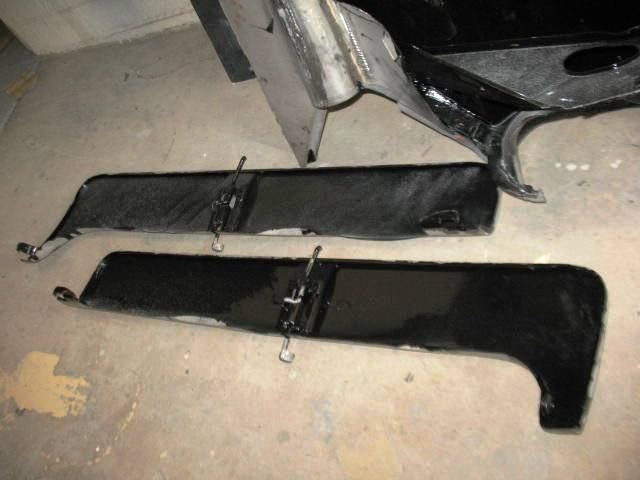
And yes, the rear fender skirts were also fully restored (just as every single part of this car has been)...


More photos to come shortly!
 
I have seen one of the copies of the original and you Sir are taking this to the NEXT level. Well done, well done indeed. I am so happy to see someone properly engineer a iconic vehicle like this into something that could actually do the job and not explode. The attention to detail as you have gone along is a beautiful thing.

Thanks for sharing.
 
Well, now it's time to get even more down & dirty. Reshaping the inside of the rear quarter panels to the chassis...something I don't think anyone other than the wizard helping me create my dream car could pull off. Now, remember, these are still not covered in primer, so they look not-so-nice, but as far as the shape goes, these are LEGIT.

RearInnerQuarter_zps58a7cef0.jpg


RearInnerQuarter1_zpseea37b93.jpg


Initially, there was just too much of a gap between the inner quarter panels and the rear tail-light chrome, so I asked my guy to address this, and suffice it to say that he got things to line up perfectly as you can see below...

RearInnerQuarter2_zps5dc5f198.jpg


RearInnerQuarter3_zpsde68fa96.jpg


Now, the Ecto in the movie has a lot of features that are extremely rare for the 1959 Cadillac hearses/ambulances. One of these things is its rear bumper. There is a very unique step in the movie car's rear bumper...a step that I have not seen in any other car's rear bumper. There were step bumpers that you can find if you're lucky (I know someone who has one), BUT, the movie car's step is different than the step I've seen in the 2 or 3 other step bumpers I've come across in photos (and it's different than my friend's). I managed to get some good photographs of the movie car's rear bumper when we were on our California trip, because I knew the movie car's step was going to be something that would set my car above the rest - I had to have the step recreated, and it has been, to exact dimensions and details (excluding a few meaningless screws, which I asked be left off of my car to limit future rust issues in the chrome).

Here is the step in the bumper being created - again, the movie Ecto is the only time I've ever seen a step like this...

RearBumperCut_zpsb4dde6b8.jpg


RearBumperStep_zpsd08adce9.jpg


RearBumperStep1_zpsf609f29e.jpg


RearBumperStep2_zps57b76d9d.jpg


At this point we've reached 2014. January 2014-present has been spent doing a number of things. The first matter of business: restoring the hood!!!!

After we sand-blasted the parts, there was some waviness to parts of the hood, which required a lot of handwork, but we got it right...the progression of the hood is below.

HoodRestoration1_zps902f6963.jpg


HoodRestoration2_zps8dd020c3.jpg


The corners of the hood needed some extra love:

HoodCorner1_zps4b147fd2.jpg

HoodCorner2_zpsac695c27.jpg


And, BAM! The finished product:

HoodRestored_zpsf8323445.jpg


Also, on the 1959 Cadillac there is a piece that attaches just under the hood between the headlights. This required restoration just like everything else for some mild rust issues...

HoodLipRough_zps01200d57.jpg


HoodLip2_zpsdacd5e52.jpg


HoodLip_zps8f98c9dc.jpg


The finished product being placed:

HoodLipCompleted_zpsdec33300.jpg


All of this work for the outside of the car...but what about the inside? Hmm...


Boy, have I got some awesome photos to share in this post. So, as I mentioned, it turns out that the inside of the car needs work too. My car needed a correct bench seat (mine had a seat from a 1964 S&S hearse in it...that just wouldn't do). Fortunately, I found one in New Jersey:

EctoBenchSeat_zpsc8de3e1c.jpg


This will be fully restored when I have the time to find the best person for the job (likely this summer).

I have also found true 1959 M&M rear jump seats to fully restore as well, but they are packed away safe & sound and I do not have a photo of them (sorry).


SO...now it was time to tackle the dash (this is what is being done as we speak...these photos are only a few weeks old):

The initial dash was in rough shape (this is from the 1959 Cadillac...the 59 and 60 have different dash panels and I wanted mine authentic).

DashPad_zps66580275.jpg


The dash was stripped clean to prep for restoration...

BareDash2_zpsc77dea31.jpg


Yes, that is not an accurate steering wheel...but don't worry...I've got one that will be restored and replace this ****ty one.

BareDash1_zpsabac7738.jpg


All of the rust was cleaned up and everything coated to prevent rusting and voila, she is looking much prettier:

DashPainted1_zps044b9fd1.jpg


DashPainted2_zps8b3f8f1d.jpg


"IF MY CALCULATIONS ARE CORRECT, WHEN THIS BABY HITS 88MPH, YOU'RE GOING TO SEE SOME SERIOUS ****." - Doc Brown

DashPanel_zps811d1252.jpg


Believe it or not, with the 454 big block engine, this baby could get up to 88mph or more without question...but yeah, I don't have the balls to get her up to that speed.


Anyway, from the original 59 dash we dissected out the dash pad core plate:

DashPlate_zps90f3204d.jpg


DashPlateTop2_zpsd10205a9.jpg


Fortunately, this plate was in perfect shape. I stated that I'd rather have the dash recreated over this core than trying to fix the horribly-conditioned original dash that's cracked...and boy, am I happy I was willing to spend the extra money...it turned out BEAUTIFUL:

DashRedone3_zpscd2078ae.jpg


DashRedone1_zpse1010e4b.jpg


DashRedone_zpsb8fe3a15.jpg


Here it is installed:

DashRedoneFull2_zpsd515cabc.jpg


DashRedoneFull_zps8903fc55.jpg


See...beautiful!!!

Oh, and remember that steering wheel I mentioned? Yeah, I really do have an accurate one:

1959CadillacSteeringWheel_zpsaa19ebe0.jpg


Oh, and the gas tank? Yeah, well, that's an issue too...

GasTank_zps03fa5208.jpg


Yikes...looks bad. Oh, and when it was emptied, some sand and pebbles came out...

GasTankContents_zpsc732df62.jpg


Long story short, we got a new gas tank...it's actually from a Chevelle wagon (which is compatible and holds a bit more gas...so I can drive longer...yes!).

NewGasTank_zps8ddbd18e.jpg


OldandNewGasTank_zpse2c6b286.jpg


I'll be lucky to get 8mpg with my engine and this car's size, so the larger gas tank is actually a big, big deal.

More photos are coming shortly!

- Adam


Last edited:
Oh, and I forgot to post the photo of my steering wheel horn ring with the last post...these damn things are expensive for 1959 Cadillacs!

1959CadillacHornRing_zpsc361e343.jpg


Ok, that's enough posts for today. I'll finish catching up with photos tomorrow. Thanks for posting your feedback guys! I really am happy that other people appreciate the project!
 

Your message may be considered spam for the following reasons:

If you wish to reply despite these issues, check the box below before replying.
Be aware that malicious compliance may result in more severe penalties.
Back
Top