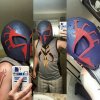
First Foam Build: Ends Of The Earth Inspired Spider-Man Armor (PIC Heavy)

Holy crap man! How do you get such a perfect round shape for the head?? I can't figure it out!

Haha.. yeah well, as you can see from the first bucket, I didn't do a very good job getting it round the first time out.

The first thing I did before making a helmet was watch this guy's tutorial: https://www.youtube.com/watch?v=ODSNPYdvJRo

It looks okay, but there's a clear seam down the middle and it peaks toward the top instead of a nice clean roundness
11183463_829896433753697_2487503673318798671_n.jpg11202852_830252220384785_4463717330301391556_n.jpg


I didn't use a heat gun on that one... once I started using the heat gun on everything I got better curves... which I won't post another picture of since they're just right above this post.
Really, I think roundness comes from the pattern before anything else, then curving from the heat gun and last but not least patience and careful gluing :)

I don't know if that helps at all, Spiderdoode
 
That helps a lot! The only other questions I have would be, what is your process for like sealing the helmet? I used Modpoge when I did a helmet recently but some of the holes were still showing. Pic below:

11899892_10203190412759926_7415729518935846489_o.jpg

Thanks for all of your help btw! =)
 
That helps a lot! The only other questions I have would be, what is your process for like sealing the helmet? I used Modpoge when I did a helmet recently but some of the holes were still showing. Pic below:

View attachment 516717

Thanks for all of your help btw! =)

Awesome bucket man. I love 2099
With the first helmet I did layers of PVA glue+water+puffy paint. I layered in globs of glue and puff paint to seal any holes or seams and every couple of layers I sanded it down to get it as smooth as I could. The glue settles into the holes so I have to keep doing that over and over until it looked flush enough to the surface. I basically repeated that ad infinitum for about a week. This time around I'll probably just do a few layers of pva+water then I'm going to plasti dip it. Hope that helps! and no problem, glad to be of service :)

Doode. That is extremely helpful! I think my biggest problem is that I'm not patient lol But it sounds like I'll have to work on that lol Thanks a lot man this has been UBER informative!
 
Just an update: I have not given up on this. Just havent had the money for more paint. Everything is built and once it's all painted, i'll post some new pics.
:)
 
Re: First Foam Build: Ends Of The Earth Spider-Man Armor (PIC Heavy)

Here's what I have so far all in one place. First time I them all next to each other ... Awesome.
View attachment 483556
I didn't make the shoulder pieces. I just painted them. They are hockey knee guards (I think) that I got at the thrift store for 3 bucks. They just happen to fit my shoulders like gloves... shoulder gloves. The gray parts will be black
View attachment 483557
That is looking EPIC. Keep up the great work
 
Hooray! A long overdue update..
Chromed that bucket
IMAG1425.jpgIMAG1426.jpg

Also, I've skipped the plastidip step. I've been making a custom armor and arm cannon I designed for a friend and skipped that step and it looks great, so I decided to do the same for my spidey armor..here's a reference photo to demonstrate that it still looks good without:
IMAG1418.jpgIMAG1421.jpg
 
glad you are back and Dang! both of those look really awesome :)

Thanks! I'm quite pleased with the armor and gun I made my sister.. its been a side project to keep me busy. Been using acrylic paints and scraps of foam.

Also, I've noticed the quality of the foam decides how much paint it swallows up without being sealed. The new foam practically closes up entirely once its hit with the heat gun, the old foam which was actually used as a floor mat for a few years, it takes a couple layers of paint to look good.
 
hmm I never noticed that, good to know! But I use 12x18 sillywinks foam :)


The black foam I use is the anti-fatigue mat foam for like shop floors. Pretty solid stuff.. The multi-colored foam pieces I was using, however, were from my daughter's old alphabet mat.. Which, incidentally, got a lot of wear and tear... like 4 years of wear and tear. The latter of the two did not seal up like the other once hit with the heat gun.
 
So I decided what my armor was missing was some lights. Even though none of his armor's, except the stealth suit, have em... I figured an arc reactor type of chest light would be cool.. so, here it is. The spider will be better affixedIMAG1444.jpgIMAG1446.jpgIMAG1445.jpg over it of course..
 
So, I'm contemplating adding EL wire to this build.
Something like this... terrible mock up in MS Paint... Just accent lighting down the abdomen and thigh... What do you guys think?

SPIDEY ARMOR EL WIRE IDEA.jpg

Does anyone have experience with EL wire? Tips?

Also, I want to light the eyes... Is there a way to do this while still being able to see? Most everything I've come across seems like it will just be headache inducing.

Thanks for any tips!
 
This thread is more than 7 years old.

Your message may be considered spam for the following reasons:

  1. This thread hasn't been active in some time. A new post in this thread might not contribute constructively to this discussion after so long.
If you wish to reply despite these issues, check the box below before replying.
Be aware that malicious compliance may result in more severe penalties.
Back
Top