ED-209 by Moderoid

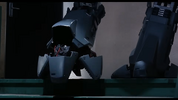
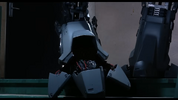
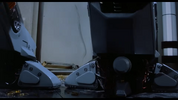
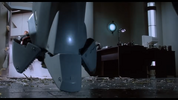
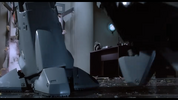
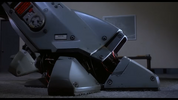
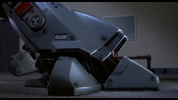
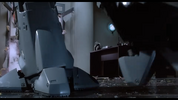
I blame Fett_Ish and Too Much Garlic for turning me into an ED-209 foot fetishist. I didn't realize it till I started this project, but i's actually surprising how many shots there are of his feet in the movie!

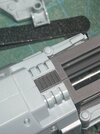
Fett_Ish, in reference to the "steps" on the tops of the toes you were looking at, apparently they're retractable and move into the toe while he walks (another cool detail on what is an amazing stop motion character). That's why they're visible in some shots and missing in others. So it's correct either way. There are also a couple pretty nice shots of the guts of the feet for your tubing and wiring project.
 

Attachments

  • videoframe_17240.png
    videoframe_17240.png
    1.2 MB · Views: 47
  • videoframe_157524.png
    videoframe_157524.png
    1,005.1 KB · Views: 50
  • videoframe_153554.png
    videoframe_153554.png
    1 MB · Views: 46
  • videoframe_89761.png
    videoframe_89761.png
    1.1 MB · Views: 41
  • videoframe_86268.png
    videoframe_86268.png
    1.3 MB · Views: 44
  • videoframe_85697.png
    videoframe_85697.png
    1.2 MB · Views: 48
  • videoframe_20099.png
    videoframe_20099.png
    1.1 MB · Views: 43
I blame Fett_Ish and Too Much Garlic for turning me into an ED-209 foot fetishist. I didn't realize it till I started this project, but i's actually surprising how many shots there are of his feet in the movie!

Fett_Ish, in reference to the "steps" on the tops of the toes you were looking at, apparently they're retractable and move into the toe while he walks (another cool detail on what is an amazing stop motion character). That's why they're visible in some shots and missing in others. So it's correct either way. There are also a couple pretty nice shots of the guts of the feet for your tubing and wiring project.
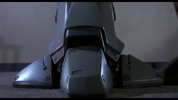
Awesome! Thank you for all the reference. I am working on getting that front toe looking good and now you gave me a good look at the back of the side toes which need work! Hahaha
 
Awesome! Thank you for all the reference. I am working on getting that front toe looking good and now you gave me a good look at the back of the side toes which need work! Hahaha
Happy to add more work! :p Fortunately, the backs of the side feet aren't egregious. Maybe bulking up the raised section, adding a couple false bolt heads, and filling in that cutout on the end if you want to really be a stickler (I'll likely leave it as-is, except maybe for a couple bolts).
 
Happy to add more work! :p Fortunately, the backs of the side feet aren't egregious. Maybe bulking up the raised section, adding a couple false bolt heads, and filling in that cutout on the end if you want to really be a stickler (I'll likely leave it as-is, except maybe for a couple bolts).
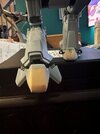
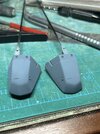
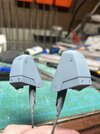
I want to smooth the transition on the shins a little add the missing ‘fasteners’ on the feet and that square indentation back on the toe, then it’s all cables, and hose replacements for leg and feet mods. I tried to replicate the stair check pose, I have to remove some putty I filled the toe with to get a total downward point. Other than that it works pretty good.
 

Attachments

  • IMG_2044.jpeg
    IMG_2044.jpeg
    1,010.4 KB · Views: 40
I want to smooth the transition on the shins a little add the missing ‘fasteners’ on the feet and that square indentation back on the toe, then it’s all cables, and hose replacements for leg and feet mods. I tried to replicate the stair check pose, I have to remove some putty I filled the toe with to get a total downward point. Other than that it works pretty good.
Looking really good! You really hit the slope of that front toe perfectly.
 
IMG_2049.jpeg
IMG_2047.jpeg
IMG_2045.jpeg

Looking really good! You really hit the slope of that front toe perfectly.
Thanks a lot I am not 100% happy and could have modeled and printed a better replacement, but this scratches that itch that made me a 3D artist anyway.
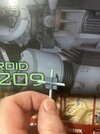
First pic is a detail I noticed. Came out terrible and I have ripped it off and cleaned to redo. I have started the re making of the toe bolts. I drilled a small hole, then inserted a styrene tube, cut and shaped. Not perfect, but pretty good. Hopefully some primer tomorrow.
 
View attachment 1861357View attachment 1861358View attachment 1861359

Thanks a lot I am not 100% happy and could have modeled and printed a better replacement, but this scratches that itch that made me a 3D artist anyway.
First pic is a detail I noticed. Came out terrible and I have ripped it off and cleaned to redo. I have started the re making of the toe bolts. I drilled a small hole, then inserted a styrene tube, cut and shaped. Not perfect, but pretty good. Hopefully some primer tomorrow.
I'd be ecstatic if that was my work!

And, yeah, there does seem to be a grid or grille on the top of the lower leg. Hadn't noticed that. Might dig through the square vent parts I use for Gundam customizing to see if I've got anything that comes close.
 
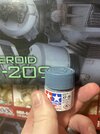
So I picked up some Tamiya medium blue XF-18 to mix with the light sea gray XF-25 I got to try to replicate ED’s gray-blue. I was originally thinking it would be the gray with some blue but damn, that medium blue is close! Might just end up being a touch of gray added to the blue.
 

Attachments

  • image.jpg
    image.jpg
    1.8 MB · Views: 30
  • image.jpg
    image.jpg
    1.8 MB · Views: 29
IMG_2051.jpeg
IMG_2053.jpeg
IMG_2052.jpeg
Sometimes you can use stairs and ramps (Train scale) to do those small piece Fett_Ish(y)(y)
Oh man yeah, a ladder would have been perfect!
Looks solid. I doubt any minor flaws will even be noticeable once it’s blended in and painted.

I found a different (cheat) solution…thank you Kotobukiya!
Nice! I sadly had nothing in my spares that would work!
So here is the last bit I can do until the end of October! I cleaned up the knee, I started softening the transition on the shin and other corners. For the shin I put some Mr Dissolved putty in the joins and sand a little. I will do one more application before priming. I also noticed on the shin guard there is an indentation for a fastener, but no fastener. I cut a small slice of tubing, glued it in and then sanded it to try and match what should be there. Pick of not changed leg to show progress.
Even though I won’t be posting here I invite you other builders to continue, I enjoy stealing your ideas being inspired by your progress!
IMG_2054.jpeg
IMG_2051.jpeg
IMG_2053.jpeg
IMG_2052.jpeg
 
I did a base model and rigged an Ed-209 a long time ago, way before I got into resin printing. Y'all brought up an interesting point if there's interest in a resin printable variant. I just finished my last project yesterday and have some time now, and this seems like a good challenge. I'm pulling up the 'last state' of the mesh now and will throw a render on here in a few.

Edit: picture added. Couldn't leave old work alone and updated materials mapping. Yes, I see a few areas to fix and would sort it correctly for resin.
ED-209 2024 materials update.png
 
Last edited:
Still working on getting the right blue-gray for ED (the longer it cured and more I looked at the one I had, the more I thought it was too dark).

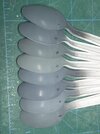
Here’s some test spoons, with a quick buff with a 4000 buffing sponge. Open to opinions here, cuz I’m honestly not sure. Maybe I’ve been looking at it too long and need to walk away…
 

Attachments

  • image.jpg
    image.jpg
    1.3 MB · Views: 28
  • videoframe_20099.png
    videoframe_20099.png
    1.1 MB · Views: 29
  • videoframe_85697.png
    videoframe_85697.png
    1.2 MB · Views: 24
Still working on getting the right blue-gray for ED (the longer it cured and more I looked at the one I had, the more I thought it was too dark).

Here’s some test spoons, with a quick buff with a 4000 buffing sponge. Open to opinions here, cuz I’m honestly not sure. Maybe I’ve been looking at it too long and need to walk away…
#5 and #7 look like the best to me.
 
Back
Top