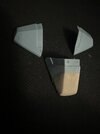
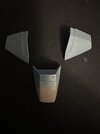
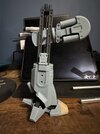
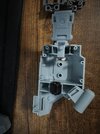
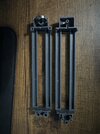
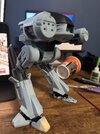
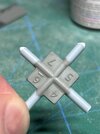
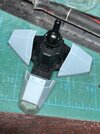
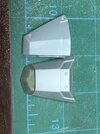
ED-209 by Moderoid

I never even knew about these models. Would have got the Cain model for sure, but it seems they started out at a decent enough price, but are now way to expensive for a plastic kit?
Is the food smile company model different to the moderoid kit?
I'll have to do some research on them.
Good Smile is the company and Moderoid is the line. Yeah I have seen the ED-209 get into the nearly 200 range, but BBTS has them in stock for a song in comparison.
Oh wow - that seems like a majorly obvious mistake in the kit. I've had both the Horizon and Argonauts vinyl Eds and both had all 3 toes the same length.
Good opportunity for a 3D printed aftermarket option here!
I was going to model and print them, but I had a hankering for hacking and sanding!
Sorry to add more work to your build, but the result looks soooooo worth it.
No, I thank you because I had noticed, you just made me do the right thing!
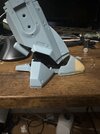
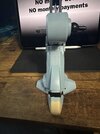
Below is the first round of sanding. I have now started the green putty and will hit it with some primer later.
Have you rough fit it yet to see if there’s any effect on stability? Damnit, now I’m sitting here thinking of that tube of green stuff I’ve got and wondering if I could use that not just to mod that toe but to also put a little weight in the feet…
No I have not, but I am planning a pretty extreme pose based on BTS pics so it may be mounted to something anyhow.
 

Attachments

  • IMG_2027.jpeg
    IMG_2027.jpeg
    847 KB · Views: 33
  • IMG_2029.jpeg
    IMG_2029.jpeg
    826.1 KB · Views: 39
I never even knew about these models. Would have got the Cain model for sure, but it seems they started out at a decent enough price, but are now way too expensive for a plastic kit?
Is the good smile company model different to the moderoid kit?
I'll have to do some research on them.
Moderoid is the series, Good Smile is the manufacturer, so they're just different ways people refer to the same kit.
 
And now that I am looking at reference photos, are these steps at the top also wrong?
Looking at ZeroSum 's reference photos, I think it depends on which model you're going by. The full-size appears to have a step at least at the top of the front toe while the stop motion model in the stairwell doesn't look like it has any (probably so it could perform that little "toe flex" thing on the stairs).
 
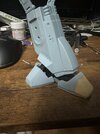
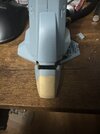
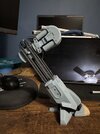
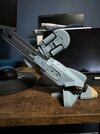
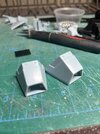
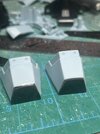
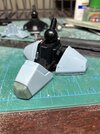
I am going by the stop motion model as much as possible so the toes have been hacked. There is a large void there but it will be filled with wires and cables. Here is where it……stands. Yet another model that could have been a 1-2 day build even with paint, but noooooo!
 

Attachments

  • IMG_2030.jpeg
    IMG_2030.jpeg
    1.1 MB · Views: 38
  • IMG_2031.jpeg
    IMG_2031.jpeg
    1.1 MB · Views: 33
  • IMG_2032.jpeg
    IMG_2032.jpeg
    1,022.5 KB · Views: 33
I am going by the stop motion model as much as possible so the toes have been hacked. There is a large void there but it will be filled with wires and cables. Here is where it……stands. Yet another model that could have been a 1-2 day build even with paint, but noooooo!
The short toe is definitely an improvement. I'm looking forward to seeing what the cable-filled gap looks like. Keep us updated...I'm still particularly interested in if the short toe causes the assembled kit to be front-heavy before I do any surgery on mine!
 
The more accurate sized toe is definitely an improvement.
The picture of that long toe was very distracting.
I see Target is selling the Hot Toys one for over a thousand and is almost 14" tall. Could probably find it cheaper.
Plus, its fun to do a built and fix stuff up anyways.
1000019259.jpg
 
Ok, I also decided that I did not want do all paint except the bottom leg half so some minor surgery and a couple magnets. I didn’t use some epoxy putty around the magnets to secure them. The rotation on the ‘knee’ is very minimal so glueing probably would have been ok if a pose is to be final,but I am not sure yet.
 

Attachments

  • IMG_2040.jpeg
    IMG_2040.jpeg
    1.1 MB · Views: 45
  • IMG_2039.jpeg
    IMG_2039.jpeg
    1.1 MB · Views: 41
  • IMG_2038.jpeg
    IMG_2038.jpeg
    1 MB · Views: 40
  • IMG_2037.jpeg
    IMG_2037.jpeg
    1.1 MB · Views: 40
  • IMG_2036.jpeg
    IMG_2036.jpeg
    1.3 MB · Views: 42
  • IMG_2035.jpeg
    IMG_2035.jpeg
    1.3 MB · Views: 43
The short toe is definitely an improvement. I'm looking forward to seeing what the cable-filled gap looks like. Keep us updated...I'm still particularly interested in if the short toe causes the assembled kit to be front-heavy before I do any surgery on mine!
So here he is with the small toe on one foot. Even when it falls all the way forward with only 4 of 6 toes on,he doesn’t fall. I wouldn’t worry that shortening the front toe makes him fall. If anything I think he is back heavy and 2 mm of toe would change that.
 

Attachments

  • IMG_2042.jpeg
    IMG_2042.jpeg
    1.5 MB · Views: 52
  • IMG_2041.jpeg
    IMG_2041.jpeg
    1.2 MB · Views: 45
So here he is with the small toe on one foot. Even when it falls all the way forward with only 4 of 6 toes on,he doesn’t fall. I wouldn’t worry that shortening the front toe makes him fall. If anything I think he is back heavy and 2 mm of toe would change that.
Excellent! Much obliged. Time to break out the hobby saw and some green stuff on my days off I guess!
 
Ok, I also decided that I did not want do all paint except the bottom leg half so some minor surgery and a couple magnets. I didn’t use some epoxy putty around the magnets to secure them. The rotation on the ‘knee’ is very minimal so glueing probably would have been ok if a pose is to be final,but I am not sure yet.
Magnets to make painting easier? Damn...there's a man who REALLY hates masking! :lol:
 
It's looking good so far:cool::cool:(y)(y)
Thanks man, it’s gotta get put under primer hopefully this weekend and the the fill and sand shuffle!
Tamiya light sea gray. Think it’s gonna need a touch of blue, but not a bad starting point for ED’s color.
That looks good to me! I am going to try and get it ready for paint over the next week, but sadly I have to go out of town for a month or so. ED will have to give me more than 10 seconds!
 
One toe roughed out! Initially built it out waaaay too much (it was almost as long as the original), so quite a bit of cutting and sanding. Trying to decide if the front is too pointy…there’s a slight angle to the original and appears to be one on the stop motion model.
 

Attachments

  • IMG_1759.jpeg
    IMG_1759.jpeg
    1.2 MB · Views: 23
  • IMG_1760.jpeg
    IMG_1760.jpeg
    1.7 MB · Views: 25
  • IMG_1761.jpeg
    IMG_1761.jpeg
    1.9 MB · Views: 24
  • IMG_1762.jpeg
    IMG_1762.jpeg
    1.5 MB · Views: 25
I like that your solution is different. And a might neater!
Your solution definitely takes less filler and probably gives it more internal structure/stability. Since I decided to use Green Stuff, I decided to take the easier route and just chop the toe off, slap sheet styrene on the open end to build on, and sculpt the toe. My sculpting skills are minimal at best, so we'll see how much of a mistake that was once I get to primer and see all the flaws! ;)
 
Back
Top