You are using an out of date browser. It may not display this or other websites correctly.
You should upgrade or use an alternative browser.
You should upgrade or use an alternative browser.
DW's Iron Man Mark 3 build
- Thread starter DW Design Studios
- Start date
coofunkcurly
Sr Member
Not only an outstanding build but highly educational. :thumbsup
ROBOSTEVE 0671
Sr Member
Nice updates Darren and smooth work with the paint finish, look forward to seeing how you strap up the rest of the suit, you've really pressed on with this, I struggle to get the time the same, Lovin the updates :thumbsup
Ruprekt
Active Member
How's your progress coming on the upper and lower legs going joining together? From what I see on mine, it looks like there will have to be some sort of hinge or something to connect them, since the thigh section only has that semi-circle relief and no actual tab for the lower leg to join to.
Royal Dump
Active Member
Do you think the helmet is too big? It should be snug tight against your face. From looking at the pictures with the helmet on the torso, the helmet just seems big.
Do you think the helmet is too big? It should be snug tight against your face. From looking at the pictures with the helmet on the torso, the helmet just seems big.
I believe this helmet is actually sized a bit smaller than most others out there.
Shakeitdavey
Well-Known Member
Loving your work bud! Keep it up. I'll be saving this thread in my fav's for sure
DW Design Studios
Sr Member
Hello Ruprekt,
Yes, I know what part you are talking about. I went ahead and cut it off of my suit. It was really tight on the back of my leg. There was just no way I would be able to connect it to the thigh's and troop with it. I did save the pieces and plan to attach it when it's on the mannequin.

Yes, I know what part you are talking about. I went ahead and cut it off of my suit. It was really tight on the back of my leg. There was just no way I would be able to connect it to the thigh's and troop with it. I did save the pieces and plan to attach it when it's on the mannequin.
DW Design Studios
Sr Member
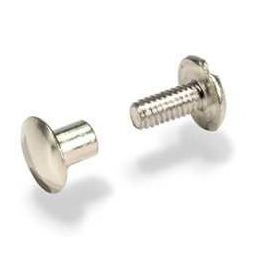
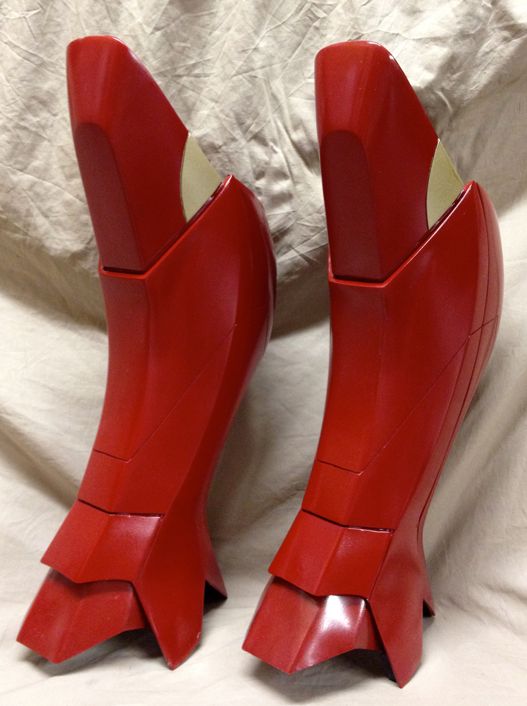
I picked up some Chicago Screw's today. I'm using 4 of them on the calves. I glued them with epoxy to the inside of the fiberglass pieces. I then drilled some holes in the small rubber pieces that attach to the thigh's. The screws come in different lengths. Make sure to get the shorter one's for use in this area. I used 3/16" ones here. I also added some rubber washers to help with mobility. I also added some foam just to help keep the calves from rubbing on the boots.
DW Design Studios
Sr Member
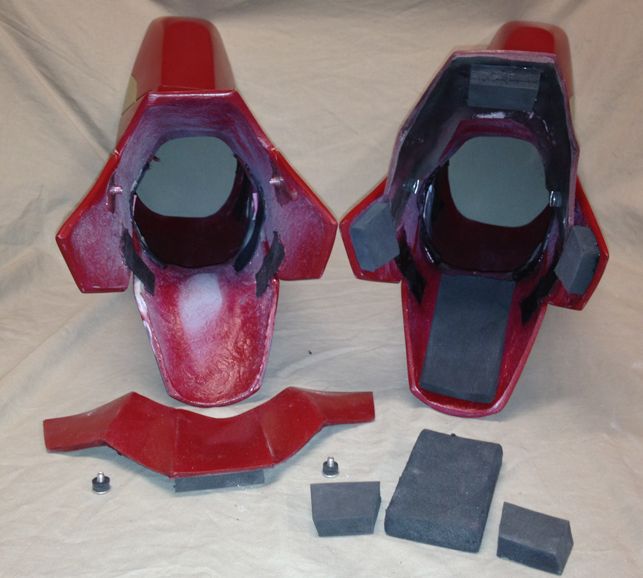
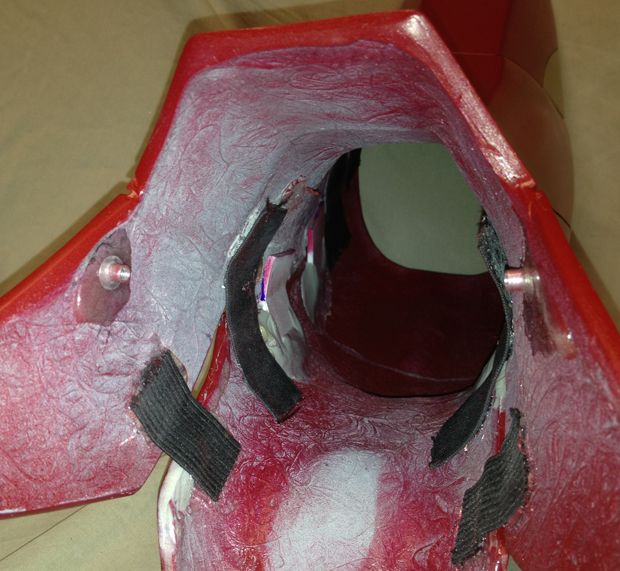
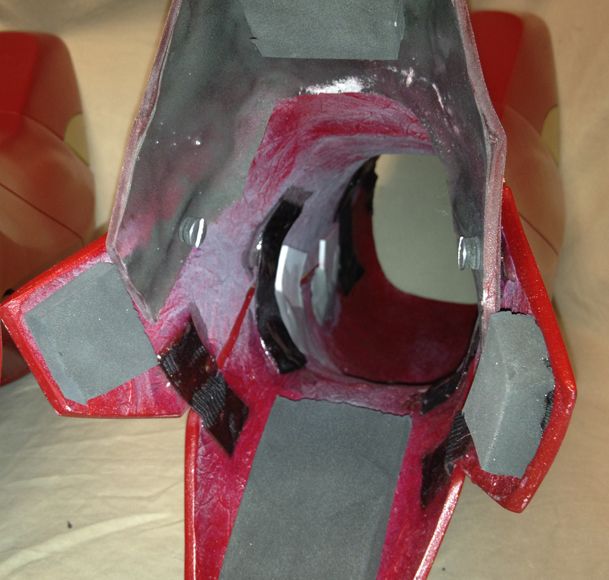
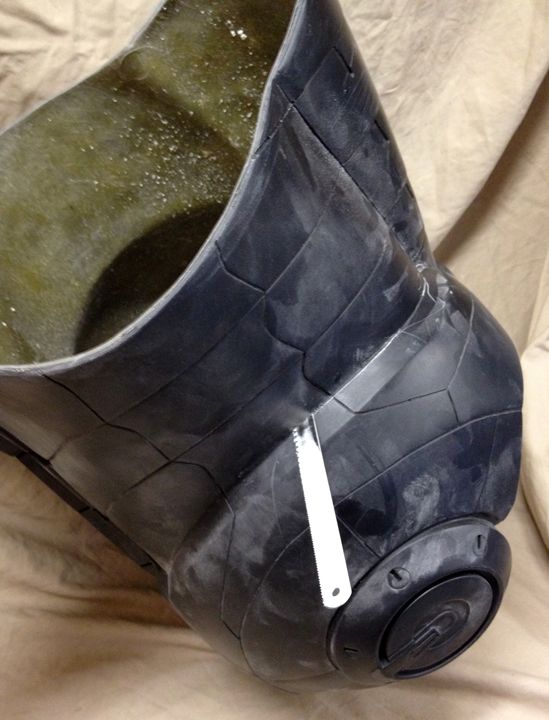
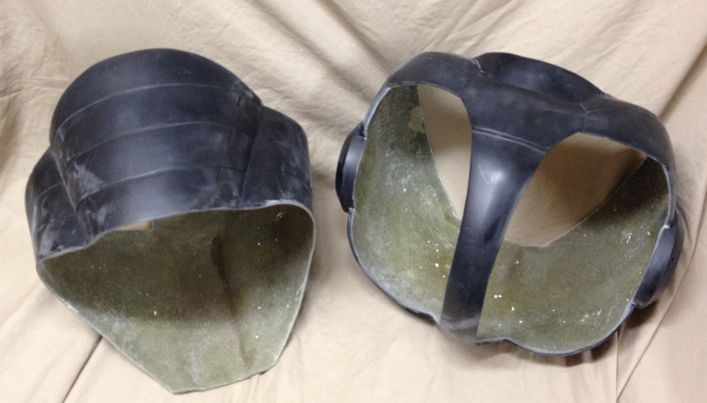
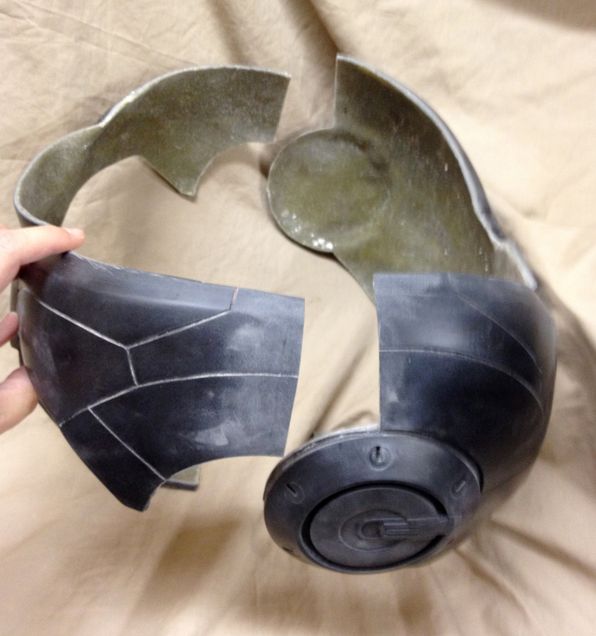
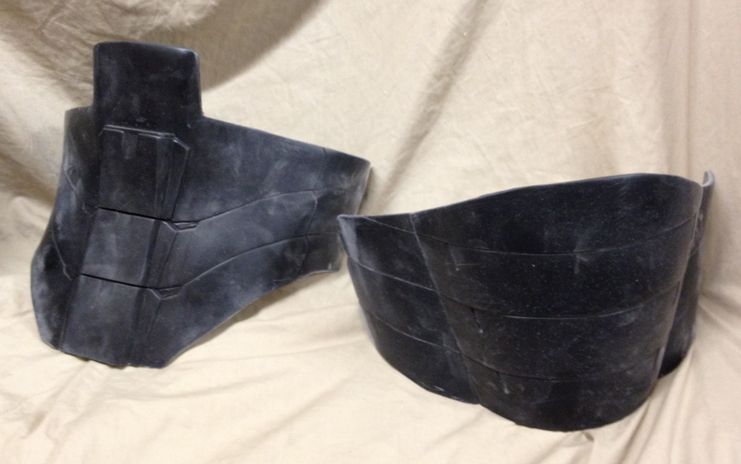
I also received my final pieces and have begun to work on them. I ordered the center section in fiberglass, we had the option of ordering it in rubber. I knew ahead of time the fiberglass one would need to be cut up to fit me. I first cut the upper section off. Then then cut the two pieces down to four. More photo's to follow.
DW Design Studios
Sr Member
I believe this helmet is actually sized a bit smaller than most others out there.
Not really sure about the size but if it was any smaller it wouldn't fit me. I really don't think I have a big head but I wear a size 7 3/8" baseball hat.
Darren
DW Design Studios
Sr Member
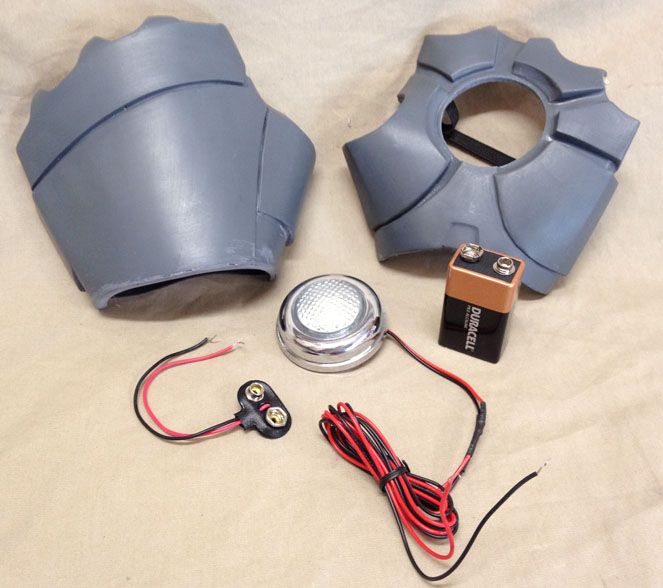
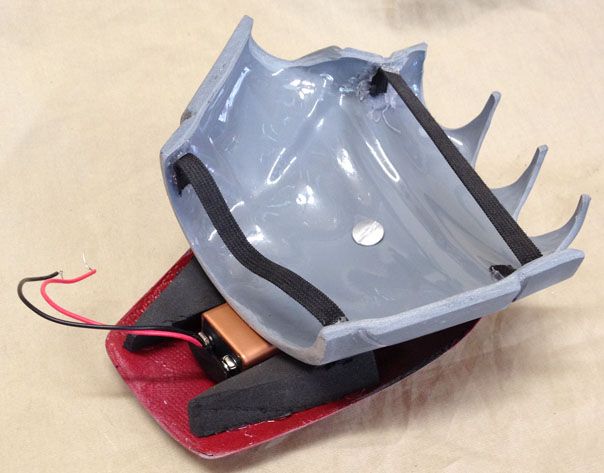
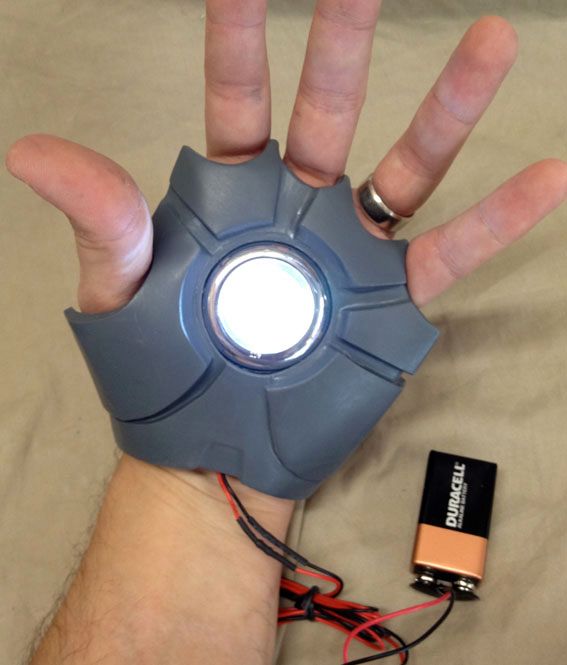
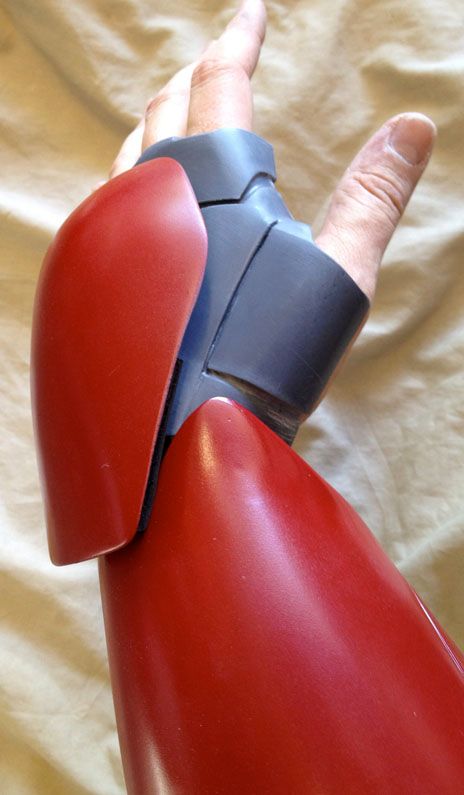
I got the hand all figured out and finished today. I used a light found here for the repulsors.
ULITE series Round Accent Light Module Specifications
The light is rated as a 12V but I just set it up to run off a 9V. I hooked it up and let it sit for 6 hours and it didn't loose any brightness at all. I also used the chicago screws again for this setup. I used a longer one here than the ones used on the calves. If you add some washers it allows the piece to swivel a bit. The 9V battery fits nicely in the rounded piece that sit on top of the hands. I will probably use some double sided tape to hold the battery in place.
TerryMcIntosh
Well-Known Member
Thank you for sharing such detailed photos on this build -- that's my personal favorite to see how things come together. It looks wonderful so far and be sure to keep the posts coming as the project progresses! =)
DW Design Studios
Sr Member
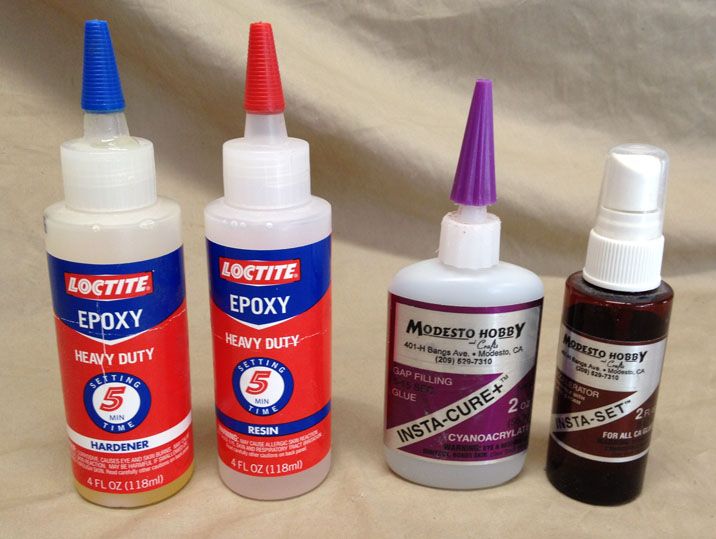
When I build props like the Iron Man suit or a Clone I use Epoxy and/or Super Glue.
The stuff I like is Loctite 5 Minute Epoxy. It can be found at Home Depot and is around $16.00. The super glue I use is Insta-Cure Gap Filling Cyanoacrylate. It can be found at most hobby shops or online. I also use the Insta-Set Cyanoacrylate Accelator.
INSTA-CURE Gap Filling Cyanoacrylate 2oz (hlc108) Hobbylinc CA Super Glue
INSTA-SET Cyanoacrylate Accelator 2oz (hlc151) Hobbylinc CA Super Glue Accelerator
DW Design Studios
Sr Member
No problem, my pleasure. I started building stuff like this around 10 years ago. I have been lucky to have met many gifted and talented people here, the TDH and in the 501st. I would not be where I am today if it wasn't for them sharing there ideas, techniques and skills with me. I am happy to pass my skills and info along. Hopefully it will inspire others as well.Thank you for sharing such detailed photos on this build -- that's my personal favorite to see how things come together. It looks wonderful so far and be sure to keep the posts coming as the project progresses! =)
")
Darren
DW Design Studios
Sr Member
I'm not totally done but here is a quick teaser pic.

Looking great! :thumbsup
Similar threads
- Replies
- 43
- Views
- 3,412
- Replies
- 2
- Views
- 678
- Replies
- 1
- Views
- 555
- Replies
- 0
- Views
- 272