Thanks for the great pics. I’ve seen one before, but I’m grateful for the other views that go with it.
On a technical note, what are you all thinking about for the small corrugated hose on the back?
I'm going to update/rectify the following:
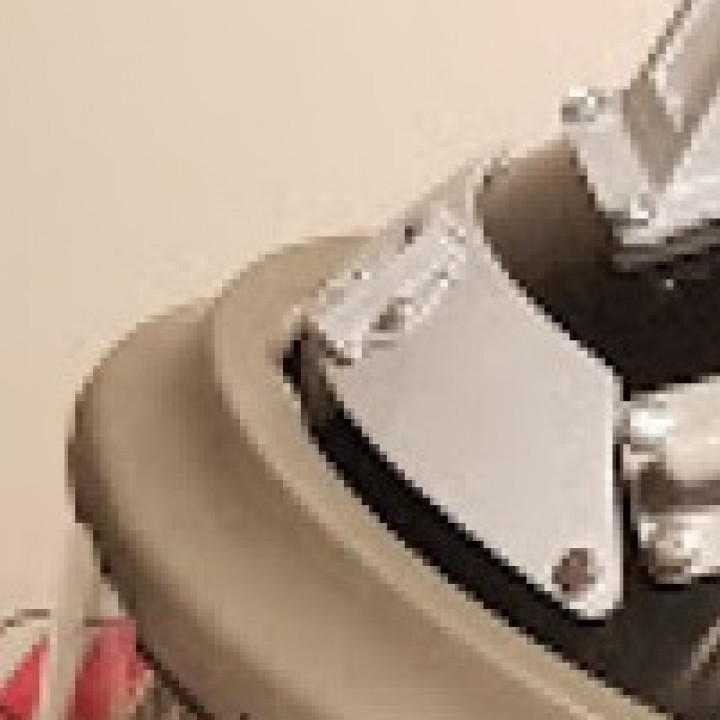
-Top lantern width and hose inlet ring.
-Ear pieces lower end (bent "spark plug) is bent more flat, not as much curved. The curve to the part looks kind of nicer but I want it to be authentic.
-Chin light. A complete rework of the housing and lens.
So photos of those are top priority. Also I'd love to have photos of the helmet inside and the magnwtic seal ring.
Just want to add my thanks for the great advice, photo's and STL files. Inspired me to 'take the plunge' and after finding a helmet on ebay for only £50 I am now starting to see what I can do with it. Going to be a long build learning as I go, but without the help here pretty sure I would never have started.
So far I have stripped the helmet down and given a base undercoat as a starter, printed the chin light and mounted and looking at electrics before moving on. Larger parts wont fit on my small printer so need to work out how I will handle, but that for another day
Forehead plate for Orange Space Helmet from WHO. This piece was missing from my other upload so I'm adding it | Download free and paid 3D printable STL files
www.myminifactory.com
I've not had energy and time to adjust or re-model parts to look like the exact ones seen in the photos I got earlier.
Most of it is rounding off edges more and someone printing them can do that manually, but also I should make a new headlight model as it's supposed to be a little wider.
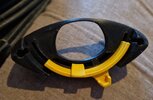
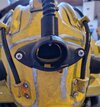
These show how I inserted the yellow lock (comes with the procap) and how I attached the complete air intake on the Procap helmet.
You need to drill holes for the screws and make the air passage cutout.
The inner part has the opening upward (text turned readable) and the foam channel that the procap comes with is cut to a length that fits in it.
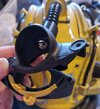
It's not perfect but the best I could find at the time I built my helmet.
It's very durable and has metal clip mounded in you can connecto to Formed Kydex rings for the helmet connection and the neck seal ring but the rubber is difficult to glue to a good seam. I used black gaffer tape (gorilla tape) to hold the seam together at the back.
")