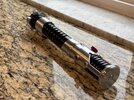
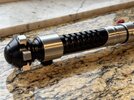
Finally decided to paint my TPM saber. I ended up using a bonding primer first and then used the satin black.
I much prefer the painted look as it softens the edges a bit and matches the original prop.
I much prefer the painted look as it softens the edges a bit and matches the original prop.
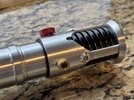


") might have ti paint mine now
might have ti paint mine now