LancLancDoubleD
New Member
FINISHED :
Skull of Dire Ahamkara with the Dead Orbit Revenant shader coloration, aka silver metal and a darker bone color.


------------------------------------------------- Original Thread Below -------------------------------------------------
So this is my first time doing Pepakura, and I chose to do what seems like a pretty complex model to start with. The Skull of Dire Ahamkara warlock helmet from the game Destiny.

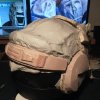
I had always liked this design, and wanted to try my hand at making a Pepakura based helmet but I run all Apple computers. After wading through the RPF I found a thread by sketcherdan on his build of the helmet and felt I needed to find a way to get Pepakura up and running. After some research I finally found a free program WineSkin for Mac and was able to install and use Pepakura Designer, and Viewer on my computers. I utilized Pep file from Crimson over at the 405th (thanks sketcherdan), and scaled the model to X,Y,Z measurements of my head. My first time Peping and I think I have gotten myself one of the more challenging helmets with so many under cuts and small angles. This took a few days of a few hours here and there but it was worth it. I used a poster board heavy stock, and gel super glue which kept my seams very clean.


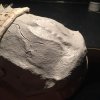
Next I resined the inside with a brushed layer of EpoxAmite Epoxy Laminating Resin from Smooth-On. Then I fiberglassed the inside using 3M fiberglass cloth and the EpoxAmite. A piece of a popsicle stick was used to brace the mandibles so they wouldn't deform during the resining process. I rolled some more resin around the inside of the mandibles and filled the cavity inside with Great Stuff expanding insulation foam to give them a little more interior strength, as I was unable to fiberglass inside them.


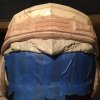
The photos are a little out of order now but I cut the back of the helmet off to create an opening large enough for my to head to squeeze into it. I formed magnet brackets on the inside of the main helmet by putting a glob of Aves Apoxie Sculpt, pushing in a rare earth magnet, and sculpting the shape of the bracket around it. When these cured I placed the opposing magnets to these and taped the helmet back together temporarily. I molded brackets onto the back panel by pushing Apoxie Sculpt over the opposing magnet and forming it to the interior of the back panel. I cut out the portions that would eventually be replaced with translucent black acrylic for the visor, and test fit the helmet. With some temporary padding, it fits like a glove.


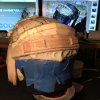
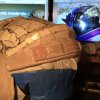
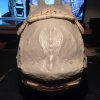
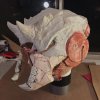
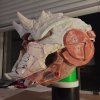
My brain is kind of all over the place as to where to start so I started sculpting some of the bone on top of the helmet. I outlined some base details on the helmet with a sharpie. Using Apoxie Sculpt I molded a thin layer over the helmet and sculpted the detail into this.


From my reference images I took from the game I noticed a lot of detailing that was not in the pepakura model.
Screws that go into the Bone pieces attaching them to the base helmet. I got some 1/2" Nylon screws from Lowes, cut off the threads, and added a bit of Apoxie Sculpt to create
the proper look of the screw heads.


Two respirator tubes coming out of the bottom chin piece. To start a base for these I cut up some dollar store markers on an angle and hot glued them in place temporarily to get an idea of how they will sit. I will add the rivet and extra layered detail to these.


The back of the helmet and neck hole of the helmet is wrapped in leather and has some padded detailing. I picked up some some black pleather and eyelits to prepare for this later on.


More to come.
Skull of Dire Ahamkara with the Dead Orbit Revenant shader coloration, aka silver metal and a darker bone color.


------------------------------------------------- Original Thread Below -------------------------------------------------
So this is my first time doing Pepakura, and I chose to do what seems like a pretty complex model to start with. The Skull of Dire Ahamkara warlock helmet from the game Destiny.

I had always liked this design, and wanted to try my hand at making a Pepakura based helmet but I run all Apple computers. After wading through the RPF I found a thread by sketcherdan on his build of the helmet and felt I needed to find a way to get Pepakura up and running. After some research I finally found a free program WineSkin for Mac and was able to install and use Pepakura Designer, and Viewer on my computers. I utilized Pep file from Crimson over at the 405th (thanks sketcherdan), and scaled the model to X,Y,Z measurements of my head. My first time Peping and I think I have gotten myself one of the more challenging helmets with so many under cuts and small angles. This took a few days of a few hours here and there but it was worth it. I used a poster board heavy stock, and gel super glue which kept my seams very clean.


Next I resined the inside with a brushed layer of EpoxAmite Epoxy Laminating Resin from Smooth-On. Then I fiberglassed the inside using 3M fiberglass cloth and the EpoxAmite. A piece of a popsicle stick was used to brace the mandibles so they wouldn't deform during the resining process. I rolled some more resin around the inside of the mandibles and filled the cavity inside with Great Stuff expanding insulation foam to give them a little more interior strength, as I was unable to fiberglass inside them.


The photos are a little out of order now but I cut the back of the helmet off to create an opening large enough for my to head to squeeze into it. I formed magnet brackets on the inside of the main helmet by putting a glob of Aves Apoxie Sculpt, pushing in a rare earth magnet, and sculpting the shape of the bracket around it. When these cured I placed the opposing magnets to these and taped the helmet back together temporarily. I molded brackets onto the back panel by pushing Apoxie Sculpt over the opposing magnet and forming it to the interior of the back panel. I cut out the portions that would eventually be replaced with translucent black acrylic for the visor, and test fit the helmet. With some temporary padding, it fits like a glove.


My brain is kind of all over the place as to where to start so I started sculpting some of the bone on top of the helmet. I outlined some base details on the helmet with a sharpie. Using Apoxie Sculpt I molded a thin layer over the helmet and sculpted the detail into this.


From my reference images I took from the game I noticed a lot of detailing that was not in the pepakura model.
Screws that go into the Bone pieces attaching them to the base helmet. I got some 1/2" Nylon screws from Lowes, cut off the threads, and added a bit of Apoxie Sculpt to create
the proper look of the screw heads.


Two respirator tubes coming out of the bottom chin piece. To start a base for these I cut up some dollar store markers on an angle and hot glued them in place temporarily to get an idea of how they will sit. I will add the rivet and extra layered detail to these.


The back of the helmet and neck hole of the helmet is wrapped in leather and has some padded detailing. I picked up some some black pleather and eyelits to prepare for this later on.


More to come.
Last edited:


