DEC ANH Hero Blaster Kit Builds

Re: Simplified, cheaper DEC ANH Hero Blaster Kit parts (posted with permission fr...

I got a question for you regarding the Barricade stuff. I'm putting it on all the parts after I've blued them. I was just wondering if I'm going to need to reapply the barricade every once in a while as people hold it and stuff or is a one time coat good? If so I need to figure out a good sealant or something that'll keep this bad boy durable.


yeah id love to know this as well lol :)
 
Re: Simplified, cheaper DEC ANH Hero Blaster Kit parts (posted with permission fr...

I wouldn't worry about it honestly. The barricade helps seal the color and is a rust preventative. I handle mine all the time, and the finish isn't coming off. The Live fire being all steel of course holds the finish really well. After firing, cleaning, oiling, etc. My MGCs are holding up well too.
 
Re: Simplified, cheaper DEC ANH Hero Blaster Kit parts (posted with permission fr...

My advice, follow Scott's advice :lol

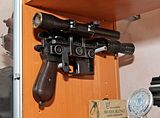
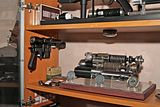
I'd roughed up the finish on the Denix a bit with some dry 400 grit paper (I was really proud of how shiny iI'd originally got it)

I heated up the metal with the hair dryer & dropped the upper in a sandwich bag with some Alu Black (then realised I wasn't wearing any gloves :facepalm)

anyway it turned a nice dark colour so I did the same with the lower

I tried touching up a few spots on the upper but it seemed to make it worse so I just left it as is & decided to call it a win

it's not a perfect finish but at least it's a lot darker, bit mottled but so was the last one I did, just going to let it sit in silicone gun oil for a few days now & see how it looks

thanks for the help :)
 

Attachments

  • image.jpg
    image.jpg
    605.8 KB · Views: 224
  • image.jpg
    image.jpg
    470.5 KB · Views: 208
Re: Simplified, cheaper DEC ANH Hero Blaster Kit parts (posted with permission fr...

My advice, follow Scott's advice :lol

I'd roughed up the finish on the Denix a bit with some dry 400 grit paper (I was really proud of how shiny iI'd originally got it)

I heated up the metal with the hair dryer & dropped the upper in a sandwich bag with some Alu Black (then realised I wasn't wearing any gloves :facepalm)

anyway it turned a nice dark colour so I did the same with the lower

I tried touching up a few spots on the upper but it seemed to make it worse so I just left it as is & decided to call it a win

it's not a perfect finish but at least it's a lot darker, bit mottled but so was the last one I did, just going to let it sit in silicone gun oil for a few days now & see how it looks

thanks for the help :)

Wow, that's nice and dark, good job! I personally like a slightly lighter, more silver/blue finish as well though, It's how the MGC's and real Mausers seem to look in all the photos I've seen, but I suppose it depends on which blaster you're going for. Keep posting your progress!
 
Re: Simplified, cheaper DEC ANH Hero Blaster Kit parts (posted with permission fr...

I wouldn't worry about it honestly. The barricade helps seal the color and is a rust preventative. I handle mine all the time, and the finish isn't coming off. The Live fire being all steel of course holds the finish really well. After firing, cleaning, oiling, etc. My MGCs are holding up well too.

awesome great to know! Thanks for all the help!
 
Re: Simplified, cheaper DEC ANH Hero Blaster Kit parts (posted with permission fr...

To get it more silvery... just get some WD40 soaked steel wool... and barely barely touch it when you rub... I mean barely...
 
Re: Simplified, cheaper DEC ANH Hero Blaster Kit parts (posted with permission fr...

What about bluing an MGC everybody? My still in-progress ANH is built on an MGC, and is (slowly) being recontoured to a real Mauser's dimensions, like Kpax's is (though he'll do the finish work on commission). What would you all recommend as the best and most effective way of achieving a pleasant finish on the MGC? Like the Denix, the MGC is also Zamak, though I think it is of a better quality. Would the basic process be the same as one would follow with a Denix? :confused
 
Re: Simplified, cheaper DEC ANH Hero Blaster Kit parts (posted with permission fr...

Basically the same process. Seems to be trial and error with both replicas.
 
Re: Simplified, cheaper DEC ANH Hero Blaster Kit parts (posted with permission fr...

My experience with Barricade was with the steel parts. After about a month it had evaporated off the scope and flash hider enough that they began to show signs of rust. Wiped them down again with Barricade. Another month, same issue. Wiped them down the last time with Hoppe's oil, about 8 months ago. The finish has been stable since then. Pewter may behave more favorably.
Very nice work everybody.
 
Re: Simplified, cheaper DEC ANH Hero Blaster Kit parts (posted with permission fr...

After applying a light coat of 3in1 general purpose oil, I used neutral shoe polish applied with a microfiber cloth to protect the finish. From what I've read on several knife and gun forums, it's every bit as good as Renaissance wax (and much cheaper).
 
Re: Simplified, cheaper DEC ANH Hero Blaster Kit parts (posted with permission fr...

Just a suggestion, you can put a nut behind the front mount threaded rod for extra security
IMG_0802.JPG
 
Re: Simplified, cheaper DEC ANH Hero Blaster Kit parts (posted with permission fr...

On the Denix yes, you can beef it up with a nut. But, for those of us who are using an MGC, our only real option is for it to be drilled and flush mounted, as I'd personally like to have the functionality of it remain. Perhaps some epoxy could be added to help cement in the threaded rods to the MGC body? :confused
 
Re: Simplified, cheaper DEC ANH Hero Blaster Kit parts (posted with permission fr...

The barricade doesn't seem to be working on the aluminum barrel.... After using aluminum blue I put a good coat of barricade on and the following morning the barrel is covered in rust. Any ideas? I'm thinking maybe just throwing a paint sealer over it before it has time to rust.
 
Re: Simplified, cheaper DEC ANH Hero Blaster Kit parts (posted with permission fr...

BTW - the rest of the flash hiders are shipping tomorrow, everybody is doing an awesome job!
Thanks for the run guys! now what's next?.............

Hmmm... Wouldn't mind a Greedo Killer scope mount and a machined Compac scope. Heck, I'd be happy if there was even another run of more expensive ANH parts! I was unlucky enough to completely miss both run 1 and 2, and though I had the money to buy a set at the time, and even now, I only caught this run, and figured that I'd rather have these parts than nothing! :lol

Blade Runner... Hmmm... :rolleyes
 
Re: Simplified, cheaper DEC ANH Hero Blaster Kit parts (posted with permission fr...

The barricade doesn't seem to be working on the aluminum barrel.... After using aluminum blue I put a good coat of barricade on and the following morning the barrel is covered in rust. Any ideas? I'm thinking maybe just throwing a paint sealer over it before it has time to rust.

I didn't think Aluminium rusted? (But I'm no expert)

I've not ever used barricade but someone recommended silicone gun oil to me for the blued parts on a previous build

all my blued parts are currently sat coated in oil for a few days, I've found it helped darken & even out the Alu black on my Denix

I built, blued & oiled my ESB blaster over a year ago & the finish is still good
 
Re: Simplified, cheaper DEC ANH Hero Blaster Kit parts (posted with permission fr...

In going over all the parts from this run, the only parts that I was at all let down by were the scope mount and the scope rings. The mount itself was OK, though it still needs a VERY good polishing job. The scope rings, however, weren't particularly great. They were of good quality, don't get me wrong, but they were quite misaligned - the scope rings didn't meet up nicely with the scope cradle. They stuck out too far an all sides, and seemed to stick out to the right and left on the very edge as well, as demonstrated here:


(This picture belongs to TFrosst, NOT me. I borrowed it simply to demonstrate my point.)

After a few days of grinding, filing, and sanding, I ended up with this:


Sorry for the blurry picture quality, but I'm no photographer-that's my dad. Then again, if you have these parts, then you should now what I mean with the issue if the scope mount rings. I'm about 1/2 way through polishing the scope mount itself, after making sure that all the surfaces are parallel and smooth, of course. The scope I will likely be replacing in the future, so that's no huge concern. What do you all think so far? I still have a LOT of work ahead of me, but that's how I like it. :D
 

Attachments

  • full-962b17ec0a6c4772f16c0f3e876315d1[1].jpg
    full-962b17ec0a6c4772f16c0f3e876315d1[1].jpg
    2.5 MB · Views: 218
  • 20140704_201253.jpg
    20140704_201253.jpg
    1.1 MB · Views: 191
  • 20140704_201347.jpg
    20140704_201347.jpg
    1 MB · Views: 176
Last edited:
Re: Simplified, cheaper DEC ANH Hero Blaster Kit parts (posted with permission fr...

First of all the scope and rings look great, nice job.

This run was about 2/3 less the cost of the original run. The reason being less due to the loss of some accuracy, better metal used in the original run etc. I was planning on having to make small adjustments here and there. Tweak this, trim that, sand this etc. I thought that this was a given with this run? I actually enjoy modifying the parts and making them as close as possible to accurate parts. 2/3rds the cost to have these parts that others are kicking themselves now for not getting in on the run originally? I'm MORE than happy with how this run turned out. Yes it's more work in the long run but I guess that's why I'm into saber smithing, model building , prop building etc.

A word of advice on the scope cradle: If you are going to Super Blue it, paint it on. I used a 1/2" brush used for painting on canvas etc. It went on very even, I was able to control it easily and the scope mount looks great.

Thanks for the compliment!

And I never meant any disrespect-I myself stated that the quality was quite nice and that there was nothing wrong with it. And to be sure, the scope mount issue was nothing huge-as demonstrated, with a little extra effort, it can be corrected. The reason for my review of the parts is to be honest and accurate. Sure, I'm totally jazzed about the parts, but at the same time, they have their little flaws and spots that need to be corrected. And the price certainly was MUCH cheaper than the previous runs, but I don't own parts from run 1 or 2, I've only seen pics of them. (Though I wish I could get my hands on them.) So, I'm just trying to fairly judge them based upon what they are and what they aren't, not what they are n relation to the previous parts in terms of quality to price value. Sure, there are little things about them that I wish could have been a little better, but they're still fantastic as a whole, and I have ZERO regrets in buying them.

Also, I'm currently recovering from surgery, so I'm not allowed to go anywhere near what few power tools I own; until I'm off my meds, I have no choice but to work by hand for now, which is why it's been difficult for me-I can't just knock it out in 5 minutes. And I like to work fast, so doing this with a 50 year old iron file without a handle that was made for woodworking has upped my stress level a few notches. :lol
 
Re: Simplified, cheaper DEC ANH Hero Blaster Kit parts (posted with permission fr...

I'd love to see a GK kit, that Blaster is my white whale, every time I come close to getting one or a full set of parts something goes wrong & it falls through :lol

I'd also love to see a set of Merr Sonn parts (you've already cracked the FH, bull barrel & cylinders) :)

I think I've got all my blued parts blued & painted parts painted

just need to beat them up & weather them now I guess

Was pleased that when I took the mystery disk sticker off it had worked, need to decide if I'm adding a small hole in the middle

noticed tonight that the bull barrel actually looks blue up close
 

Attachments

  • image.jpg
    image.jpg
    577.2 KB · Views: 236
Back
Top