Vox
Sr Member
This post has been edited to show the completed costume. To see the process, please see the rest of the thread.
C2E2 2015


Original post test:
Helmet
A huge thank you goes out, first and foremost to @Sorenzo for this cast. It came out beautifully, I only had to apply some Bondo spot putty to a couple small places. As for finishing the piece (see the rest of the thread for THAT big process), I closely followed Sorenzo's build thread, but reported my own progress here.


Jacket
The jacket is probably one of my favorite clothing articles that I own. I got it a few years ago care of Wilson's Leather, should be perfect for the costume.

Torso
The shirt is entirely custom. I designed the pattern myself after many meticulous measurements. I ordered a stretch spacer mesh fabric, onto which I traced the patterns. The exposed edges of the shirt (bottom hem, sleeve ends) were finished with 1" elastic tape, folded length-wise over the edge of the fabric and stitched on. The elastic was too thick to follow line of the top of the neck, so that was finished with simple twill tape. The back of the neck was not sewn together, since the twill tape does not stretch and my head still needed to fit through the neck hole. Instead, the back of the neck is closed up (once the garment is put on) with two hook-and-eye settings.


Gloves
Purchased these a while ago for dirt cheap off Ebay. I know Red Hood has full-fingered gloves, but my frugality is winning out over my perfectionism. If I find myself with the cash, I may find more accurate gloves. But at the moment, that is low on the priority list. Note: the cloth is actually a sheen black, I think the camera is just picking up the blue tone of the comforter.

Belt
Most likely just going to be a belt I own, or I might try to find something with a silver plate buckle that will work. Suggestions welcome!
[UPDATE 7/3]: Looking into purchasing a custom nylon strap with metal aluminum buckle.
[UPDATE 7/27] Belt acquired, thanks to a custom (and very affordable) order from Strapworks.

Holsters
Got these off Ebay for about $15 a pop (free shipping!) and they are totally worth it. The come with a vertical strap/buckle to attach to a belt, and two thigh straps. I ended up removing the vertical straps and replacing them with my own nylon angled straps (as per the reference photos). I also removed the lower thigh straps because, thanks to the new straps, the holsters were sitting higher on my legs and the lower strap would not wrap around all the way.


Guns
2 airsoft pistols, made of plastic, with orange tips, purchased off Ebay for $10 a piece. I will likely be dismantling them and removing the firing mechanisms (I have no use for BB guns) to ensure their Con safety.

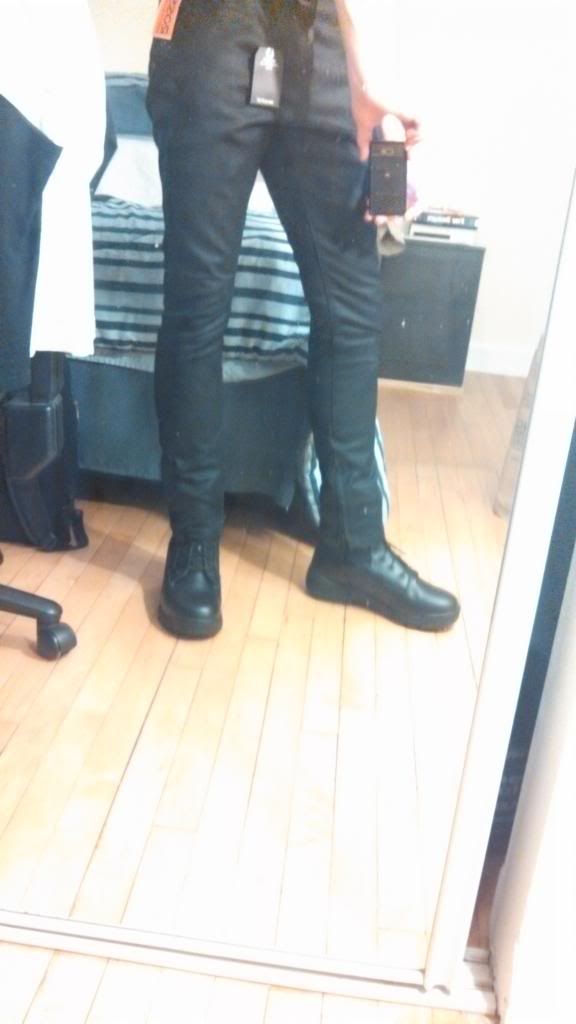
Pants
Found after much (over a month of) research and searching online.

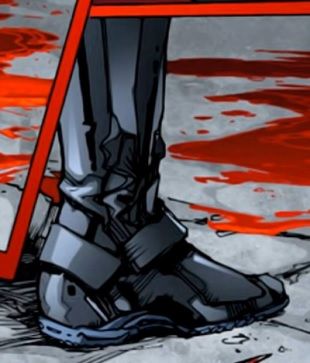
Boots
Combat boots I purchased a couple years ago, to which I taped red vinyl for a Captain America costume. Like the gloves, these aren't quite accurate, but given that I have them already, I am leaning toward using them unless I find an affordable alternative in the next few months. The pants will be pulled over them, rather than tucked in or bunched up.

That pretty much covers it! I am unsure of how to do a neck covering, so that is something I am putting on the back burner for now. All feedback, experience, suggestions, comments, and constructive criticisms are more than welcome!
References:


C2E2 2015
Original post test:
I know Red Hood seems to be one of the "flavors of the month" so to speak, but I've had the idea for a few months and have been unable to shake it, so I decided to go for it, with the intention of having it done for Halloween this year, and wearing it to C2E2 next year. I am a bit of a perfectionist when it comes to my work; thankfully I have a number of months to work on this.
I will mostly be working out of my Chicago apartment and Pumping Station: One (the hackerspace on Chicago's north side). And, here we go!
I will mostly be working out of my Chicago apartment and Pumping Station: One (the hackerspace on Chicago's north side). And, here we go!
Helmet
A huge thank you goes out, first and foremost to @Sorenzo for this cast. It came out beautifully, I only had to apply some Bondo spot putty to a couple small places. As for finishing the piece (see the rest of the thread for THAT big process), I closely followed Sorenzo's build thread, but reported my own progress here.
Jacket
The jacket is probably one of my favorite clothing articles that I own. I got it a few years ago care of Wilson's Leather, should be perfect for the costume.
Torso
The shirt is entirely custom. I designed the pattern myself after many meticulous measurements. I ordered a stretch spacer mesh fabric, onto which I traced the patterns. The exposed edges of the shirt (bottom hem, sleeve ends) were finished with 1" elastic tape, folded length-wise over the edge of the fabric and stitched on. The elastic was too thick to follow line of the top of the neck, so that was finished with simple twill tape. The back of the neck was not sewn together, since the twill tape does not stretch and my head still needed to fit through the neck hole. Instead, the back of the neck is closed up (once the garment is put on) with two hook-and-eye settings.
Gloves
Purchased these a while ago for dirt cheap off Ebay. I know Red Hood has full-fingered gloves, but my frugality is winning out over my perfectionism. If I find myself with the cash, I may find more accurate gloves. But at the moment, that is low on the priority list. Note: the cloth is actually a sheen black, I think the camera is just picking up the blue tone of the comforter.
Belt
Most likely just going to be a belt I own, or I might try to find something with a silver plate buckle that will work. Suggestions welcome!
[UPDATE 7/3]: Looking into purchasing a custom nylon strap with metal aluminum buckle.
[UPDATE 7/27] Belt acquired, thanks to a custom (and very affordable) order from Strapworks.
Holsters
Got these off Ebay for about $15 a pop (free shipping!) and they are totally worth it. The come with a vertical strap/buckle to attach to a belt, and two thigh straps. I ended up removing the vertical straps and replacing them with my own nylon angled straps (as per the reference photos). I also removed the lower thigh straps because, thanks to the new straps, the holsters were sitting higher on my legs and the lower strap would not wrap around all the way.
Guns
2 airsoft pistols, made of plastic, with orange tips, purchased off Ebay for $10 a piece. I will likely be dismantling them and removing the firing mechanisms (I have no use for BB guns) to ensure their Con safety.
Pants
Found after much (over a month of) research and searching online.
Boots
Combat boots I purchased a couple years ago, to which I taped red vinyl for a Captain America costume. Like the gloves, these aren't quite accurate, but given that I have them already, I am leaning toward using them unless I find an affordable alternative in the next few months. The pants will be pulled over them, rather than tucked in or bunched up.
That pretty much covers it! I am unsure of how to do a neck covering, so that is something I am putting on the back burner for now. All feedback, experience, suggestions, comments, and constructive criticisms are more than welcome!
References:
Last edited:
")