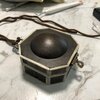
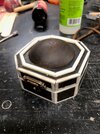
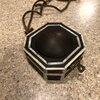
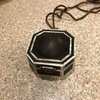
Cbstudios

Sr Member
Well, with this year marking my 10 year point in my Jack Sparrow cosplay life, my Disney Store compass has been looking a bit sorry and out of place. I've upgraded every part of my gear (Most several times over) and there's barely anything that isn't authentic or close to in it. Down to custom leather hat, hand finished leather belts and pewter buttons, having a plastic kids toy hanging from my belt was somewhat of a personal let down. I don't want it to be a Captain Jack compass, I want someone to pick it up and think "This is ACTUALLY Captain Jack Sparrow's compass", So...... after sitting down with my dad over a few (many) drinks, I pitched the idea of "hey.... wanna help me make a legit Jack Sparrow compass? Its gonna be a total pain in the ass to do" and the journey began.

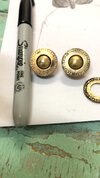
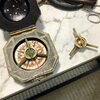
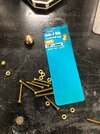
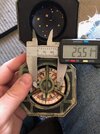
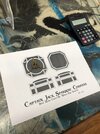
Step one was gather a bunch of measurements. I think the size for the Disney Store Compass is pretty much bang on and I'm happy with that, so I went to town with some calipers. (Click to embiggen)
IMG_2398.jpgIMG_2557.jpg

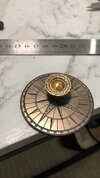
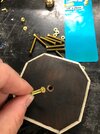
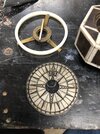
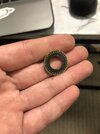
Once I'd worked out my sizes, I ordered a packet of brass washers to use for the sundial base. I tried an acid etching process with Amonium persulphate and laser printer toner. It worked OK but was a whole bunch of trial and error, and ultimately wasn't a perfect solution. The combination of the tiny dial and using pre-made washers made it very difficult to get the laser toner to bond. This piece is gonna be pretty beaten up anyway so I'm not super worried, once it was assembled and weathered it looks pretty slick.
IMG_2436.jpgIMG_2459.JPG

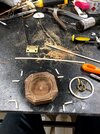
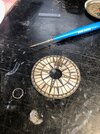
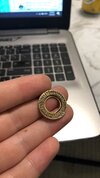
Once I'd messed around getting a design and an etch I Liked, I used my dremel to ream out the washer's center, stacked two together and soldered them together. You'll notice the etch design is different, this is because I'm an idiot and was using the Curse of the Black Pearl sundial design instead of the Dead Mans Chest/At World's End design. Yes, the compasses are actually pretty different. The compass rose seen here is a test laser cut from a friend of mine, Lost Kiwi Designs. She's agreed to help me with laser cutting my inlays as well as laser cutting and etching my compass dial as well!
IMG_2490.JPGIMG_2491.JPG

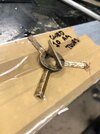
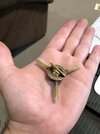
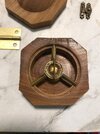
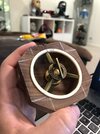
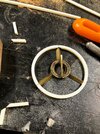
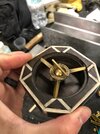
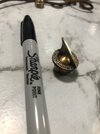
Next up came the sundial's Fin piece, I've got no idea of the technical term and I honestly don't care to learn it, so It's a fin ok? This was hand shaped from brass sheet, and then PAINSTAKINGLY soldered on. It was at this point I'd realised exactly what a dumb decision this whole endeavour was, but "in for a penny, in for a pound". I then grabbed a small piece of brass square rod for the three legs, I ground it down to a right angle and attempted to solder those on too. I'd originally planned for this build to be entirely "Universe Accurate", with no plastic, all the metal soldered together etc, but I completely had a meltdown trying to get the legs soldered on, and after a good 4 hours of struggling I conceeded and went with JB weld. The Shot of it in my hand really shows how tiny it is. I'm not a big guy and it feels miniscule in my hand.
IMG_2502.jpgIMG_2514.jpgIMG_2544.jpgIMG_2545.jpg

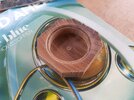
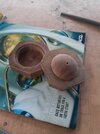
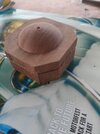
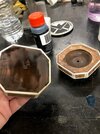
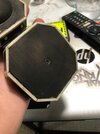
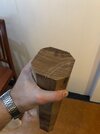
Now comes the good bit. Dad was rummaging around and found a nice lump of wood. Its a fence post that he's been saving for god knows why, but its like 30 years old and solid as a rock, so he started doing some machining. Lopped down the sides for some Octagonal goodness, and then attacked it with a lathe!
IMG_3120.jpgIMG_3240.JPGIMG_3243.JPGIMG_3241.JPG

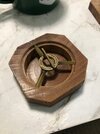
Just wow. I definitely owe him a good bottle of rum. The timber has some natural cracks and grain that I definitely wanted to preserve, and its turned out gorgeously. I had to file a fraction of a Milimeter off one of the dial legs and the whole thing fit perfectly into the groove. This is where I am at so far....
IMG_3331.jpgIMG_3335.jpg
IMG_3333.jpg


So what next? Well.... Getting a laser cut compass rose, a bunch of acrylic strips for inlays and cutting the channels for those inlays, that's basically where I am at right now. Its definitely taking shape but with a long way to go. Watch this space!
 
Nice! good luck with that build, I'm working on one in black wood and bone inlays for a few months, it's an extremely difficult prop to replicate but an extremely rewarding build to do :)
 
The pointy part of the dial is called a gnomon. When the compass was aligned for the correct hemisphere pole, where its shadow on the dial was your time
 
The pointy part of the dial is called a gnomon. When the compass was aligned for the correct hemisphere pole, where its shadow on the dial was your time
Well, It’s not as easy to remember as fin, but I now I don’t have to google it, so I am very thankful! Hahaha, that’s actually awesome!
 
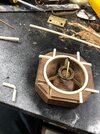
Alrighty, so after literally MONTHS of dicking around on this, I'm making ridiculous headway in only a handful of days. Lost Kiwi came around today with a bunch of 3mm square Ivory coloured acrylic strips and one center ring. The center ring fit FLAWLESSLY.

1.jpg3.jpg

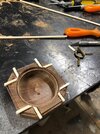
From this point it was time to cut a bunch of 3mm channels to set my acrylic into. The corners are the only place that the full 3x3 sides will be seen, so the flush inlays on the top can be as shallow or as deep as needed. I plugged in my bandsaw to start doing some cuts, and the blade promptly broke. Time for the coping saw and some needle files.

4.jpg2.jpg

I test fit all the pieces as I cut them down, and when I was happy with all of them, I mixed up some 2 Part Epoxy adhesive and stuck them all down. A quick buzz on my belt sander once it cured and everything was brought flush. Now I wanna say now why I'm using acrylic when I was intending this to be an "as issued" in accurate materials kinda build, well.... carving bone isn't something I really wanna be doing, plus cutting a complete circle by hand was gonna suck, so Acrylic is the choice for me!
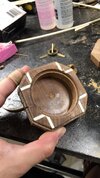
5.jpg6.jpg7.jpg

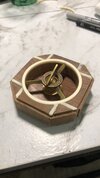
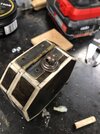
More cutting started giving me the proper channels around the edge. My same "sand flush" method is the way I intend to clean up the vertical inlays. This is my progress so far, and its looking really promising, the center ring and brass sundial piece aren't gonna be secured in until the final assembly, so that's why its not quite a flush fit yet. There are also some slightly off corners as well, and thats still due to it being an in progress piece, they'll get squared out later on.
8.jpg


And finally for some context, this is my Jack gear on display at a local convention this past weekend. I prefer the DMC/AWE style, but I had my CotBP configuration on the mannequin, because why not!
172533356_10157778848147132_3699627428773989685_n.jpg
 
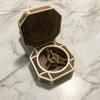
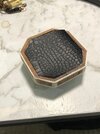
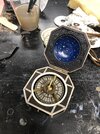
Ok a little more progress on the thing what does not point north today! I knuckled down and got almost all of the inlay work done, bar the insert piece on the lid (cos that bit is absolutely gonna suck). I also dremeled the inside of the lid slightly for the recessed area, which was incredibly tedious due to the very very hard timber.

Ooooooh, Aaaaahhhh.
compass1.jpg

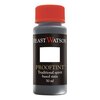
The lid is just resting in place for this shot, but I'm incredibly happy with how this is looking so far. I also popped down to the local hardware store, Bunnings for some Timber Stain and another hinge option. The color I've decided on is a Japan Black by Feast Watson. It should allow me to darken the timber without just slapping some paint onto it, while still showing the grain and finish of the timber through. I'm intending to do a bunch of light coats to gradually sneak up on the color. I'll also be testing to see if it discolors the acrylic inlays or not.
c54d080c-5ed4-45e3-a7a7-4f157452e3d7.jpeg

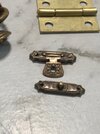
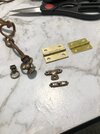
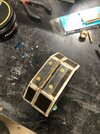
So far these are my hardware options. I had originally picked up the duller brass hinge, but the more I looked at it the less happy I am with it. I did manage to find the smaller shiny brass hinge, which I like the look of much more, but I plan to strip the shine back and give it a nice aged patina. I've also ordered some antique brass finish latches and ring pulls, and while the latch looks fantastic, the ring pull that arrived was far too small, so I've ended up cannibalizing the ring pull from the back of my plastic compass. For the greater good.

compass3.jpgcompass2.jpg

I also have been testing out leathers and faux leathers for the lid lining. I'd really like to use genuine leather, but this is a rough test of some synthetic stuff I have kicking around in my shop. Its nice, and has a great texture, but I just really wanna keep as much of it natural as possible.
compass4.jpg

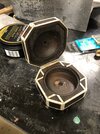
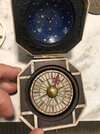
And finally, the entire reason I'm doing this build, is a comparison of the guts of my plastic compass versus my Legit build. I'm almost giddy over how good the difference is.
compass5.jpg
 
Last edited:
Ok so, I've been crazy slack updating this, but hey, life gets in the way and I PROMISE it's worth it.

I got my Feast Watson Japan Black wood stain, and a tin of their Hard Wax to seal it. I started off with a diluted coat thinned with white spirits, but after a single coat, I went to raw undiluted power.
1.jpg

Once I had a few solid layers of colour down and a couple of layers of wax on, I took the opportunity to slap on the hinge. I went back and forth on the hinge attachment, as its completely concealed on the screen used one. One problem I was running into was the hardwood compass body likes to crack pretty significantly, so rather than risking the whole compass with cutting a hidden slot or running a fragile veneer, I decided to chemically blacken the brass hinge, and screw it externally on. Its somewhat disguised, enough for me at least, and its a rock solid join. I'm also quite fond of the subtle highlights I could get on the brass edges.

2.jpg3.jpg

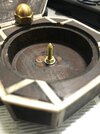
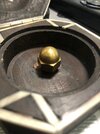
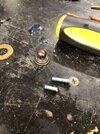
Next up was mounting the compass rose. Sticking by a "simple but effective" methodology, using my previous acorn nut, I got some small brass bolts, trimmed one down to length, filed to a point and made full use of the lathe hole left in the bottom of the body. I countersunk a socket and just bolted it right in place. The acorn nut has a center divet inside from the machining process and it self centers right on the pointed bolt.
5.jpg6.jpg9.jpg8.jpg7.jpg

I also dipped the bolt head in some blackening patina to disguise it. I'll likely use some dark wood filler to totally conceal it at some stage, but for now it doesn't bother me.
10.jpg

The final steps on this stage was attaching the ring pull to the back. This is one I've had on my plastic compass for literally years, i believe it originally came from a Zlurpo kit, but I love the look of it so on it goes. I cut a scrap bolt down to length, cut a thread into the compass body and screwed it into place. Sturdy as hell!
11.jpg12.jpg

So, this is where it all stood at the end of this stage. I could see the light at the end of the tunnel, and all i needed now was some paint and a compass rose!
14.jpg Look at that dome sheen!

15.jpg
 
Home Stretch? HOME STRETCH!

You may notice in that last image, that I had plugged the lathe hole in the dome top. Small piece of dowel, shitload of dye... happy days! I also attached the font latch with some small brass nails, just drilled and press fit in place, I may swap them out later so semi-permanent is the best way to go.

What I HADN'T done was the pesky second line of inlays on the lid. Several hours of steady handed dremel wheel work later and I had some shallow channels to glue some inlays in. Thankfully as these weren't on corners or edges, they didn't need to be super deep. I glued them in place and removed a heap of excess acrylic to get them level.

1.jpg

I then hit them with some of the spirit dye, this gets into all the tooling marks and gives an amazing aged look. really convincingly mimics the ivory inlays, and can be stripped back with white spirits for highlights. this means...... the outside... IS DONE!

2.jpg3.jpg

What else is to be done? Well.... the compass that doesn't point north has to have something to point....with. I got Lost Kiwi Designs to throw some different materials into her laser cutter, to see what would look nicest, but ultimately we decided on more of the ivory coloured acrylic. I sanded back the shiny surface and hit it with some of my dye! Good lord, it looked JUST how I imagined. I'd also painted the inside of the dome with it's sky motif and stars, as well as glued in the vinyl for the lining. I haven't found a leather that I like enough yet, so I used contact adhesive to make the bond semi-permanent if i change that later on too.
6.jpg5.jpg

I busted out some super fine tip paint brushes and started painting in the details on the dial, blue, yellow, red and even used some gold leaf for some dazzling highlights.
7.jpg8.jpg

I press fit the painted dial to the acorn nut and then did a full dry fit assembly, before taking that final plunge.....
9.jpg It be proper to my eyes sir....

Final step was gluing the center ring into place, locking my sundial, compass rose and acorn nut permanently into place, everything spun and moved beautifully. Carefully sand the center ring flush, hit it with a final pass of dye to age the acrylic and then......

Done.
10.jpg

11.jpg

12.jpg


This was a great idea that quickly became an uncomfortably large amount of work. There are irregularities and defects all over this piece, and in hand they make it feel all the more authentic. It feels heavy, it rattles and clacks and it holds like an antique. This thing in hand FEELS like Captain Jack Sparrow's compass. Its indescribable and absolutely everything I could have possibly hoped for in this endeavor.

Now.... where's the rum, I've earned meself a drink.
13.jpg
 
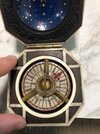
Figured it was time for a little update, I've continued to wax and handle the surface of this compass and its settling in very nicely. The acrylic is getting a nice worn finish as i do so. I also decided to start a youtube channel, so I've got a short video showing off prop, which if you're interested gives a great idea of its size and shape in a 3d space!
 

Your message may be considered spam for the following reasons:

If you wish to reply despite these issues, check the box below before replying.
Be aware that malicious compliance may result in more severe penalties.
Back
Top