Cbstudios
Sr Member
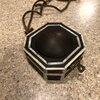
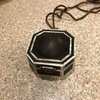
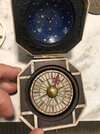
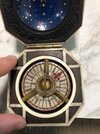
Well, with this year marking my 10 year point in my Jack Sparrow cosplay life, my Disney Store compass has been looking a bit sorry and out of place. I've upgraded every part of my gear (Most several times over) and there's barely anything that isn't authentic or close to in it. Down to custom leather hat, hand finished leather belts and pewter buttons, having a plastic kids toy hanging from my belt was somewhat of a personal let down. I don't want it to be a Captain Jack compass, I want someone to pick it up and think "This is ACTUALLY Captain Jack Sparrow's compass", So...... after sitting down with my dad over a few (many) drinks, I pitched the idea of "hey.... wanna help me make a legit Jack Sparrow compass? Its gonna be a total pain in the ass to do" and the journey began.
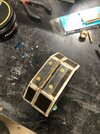
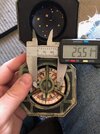
Step one was gather a bunch of measurements. I think the size for the Disney Store Compass is pretty much bang on and I'm happy with that, so I went to town with some calipers. (Click to embiggen)
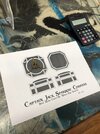
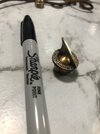
Once I'd worked out my sizes, I ordered a packet of brass washers to use for the sundial base. I tried an acid etching process with Amonium persulphate and laser printer toner. It worked OK but was a whole bunch of trial and error, and ultimately wasn't a perfect solution. The combination of the tiny dial and using pre-made washers made it very difficult to get the laser toner to bond. This piece is gonna be pretty beaten up anyway so I'm not super worried, once it was assembled and weathered it looks pretty slick.
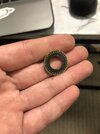
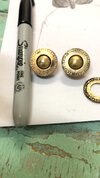
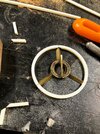
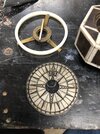
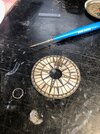
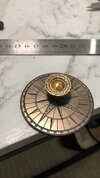
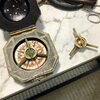
Once I'd messed around getting a design and an etch I Liked, I used my dremel to ream out the washer's center, stacked two together and soldered them together. You'll notice the etch design is different, this is because I'm an idiot and was using the Curse of the Black Pearl sundial design instead of the Dead Mans Chest/At World's End design. Yes, the compasses are actually pretty different. The compass rose seen here is a test laser cut from a friend of mine, Lost Kiwi Designs. She's agreed to help me with laser cutting my inlays as well as laser cutting and etching my compass dial as well!
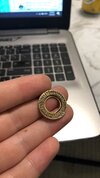
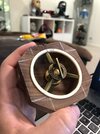
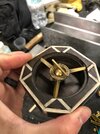
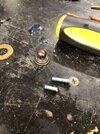
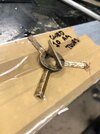
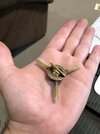
Next up came the sundial's Fin piece, I've got no idea of the technical term and I honestly don't care to learn it, so It's a fin ok? This was hand shaped from brass sheet, and then PAINSTAKINGLY soldered on. It was at this point I'd realised exactly what a dumb decision this whole endeavour was, but "in for a penny, in for a pound". I then grabbed a small piece of brass square rod for the three legs, I ground it down to a right angle and attempted to solder those on too. I'd originally planned for this build to be entirely "Universe Accurate", with no plastic, all the metal soldered together etc, but I completely had a meltdown trying to get the legs soldered on, and after a good 4 hours of struggling I conceeded and went with JB weld. The Shot of it in my hand really shows how tiny it is. I'm not a big guy and it feels miniscule in my hand.
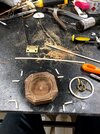
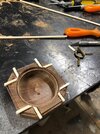
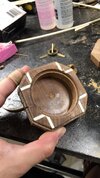
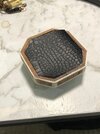
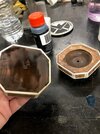
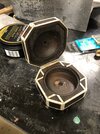
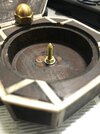
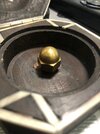
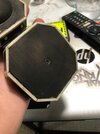
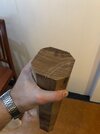
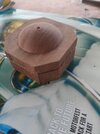
Now comes the good bit. Dad was rummaging around and found a nice lump of wood. Its a fence post that he's been saving for god knows why, but its like 30 years old and solid as a rock, so he started doing some machining. Lopped down the sides for some Octagonal goodness, and then attacked it with a lathe!
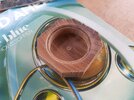
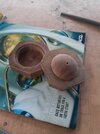
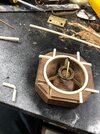
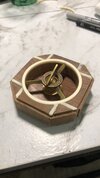
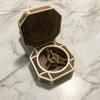
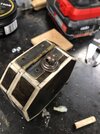
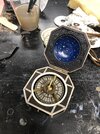
Just wow. I definitely owe him a good bottle of rum. The timber has some natural cracks and grain that I definitely wanted to preserve, and its turned out gorgeously. I had to file a fraction of a Milimeter off one of the dial legs and the whole thing fit perfectly into the groove. This is where I am at so far....
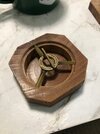
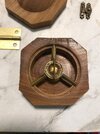

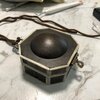
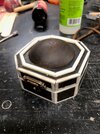
So what next? Well.... Getting a laser cut compass rose, a bunch of acrylic strips for inlays and cutting the channels for those inlays, that's basically where I am at right now. Its definitely taking shape but with a long way to go. Watch this space!
Step one was gather a bunch of measurements. I think the size for the Disney Store Compass is pretty much bang on and I'm happy with that, so I went to town with some calipers. (Click to embiggen)


Once I'd worked out my sizes, I ordered a packet of brass washers to use for the sundial base. I tried an acid etching process with Amonium persulphate and laser printer toner. It worked OK but was a whole bunch of trial and error, and ultimately wasn't a perfect solution. The combination of the tiny dial and using pre-made washers made it very difficult to get the laser toner to bond. This piece is gonna be pretty beaten up anyway so I'm not super worried, once it was assembled and weathered it looks pretty slick.


Once I'd messed around getting a design and an etch I Liked, I used my dremel to ream out the washer's center, stacked two together and soldered them together. You'll notice the etch design is different, this is because I'm an idiot and was using the Curse of the Black Pearl sundial design instead of the Dead Mans Chest/At World's End design. Yes, the compasses are actually pretty different. The compass rose seen here is a test laser cut from a friend of mine, Lost Kiwi Designs. She's agreed to help me with laser cutting my inlays as well as laser cutting and etching my compass dial as well!


Next up came the sundial's Fin piece, I've got no idea of the technical term and I honestly don't care to learn it, so It's a fin ok? This was hand shaped from brass sheet, and then PAINSTAKINGLY soldered on. It was at this point I'd realised exactly what a dumb decision this whole endeavour was, but "in for a penny, in for a pound". I then grabbed a small piece of brass square rod for the three legs, I ground it down to a right angle and attempted to solder those on too. I'd originally planned for this build to be entirely "Universe Accurate", with no plastic, all the metal soldered together etc, but I completely had a meltdown trying to get the legs soldered on, and after a good 4 hours of struggling I conceeded and went with JB weld. The Shot of it in my hand really shows how tiny it is. I'm not a big guy and it feels miniscule in my hand.


Now comes the good bit. Dad was rummaging around and found a nice lump of wood. Its a fence post that he's been saving for god knows why, but its like 30 years old and solid as a rock, so he started doing some machining. Lopped down the sides for some Octagonal goodness, and then attacked it with a lathe!


Just wow. I definitely owe him a good bottle of rum. The timber has some natural cracks and grain that I definitely wanted to preserve, and its turned out gorgeously. I had to file a fraction of a Milimeter off one of the dial legs and the whole thing fit perfectly into the groove. This is where I am at so far....


So what next? Well.... Getting a laser cut compass rose, a bunch of acrylic strips for inlays and cutting the channels for those inlays, that's basically where I am at right now. Its definitely taking shape but with a long way to go. Watch this space!

