Cargo Ship Build

Back to the drawing board this morning to work out some designs.
I had aimed to "find" most of the design during fabrication; to just build it off a base concept.
But 3D is so helpful at pushing and pulling shapes around and testing before committing to plastic.

I changed and improved the top from the sketch. I think I'll go with this mockup and start cutting styrene for the top section today.
I'm also adding a functional "shoulder section", front thruster block C. it will help position the ship at port.
Norscout.RPF.012d.Cargoship-DesignWIPs.jpg

Deciding to hand make or 3d print the rear nozzle details... I need a 3D printer! I'm shopping, leaning towards resin, any suggestions or recommendations?
joberg yes, can make the front guns similar, and drop the front ball turret, or the very top mast section could be a good spot for a turret.
swgeek Hack saw working as my best option for now. I need a band saw! and more model-making tools at my home shop.
 
swgeek Hack saw working as my best option for now. I need a band saw! and more model-making tools at my home shop
That makes two of us. The only "power tools" I have at home are my 3D printer and my laser cutter. I normaly use the power tools at work, but since the whole town is shut down due to the strikes, hand tools it is.
 
wonderful work Mr norscout, and you have let me see the light about my own next model project .Like you I think a wood core is the way to go saves material and prevents warping when panels are added, keep up the great work looking forward to the product or should I say ship.
take care,
regards Barrie ( the old inspired guy ) and YES ACYLIC IS BRITTLE AND HARD TO CUT. DESTEST THE STUFF. ( but it is very handy for nozzles ect )
Thank you Barrie. That's an awesome looking Viper in your profile pic. What scale is it?
 
Hello Norscout,
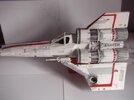
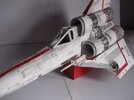
the viper is about 1/12th scale. it was a model I built for display at my local hobby shop, ( which has seen stopped trading ) and was only on display for a week or so and a guy wanted to buy it , the shop rang me I gave them a price and the guy was happy and the proud owner of a viper. Since then I have been lucky enough to have sold quite a few models ( over 60 ) of various things which then led to the museum at Milton Keyenes getting in touch with me to build models for display. I have been very very lucky, maybe 50 years of model making does pay off.
here are a few more pics of the viper. I know one thing I am going to build my next model with possibly a wooden core after seeing how well your own model has been coming along, you have been an inspiration to an old guy.

keep safe and well
regards Barrie ( the old lucky guy )barrie with viper 2.jpgDSCF9852.jpgDSCF0306.jpgDSCF0307.jpgDSCF9803.jpg
 
Nice work so far.
Concur with the problems of acrylic. Stay away from the bandsaw as well, it tends to explode and melt if you go too fast or the tooth is not fine enough.
 
swgeek Same, fully equipped shops at work, hand tools at home. Laser cutter and 3D printer though, you're two ahead of me!!
I'm getting a 3d printer soon. srspicer Thanks! True, I've seen that. When I use acrylic flat sheet on work productions I use laser cutters. At home acrylic is always more of a pain to cut. Using only basic hand tools can be fun, then you realize the additional time and patience required.
 
Back to the drawing board this morning to work out some designs.
I had aimed to "find" most of the design during fabrication; to just build it off a base concept.
But 3D is so helpful at pushing and pulling shapes around and testing before committing to plastic.

I changed and improved the top from the sketch. I think I'll go with this mockup and start cutting styrene for the top section today.
I'm also adding a functional "shoulder section", front thruster block C. it will help position the ship at port.
View attachment 1722680
Deciding to hand make or 3d print the rear nozzle details... I need a 3D printer! I'm shopping, leaning towards resin, any suggestions or recommendations?
joberg yes, can make the front guns similar, and drop the front ball turret, or the very top mast section could be a good spot for a turret.
swgeek Hack saw working as my best option for now. I need a band saw! and more model-making tools at my home shop.

Thanks JamesM242
Made progress on the command tower section this week. It's about 4" x 2" overall:
Norscout.RPF.017.GF_CargoShipBuild7.23 .jpg

Norscout.RPF.017b.GF_CargoShipBuild7.23.jpg

Norscout.RPF.017c.GF_CargoShipBuild7.23.jpg


I have two antenna up top. Thinking about what material to use for them. I'd like them tapered from base to point, or stepped. Gonna need some smaller tube or wire or something... Any suggestions or recommendations? Antenna will be approx. 1/8" or 1/16" diameter at base, maybe a 64th or 32nd at tip and up to 1" in length.
 
More expensive but if you can, get cast acrylic instead of extruded.
Also routing the ends after cutting gives you a smoother edge.

Edit.
THE most important thing is use acrylic specific blades.
The shop I worked at we cut everything on a table saw then routed the edges.
 
Last edited:
My recommendation for small antenna like that is piano wire/music wire. Although, I think the smallest piano wire goes down to is .030".
So if you want a 1" antenna, make the music wire 2", cover one inch of it with propoxy or magic sculpt, and then after it cures, chuck up the antenna in a drill and sand the taper you want.
Good tip. Thx! I'm gonna dig thru my guitar strings & see if I have a non coiled G string thick enough.
 
Great update.
You can find fine steel wire on line, something like .010, .007, .005. I have found .010 on a spool, but I know you can find in bundles of straight wire in a packet.
 
Thanks joberg & srspicer I have a few spools of alu. and steel wire and guitar strings I'm gonna mess with this weekend to see what I can make work. Maybe I'll keep the antenna faceted, not sure yet.

I like to design with practical elements in hand while fabricating. It always turns out different than if I design it all on paper or all in 3D first.

I was researching bow thrusters, Hawker Harriers & thrust vectored engines last week as I designed shoulder thruster blocks for this ship.
As soon as I saw the Harrier engine assembly I thought - Jawa sandcrawler backend and AT-AT underside! I'm new to the actual part ID game but every time I go to a WWII museum and often when I build a military kit I see SW shapes! This cargo ship is not trying to be SW but I'm pulling from similar real life inspiration.
 
Looks good (y) (y) You could buy a special bit that could sand those 2 holes and make them smoother and more interesting in terms of shape;)

1691333448643.png
 

Your message may be considered spam for the following reasons:

If you wish to reply despite these issues, check the box below before replying.
Be aware that malicious compliance may result in more severe penalties.
Back
Top