Captain America: TFA - Rescue Cap and Bucky

Wow, that star looks great. It really shows that you saw the actual costume.

Here are the photos of a reproduction sheath and rubber fighting knife. The background is a 12 x 18 piece of craft foam.

The knife is an overall length of 11 7/16 and the blade is 6 5/8 and 7/8 inches wide.

The sheath is 15 1/16 long and 1 15/16 inches wide. The black metal plate is 2 inches tall and 1 7/8 wide.

Hopefully with these measurements and the tape rulers will help the photos to be used as a template.

Thanks for the measurements! I hadn't realized just how large the sheath especially is (I guess I wasn't fully taking into account how tall the people in my reference photos were compared to me). I might have to scale down any replicas I make (at least for myself), but it's good to know what to start with.
 
Last edited:
Little bit of an update.

The holster and sheath are done-ish.
TFA Rescue Cap 8.jpg
They're stitched up, and some of the detailing has been added to the sheath. So I just need to fix/finish the "US" stamp and add a peg for the flap closure on the holster, finish the top edge of the knife sheath (after the knife itself is done), and add leg ties and *maybe* some paint/finish to both. Which still sounds like a lot. But the most important steps are done, and the rest is just details.

And the embroidery on the shirt star is done.
IMG_3719.JPG
So all that's left for that is cutting it and sealing off the edges, then eventually attaching it to the shirt (which I got the materials for over Christmas, so I'll probably start on that soon).
 
Last edited:
I've started dye tests on the pants. Instead of just leaving the green as is, I decided to go ahead and try to tone down the green and make them a little more brown. I also pulled the lower pockets off a USMC BDU to use as the cargo pockets on the pants, so I've also been testing that too to try to cover the camo print.

IMG_3750.JPG
This is the pants fabric untreated on the left and after color remover on the right. So that alone is an improvement.

IMG_3753.JPG
If I remember correctly, from left to right this is: pants with dark green, camo underside with color remover and tan, camo underside with remover, camo underside with remover and dark green, pants with remover and tan, pants with remover.

I still want to test dark brown on the pants and camo, but as a fallback I'm happy with the tan on the pants. Neither the color remover nor any dye covered the camo well enough (I didn't even bother taking photos of the front of the fabric), so now I'm considering ripping them apart and stitching them back together with the non-camo underside of the fabric on the outside (inside out, essentially) if the ripstop isn't too obvious, or using them as a pattern with different fabric.

I've also got to a good "finished" point with the holster and knife sheath. I sprayed them with a red-brown Rust-Oleum primer I already had, then for some gloss to give it more dimension I went over that with a *very* lightly watered down Tacky Glue (which fantastically stays flexible and doesn't crack when it's dry). The foam was heat sealed with an iron before it was assembled and painted, but otherwise didn't have any sealer as a base. I used the same Rust-Oleum on the leg ties, which were just lengths of cord taken from an old belt.
IMG_3769.jpg IMG_3738.jpg TFA Rescue Cap 16.jpg TFA Rescue Cap 15.jpg

I'm not thrilled with the "US" imprint - I tore up the circles too much, and I added some ink to the background to help with depth but it turned out a little too dark. *But* it's still useable and it's still better than when it had no imprint at all. And since I've got the sheath, I think I'm going to skip the knife itself. Having the sheath there is the most important thing, and my "knife" would really only be the handle section anyway. So if I have time later I might go back and mock one up, for now I'm just going to add the last few bits of black metal detailing to the sheath and call it good.
 
Last edited:
Sorry things have been so quiet here lately. I just finished one class and started three more earlier this month, and I've got a few commissions in the works too, so I haven't had much time to work on my own stuff. I did do touch-ups and sealing on the helmet and all the webbing gear is slowly coming together, plus both the goggles and pants are about half done. So I will have something to update eventually.

And a heads up to anyone going to WonderCon: we decided to go to this year, so if we can get things more or less finished we might be debuting these there as a test run to figure out what needs tweaking before SDCC.
 
Seeing as the only thing I have left for this costume is to buy my clip-on bangs (Bucky just doesn't rock the Rogue look), I decided to try my hand at a weapon build.

10978697_755530491191761_5069343028446991893_n.jpg

I'm the epitome of cosplay on a budget; I do everything as cheaply as possible so that I can spend more money on both events, and the more important details. Everyone wants WAY too much money for a Hydra rifle, so I'm gonna try and build one myself. I took the photos from the TFA Auction catalog (bless that thing really), created a decent size file, then sized up the rifle to the appropriate 26" measurement the catalog gives for approximate length. I'm doing the whole thing from EVA with craft foam detailing, prolly PVC for the barrel and shoulder post. I've never worked with EVA, never made a weapon or gun, I'm in the dark here. I plan on coating everything with plasti-dip to seal it, then finish off with a coat of satin black paint. Any tips are appreciated. I only have the basic shape blocked out right now, seeing as I just started this.
 
I finally got some more work done over the past week or so.

It had been a while since I had the heater shield out, and looking at it again I decided it was just a little too large for me. It was more or less okay on my arm, but when it was hanging on my back it came out too far. So I ended up cutting it down a half inch to that first line I had marked when I initially cut it out. From there I sanded off the texture on the back with a dremel, heated and shaped it (I couldn't find my heat gun, so I sat in front of a space heater with it and that worked great), and glued down a sheet of craft foam over the sanding. I've put on about 7-8 coats of PVA/water, so I'm ready to spray Plasti-Dip which I might start today if the weather cooperates.

I feel really outside my depth with this since I've never done anything like it before, and there are already some things I would do differently next time. So I think I'm going to tentatively plan to remake this at some point. I'll probably still do it out of foam instead of getting a metal shield, since the foam is so cheap and easy to work, but some of the construction will be different.

IMG_3860.JPG IMG_3859.JPG IMG_3870.jpg


I also finished the goggles. I swapped out the black elastic for grey, then decided kind of after the fact to paint the frames instead of gluing on foam. I should have done the frames before I replaced the elastic, because taping off the whole thing was a hassle. But oh well. I sanded the frames a little to help it stick but didn't use a primer (though I probably should have). I already had black and white acrylic so I mixed that to a grey color that worked with the elastic color and looked close to the foam on the movie goggles, and it was sealed with Rustoleum matte clear coat.

IMG_3891.JPG IMG_3873.jpg IMG_3902.jpg
 
Last edited:
The shield is taped off and I've started painting. I didn't bother with photos of the Plasti or primer or white since that's all pretty straightforward. I sprayed the red yesterday (when this photo was taken) so I'm hoping to get to the blue today.
IMG_3940.jpg

I've also got the jacket and gear sorted. I'm still working on modifying the original thrift store jacket, but I was running short on time before WonderCon so I looked for an alternative. I lucked out finding this jacket pretty last minute on eBay, and I like it so much I'll keep using it as the "intact" jacket (so I can still get normal use out of it) and then I'll turn my modified jacket into the more ripped up weathered version. The zipper is on the wrong side and it has straps on the shoulders, but none of that is too obvious so I'll leave it alone. I will be adding some extra length though, since the hem hits just about the center of the cartridge belt and it likes to ride up.
IMG_3948.jpg IMG_3947.jpg

The gear is mostly from At the Front. I got their Economy 1936 Suspenders, Economy M1923 Cartridge Belt, and map case strap. The compass pouches are from eBay. For the extra piece at the right shoulder, I removed the webbing from the back of one of the compass pouches, cut it down and sewed it back together, and added a d-ring scrounged off an old messenger bag.
IMG_3776.JPG IMG_3816.JPG IMG_3812.jpg
 
I leave for WonderCon in a few days and time is already tight, so I don't know that I'll be able to update properly again beforehand, but I figured I'd do a quick update even if it's small.

The star is cut out and the edges sealed off, so it just needs to be attached. Since I'm not sure if I'll keep using the shirt I have for this week, I'm just going to handstitch the star on in a few spots. Just enough to keep it in place for a day. I'll also weather it some once it's on the shirt.
IMG_3950.JPG

The red stripes are down on the shield. I've sprayed the blue too, but I'm still touching up the stars so I don't have any photos yet. I'm not thrilled with the finish, so I'll probably make a second version before SDCC, and whenever I do make another I'm definitely going to do more sealing and filler prior to painting.
IMG_3954.JPG
 
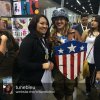
WonderCon has come and gone, and despite a few setbacks and plan changes it went really well. This is the first photo I have so far, but I expect a few more to pop up eventually, and I'll do a photo of the full rig on my dressform too.

11031938_783292248415585_7366562395626624594_n.jpg
We stopped for our own photo, but a few other people jumped in too and we got the best comment of the day: "Awesome! Chris Evans AND a lady Cap!"

Needless to say, at this point it's gonna be a weird mix of posting finished photos and playing catch up on the progress photos.

This is the shield done.
IMG_3957.JPG IMG_3962.jpg
I used the weathered shield from the auction catalog as a reference for the streaks, and I added a few extra marks to hide some problems with the paint job. I also did different weathering before this but I didn't like it so I scrubbed it all off. It worked out kinda nicely doing it twice though, because the black acrylic from the first attempt settled into some of the pits in the foam, and it added some extra speckles of weathering (and helped disguise the pits, which I had been a little worried about). The back didn't turn out how I intended and I had to do some makeshift changes the night before I left so I don't have any photos of it (and probably won't take any), but it's just a basic approximation of how the back looks in the auction catalog. Overall this ended up better than I expected, so aside from fixing part of the strap that broke I might not make any changes or duplicates for SDCC after all.
 
Nice work...you look great :) I love the weathering on the shield.

Thanks! :)

And I don't know if I mentioned it altogether yet, but for anyone who wants to know, the final shield layers are:
7ish coats 1:1 PVA and water
3-4 coats black Plasti-Dip
Rust-oleum Ultra Cover white primer
Krylon indoor/outdoor gloss in white, Banner Red, True Blue
basic black and silver acrylic for weathering
and everything sealed with Rust-oleum Ultra Cover matte clear.
IMG_4241.JPG


We got a few more photos back. Excuse our derp faces and weird poses in that one. The lady who took the photo caught us off-guard and threw us into an improv moment reenacting the scene of Cap dragging Bucky up the stairs, and we are NOT improv actors. :$
956877597677997868_1754152066_tunebleu_8ecf12b5108554b9c25dbff640353242.jpg 11155004_786468151431328_1166749192446398932_o.jpg 10857252_786467938098016_8014700103625049034_o.jpg

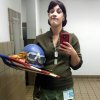
This is what I ended up doing for Bucky's hair. I'm pretty comfortable with vintage hairstyles, so I kinda just winged it and luckily it worked out. Also lucked out that it was supposed to be messy, so I didn't have to keep things neat. I might do step-by-step photos next time as a tutorial of sorts, since messiness aside it actually turned out to be a really pretty style. The bangs are a clip-in from Arda Wigs.
TFA Rescue Bucky 1 .jpg
 
So SDCC has come and gone and then some. It was underwhelming overall, and we didn't come out of it with many photos, but a recent development has brought this project back up. First the old stuff...

I found another photo from WonderCon that we posted to Facebook but never put up here.
1534972_783351751742968_6237029992613305690_o.jpg

And this was the only really relevant photo we got at SDCC (credit to Tim Blackburn, from https://m.flickr.com/#/photos/zetetics/19436003389/in/set-72157655288236560/ ).
19436003389_22d8772e44_o.jpg

And this is the cool recent thing. MouseMeat's friend, the wonderful and talented Chuck Holbert (aka KidNotorious), sent her this AMAZING drawing in a Christmas card this week. We are both super flattered and absolutely love it.
12322377_895968793814596_7361181142922369412_o.jpg
We've come a long way with our costuming in the past year, gaining a lot of new followers including some super cool cosplayers we really look up to, other super cool cosplayers stopping us for photos at cons, followers asking us construction advice and showing us their projects in return. Now this is just the icing on the cake. As MouseMeat said, "Making our cos-dreams come true now that we're immortalized in paper." We'll be wearing and continually upgrading these costumes for a while, but I don't know if or when we'll do any more updates. So until then, thanks to everyone who followed our progress here and elsewhere, who helped us along the way, and who pulled us aside to show their appreciation. You guys are awesome. :)
 
It’s been literally years, but I’ve been thinking about this costume recently (might bust it back out for a con this fall). Since I was doing a somewhat notoriously pricey costume on a budget, I had intended to do a final cost and materials tally, and I realized I never did.

Helmet:
-Reproduction Paratrooper Helmet from At the Front: $110 (gift)
-Rust-Oleum white primer: $4 (gift)
-Krylon Oxford Blue satin spray paint: $4 (gift)

Goggles:
-Aviator Pilot Cruiser Motorcycle Scooter ATV Goggle EyewearT04 Clear Lens goggles from eBay: $8
-8.5"x11" gray craft foam sheet: $1
-3 yards Dritz 1" knit elastic in gray: $1.50
-black acrylic: already had
-white acrylic: already had

Shirt:
-blue t-shirt: already had
-8.5"x11" grey felt sheet: $1
-white cotton scrap: already had
-white thread: already had

Jacket:
-pleather motorcycle jacket: $30
-leather jacket + scrap leather: $2

Harness:
-Economy M1936 Suspenders from At the Front: $24.99
-Economy M1923 Cartridge Belt from At the Front: $34.99
-Map Case Strap from At the Front: $19.99
-2 compass pouches from eBay (plus extra canvas/webbing removed from back): $20.00
-black d-ring: already had

Holster/Sheath:
-2 sheets 8.5"x11" brown craft foam: $2
-Rust-Oleum Rusty Metal Primer: already had
-Aleene's Tacky Glue: already had
-cording: already had

Pants:
-Route 66 cargo pants: $2
-tan Rit dye: $3
-2 Rit color removers: $6
-Echo Jump Trousers from At the Front: $75 (partial gift)

Boots:
-Ariat Heritage black paddock boots: already had

Shield:
-EVA floor mat: already had
-36x60 craft foam roll: $8
-black Plasti-Dip: $8
-Krylon True Blue spray paint: $4
-Krylon Banner Red spray paint: $4
-Krylon glossy white spray paint: $4
-gold mylar: $7

Other:
-webbing belt: $2
-leather gloves: already had
-original WWII U.S. Navy leggings: already had
-Rust-Oleum Ultra Cover Matte Clear sealant: already had
-Frog Tape: $6

Total cost: $392.46
What I spent: $162.50

So obviously this kind of budget only worked because I already had things I could use for some pieces, and I was willing to compromise on accuracy for the sake of price, and people gave me stuff and I took advantage of gift cards at Christmas. But I'm still really proud of doing as well+cheap as I did.

I eventually want to upgrade a few things (I already have a new holster that I never posted about, I want to build a new knife sheath, and I've been lusting after some accurate goggles for a while), so maybe in the next few months I'll pick away at it again.
 
Back
Top