Budget light saber conversion - Luke/Rey Graflex-type mod

Bloop

Sr Member
So I decided to do a quick/budget Luke Skywalker costume for this past Halloween, specifically his outfit from Crait (the duel). I also wanted a decent looking lightsaber to go with it, but didn't want to break the bank.
I finished it enough for Halloween, but I'm still trying to tweak it. It'll never look as good as a metal graflex, but I like trying to see how close I can get.

Parts:

YDD lightsaber - "ice blue," silver hilt
Star Wars Bladebuilders lightsaber (Rey's/Luke's)
Loctite repair (epoxy) putty
Hot glue
Tamaya putty (white)
JB Clear Weld epoxy glue
Krylon metallic silver spray paint
Flat black spray paint
Painters tape

Tools:

Dremel rotary tool - grinding and sanding drums, cutting wheel
X-acto knife
Small detail metal files
Hot glue gun
Hammer
Flat blade screwdriver
Needlenose pliers

Screenshot_20181109-204616_Amazon Shopping.jpg

20181019_221740.jpg

20181019_221924-01.jpeg

I opted for the YDD saber because it has overall good reviews, was relatively cheap for it's features - $59.80 on Amazon, light up polycarbonate dualing capable blade (also removable), metal hilt, rechargable internal battery, and has motion enabled sound effects that can be toggled on or off. And it was Prime eligible, so I got it with free shipping in 2 days. If you've looked at light sabers with similar features, you know the prices can easily be in the hundreds of dollars, so I was happy. I also used an Amazon discount, so it only cost me around $30.

20181019_220030.jpg

20181019_220629.jpg

The "Bladebuilders" saber turned out to be a good option for size, and looked somewhat accurate in terms of the hilt. I figured, even if I couldn't modify it to work woth the YDD saber, it could still be a decent belt-hanger. Reviews online were favorable to the Rubies prop, it size and appearance.

Here's the Bladebuilders next the the YDD:

20181019_222253.jpg

You may not need all the items listed , since a lot of this was trial and error on my part.
 
Last edited:
Prep stage - just the tip
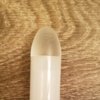
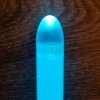
I wanted to remove the clear sleeve that holds the tip onto the polycarbonate blade. Instructions from YDD say not to remove it, but you can glue it if you want. So I started by circumcising my blade with an Xacto knife. Shalom! The tip is not affixed at all and will fall out when the sleeve is removed, so be careful when cutting.
20181019_222029.jpg

20181019_222038.jpg
I used JB Clearweld to attach the tip to the blade. I researched the best adhesive for polycarbonate to acrylic bonding, and it didn't disappoint. It did take a minute or two longer to set up than expected, so take care not to move the blade before it does.

20181022_153524.jpg

NOTE: I noticed the mirrored part of the tip, that reflects the led back towards the hilt, was marred after I glued it. I don't know if it got damaged when it fell out initially before gluing, or the glue itself caused it to wrinkle. It's not hugely noticable, but you can see it if you look for it. So caution is warranted if you try this yourself!

20181126_122355.jpg

20181126_122426.jpg

(EDIT: added a couple post-glue pics. Just took them and noticed a few scratches that occured since Halloween. Not noticable IRL, but can be buffed out with a Scotch Brite pad or similar lightly abrasive material).
 
Last edited:
1st step - removing the plastic blade
I took out the narrower parts of the blue telescoping blade by cutting it. The outer most piece wouldn't come out of the hilt. I found I needed to grind out the interior from the bottom of the hilt, so that the rest of the plastic blade could be removed, and I could make room for the entire YDD saber (blade and hilt) could slide into the Bladebuilders hilt.

20181021_105923.jpg

20181021_131215.jpg

After grinding for awhile, and removing pieces of plastic with pliers as I went, I was able to get the blade to come out if the bottom with some gentle whaling away with a hammer onto a screwdriver, from the top of the hilt, onto the remaining blue plastic blade. I didn't grind away any of the blue blade, just the interior molded plastic of the hilt. There was also a metal spring inside that came free after grinding.

20181022_123136.jpg

I still needed to grind/sand with the Dremel to smooth out the interior so the YDD saber could slide in easy.

20181022_124126.jpg

Success! I put some electrical tape around the YDD hilt in part to protect it from scratches (the metal seems quite durable though), but mostly to create a better seal so it would stay put inside the Bladebuilders hilt. I had grinded out a little of the interior at the top of the Bladebuilders hilt before I realized it didn't really need it, because I didn't need the YDD hilt to be able to be removed from the top, only the bottom of the hilt. So the electrical tape might not have been needed to create a better fit.

After grinding the hilt and removing the gray and black plastic bits from the bottom interior, there were holes that needed to be filled. Also, my ape-like grinding technique ended up melting and grinding through the hilt in spots that left warping and small holes that needed to be filled and smoothed. I used Loctite repair putty to fill and reshape those areas, then Tamaya putty to refine things.
One note: Tamaya putty melts Krylon acrylic spray paint. Maybe it reacts better to enamels, but I wanted to use quick drying spray paint (I'm impatient).

20181024_172936.jpg

20181027_121632.jpg

(EDIT: added pics showing the blade inserted. You can see where the YDD saber fits inside at yhe emitter end. You can also see the speaker at the base or the YDD saber inside the Bladebuilders hilt.)

20181022_124143.jpg

20181022_124153.jpg
 
Last edited:
2nd step - grinding/sanding/cutting
I started by grinding and sanding off the raised writing, getting rid of the big "C E" the "Hasbro" and "Made in China" stuff, being careful so that only the lettering was sanded flat. Next was all the seams. I smoothed the whole surface as best I could with sand paper, moving to finer grades and finally wet sanding.

I used the Dremel cutting wheel to add some missing details, like rounding and adding notches in the "bunny ears." I also cut into the part on the emitter end that was representing the bulb holder of the Graflex flash. This whole area is inaccurate to an actual Graflex because it had to be wider to accommodate the telescoping blade. The cut I made makes it slightly more accurate, though I wasn't entirely sure if, in the movies, there was a hole where you could see part of the rotoscoped blade. You can see it in pics from TFA, but I don't think the original trilogy rotoscoped that tiny slit. Since my saber wasn't ever going to be close to 100% accurate, I decided to go with it for now.

20181022_131425.jpg

20181022_141131.jpg

I thought about cutting the whole area off and fabricating a more accurate bulb-clamp thingy, but time was an issue. And I knew if I went down that road, I'd probably end up ruining it and having nothing for Halloween.
 
This thread is more than 5 years old.

Your message may be considered spam for the following reasons:

  1. This thread hasn't been active in some time. A new post in this thread might not contribute constructively to this discussion after so long.
If you wish to reply despite these issues, check the box below before replying.
Be aware that malicious compliance may result in more severe penalties.
Back
Top