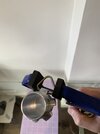
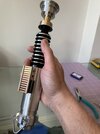
BRRogers / Verity Cosplay / 7 Chambers - "MoM of All Heroes"

The CC chamber looks stunning!

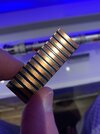
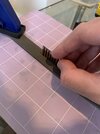
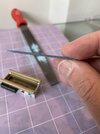
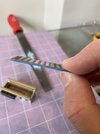
On a separate topic has anybody been able to replicate the rusty effect on the triring? Tried the peroxide, salt and vinegar combo, worked nicely on DaveP's mild steel ring but not on the MoM ring... BRRogers Assuming the ring is stainless steel then?
It *should* be mild steel?

If in doubt try putting a magnet on it. Stainless is significantly less magnetic.

Otherwise, you could buff it bright, put it in the oven at 400, take it out, and spray it (outside) with WD-40 if you want to darken it.

Adam also typically recommends boiling the ring In a combination of what you mentioned above to force the rust to move (Verity Cosplay) I'll let him remind us of that process since that has the potential to be noxious.

I've had other great success by leaving the steel I want rusted in a ziploc with bleach, peroxide, and steel shavings over the course of several days... and actually EVEN stainless steel will become rusted as well given the right circumstances (Stainless will rust if rusted mild steel is in near-proximity).
My trick is not to leave it 'drenched in fluid' but rather have enough in there to let it sit in dampness or 'vapor'. TIME and patience yields my favorite result in that process.
Thanks! I'll try it over multiple days I only did it for a couple of hours but I guess it depends on the alloy etc.
 
Sorry if I seem to do this every 2-3 months but just wondering if the replacement hilt kits for the trade-ins are meant to have gone out yet?

Also what's the current status of your custom chassis Verity? If it's within my "upgrades budget" I wouldn't mind getting one sent out at the same time :cool:

Edit: Just had a quick read back through the last few pages and it seems they have already been sent out?
Edit2: Dug up the old email from 7 Chambers, seems they were meant to go out mid December 2020 but never received anything or an email with a tracking number as advised in the last email from him. I've sent him an email and just waiting on a reply.
 
Last edited:
Does anyone have a reference or resource that could be helpful for wiring the helper board to a proffieboard? The proffie website doesn't seem to have functionality for creating this type of configuration in the wiring diagram generator
 
Does anyone have a reference or resource that could be helpful for wiring the helper board to a proffieboard? The proffie website doesn't seem to have functionality for creating this type of configuration in the wiring diagram generator
I can make one but it is a very simple breakout. It is no more difficult than wiring up an accent led or switches.

I'll put something together for all of you though before they start shipping out
 
Stuck with work, can't wait to find some time to open this beauty!!

IMG_4104.jpg
 
The clamp card needs it's own display case, it's gorgeous and feels quality!

Have to say the saber has more heft than I thought it would, solid.
 

Attachments

  • IMG_4125 (1).jpg
    IMG_4125 (1).jpg
    1,020.7 KB · Views: 173
  • IMG_4124 (1).jpg
    IMG_4124 (1).jpg
    979.2 KB · Views: 188
  • IMG_4109.jpg
    IMG_4109.jpg
    723.8 KB · Views: 168
  • IMG_4116.jpg
    IMG_4116.jpg
    637.5 KB · Views: 190
I posted on FB but will leave this here in case anyone needs the info.

Hi all,

I know a few people have had questions around how to reduce the edges and thickness of these amazing clamp cards, so thought I'd share a few pics of my approach.

Clamping a file down worked best for me. Make sure it's a decent file, some files can come slightly bowed. Hold card on one side with even pressure and begin to file. Swap sides every few strokes (depending on file grade), wipe off residue and check fitting. Took me 10 mins max for the whole process. If you don't have or don't want to use a file, I'd go with placing a piece of sandpaper on a flat surface (glass if possible) and then carry on same as above. Key is patience (i usually have none lol) check and re-check every few strokes.

Taken a few pics of the filed finish for reference, worked out perfectly for me.

Also, for those who may not have a vice/hobby vice at home (which will ultimately give you the most control) I've shown an example of how to use quick grip hand clamps to squeeze the tri-ring into place, has the added security of the clamp surfaces being of a plastic material, hard enough to do the job, soft enough not to damage the surface and/or the pommel itself. I recommend some tape on the pommel face when doing this.

Just sharing some of my newbie thoughts, and hope it helps!

P.s I did not need to adjust the thickness of my card.
 

Attachments

  • IMG_4148.jpg
    IMG_4148.jpg
    744.5 KB · Views: 148
  • IMG_4149.jpg
    IMG_4149.jpg
    1.6 MB · Views: 144
  • IMG_4150.jpg
    IMG_4150.jpg
    1.5 MB · Views: 139
  • IMG_4153.jpg
    IMG_4153.jpg
    858 KB · Views: 148
  • IMG_4154.jpg
    IMG_4154.jpg
    796.7 KB · Views: 139
  • IMG_4158.jpg
    IMG_4158.jpg
    683.5 KB · Views: 155
  • IMG_4159.jpg
    IMG_4159.jpg
    711.4 KB · Views: 152
  • IMG_4160.jpg
    IMG_4160.jpg
    966.4 KB · Views: 135
  • IMG_4162.jpg
    IMG_4162.jpg
    1.1 MB · Views: 168
  • IMG_4165.jpg
    IMG_4165.jpg
    1.1 MB · Views: 158
  • IMG_4169.jpg
    IMG_4169.jpg
    1.3 MB · Views: 160
  • IMG_4170.jpg
    IMG_4170.jpg
    719.9 KB · Views: 150
  • IMG_4171.jpg
    IMG_4171.jpg
    1.2 MB · Views: 167
I posted on FB but will leave this here in case anyone needs the info.

Hi all,

I know a few people have had questions around how to reduce the edges and thickness of these amazing clamp cards, so thought I'd share a few pics of my approach.

Clamping a file down worked best for me. Make sure it's a decent file, some files can come slightly bowed. Hold card on one side with even pressure and begin to file. Swap sides every few strokes (depending on file grade), wipe off residue and check fitting. Took me 10 mins max for the whole process. If you don't have or don't want to use a file, I'd go with placing a piece of sandpaper on a flat surface (glass if possible) and then carry on same as above. Key is patience (i usually have none lol) check and re-check every few strokes.

Taken a few pics of the filed finish for reference, worked out perfectly for me.

Also, for those who may not have a vice/hobby vice at home (which will ultimately give you the most control) I've shown an example of how to use quick grip hand clamps to squeeze the tri-ring into place, has the added security of the clamp surfaces being of a plastic material, hard enough to do the job, soft enough not to damage the surface and/or the pommel itself. I recommend some tape on the pommel face when doing this.

Just sharing some of my newbie thoughts, and hope it helps!

P.s I did not need to adjust the thickness of my card.
Just wanted to say thank you! Went out and got a file and it worked like a charm :D
 
I think I missed something, what is the gold colored piece? Or is that just your surface?
Death Star brass, confirmed and re-captured from images of the Death Star 2 production model as well as unused sheets from production.
Each kit gets a little sheet with all the bits necessary to replicate the original reveal board and I included a couple extra to fiddle with.
 

Your message may be considered spam for the following reasons:

If you wish to reply despite these issues, check the box below before replying.
Be aware that malicious compliance may result in more severe penalties.
Back
Top