Borderlands 2 Maliwan Hellfire build

Wow! Good thinking with the harness!!!!!
That's the sort of thinking that Maliwan needs :p I'm loving the work dude, keep it up. I'll be watching! :ninja

Thanks man, much appreciated. While I'm writing this post, I might aswell mention that the magnets have been ordered and are expected to arrive on Tuesday, just after the bank holiday. If the weather is good that day, I'll sink the magnets into my gun with milliput and fill over it with body filler outside the house. (My family don't appreciate toxic stuff in the house) Hopefully, I'll have a floating gun to show either the same day or the day after!
 
Wow!! Can't wait. I've been planning my own Maliwan build and was completely flummoxed about how to deal with that! Great work.
 
Wow!! Can't wait. I've been planning my own Maliwan build and was completely flummoxed about how to deal with that! Great work.

That's good to hear; there aren't many BL2 weapon builds (excluding nerf inspired guns) so it's great to see more people making BL2 guns. What Maliwan gun are you planning to make?
 
Last edited:
At the moment I'm using this beast for my blueprint, but it will be painted with the "Blue" level paintjob for Maliwan. Very typical, I admit (and the same as yours, thats why i'm watching you:p), but also so, so sexy. And a fun challenge!
Technetronic_SubMalevolent_Grace.jpg

And this is how my blueprint is going :) Inkscape is a beautiful thing.
Process 1.jpg

Did you do much drawing/planning for yours, or just hopped in?
 

Attachments

  • 082.JPG
    082.JPG
    4.8 MB · Views: 174
At the moment I'm using this beast for my blueprint, but it will be painted with the "Blue" level paintjob for Maliwan. Very typical, I admit (and the same as yours, thats why i'm watching you:p), but also so, so sexy. And a fun challenge!
View attachment 330690

And this is how my blueprint is going :) Inkscape is a beautiful thing.
View attachment 330691

Did you do much drawing/planning for yours, or just hopped in?

I printed out a scaled screen capture of the gun and made a cardboard template to transfer to foam, I haven't really bothered to try and draw/trace blueprints yet, but I will teach myself eventually.

Update time, and as promised, SUCCESS WITH MAGNETS! Well, sort of...

They arrived on Tuesday but between Monday to Wednesday I was on super crunch time for college work (I'm making prop there aswell) and that was a bigger priority and I only got around to the magnets today.

I have got positive results, but nothing solid yet; I was hoping 10 would be enough but I discovered I need to sink 3 magnets into each hole instead of 1 and 2 magnets in the plate in every hole for a stronger force.

I managed to get an image with only 2 holes sunk with magnets backing my hoodie which alone was able to hold up the gun up, but need to fixed in place. This is good news because it means 5 holes sunk will be more than enough magnetic power and I know that a harness will keep the gun fixed in one place.


I'll order more magnets tomorrow (I need 15 more) so they will probably arrive next Tuesday (just like the batch I ordered last Friday) but probably won't report progress until next Thursday because I have an exam Tuesday. (which is obviously more important)

Also another note, forget about the deadline, the gun won't be ready for June 6th because college has swallowed so much time, however I am going to LFCC in July and have every intention on bringing a completed Hellfire by then.

Until then...
 
So mini update here, college work has finally settled down to a calm state (I have been building an axe based on my original design) so I can get back to the gun soon. After doing a bit of research (something I should of done in the beginning) I discovered that n52 is the strongest kind of neodynium magnets, with n35 being the weakest and like the idiot I am, I have been using n35 on my gun so I have ordered 25 n52 10mm X 2mm magnets that will replace the magnets which have been embedded. Hopefully, these will provide a much stronger force to ensure the gun does not slip from the disc (I had an incident where the gun fell off and it dented, I was not happy) :( I will try to salvage the n35 magnets and use them for other, less reliant means like attaching small parts to the gun.
 
Update:

As I mentioned in my last post, I had to remove the old magnets; this was successful, albeit it took 40 minutes to get them out. I salvaged all 10 original magnets out of the gun and the plate but I accidentally crushed one when separating 2 magnets. I'll use the remaining ones for the rail and other bit and bobs which are fiddly to attach to the gun.

My new magnets arrived today and straight away, I could feel the difference between the N35 magnets and the new N52 magnets. I have sunked 15 magnets into my gun using milliput and it's curing as I type this.

I pre-tested the magnets by placing them into the gun and taping over them so they don't fall out, I then layed my hoodie over the mag and placed all of the remaining magnets on top so the magnetic force pulls through the hoodie; the force was so strong, I physically could not shift the gun or move it out of place at all, unlike last time when the gun wanted to slide down my hoodie.

After that was tested, I sunk all of the magnets with milliput into the gun and plate to cure overnight. Next day, I tested the plate and gun to see if they would grab and it did! Fortunately, the milliput didn't eliminate too much of the magnetic force. It grips well to the gun and I can easily lift it with no issues. I made a quick masking tape strap to suspend the gun into the air for more testing.

(I did manage to wrap tape around myself to hold the plate on my back and suspend the gun on my back, but I couldn't get a picture of it.)


There are a couple issues with this configuration at the moment. The "harness" at the moment only has 2 loops which span across my body horizontally which is enough to hold the gun but it wants to drag down, plus the plate isn't flush with my back because of this. I need to make 2 more loops to make 4 loops; either the setup will be a 4 cross section across my body, or a 2 horizontal and 2 north-west and north-east setup which go over my shoulders. I will experiment in the future.

The other main problem is the gun trying to lock itself in place. I know it will be easier once the harness is sorted (at the moment, I'm using one hand to pull the masking tape straps and the other to line up the gun) but because of the way the magnets are setup, the middle one latches, but the others struggle to line up with each other. I think this just requires practice to know where to angle the gun when putting it on my back.

Until then...

P.S. One super cool thing about my gun, I can throw it on my radiator and my fridge and the magnets latch on! I might make a display piece which is made of sheet metal, give it a Borderlands themed paintjob (or decal) and attach it to my wall so my gun can float on display...
 
Last edited:
You know, they sell those magnets with countersunk holes in them for #10 screws. We used them at my shop on this mirror polished garage on the west side of Manhattan. Fit removable panels to access the HVAC and wet wall.

Sent from my SGH-T989 using Tapatalk
 
Awesome! I just checked them out, I'll keep them in mind for any future projects which could benefit from them.
 
Sooo... I've been slacking quite a bit on this project for the past month, college recently finished, other projects have popped up and general stuff in my life have clouded over this project but I'm jumping back on before I completely forget about it. Since the last post, I have completely redone the mag, constantly adding more milliput so every millimetre is rock solid, the handle is practically complete but it will not be added to the gun until the paint process is complete and I have been experimenting with paints on the gun.

I am using harbor blue enamel spray paint for the base colour and I have started application onto the gun.


What I am doing is adding layers to the gun and lightly sanding it, progressively sanding it with higher grits until I get a great shine with no flaws. Once the piece has been completely covered, I'll attach the handle and begin on the vinyl application. I am still working on the display panels (which will likely be laser etched) and the rail but painting the base is my main priority.

Until then...
 
Wow! Nice to see some progress here :p I've been working on my bleprints and I've figured out some of the display panels, if you like I can lend you a hand there.
SMG Small.jpg
Your gun is looking fantastic and that paint finish looks so smooth! Keep up the awesome awesome work!
 
Last edited:
Wow! Nice to see some progress here :p I've been working on my bleprints and I've figured out some of the display panels, if you like I can lend you a hand there.
View attachment 348503
Your gun is looking fantastic and that paint finish looks so smooth! Keep up the awesome awesome work!

If you're willing to share the display panel, that would be extremely useful to use! You can PM it to me or you could just post it here on the thread, it's up to you.
 
EDIT: 3rd November, 2014

I will use this accidental double post to mention that this project is back on starting from today and that I will have progress pics and an update soon.
 
Last edited:
One very long overdue update:

It has been a long time since I've even acknowledged the existence of this gun, but now that a lot of other prop makers have jumped onto the Maliwan SMG bandwagon, I've decided to blow off the dust and get this good ol' thread started again!

Picking up from wear I left off, the gun body and magazine was basically complete and the last major piece after was the handle, so I'm sharing my progress I have achieved over the week. (I apologize for the slightly blurred images that are taken from now and hence forth since I am using my phone to take images)

To begin with, the handle needs to actually be adhered to the body, I used Gorilla glue to bond the pieces together.


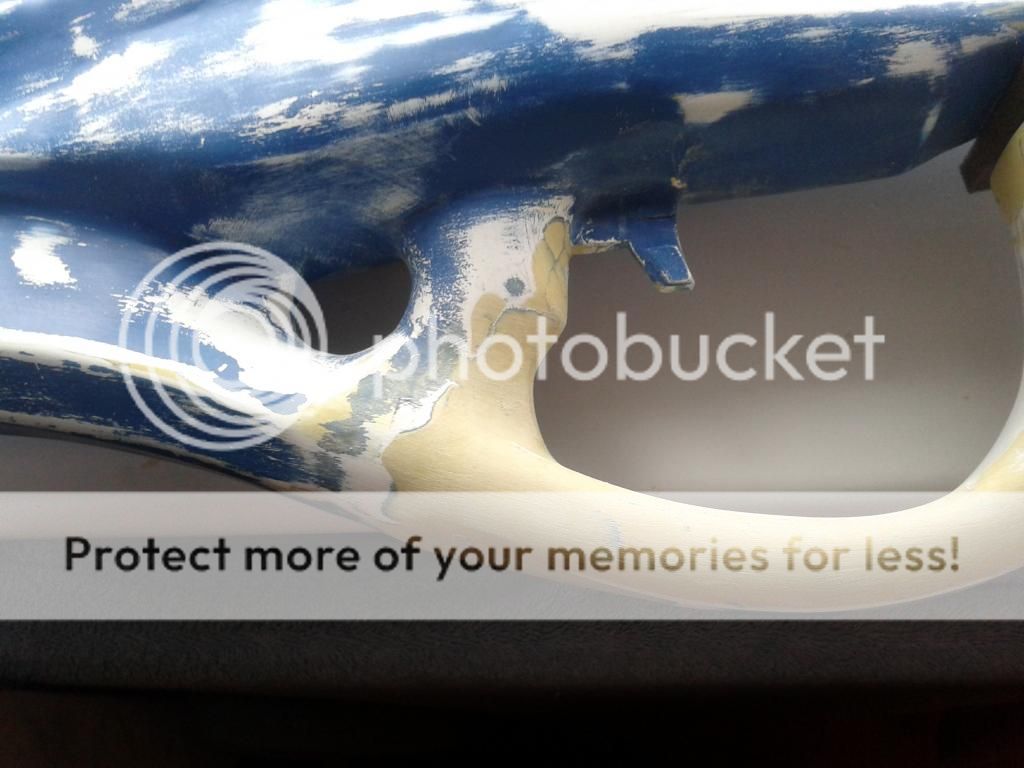
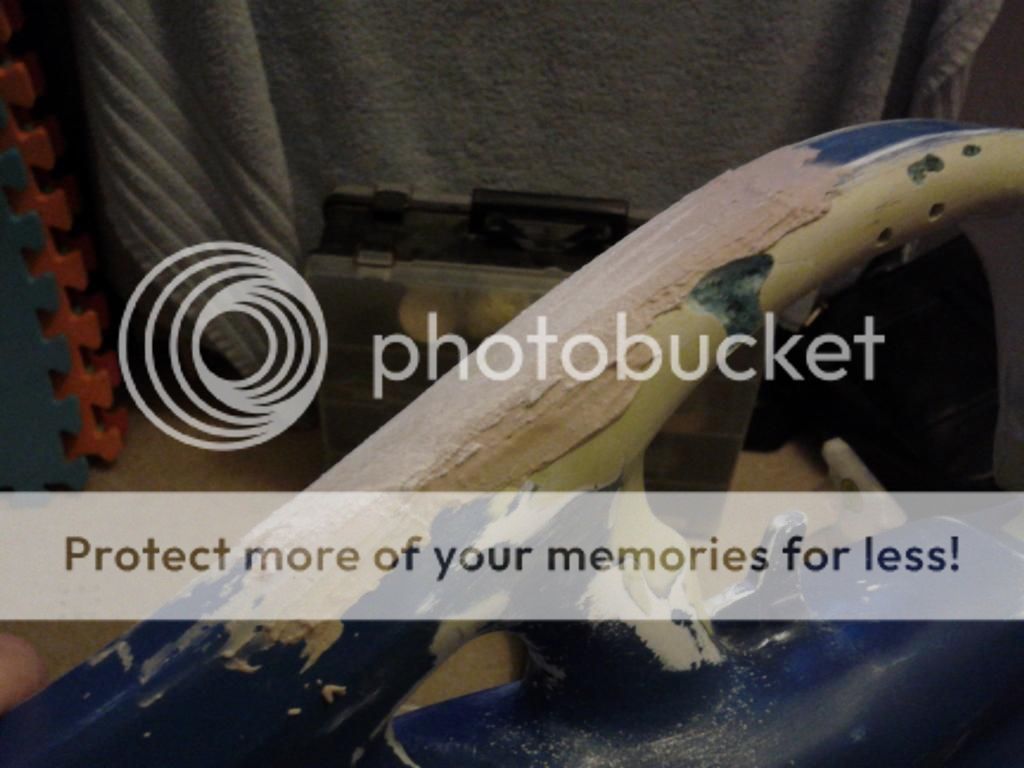
Once adhered, I turn my attention to sculpting the curve that blends the handle and grip together. I used Milliput for this.


The next step was to hunk out a space of material between the join so I can blend them better together and add more strength. Again, I used Milliput for this since it bonds and sands so gloriously.


When I was satisfied with the blend, I did a little work on the rear sights, I used a flat file to straighten the top and sandpaper to round the edges. Both parts now line up properly.


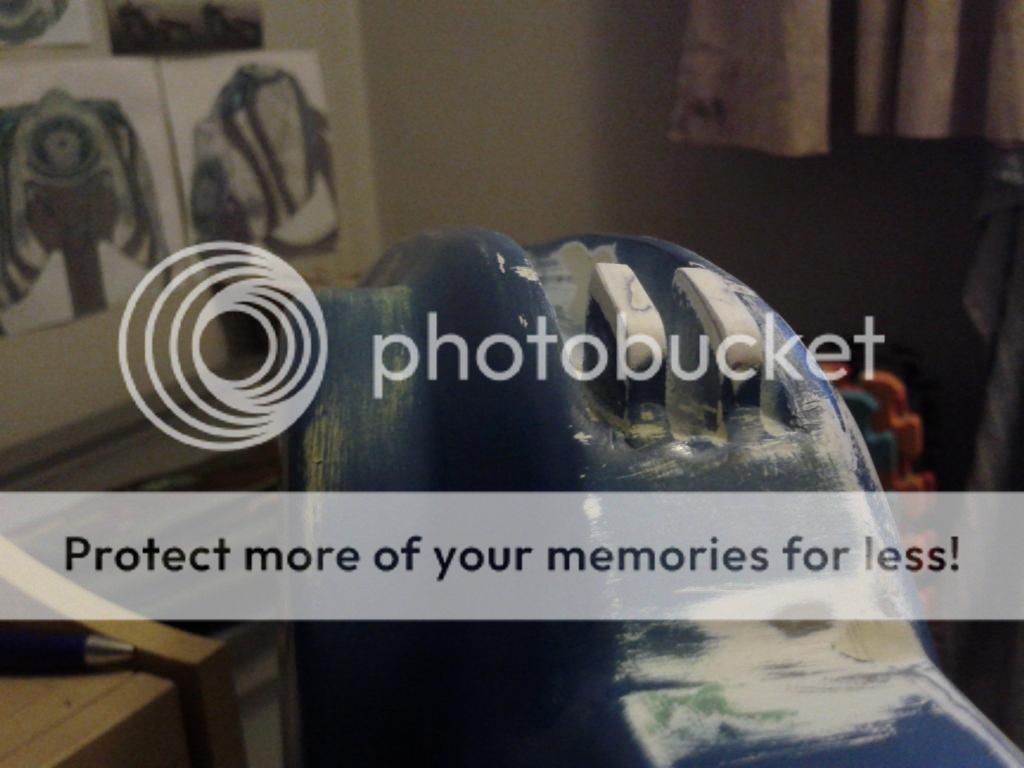
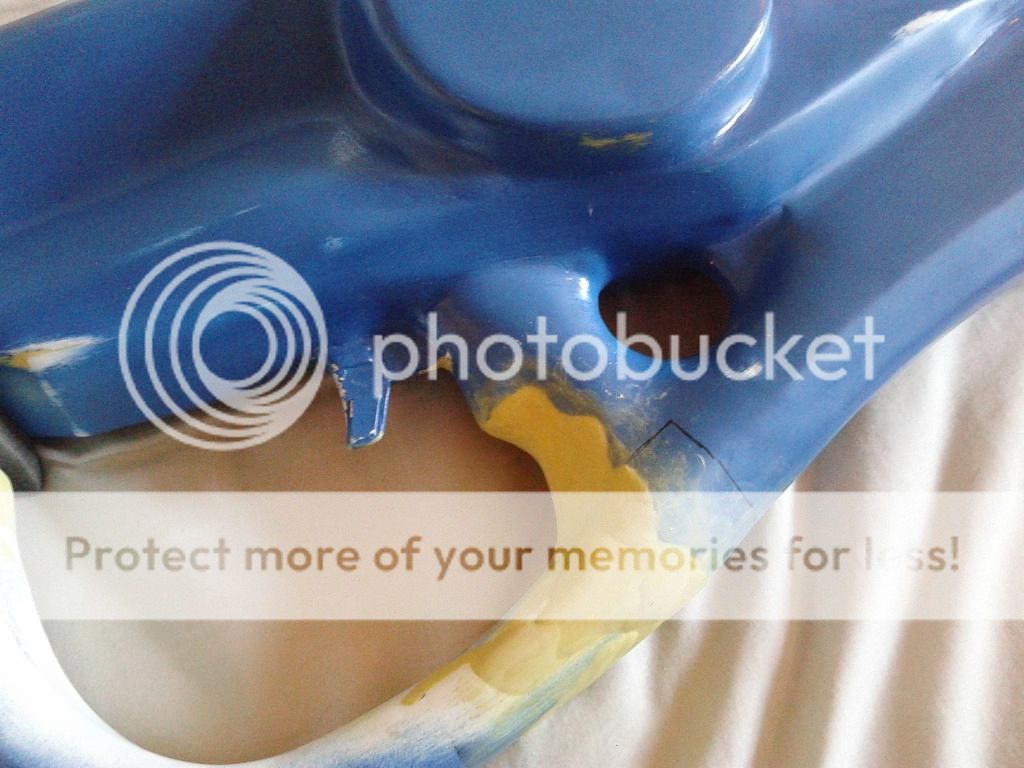
Unfortunately, when I turned my attention away from the handle, I noticed that the handle moved a bit causing the blend to have a crack along the body, I had to compromise on appearances and had no choice but to add some kind of wedge in-between the end of the handle to keep it in place. I will shape this properly in the future.


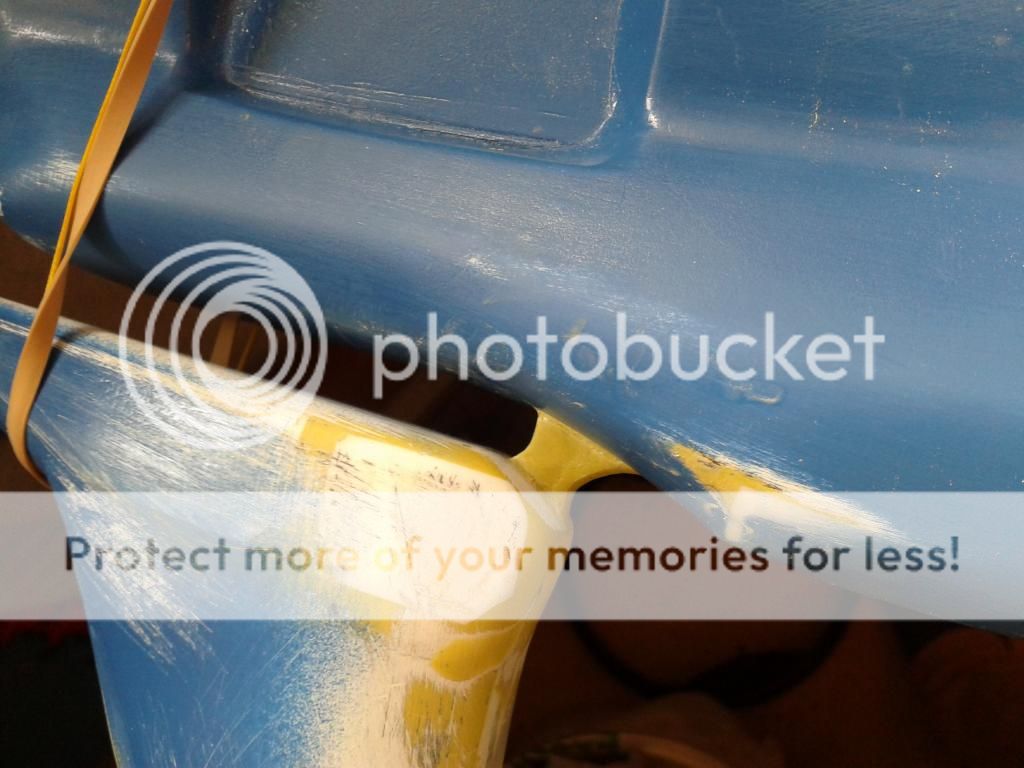
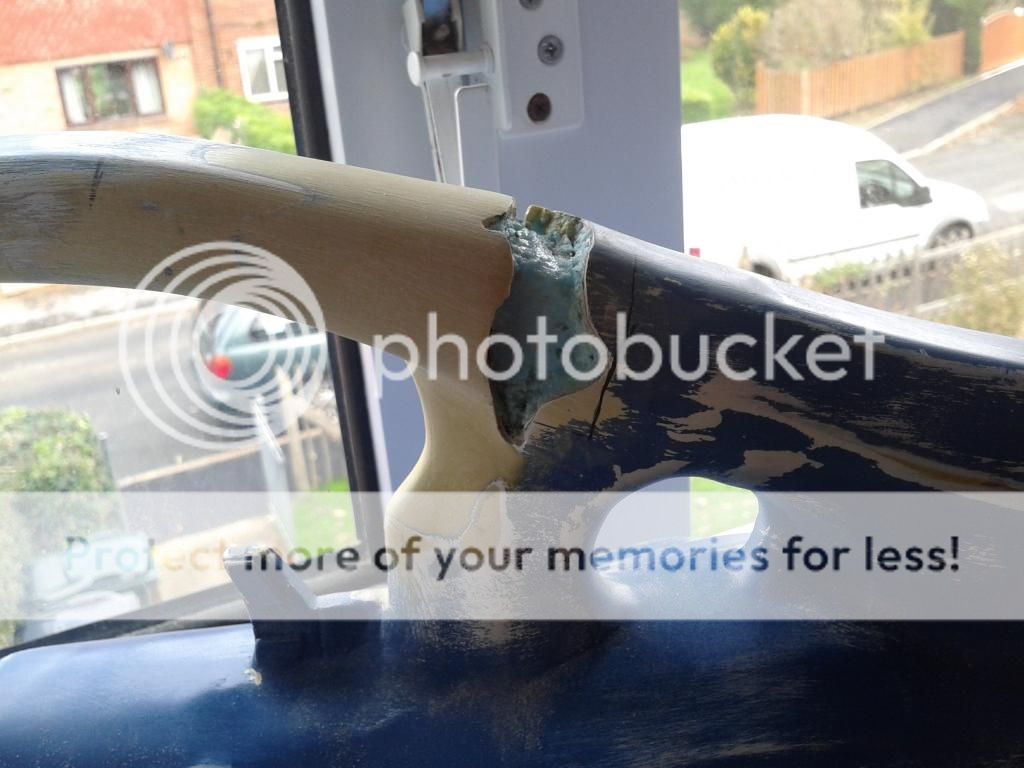
After sorting the movement problem, I still had the problem of the crack and I also discovered that the blend had a slight gradual bump that didn't quite follow the curve of the gun, being a perfectionist, I could not let this slide but I could knock out 2 birds with 1 stone by sculpting good ol' body filler over it to sort out the crack and make the curve uniform.


So as I have left it, I rasped it, filed it, sanded it with 80 grit then finally, wet sanded it to an ultra smooth finish so now the crack isn't an issue and the curve is now uniform.

That's all for this revival post, there's still work to be done but now that the engine is running again, I will see this through to the end, bit by bit.

Until then...
 
Last edited:
Welcome back. You are correct, it's not as lonely up here on Maliwan hill as it used to be.

Good work this week. I look forward to next.
 
You still alive, or did you buried under a pile of pints?

With my new regime of neverending college work and holding down a part time job, it's like I am dead on theRPF but I assure you, on the sidelines I have been working on the gun when I get time to and I will continue and update when the time is right.

Oh, also I've been working on building my own workspace (basically a shed) so when it's built, productivity will soar.
 
Back
Top