B/Y wing builds.

CutThumb

Sr Member
2012_0129buildYB0004.jpg


Well, I've decided to combine two builds together. One has taken me two weeks and was a breeze to finish. One has taken me two years and alot of patience. Not too difficult to guess which was which. I've figured that as I will end up painting both at the same time in the spring anyway, if I post them together the one will eventually force me to complete the other.
First off the mark then ,the Red Jammer Y wing.
I've not much to say about the kit other than it exceeded my expectations hugely in almost every area.

2012_0129buildYB0003.jpg


When I was finally able to download the build instructions ( I've also had to rebuild my computer drive so I would recommend all members give all their files and drives a through scan with their security software some time soon) I was greatly impressed by the detail and documentaion that had gone into it. Thats pretty rare for most garage kits and given the complexity of RED Jammer Y wing,its absolutely necessary.
I just gotta say thanks again for them Jason. They made building this bird a very much easier process than I would have ever guessed and more importantly a fun one.
There is very little I did differently other than NOT attatching the two engines to the aluminium plate first. I'm wiring this for lights so I wanted to be able to get access to them relatively easily. Be warned. If you do this it is a lot harder to keep all the elements of the engine build lined up with the rest of the ship. I sketched and marked positions onto them by slipping them on and off the strut frequently. Otherwise , given all the angles involved with the T strips etc its dead easy to get them wrong.
As I've said great instructions without which getting all those greeblies on would have been difficult.


2012_0129buildYB0002.jpg


Talking of greeblies the detail captured in this kit is hugely impressive considering just how many small pieces are in it. Besides the small blurry bit that everyone is missing I had only two tiny pieces that will need replacing. The parts were really clean and required very little clean up and prep. I've used less apoxie sculpt on this build than almost any other I've had. Mike did a fantastic job with this kit and after doing fifty odd of them in such a short period will probably need a very long holiday!


2012_0129buildYB0001.jpg


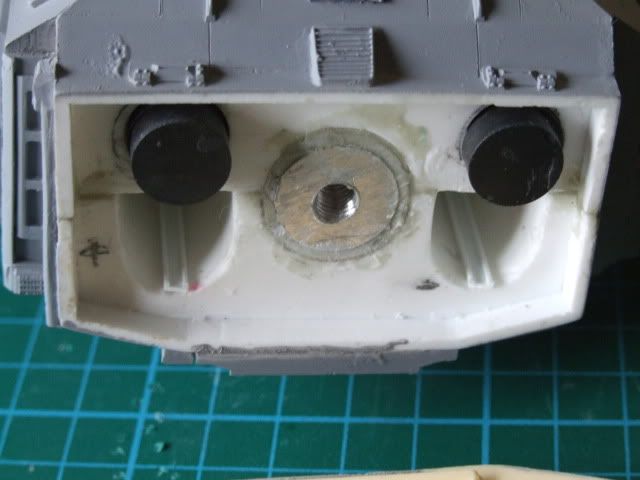
Its an iconic ship and one I've always to get hold of so thanks to Steve and everyone involved for producing it. I got a kick from building this that I had not had in a while. Anyone thinking of lighting it ,its been made pretty simple to do, at least the engines anyway. I moved the magnets up on the back plate and put two runners in the bottom to hold the batteries dead flat against copper strips at the back. You only have to solder the wires on and put another strip in to the back plate to make a circuit. I'll finish the lighting the same time I finish with my next build.

2012_0129buildYB0019.jpg


2012_0129buildYB0018.jpg


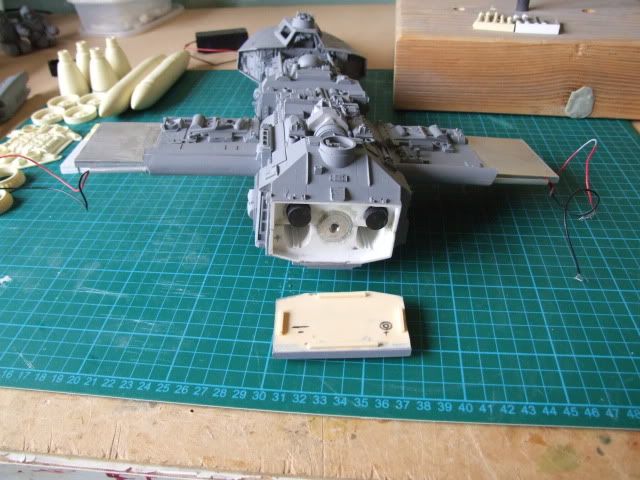
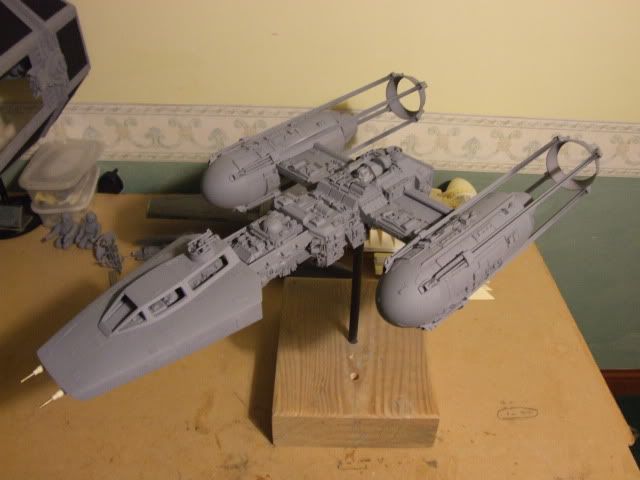
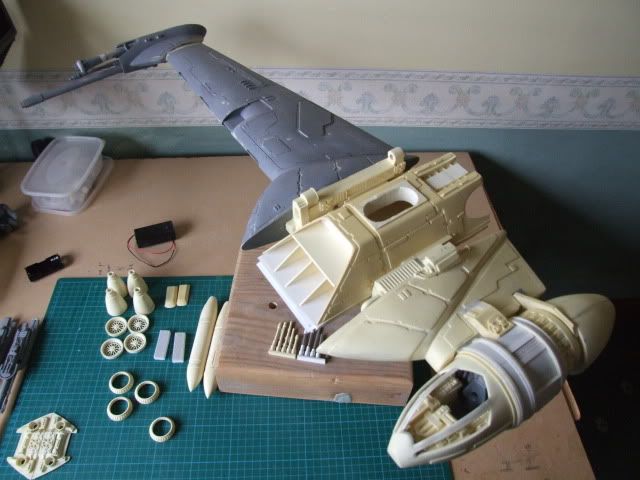
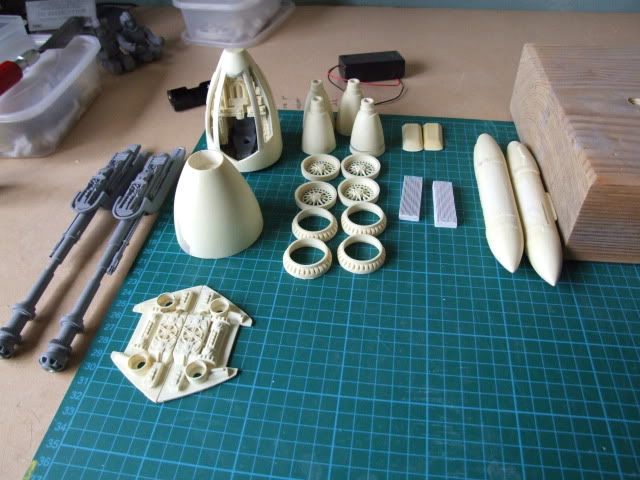
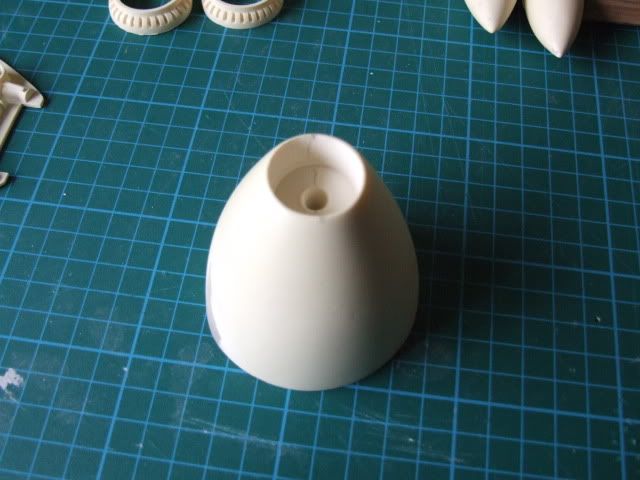
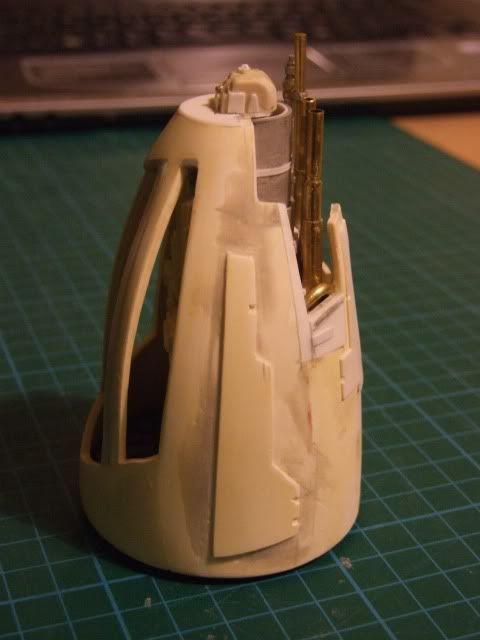
And this is it. Two years and some many months on since I got the B wing. This is NOT Frank and Moes kit. This is the Robert Burns kit and its been a difficult build for many reasons.
Firstly the casting was not good at all. The big wing actually looked like an aero bar when I tried to clean it up and I've filled and sanded it so many times I almost gave up on it . Infact nearly all of the parts needed significant revision and clean up to make them usable. If it had not been for TJ (Shadowknights) help with replacements and some advice this would still be in the loft in a box.
I know its a representation of a B wing and as such its a damn sight better than I could ever have managed but it really did stretch my abilities to get it into the shape it is today.


2012_0129buildYB0013.jpg


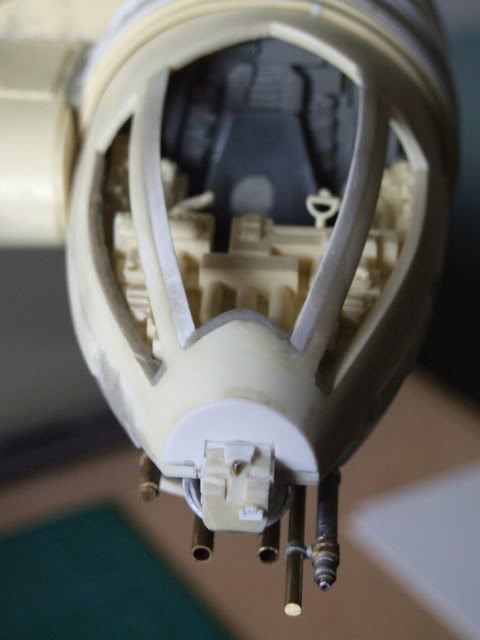
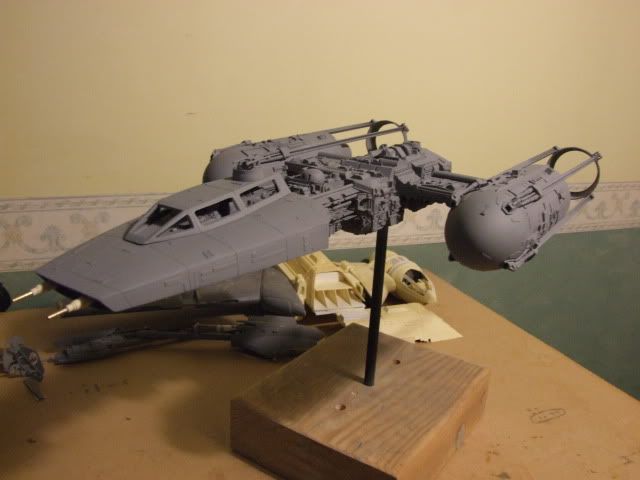
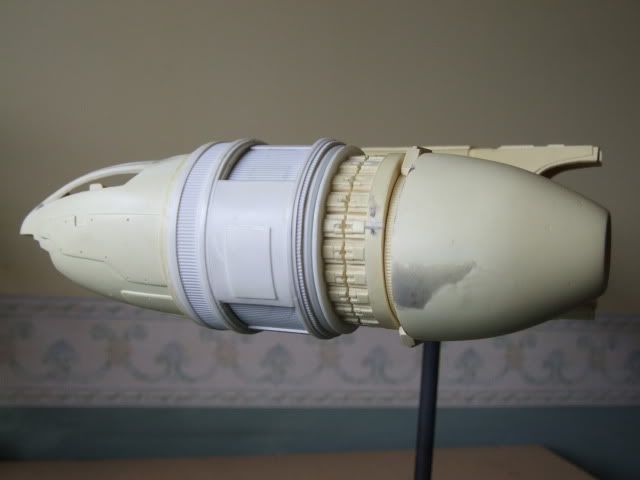
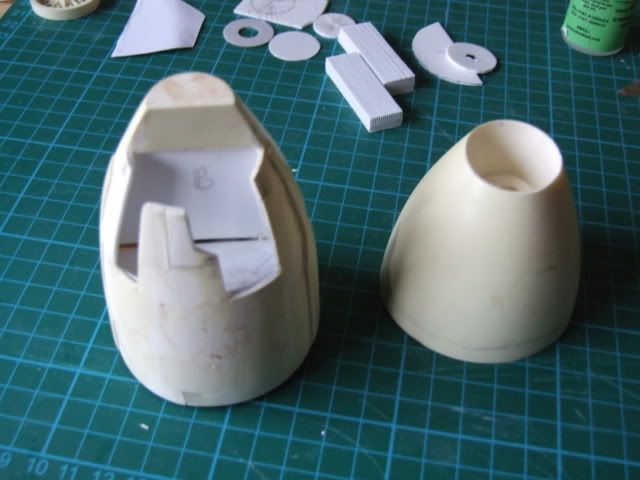
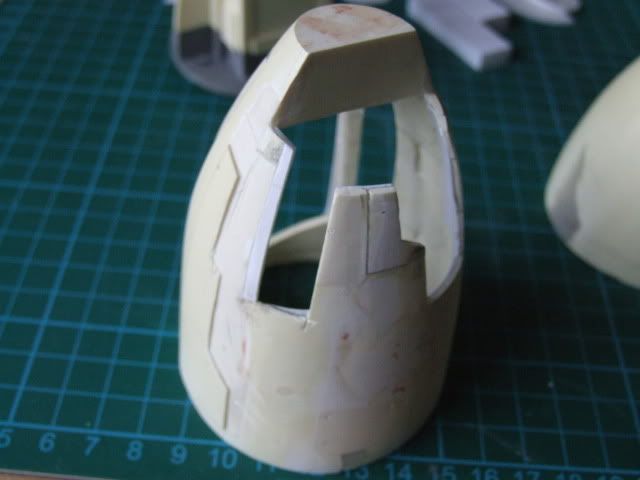
One thing it has taught me is not to be afraid about cutting up a model. if you aren't happy with it you may as well change it because its you whose going to be looking at it everyday once its finished. So I've redone the cockpit as best as I've can to more closely resemble the original.


2012_0129buildYB0017.jpg


2012_0129buildYB0012.jpg


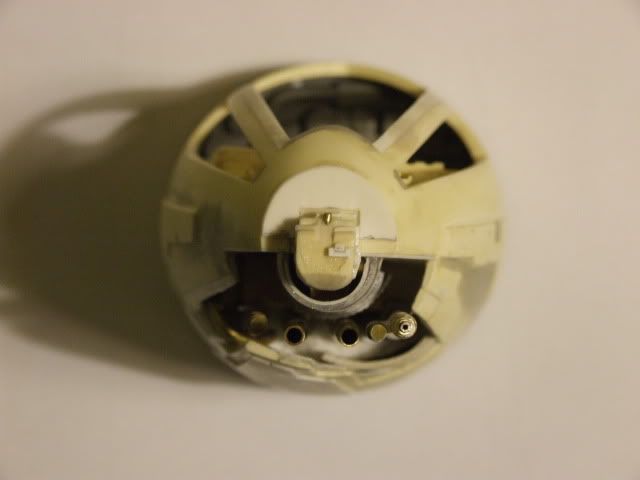
Theres also lighting the engines to consider, so I've bored the hull out to take some batteries. I've also put two additonal steel rods in to keep the two sides connected so it won't ever sag.


2012_0129buildYB0011.jpg


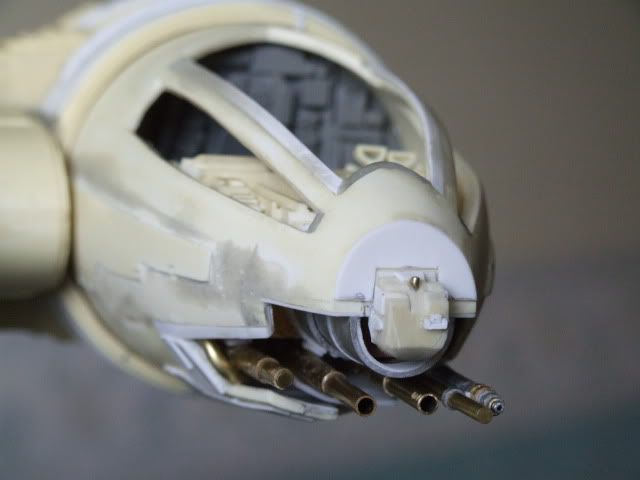
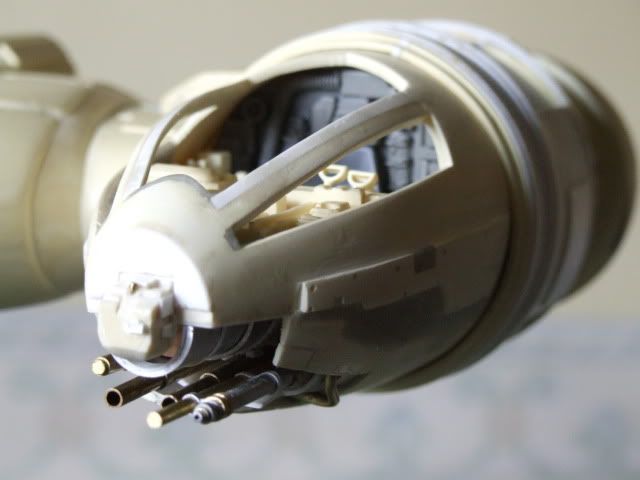
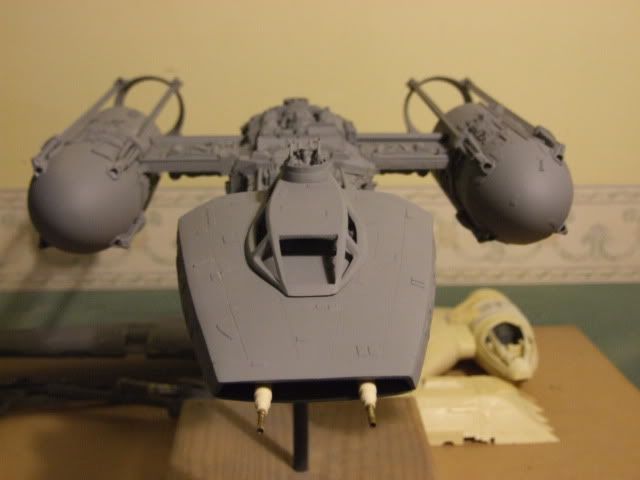
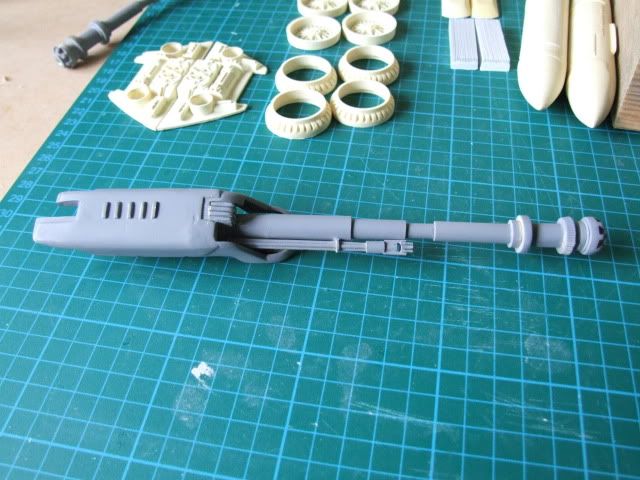
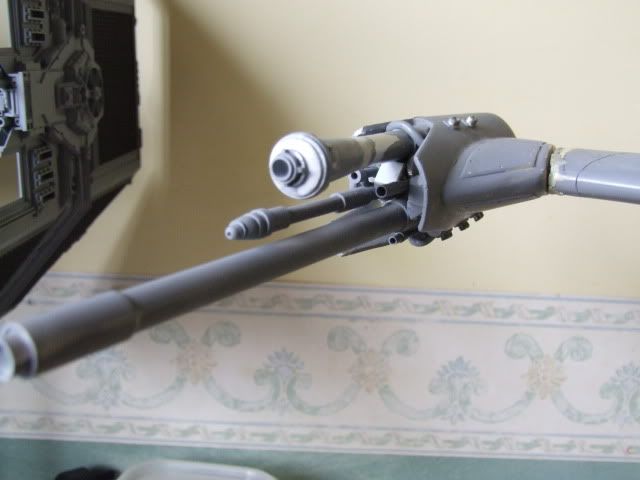
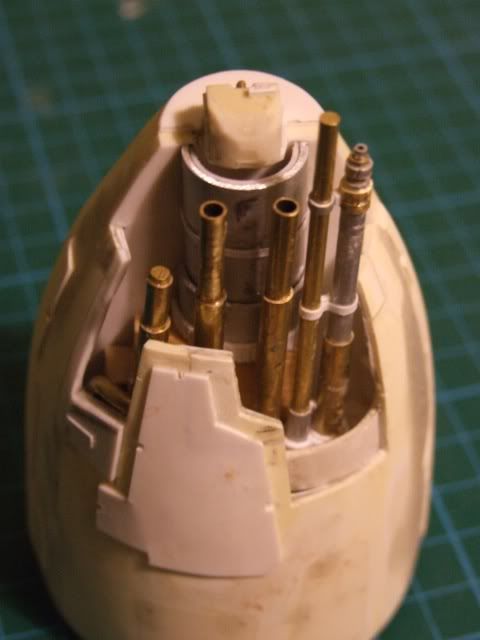
Nearly all the guns have been updated and had detail added into them to take them alittle bit closer to the original. The tail gun array really needed the most work

2012_0129buildYB0015.jpg


2012_0129buildYB0010.jpg


2012_0129buildYB0008.jpg


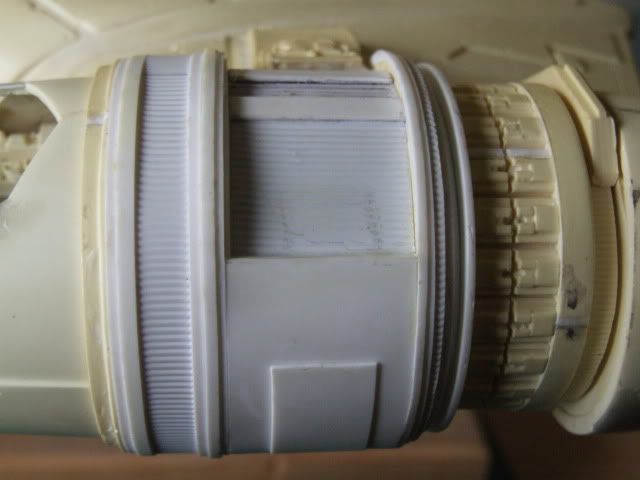
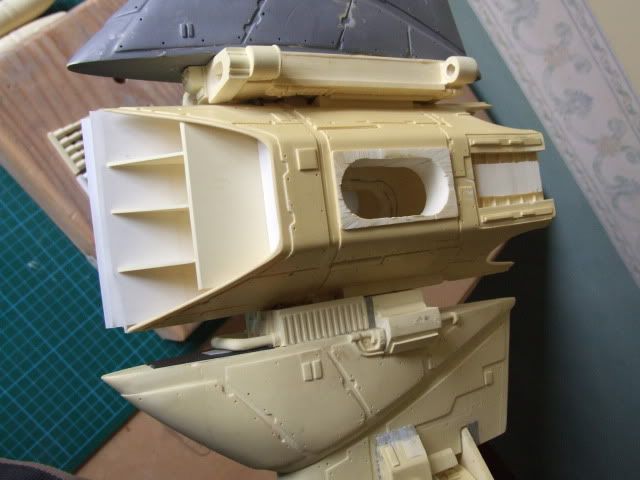
The bits left are the most time consumming to finish. I am rebuiding the heat sinks for the top and bottom hulls, but does anyone know from which kit the four engine rim rings come from?


2012_0129buildYB0007.jpg


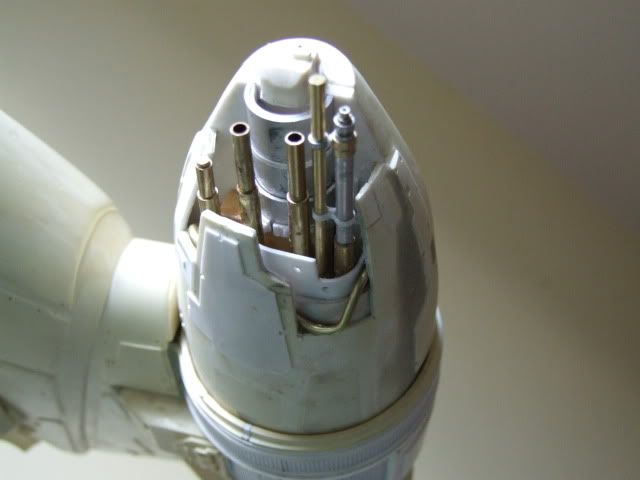
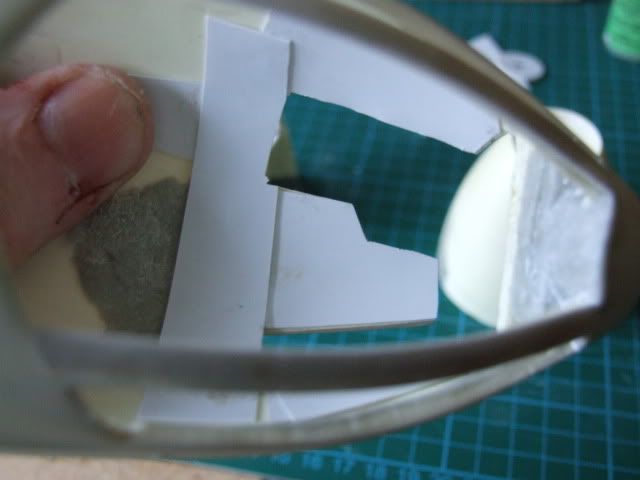
Similarly I've drilled the old detail out of the rear of the cabin. Where did the part that goes in here come from (looks like jet turbine blades.)

2012_0129buildYB0006.jpg


If I can get those bits sorted then I'm in striking distance of finishing this off, which I'd really like to. It a decent model that could be made better and unfortunately for me I can't leave well alone if I think I can improve it.
On the plus side I've been able to combine two kit builds together and I'll finish them both at the same time. As there are only about five or so kits that I want now I might as well try to make as good a job of them as I can.
 
Glad the instructions worked as intended! Looks KILLER!!

That B-Wing - ooof. Its kits like that that can discourage people away from the hobby. Shame... but you're doing a man's job, sir!
 
Awesome job on both builds!

That B-Wing kit took me forever, maybe two years. The casting of mine was awful as well.
I tried to correct as many details as I could, but I see you´ve gone even further on some bits - the cockpit area and the main gun pod. The new guns look great. And the small guns on the side gun pods, did you scratchbuild them or use the Flak guns like on the ILM model? I tried to copy them as best as I could.
Will be interesting to see someone else fight this beast!

And the Y is just lovely...
 
I scratched most of the guns and made mods on the two kits I built as well. It is not an easy kit to build, and I don't think that I would ever build another one.

If it had not been for TJ (Shadowknights) help with replacements and some advice this would still be in the loft in a box.
I was happy to help.

I am rebuiding the heat sinks for the top and bottom hulls, but does anyone know from which kit the four engine rim rings come from?
I'm not sure which kit they are from, but Alfred used them on the 1/24 A-Wing kit that he mastered as well. He has posted over at RI before, if you have an account there maybe you could message him there and see if he replies.
 
Darth Daniel I can remember your build way back, you significantly improved your B wing with a great amount of new detail, particularly the heatsinks if I recall correctly. I think it was the most screen accurate one I ever saw done here until F/M finished theirs. Everything I've done is scratch built as I have no talent at all identifying kit parts ,its a skill set way beyond me interms of memory and patience, I think you have to have been involved in the hobby for decades to build up the necessary knowledge base. I'm doing the larger corrections first then working my way down to the smaller pieces. Most annoying is the gun pit benieth the cockpit, I don't know how I am going to correct that but I'll give it ago.
TJ ,nice to know your still about! I really need to finish the B this year, that big box just gathering dust has been annoying the hell out of me. At least you won't have to cast anymore parts for it again!!! The resin has actually "aged" to a deep yellow, its been hanging around so long.
Jason, downloaded the pipe cheat sheet! You really like to make peoples lives easier don't you,should save me at least a day or two of bending. I also found the decal sheet I got off you last year with the B wings on! Which is nice! Hope you finish your Blimp in time for the fest. Epic build!
 
Picked up alot more reference on the Orange spot B wing version around the cockpit so I've had a go at making the gun pit a little more close to the original. Very delicate work as the whole thing is eggshell thin in places.
In the end I used bits I cut off to add into areas that needed them plus sheet cut strips to expand and strengthen the alterations.
Sanded and cut alot of the excess plate detail. Fortunately there is a large plate to be added to the centre of the outside of the altered pit, so that should help strengthen it even more.
Obviously there is a lot more to do to it to fill in the cuts, gaps etc but its going in the right direction I think.
Redrilled the rear cabin hole to give it a bigger hollowed out feel. The more I look at that jet turbine intake part, the more I think it may actually be scratch built. If nobody can identify it then I shall get a copper disk and try to cut lines in them to imitate it.


2012_0131PITB0001.jpg


2012_0131PITB0004.jpg


2012_0131PITB0002.jpg
 
It's not A-10 Warthog is it?

I have this kit, aaah, dammit, after reading this I'm not gonna be able to build it out-of-box as I'd planned. Inspiring stuff!
 
Im pretty sure it was the 1/48 Warthog Martyn, pretty sure the impeller fan or whatever id also inside the back cone of the cockpit cone.

Great work 'thumb, what is your bloomin name lol, really loving your dedication.

My Y sits and sits right now, keep wanting to play, just wont have the time for a while.......but im really pondering having the armature tube machined and tapped from 100% alloy, just for bragging rights :lol.

lee
 
Wow altering the mouth is ambitious, well it was too ambitious for me anyway! :lol Great mod though. Wish I had done it...

I still wonder why Al Wong cut the mouth like this, there´s enough reference available and cutting it the way he did isn´t less work than cutting it correctly! :rolleyes

BTW, are you going to modify the biggest shortcoming of this kit, the main wing gets thinner to the end while it should have the same thickness as at the top and the "triangular" odd-shaped structure it attaches to? This "triangular" structure should be thinner, just as thick as the main wing, also the mirrored part at the other side of the engine housing, then the fuel tanks wouldn´t sit so far apart from each other.
But then you´d also have to widen the main gun pod as it is much too narrow... I´ll rather stop now. :behave
 
Thanks for the info Nwerke and Lee! An A-10 it is then. I'll see where I can pick one up! Darth Daniel there are limits I believe ,to how far you can correct this kit. That wing was almost replaced before, it was that difficult to get the bubbles out of it. It was TJs advice to slather it in a putty then sand it all the way back that saved it. In the end I was just happy to have something that didn't look like it had been flown through a meteor storm for a dare and then lost , so I'll leave it as it is.
I'll take the alterations as far as I can before I feel I've done enough. The strange thing is I've learned more about building by trying to alter this bird than any other kit and it certainly cures you of the any worries you may have about fixing the inevitable errors you'll make on any other build.
Nwerke, you could just build it from the box and be happy with the results ,but probably not VERY happy. Most of the gun barrels will almost certainly need replacing. As an interpretation of the B wing it is a good kit and I've seen some great builds of this ship without many alterations at all. The saving grace as always is the paint work though , get that right and it pulls the eyes away from the other things. Unfortunately as I've said I can't leave well alone. The more I look at the reference the worse the compulsion to ammend it gets!
It would truely be kudos to you to do the full rod Lee.However, I think you'll be happy just to drill a couple of brass pipes into it in the end. The taping was an interesting experience. I picked a four die set up from B&Q for about a tenner and practised on some scrap. Its not as bad as you might think if you take your time. I'm glad Jason put it in his build instructions, another skill set added!
 
You can do modification after modification on the B-wing. At some point I had to tell myself that enough was enough and it was time to stop. Otherwise, I still might be modifying it. :lol

I'm glad you were able to save the wing.
 
Guns, guns, guns! B wings are playing tonight, never miss a game.

2012_0201GunSB0004.jpg


2012_0201GunSB0002.jpg


2012_0201GunSB0005.jpg


Its surprisingly tiring doing these small details. My eyesballs are actually aching. Ammended lots of the surface detail as well, about 70% through with the cockpit mods. Sanded it once to get most of the marks out but will doing it with finer grain to finish.The nasty red brown stains are where I managed to live up to my handle again and expertly stab myself in the thumb.
 
Last edited:
Cockpit is just about done. I may try and add some detail and to light it but all these small pieces are getting abit annoying. I think I'll take a break for a few days. Gun pit is as good as its going to get now and pretty true to the original. When I look at reference you can pick out where bits have just snapped off as the models got older so I'm glad I've brassed mine.
Cosmic, the trick with the cuts is to have a very small level vice and a sharp saw. Then rub the end against very,very fine sandpaper so most of the metal burrs are taken off. Then, if any are left in the barrels just a very light scrap with the very sharp tip of a scalpel>
Daniel, I think the hull engines are going to be the struggle in the build for me. Yours were very, very detailed.

2012_0202gunsFinished0005.jpg


2012_0202gunsFinished0002.jpg


2012_0202gunsFinished0001.jpg


2012_0202gunsFinished0006.jpg
 
Last edited:
Daniel, I think the hull engines are going to be the struggle in the build for me. Yours were very, very detailed.

Wow, the whole cockpit section looks so awesome, from the corrected mouth, to the guns and strange stuff inside the mouth, and how close the cockpit sits to the neck - again something I was too lazy to correct. :facepalm

What do you mean by "hull engines"? My build is documented HERE if you wanna have a look, you can see everything I´ve done and how I´ve done it. I just realized I never posted pics of the finished model. You´re putting mine to shame though... Honestly.
 
Ahhh thats it, thank you Daniel!!! It was the work on the vent housings I remembered so well! Incredibly detailed down to include even the bits below the grilling. Great work. I'm thinking of cutting that whole section out entirely narrowing it and then gluing it all back in place on ce built. Each of the two hull engine sections can then be completed before finally attatching them to the whole ship. Your electrics and lighting are also very well thought out and executed. That switch is a tidy addition. Drilling through all that resin was tough going though. You had to do both the top and bottom to have any chance of getting the battery packs in. And I don't think you can really call yourself "lazy" for all the work you put into the model over two years , its a terrific build. Like TJ said theres a point at which you simply have to stop and get on with something else.
 
Yes go ahead and cut the grill area from the housing, I did the same, the ribbed detail below needs to be replaced and the cutout in the hull should have rounded corners, really makes a difference. Same for the plating as you can see in my build.
 
...
Cosmic, the trick with the cuts is to have a very small level vice and a sharp saw. Then rub the end against very,very fine sandpaper so most of the metal burrs are taken off. Then, if any are left in the barrels just a very light scrap with the very sharp tip of a scalpel>


SS newb lurking here... can you recommend a 'sharp saw?' i was at lowe's the other day looking for a saw, and the edges of what i was looking at seemed to wide to me .. or 'wavey' ..

i was thinking of getting a bench grinder? would that work if i just cut long and ground them down?

p.s. your b-wing is looking great btw
 
This thread is more than 5 years old.

Your message may be considered spam for the following reasons:

  1. This thread hasn't been active in some time. A new post in this thread might not contribute constructively to this discussion after so long.
If you wish to reply despite these issues, check the box below before replying.
Be aware that malicious compliance may result in more severe penalties.
Back
Top