Moska
Sr Member
Hello friends.
This is my model of the NARCISSUS spaceship. Like the DROPSHIP kit, I bought it in London 30 years ago. Its price is also from 1995 .
.

Although the kit isn't entirely bad, I had to make some improvements to make it more closely resemble the movie model. The main improvement was cutting all the 0.25mm styrene panels to achieve the relief the kit lacks.
TOP SIDE
The two side areas of the front come in the kit as separate parts. I didn't use these parts and replaced them with scratch-made ones. I modified the panel layout to make their design and distribution more faithful to the original model.
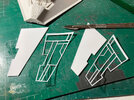

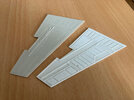
I copied the small details of the original kit parts with polyurethane resin, using "Blue Stuff" as the mold material.
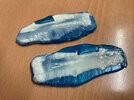

On the nose, I filled the etched panel lines with Millpiut and made the relief frames with 0.25 mm styrene.
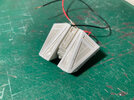
The rear side areas also come as separate parts. In this case, I simply added some details using small pieces from the resin copies I made of the Revell Star Destroyer's side trenches. I also removed the panels over the upper engines and replaced them with styrene ones.
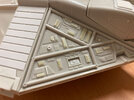

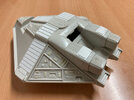
On the rear, I also added the relief frames and some additional details.
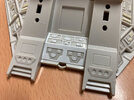

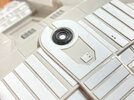
On the top, I also added new relief panels and replaced the circular piece with one I took from an old (poor-quality and cheap) plastic camera. I used the circular piece that holds the camera lens.
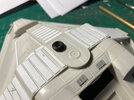
BOTTOM SIDE
The lower part of the hull comes in the kit as a single piece. I cut and glued all the panels and frames using 0.25 mm styrene. I also added additional detail to the rear side areas with small fragments of parts from other kits.
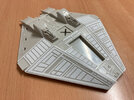

On the detail covers in front of the engines, I added 0.25 mm relief to make them more similar to the original. In the original model, the front of the cockpit from the 6-wheel Tyrrell F1 single-seater was used to make these covers. I believe it's from the Tamiya kit.
I also added a little more detail to the interior using parts from the old AMT/ERTL Y-Wing fighter kit.

LIGHTING
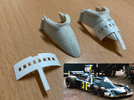
I added lights to the four engines and the "nostrils".
PAINTING
This model is basically white, which makes painting much easier. To achieve the weathered effect, I used oil washes and graphite powder.
DECALS
The kit includes very few decals, which are of poor quality and inaccurate. I spent time researching and found references for the most important decals for this model. I drew them on my computer and printed them on a virgin transparent decal sheet. The model's white color is perfect for using these homemade decals printed on a transparent surface. I also used these decals to make the small gray circles and rectangles scattered throughout the ship.
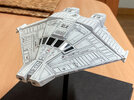
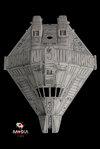
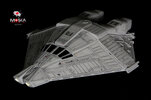
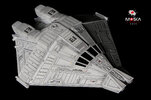
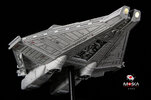
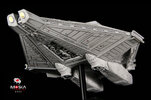
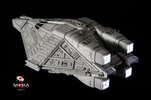
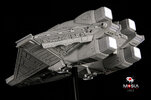
With that, I considered the project complete. Here's a small gallery of images of the finished model.


I hope you like it.
Rafa
This is my model of the NARCISSUS spaceship. Like the DROPSHIP kit, I bought it in London 30 years ago. Its price is also from 1995

Although the kit isn't entirely bad, I had to make some improvements to make it more closely resemble the movie model. The main improvement was cutting all the 0.25mm styrene panels to achieve the relief the kit lacks.
TOP SIDE
The two side areas of the front come in the kit as separate parts. I didn't use these parts and replaced them with scratch-made ones. I modified the panel layout to make their design and distribution more faithful to the original model.


I copied the small details of the original kit parts with polyurethane resin, using "Blue Stuff" as the mold material.


On the nose, I filled the etched panel lines with Millpiut and made the relief frames with 0.25 mm styrene.

The rear side areas also come as separate parts. In this case, I simply added some details using small pieces from the resin copies I made of the Revell Star Destroyer's side trenches. I also removed the panels over the upper engines and replaced them with styrene ones.


On the rear, I also added the relief frames and some additional details.


On the top, I also added new relief panels and replaced the circular piece with one I took from an old (poor-quality and cheap) plastic camera. I used the circular piece that holds the camera lens.


BOTTOM SIDE
The lower part of the hull comes in the kit as a single piece. I cut and glued all the panels and frames using 0.25 mm styrene. I also added additional detail to the rear side areas with small fragments of parts from other kits.


On the detail covers in front of the engines, I added 0.25 mm relief to make them more similar to the original. In the original model, the front of the cockpit from the 6-wheel Tyrrell F1 single-seater was used to make these covers. I believe it's from the Tamiya kit.
I also added a little more detail to the interior using parts from the old AMT/ERTL Y-Wing fighter kit.


LIGHTING
I added lights to the four engines and the "nostrils".
PAINTING
This model is basically white, which makes painting much easier. To achieve the weathered effect, I used oil washes and graphite powder.
DECALS
The kit includes very few decals, which are of poor quality and inaccurate. I spent time researching and found references for the most important decals for this model. I drew them on my computer and printed them on a virgin transparent decal sheet. The model's white color is perfect for using these homemade decals printed on a transparent surface. I also used these decals to make the small gray circles and rectangles scattered throughout the ship.
With that, I considered the project complete. Here's a small gallery of images of the finished model.


I hope you like it.
Rafa
