Arthas The Fallen Prince...Litch King...And all around bad ass.
With a Con in less than a week I roll up my sleeves to Complete and Compete with my Arthas Budget Build.
Materials :
EVA FOAM
Cloth : Linen.
Wire.
Random Accessories.
Overall pic
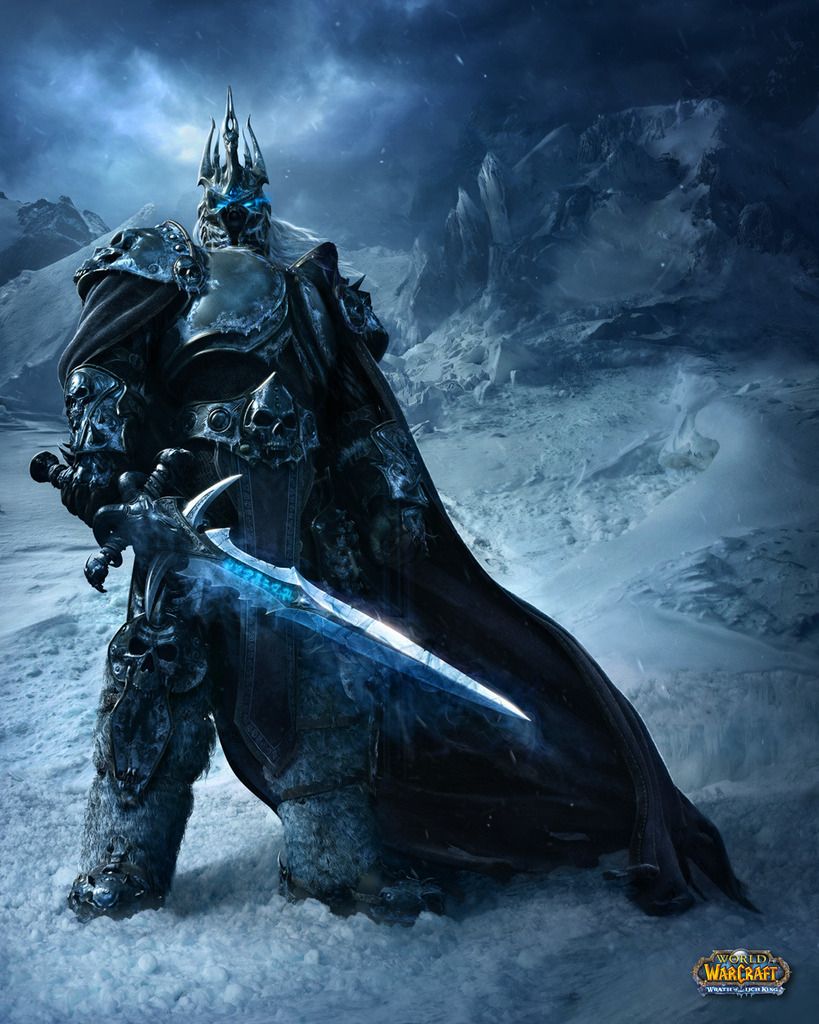
General Referance Material for Cosplay
http://news.mmosite.com/content/201...h_king_arthas_deluxe_collector_figure,1.shtml
So lets get started.
Its day one, so im starting from the ground up. Starting with the boots.
In additions to toy refance I pulled images from the Cinematic trailer for Arthas.


From these I worked out that with mid-evil placing of straps he would use a circle type latch to hold everything together to the front. I worked out the sides baldrics and ankle guards from the image and toy referance.
Then it was time to get started.
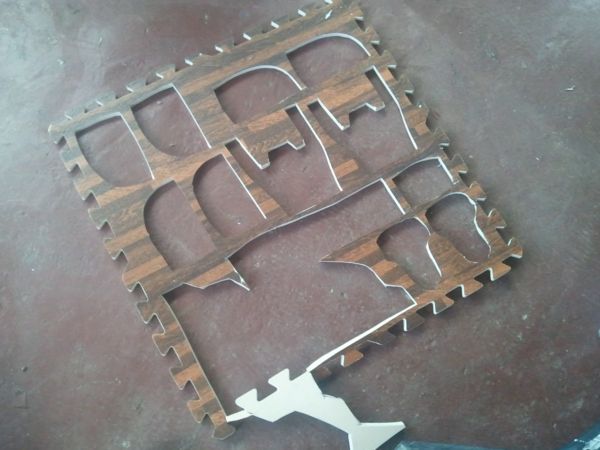
I start of with the general material. This is ALL the material i will be using or rather all the material i can afford >:
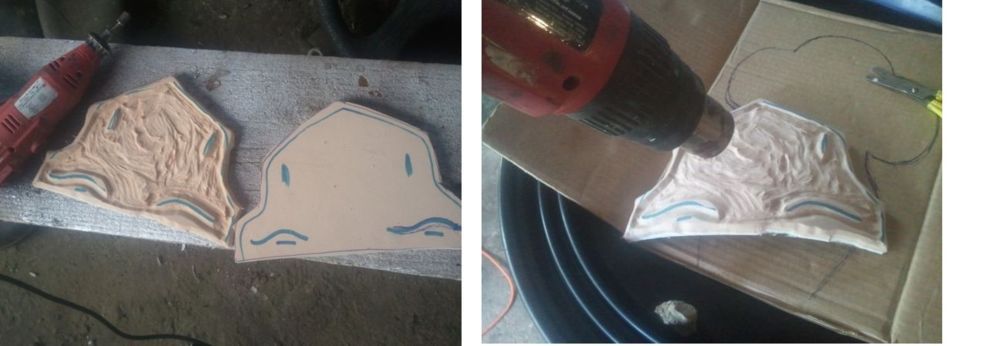
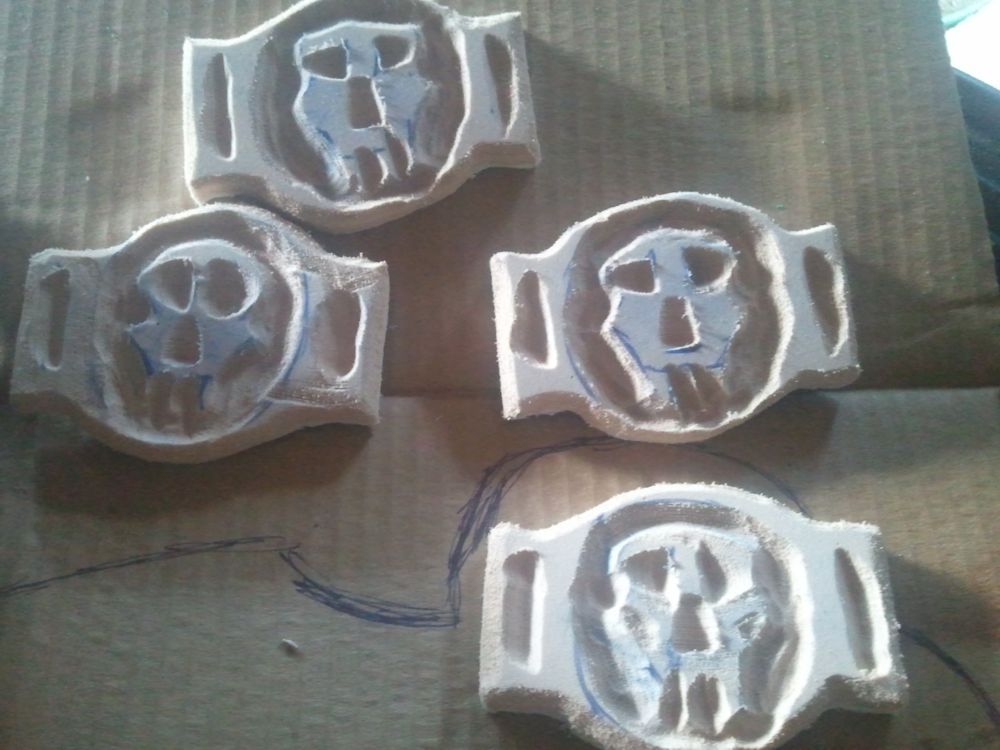
Using some paper i sketched out the general shape, then traced onto the foam. Cut and using the rotary tool, etched and sanded out the shape of the skull head onto it.
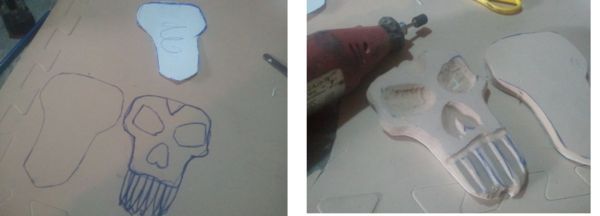
After embellishing it a bit worked on the second as well. After I worked out the size of the Ankle guards and cut them out as well. I also place general guide line as to where I would want effects like bumps , etc.
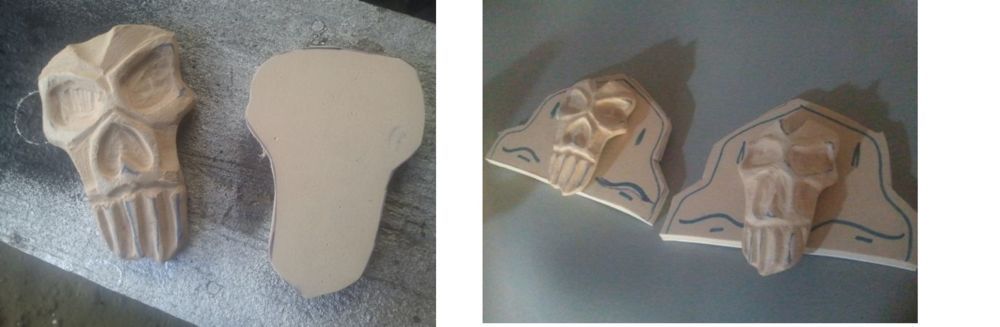
Once it was dremeled out and I heated with a heat gun. 1. to edge of the furry finish. and two semi prep for priming and painting later on. IT also help close in the open cells in the foam. its a science thing
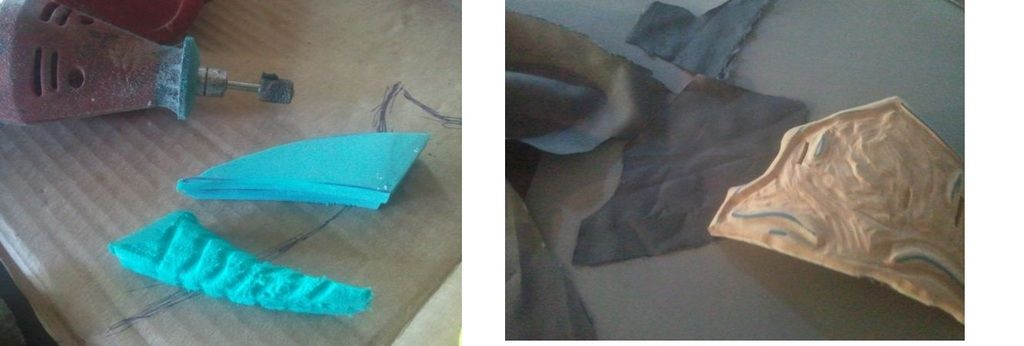
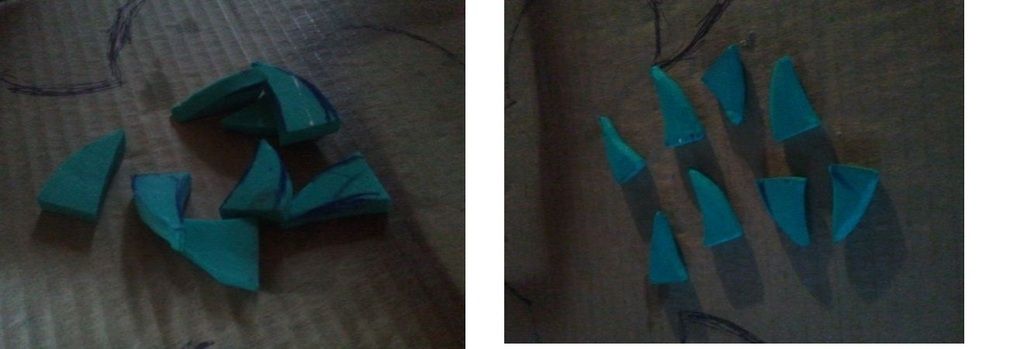
Here I worked out the two main horns that are seen in the ankle. From my own expirance with EVA foam is that certain points that carry stress rip or tear. To fix this I cut out a outline shape of the part in linen cloth and spray glue it to the back of the prop. ITs a really cheap and easy way to help from tearing parts that hold stress.
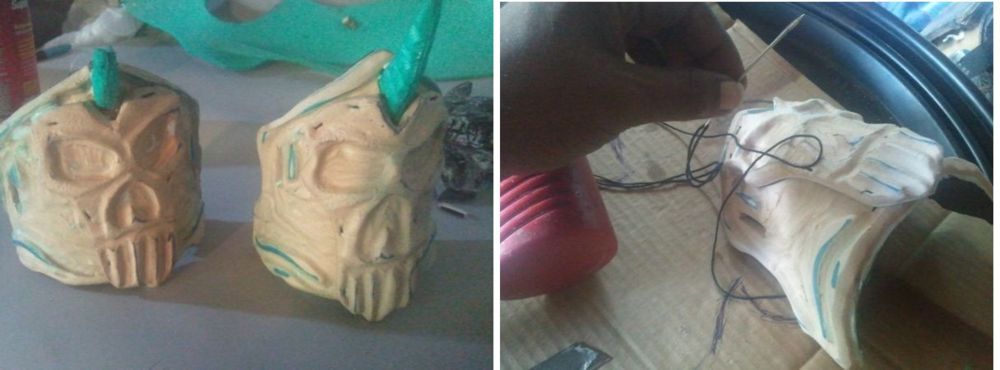
Then I placed the first pieaces together. Again from experiance , using glue alone doesnt help hold pieces together, So i also hand sew pieaces with twine

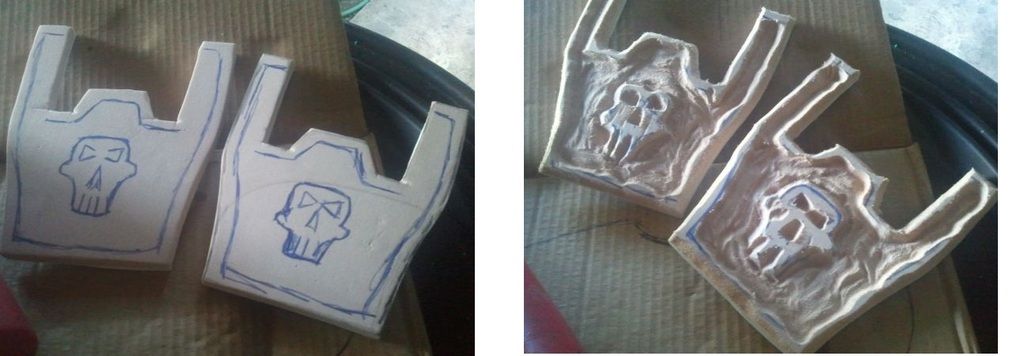
Next up are the baldrics which i just eye balled and hand drew in the skull. It was a bit of a trick to shape it but after the first one.
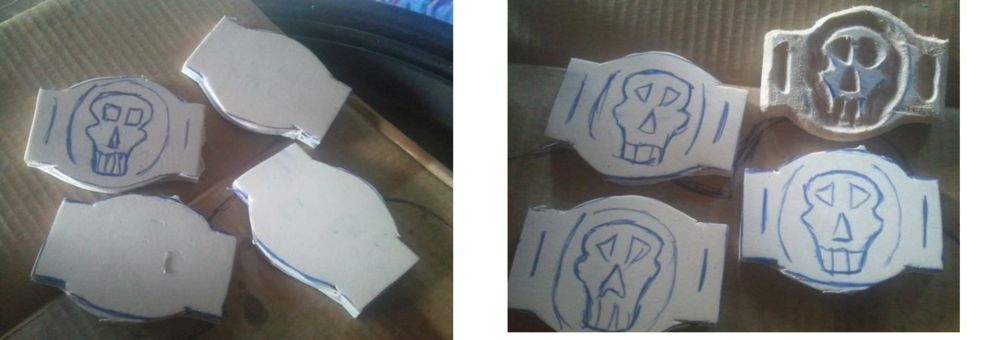
They came out pretty well.
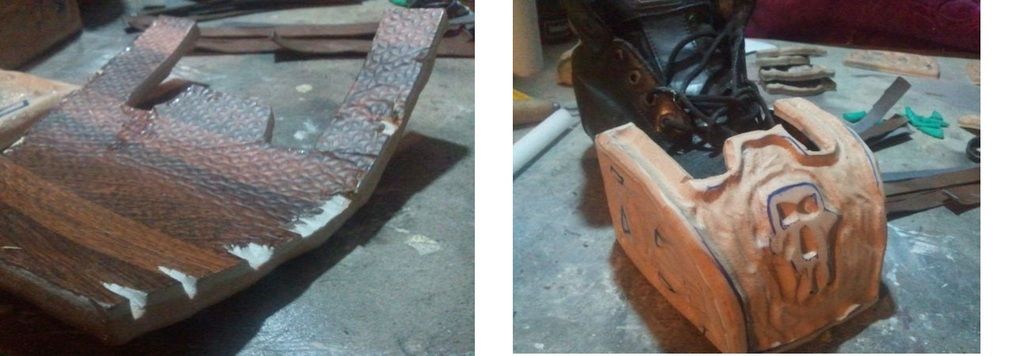
Next was the Toe guard. I used a sheet of paper (off shot) to get the shape i would need over a boot im using as the base. then just went with whatever felt right to me to make it.

Now was time for the toe guard assembly. I nitched and notched the parts that would be hot glued so it would have some *bite* when they joined.
Once done, i prepped material for leather straps.
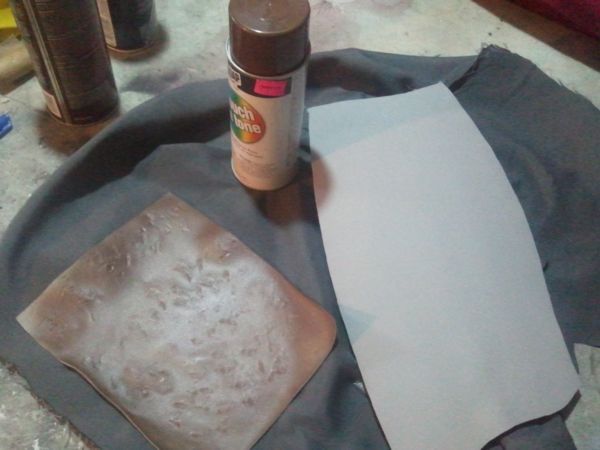
for this I used 2mm foam, destressed, and painted in brown leather. TO give it strenght, I lined the back with linen coth. its a easy diy for leather like straps.
Stabbed in the horns for the front by making a notch and stuck them in instead of just placing them ontop. also just did a course check to make sure everything was working out.

Time for painting.
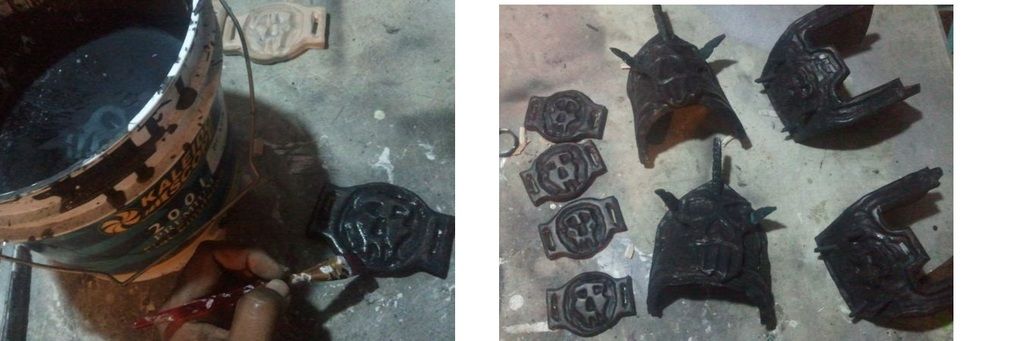
For this I used Concete black primer. I brought a gallon for this purpose and have used several cosplays and props with this and it have never failed to be a cheap and easy way to prep my work for painting or stand alone. in this case its a stand alone.

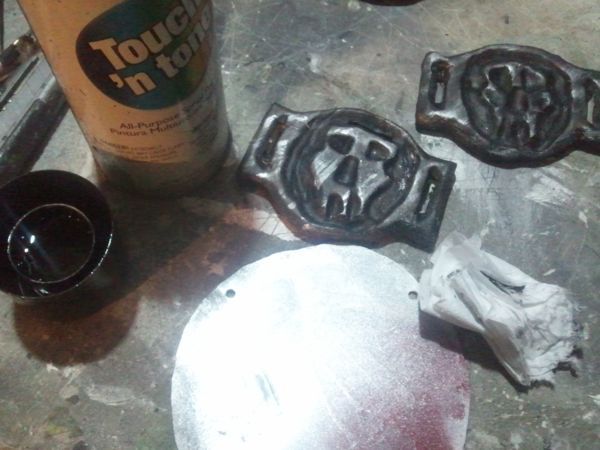
To give it an ageing effect heres a trick that i use.
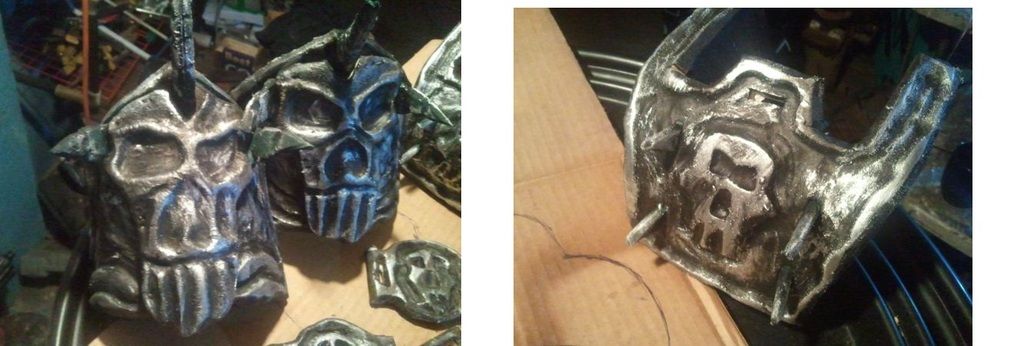
I sprayed the sliver paint onto a pieace of glass till it makes a small pool. then using some tissue paper, with the edges torn. i light seep it with paint then rub and buff it lightly or heavily onto the prop. its really a great way ( in my case) to make it ageing easy and no fuss.
And finally the end...
heres the lot of them
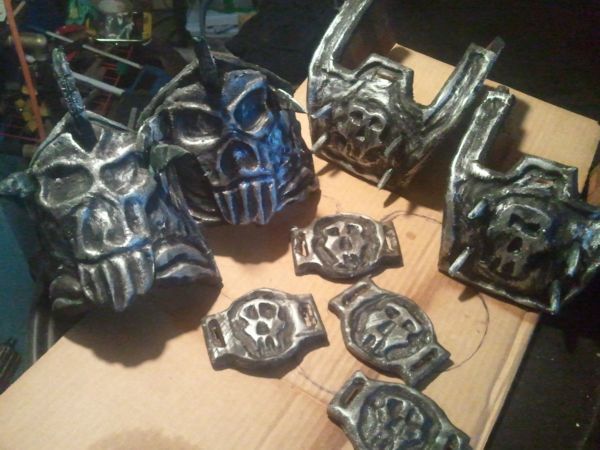
DAY ONE COMPLETE!
Im going to rest tonight before finall assembly and move on the the thigh guards .
1 sheet used : 7 sheets left.
With a Con in less than a week I roll up my sleeves to Complete and Compete with my Arthas Budget Build.
Materials :
EVA FOAM
Cloth : Linen.
Wire.
Random Accessories.
Overall pic

General Referance Material for Cosplay
http://news.mmosite.com/content/201...h_king_arthas_deluxe_collector_figure,1.shtml
So lets get started.
Its day one, so im starting from the ground up. Starting with the boots.
In additions to toy refance I pulled images from the Cinematic trailer for Arthas.


From these I worked out that with mid-evil placing of straps he would use a circle type latch to hold everything together to the front. I worked out the sides baldrics and ankle guards from the image and toy referance.
Then it was time to get started.
I start of with the general material. This is ALL the material i will be using or rather all the material i can afford >:

Using some paper i sketched out the general shape, then traced onto the foam. Cut and using the rotary tool, etched and sanded out the shape of the skull head onto it.

After embellishing it a bit worked on the second as well. After I worked out the size of the Ankle guards and cut them out as well. I also place general guide line as to where I would want effects like bumps , etc.

Once it was dremeled out and I heated with a heat gun. 1. to edge of the furry finish. and two semi prep for priming and painting later on. IT also help close in the open cells in the foam. its a science thing

Here I worked out the two main horns that are seen in the ankle. From my own expirance with EVA foam is that certain points that carry stress rip or tear. To fix this I cut out a outline shape of the part in linen cloth and spray glue it to the back of the prop. ITs a really cheap and easy way to help from tearing parts that hold stress.

Then I placed the first pieaces together. Again from experiance , using glue alone doesnt help hold pieces together, So i also hand sew pieaces with twine


Next up are the baldrics which i just eye balled and hand drew in the skull. It was a bit of a trick to shape it but after the first one.

They came out pretty well.

Next was the Toe guard. I used a sheet of paper (off shot) to get the shape i would need over a boot im using as the base. then just went with whatever felt right to me to make it.


Now was time for the toe guard assembly. I nitched and notched the parts that would be hot glued so it would have some *bite* when they joined.

Once done, i prepped material for leather straps.
for this I used 2mm foam, destressed, and painted in brown leather. TO give it strenght, I lined the back with linen coth. its a easy diy for leather like straps.

Stabbed in the horns for the front by making a notch and stuck them in instead of just placing them ontop. also just did a course check to make sure everything was working out.

Time for painting.
For this I used Concete black primer. I brought a gallon for this purpose and have used several cosplays and props with this and it have never failed to be a cheap and easy way to prep my work for painting or stand alone. in this case its a stand alone.


To give it an ageing effect heres a trick that i use.
I sprayed the sliver paint onto a pieace of glass till it makes a small pool. then using some tissue paper, with the edges torn. i light seep it with paint then rub and buff it lightly or heavily onto the prop. its really a great way ( in my case) to make it ageing easy and no fuss.

And finally the end...

heres the lot of them

DAY ONE COMPLETE!
Im going to rest tonight before finall assembly and move on the the thigh guards .
1 sheet used : 7 sheets left.

Last edited:


 . I'm digging the paint job so far and can't wait to see more progress.


